
2 Ways To Refresh Thrifted Baskets Using MilkPaint™
Happy New Year, everyone! Who is ready for a home refresh?
I sure am.
Even though I love Christmas and sometimes have a hard time putting my beloved Christmas decorations away, I know my heart loves a clean, clutter-free home as well.
So today, I am doing just that. I am refreshing some old baskets and turning them into beautiful statement pieces that will also act as wonderful storage!

A Love For Baskets
I love to go thrifting, and one of my favorite items to thrift are baskets.

Why? Because not only do thrift stores carry the coolest basket shapes, but they are normally much cheaper than what you would pay at a big box store. I also love baskets because I have three young children and baskets are a pretty and practical storage option for them.
Creating 2 Different Styles
For today’s project, I decided to showcase two different design styles to showcase the versatility of Miss Mustard Seed’s® MilkPaint™. I created a more modern approach with some bold stripes

…and a more vintage-inspired piece with a stain.

I love how both of them turned out, and I hope these techniques inspire you to play with your MilkPaint™ to find a look that you are after. Personally, I enjoy using Miss Mustard Seed’s® Milk Paint in my crafting projects because (like furniture) MilkPaint™ adds such a gorgeous texture, warmth, and beautiful dimension to any piece. I don’t need to use a lot of product to make a big impact. And, I really love that I can craft with my children around because it is non-toxic, and the cleanup is very simple.
Cleaning Your Thrifted Finds
Before we start, some of you asked during my LIVE how I clean my thrifted finds. I wrote a full blog post on this at Country Peony that you can find HERE.
In short, I recommend cleaning baskets with a homemade vinegar mixture or Thieves cleaner and then setting them outside to dry in the sun!
Now, let’s get painting!
Milk Painting Thrifted Baskets Video Tutorial
Last week, I went LIVE on Miss Mustard Seed’s® Milk Paint Facebook page to demonstrate how to decorate these charming baskets. You can watch the broadcast here and follow along with the written tutorial below.
Enjoy!
Project 1: Modern And Whimsical Basket Refresh
Supplies Needed
For the modern basket, I used:
Miss Mustard Seed’s® Milk Paint in Boxwood, Ironstone, and Typewriter.
Basket with a tight weave (the stripes work best on a basket with a tight weave)
Green Painter’s Tape
Craft Paintbrush
Yarn (Optional for the Pom-Poms)
Clover’s Pom-Pom Maker (Optional for the Pom-Poms)
Scissors (Optional for the Pom-Poms)


Step 1: Determine The Pattern And Colors
Decide on your color palette and your design.
For this more modern project, I chose three different colors: Boxwood to add some interest and charm, Ironstone for a fresh and contrasting approach, and Typewriter to keep it extra modern and to give the basket some depth.
Step 2: Mix The MilkPaint™
Mix 1 part MilkPaint™ to 1 part water. A “part” can be any unit of measurement you wish. I used a tablespoon.
Country Peony Tip: For most of my crafting projects, I start with one tablespoon. I always recommend starting with less powder than you think you may need. This will help avoid wasting your product. You can always make more paint later. A little bit of MilkPaint™ goes a long way, especially with this small project!

Adding 1 tablespoon of Boxwood

Adding 1 tablespoon of water
Stir everything together, then set the paint aside.

Step 3: Tape Off The Basket For The First Set Of Stripes
With your pattern in mind, tape off the basket to create the first set of stripe lines. For this basket, I chose the thickest line at the top and then the lines got thinner as I went down the basket. But you can choose whatever design and pattern your heart desires.

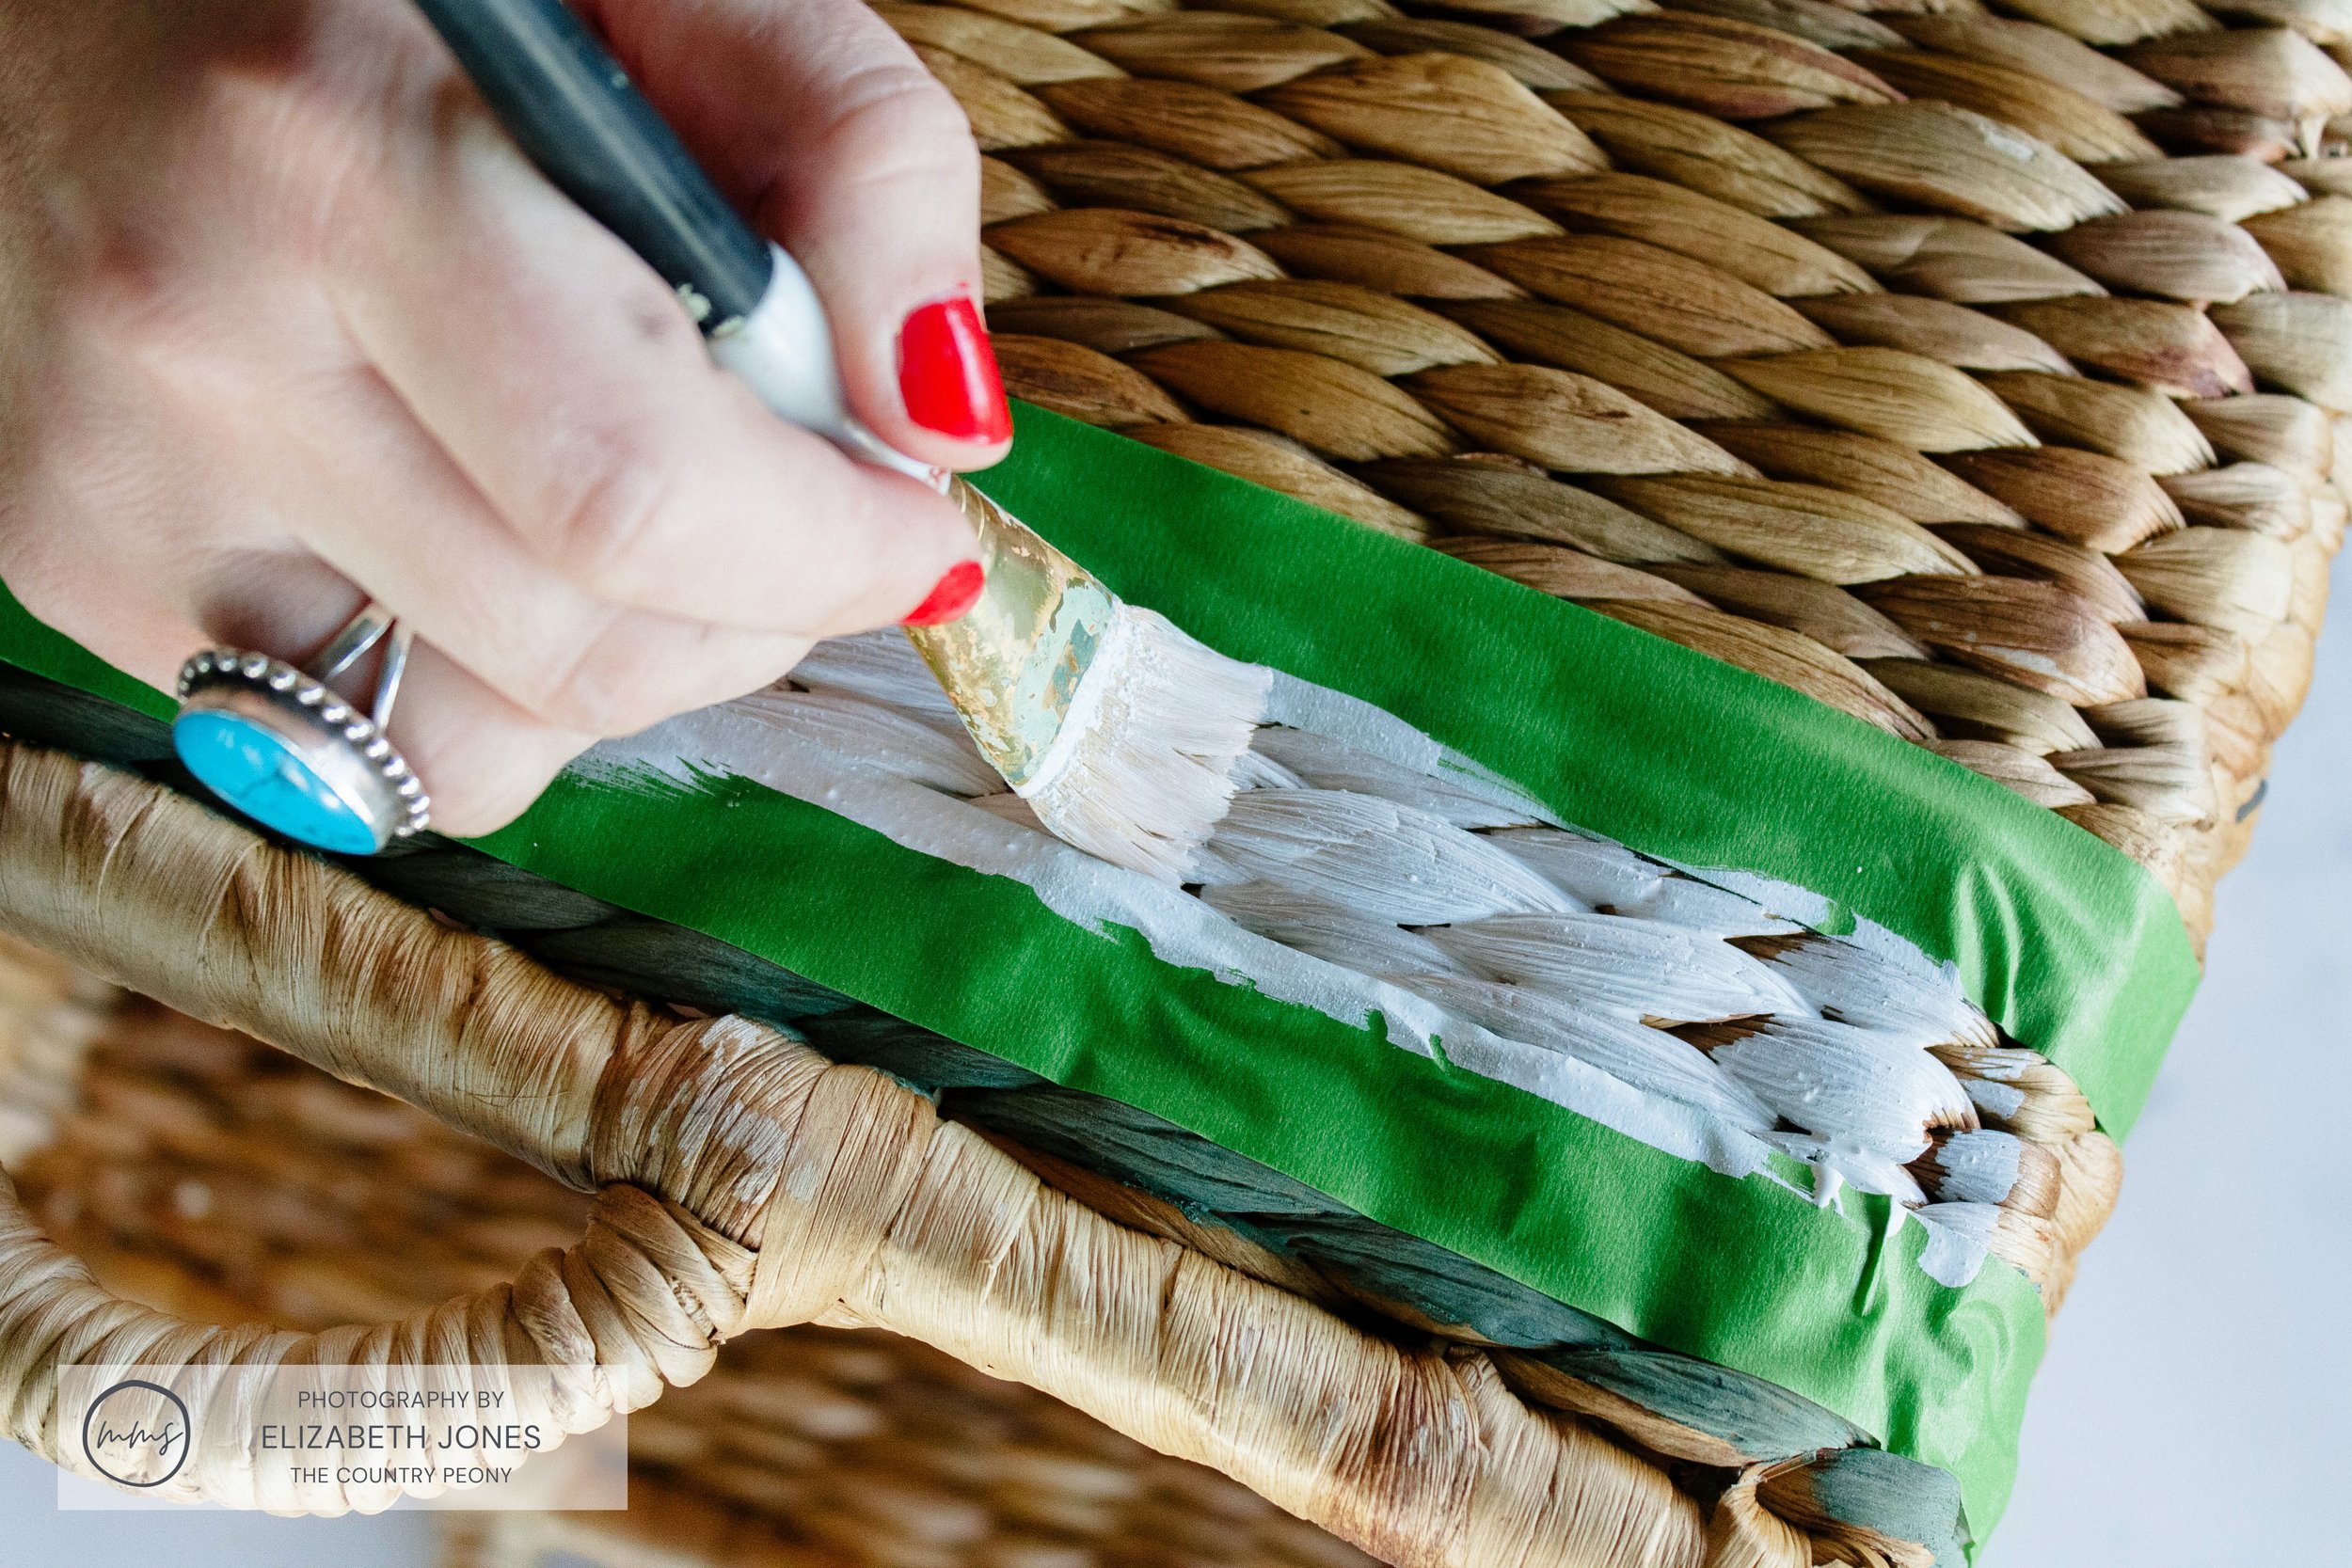
Once you apply the tape, be sure to press it firmly into the basket so that the paint doesn’t seep underneath the tape.

Step 4: Paint The First Set Of Stripes On The Basket With The MilkPaint™
Paint 1 thin coat of MilkPaint™ onto the basket in between the tape lines. My top stripe is Boxwood and the bottom is Typewriter.

Let the first coat dry, then paint a second thin coat of MilkPaint™.

Let it dry!
Step 5: Remove The Tape From The Basket
Once the MilkPaint™ is dry, slowly remove the tape from the basket to reveal beautiful, clean lines.

Step 6: Tape Off The Third Stripe Onto The Basket
Apply the tape directly onto the edge of the painted stripes, leaving the non-painted area clear.

Step 7: Paint The Third Stripe Onto The Basket With Ironstone
Paint 1 thin coat of Ironstone MilkPaint™ onto the basket in between the tape lines. Let it dry, then paint a second thin coat of MilkPaint™.
Let it dry!
Step 8: Remove The Final Tape From The Basket
Once the MilkPaint™ is dry, slowly remove the tape from the basket to reveal beautiful, clean lines.

Step 9: Make The Pom-Poms And Add Them To The Basket
I am a big fan of pom-poms. I believe they add the perfect touch of personalization and whimsy. So, I finished the baskets off with some handmade pom-poms.

I used Clover’s Pom-Pom Maker to make 3 or 4 of them.


Then I double knotted them onto the basket handle.

I have many pom-pom tutorials on my blog, and you can see them HERE if you want to create your own.
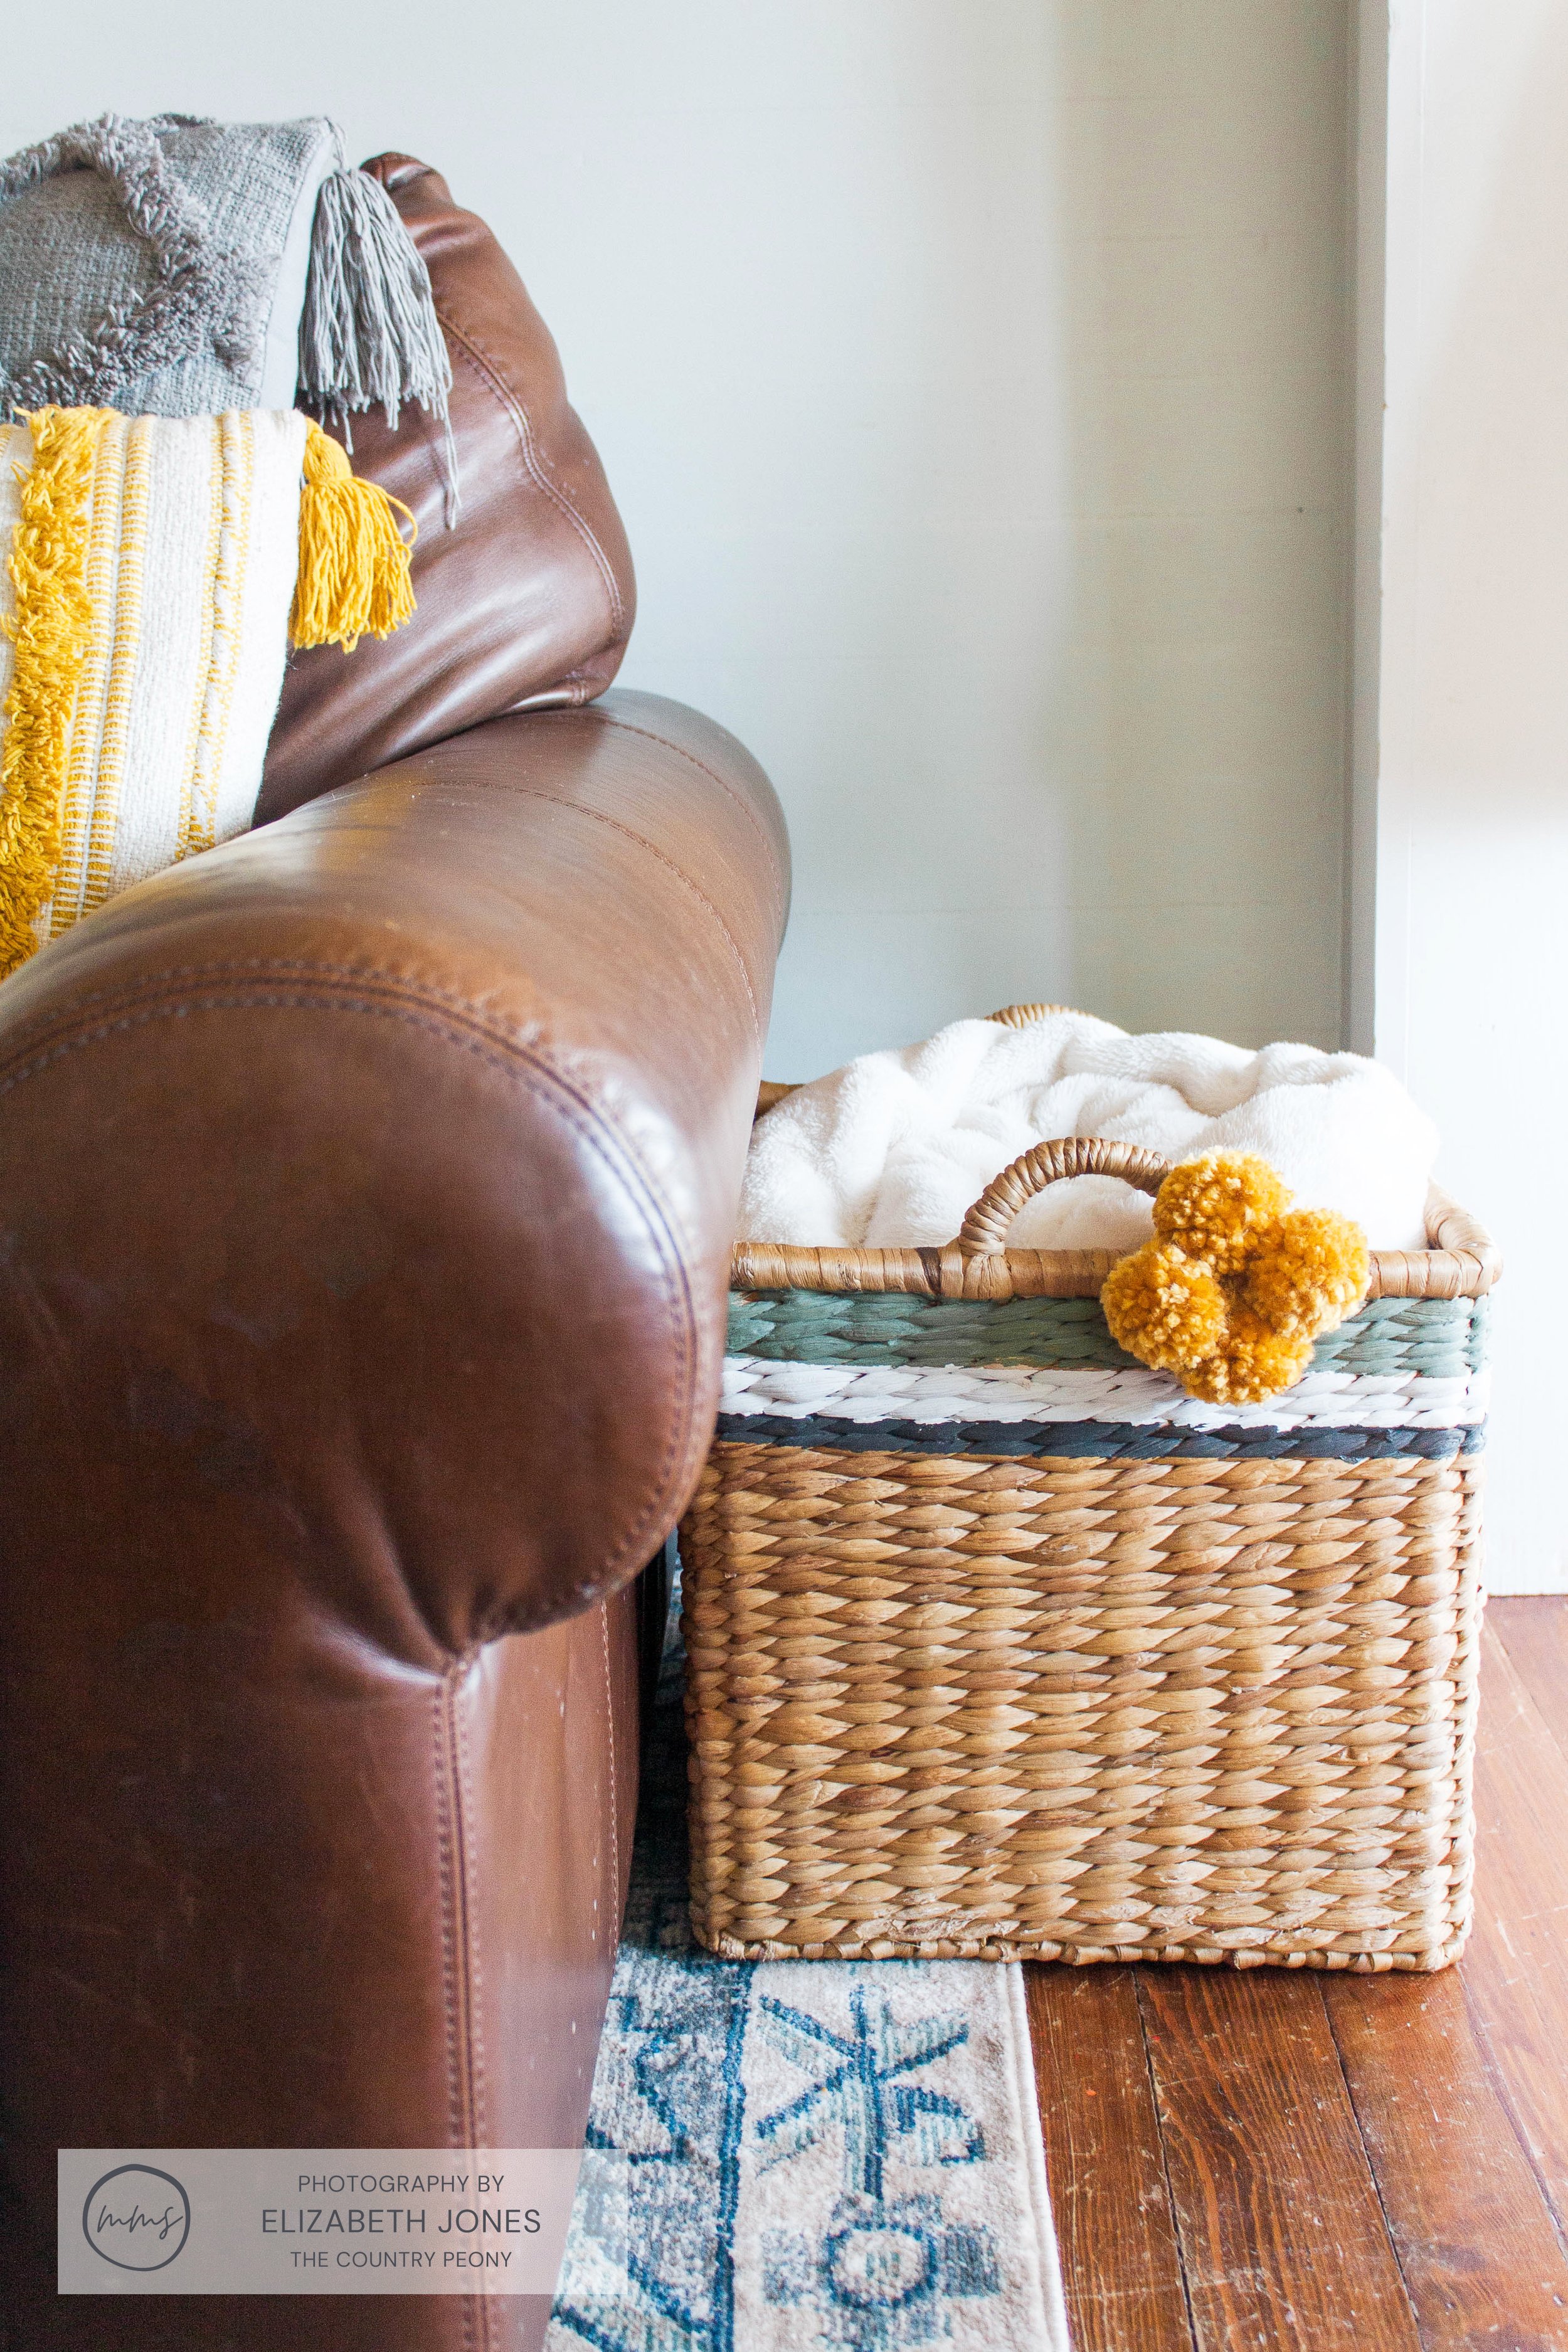
Step 10: Display And Enjoy Your Custom, Modern Baskets
Set your basket out for display and enjoy!
I love using mine next to our couch and filling it with cozy blankets so my children and I can both easily access them!
Project 2: Vintage-Inspired Basket Refresh
Supplies Needed
For the vintage-inspired basket, I used:
Miss Mustard Seed’s® Milk Paint in Arabesque
Thrifted Basket
2 Inch Paint Brush

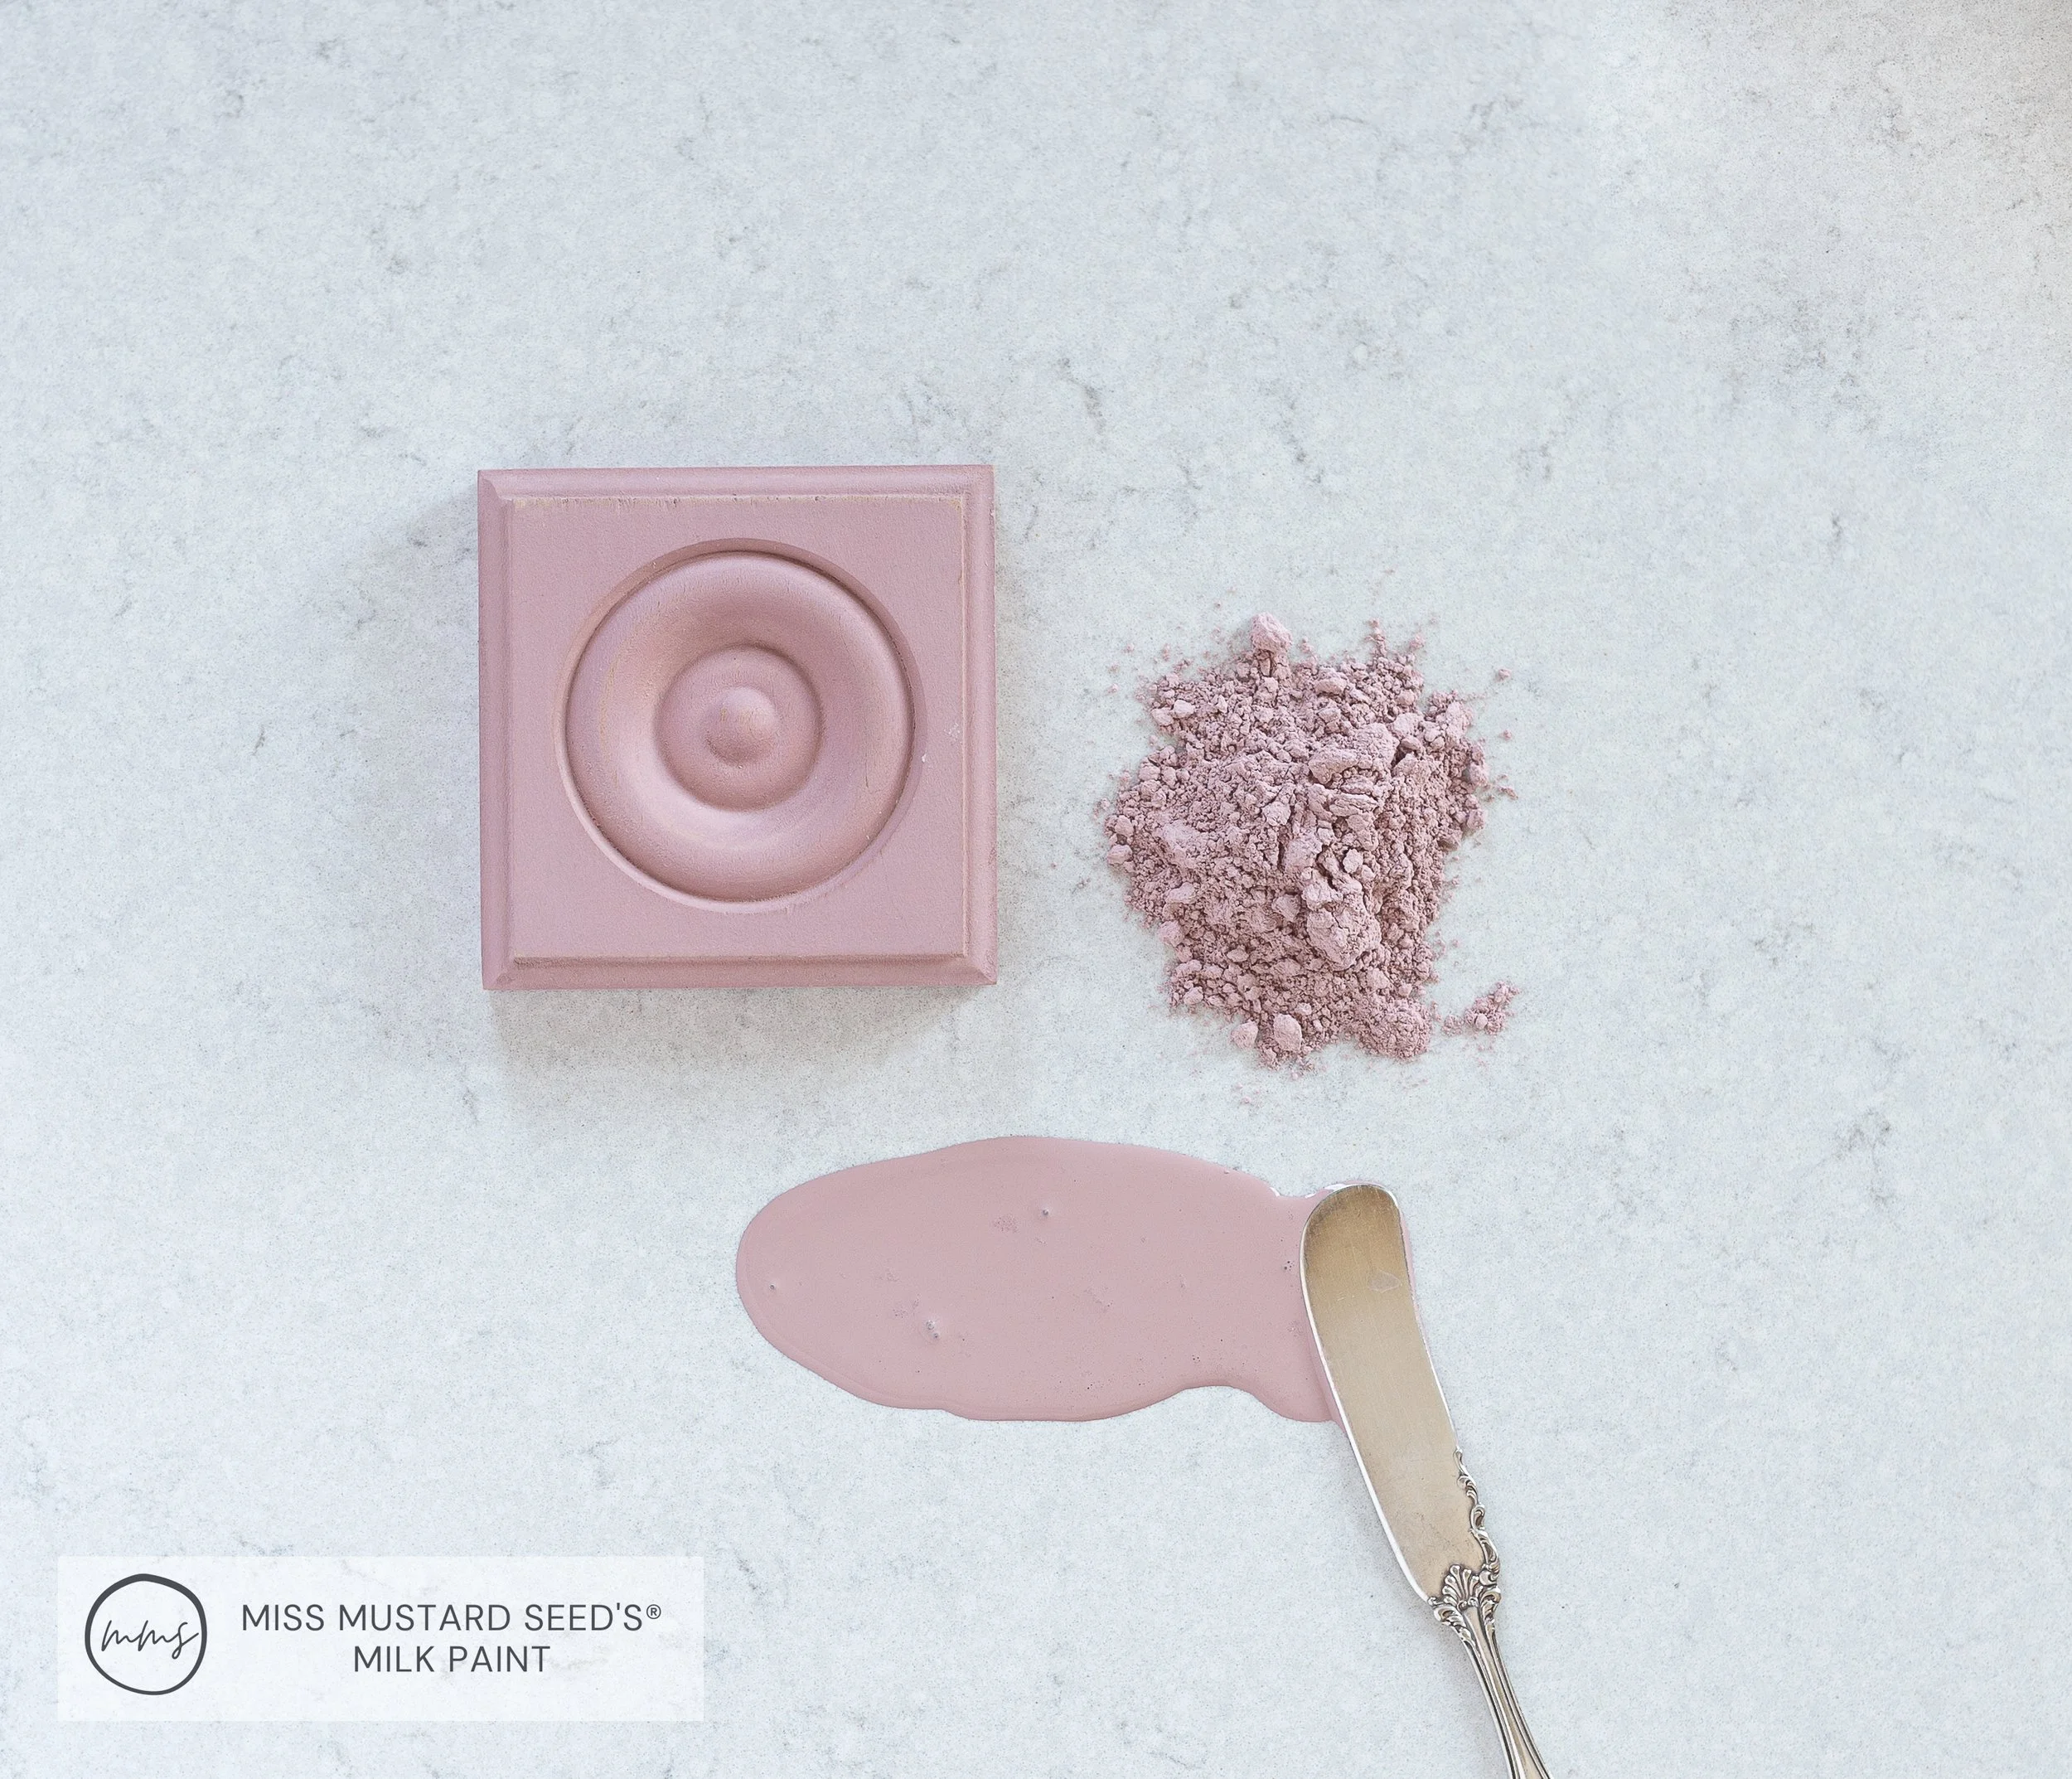
Step 1: Mix The MilkPaint™
To mimic the vintage-inspired look, I created a stain effect which is 1 part MilkPaint™ to 2 parts water. For this project, I used 3 tablespoons of MilkPaint™ to 6 tablespoons of water.
Step 2: Paint 1 Coat Of The MilkPaint™ Stain Onto The Baskets
Paint one thin coat of the MilkPaint™ stain to the entire basket (outside and inside).

Then, set it aside to dry.
I only applied one coat of MilkPaint™ to this basket to achieve a vintage-inspired look.

Country Peony Tip: I recommend protecting your work surface with some parchment paper, or a silicone mat. This process is messy because the paint may seep through the basket weave. But it is so much fun!
Step 3: Display For All To Enjoy!
Once the basket is dry, fill it with wonderful goodies and display it for practical and beautiful use!
I filled mine with my crafting supplies, and it sits inside my craft room. I love how it turned out!

The beauty of this project is that you can use any color that you want. I love how the soft pink hues come through onto the basket but don’t overpower it!
Thanks so much to Miss Mustard Seed’s® Milk Paint for having me, and thank you so much for following along today. I hope you enjoy experimenting with Miss Mustard Seed’s® Milk Paint as much as I do!
You can follow along with more of my crafting projects over at Country Peony. I’d love to connect with you further!
