Creating A Color Wash With MilkPaint™
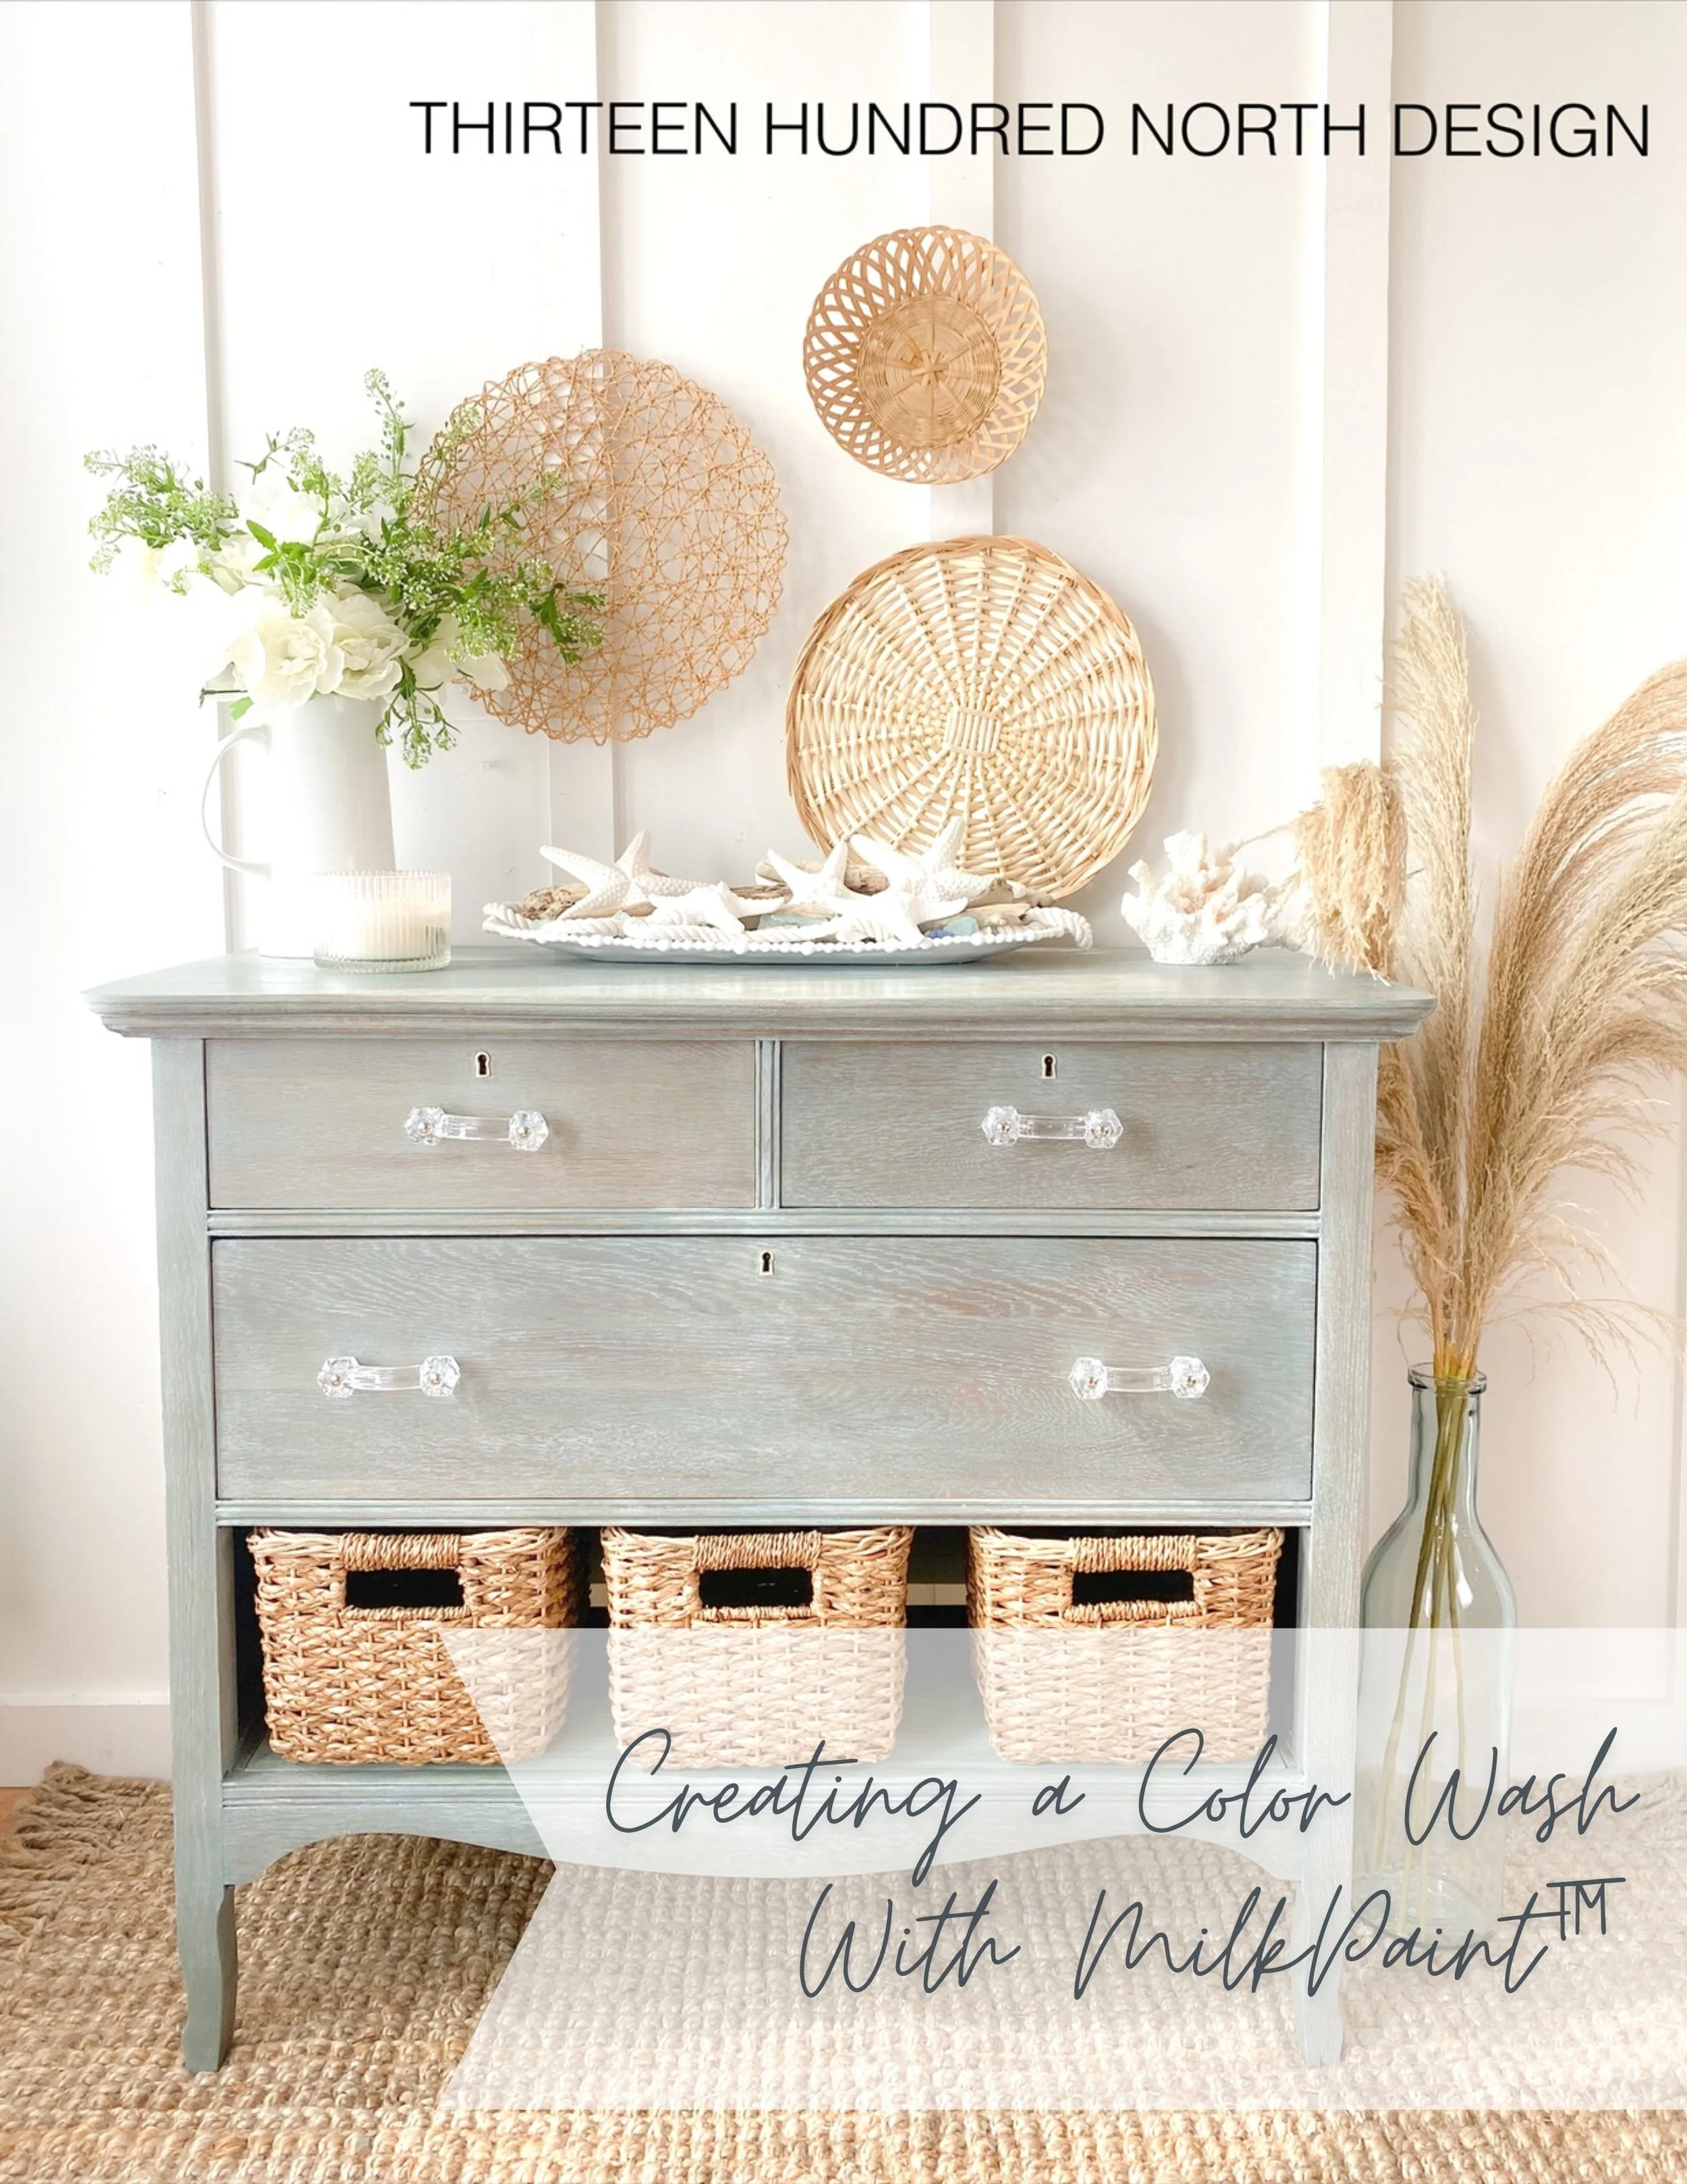
An Antique Dresser Gets A Coastal Color Wash With MMS MilkPaint™
I have been in a warm weather and coastal state of mind lately, and I have every intention of staying there. I have been going through my home cleaning, lightening up my décor, and decluttering, which always feels so nice in the spring to have that fresh start. I am seeing all of that flowing over into my furniture refinishing, and I have really been drawn to the lighter and more breezy feeling shades of paint.

Inspiration
I typically never know what piece I am going to work on next, I usually just walk out into my storage area when I am ready to start something new and pick a piece that is speaking to me at that point, and if I am not really feeling inspired by anything in my inventory, I start scrolling online for something to purchase. I find it so hard to complete a piece when I am not feeling inspired by it.
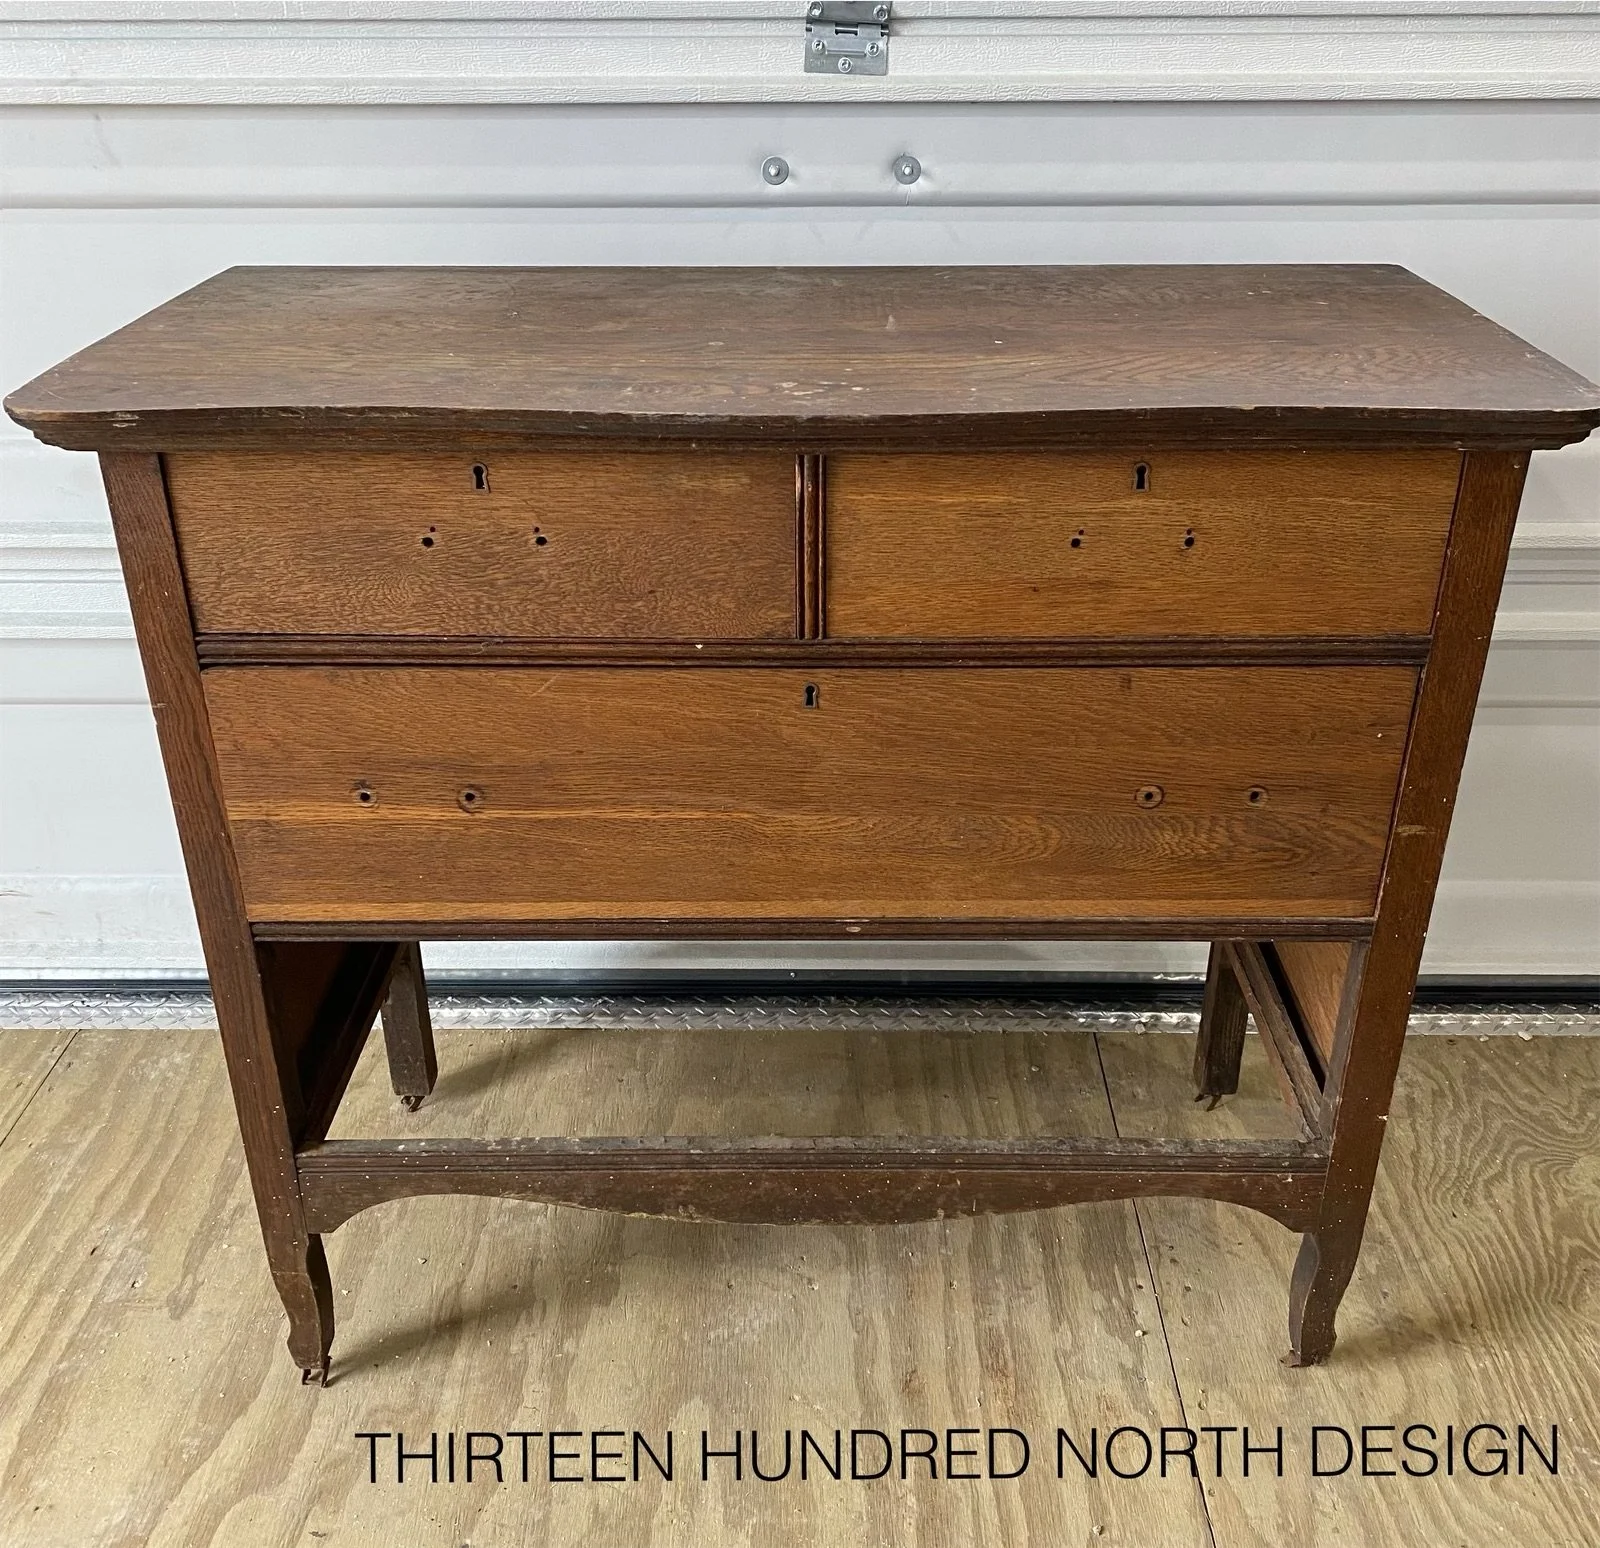
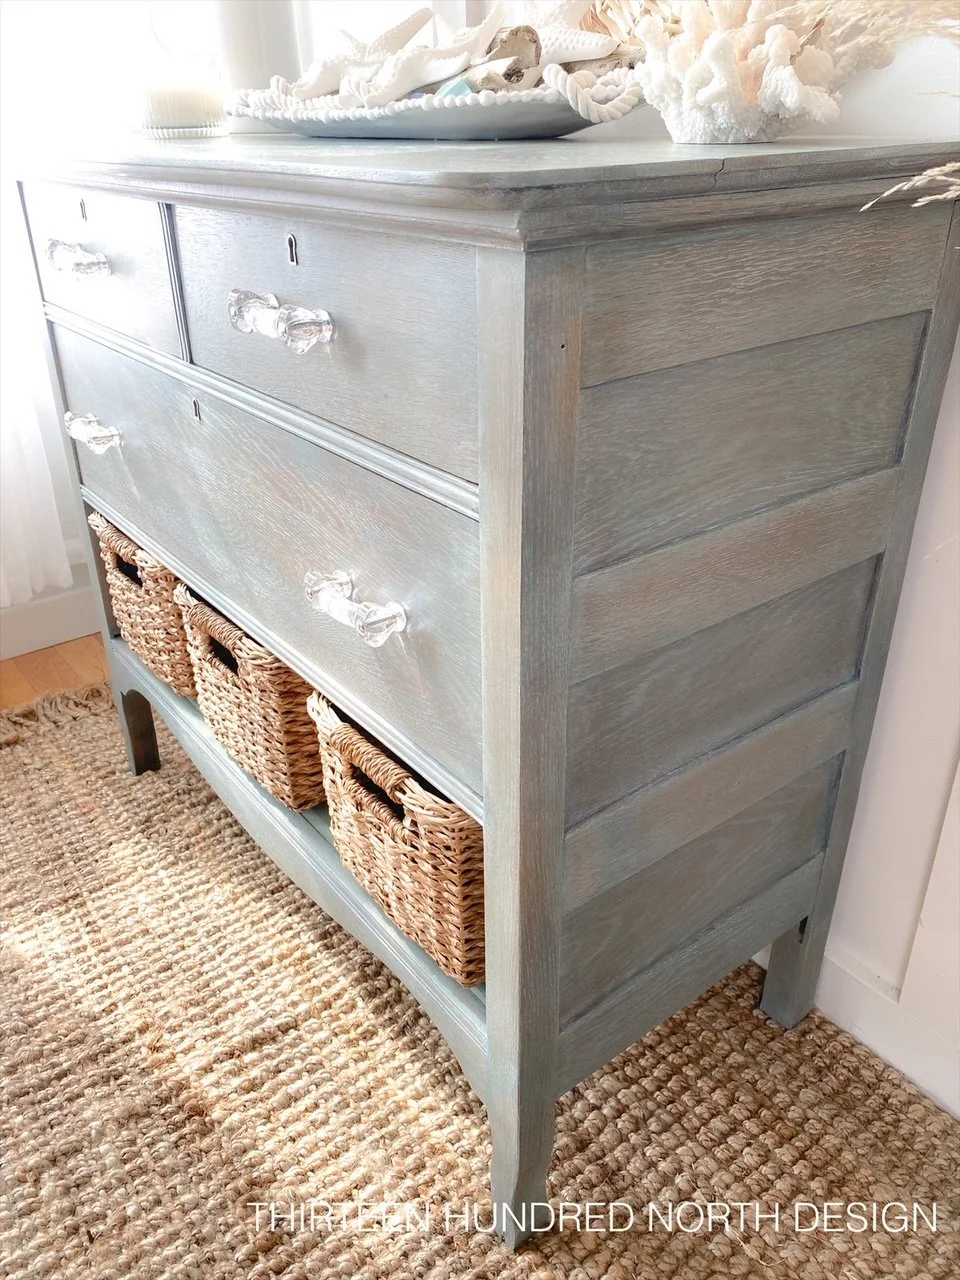
I had this dresser in my inventory, and it was missing its bottom drawer.
I had picked it up when I was invited to go picking in an old store that had long since closed its doors. I thought that adding a shelf where the drawer had once been would give me the chance to pop in some seagrass baskets adding to the coastal feel I was looking for in this blog piece.
A Perfectly Coastal Color
I knew I wanted to use a shade from the MMS Coastal Collection for my next piece. I landed on Teal Ocean (formally named Kitchen Scale) for this piece because I thought it was perfect for an understated look. I wanted it to be the pop of color a customer was looking for in their home without it being too over the top.

I decided I would try something new and create a color wash instead of painting this piece. This dresser had gorgeous light wood and beautiful wood grain when I began to sand it back, making it a great candidate for a paint wash.
Materials Needed:
Cleaning:
Dawn dish soap
Scrubbing Pad
Vacuum
Microfiber towels
Sanding:
80 Grit sandpaper
110 Grit sandpaper
220 Grit sandpaper
220 Grit sanding block
Tools:
Orbital sander
Detail sander
Drill
Miter saw
1 ¼” pocket screws
Kreg Jig
Paint and Finishes:
Sponge brush
Miss Mustard Seed’s® MilkPaint™ in Teal Ocean
Disposable shop towels

Finishing Touches:
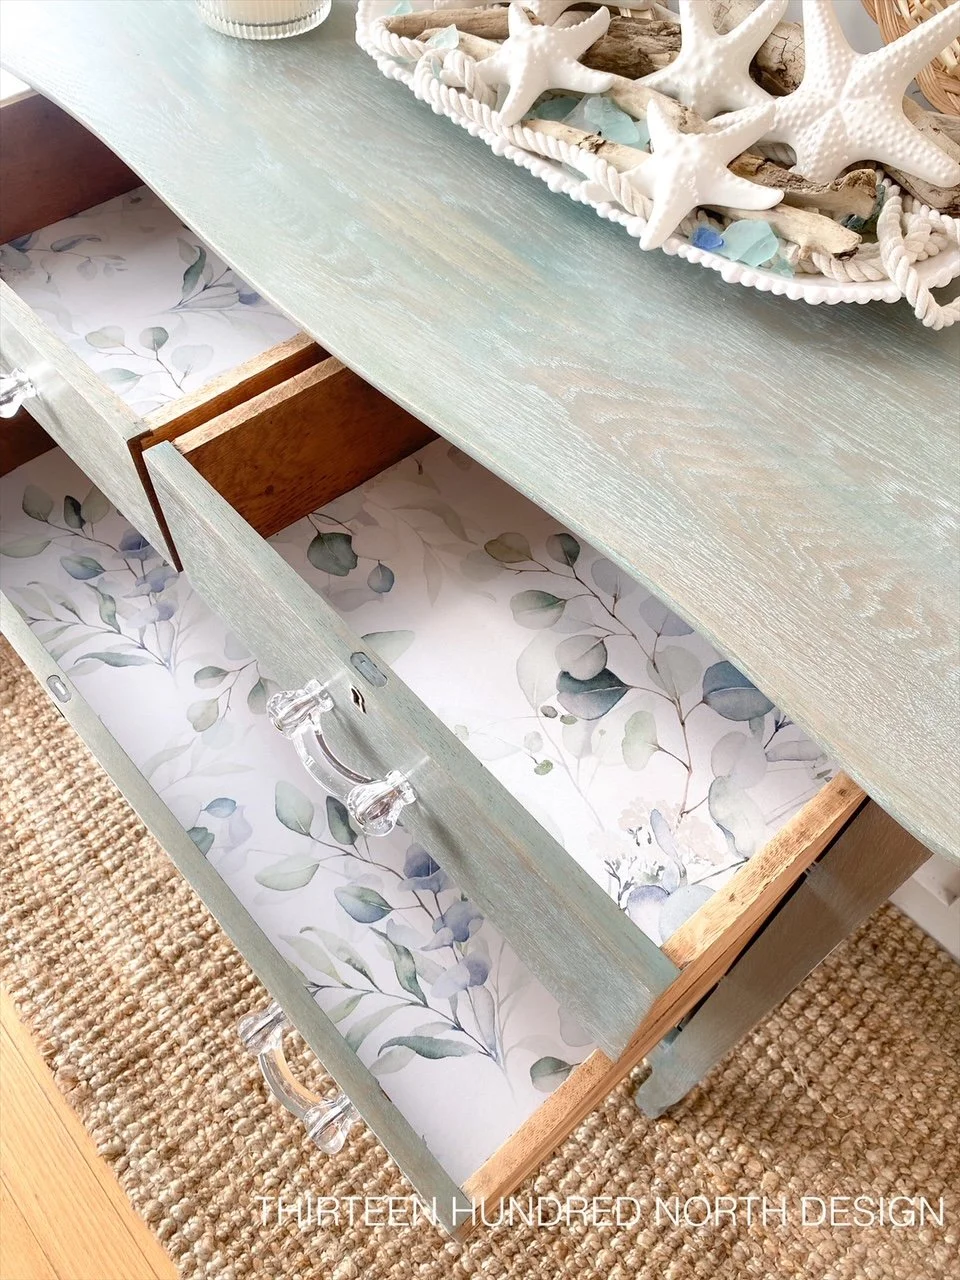
Peel and stick wallpaper (as drawer liner)
New glass drawer pulls (Amazon)
1” x 12” x 36” glued board (hardware store)
Seagrass baskets (Target)
Cleaning And Repairs:
I began as I always do - by scrubbing the piece down really well, both inside and out. I then looked the piece over, making sure I didn’t need to make any repairs. I have refinished quite a few dressers in this exact style, and I have to say they are of great quality, and I rarely have too much work to do.
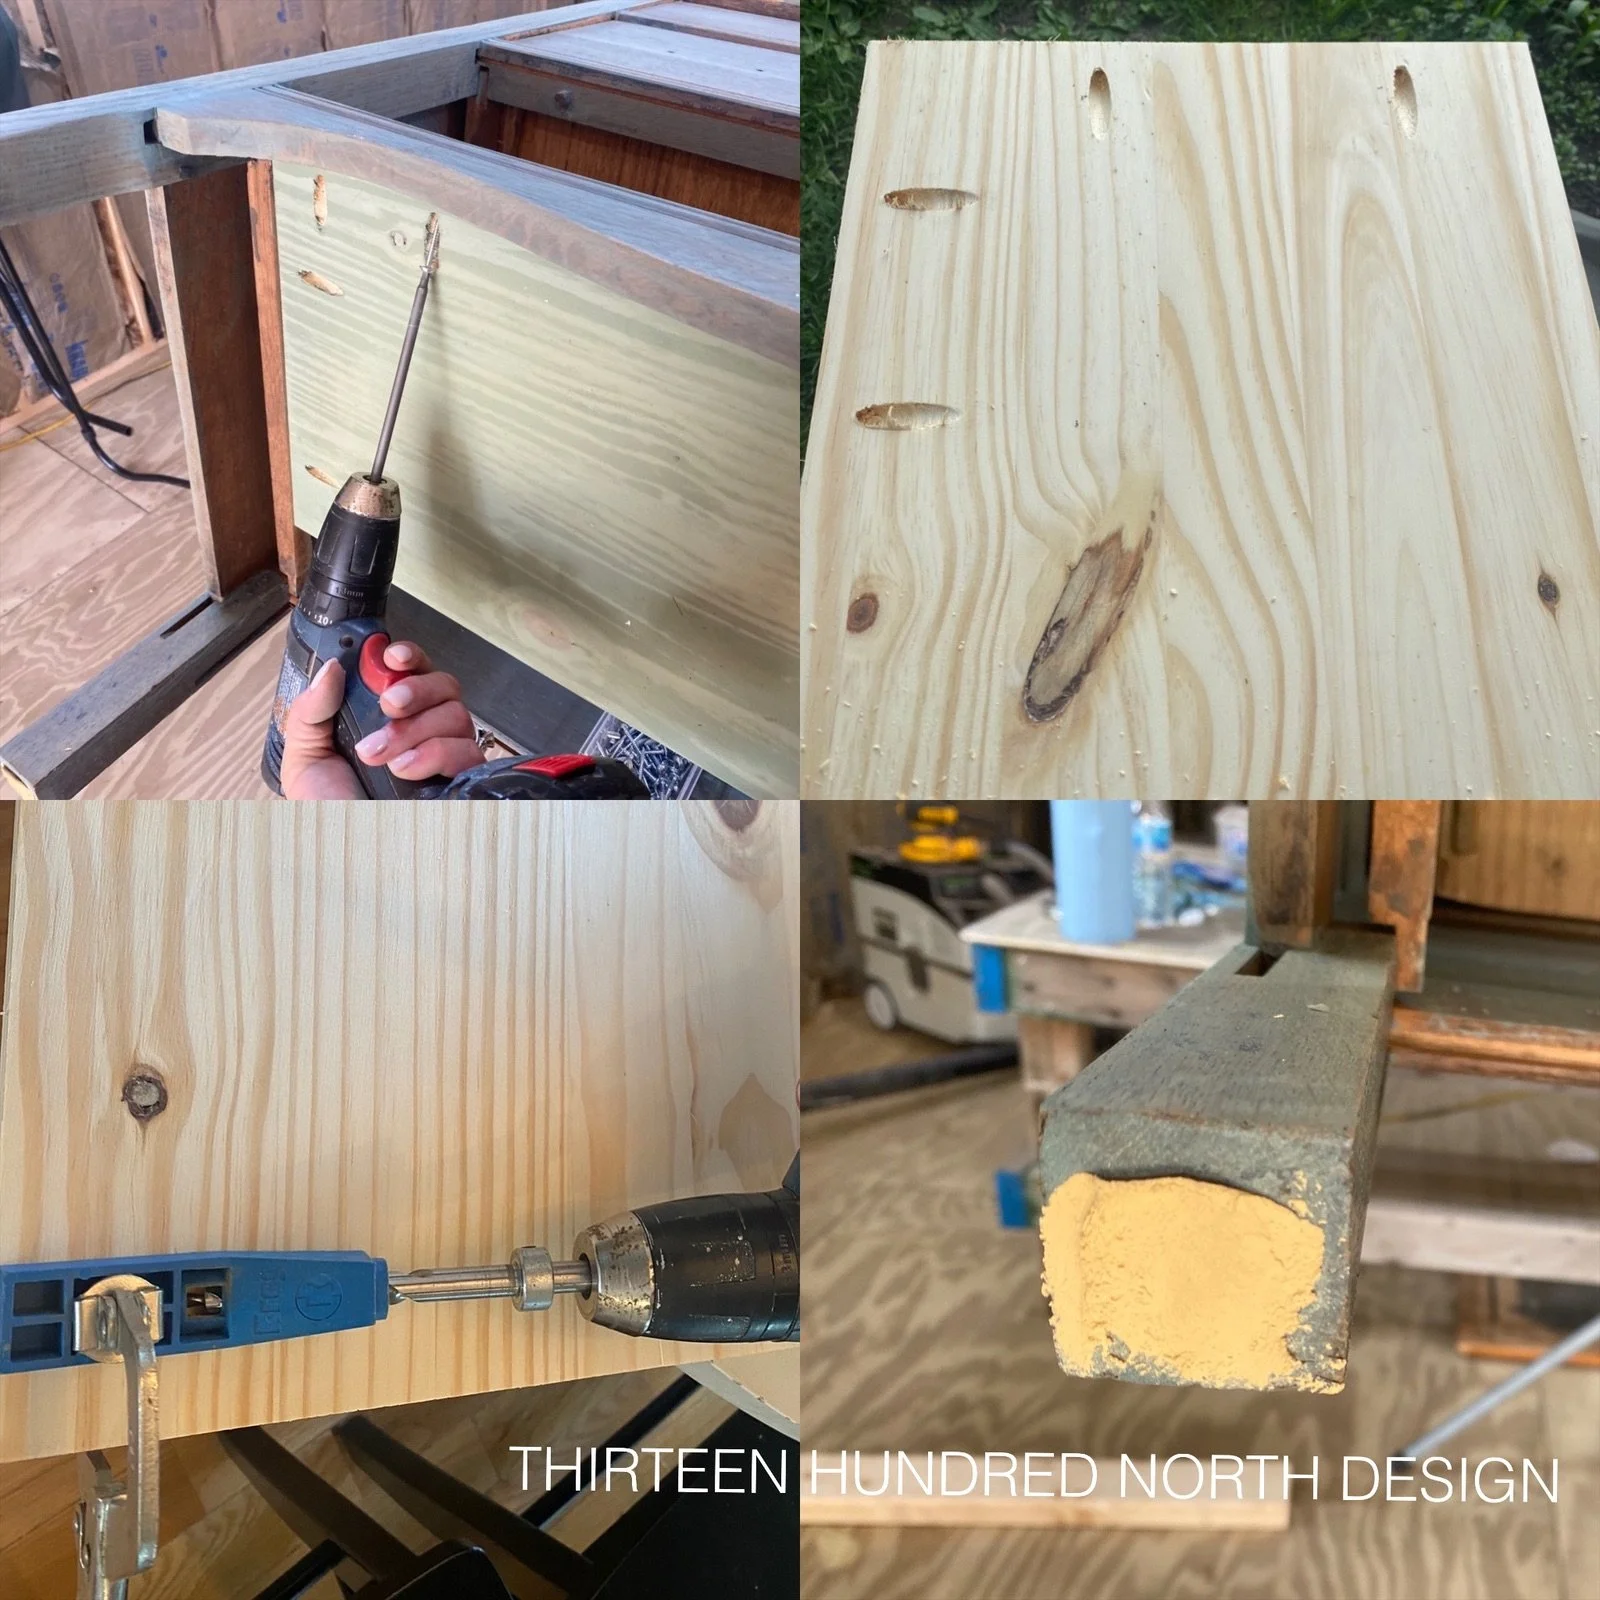
I removed the busted casters and filled the holes with wood putty. I flipped the drawers over and ran a bead of glue along the drawer bottoms to stop the rattling, and I filled in two tiny nail holes with stainable wood putty where old hardware had been attached, but overall, it was in great condition aside from the missing drawer.
In order to replace the missing drawer with a shelf, I purchased a glued board and cut it to size using my miter saw. I then attached the shelf by drilling holes for pocket screws with my Kreg Jig, placing a bead of wood glue around the new shelf edge, and I used 1 ¼” pocket screws from underneath to secure it.
Sanding:
The finish on this piece was fairly worn from use over the years, so I decided to sand off the previous stain and varnish as opposed to stripping the piece. I personally avoid stripping furniture unless it is absolutely necessary. I prefer to sand the piece down and not introduce extra moisture to the wood.
I started with 80 grit sandpaper on my orbital sander to get through the previous varnish. Once most of the sticky varnish was off, I started in with 120 grit sandpaper on my orbital, and that began to smooth out the wood nicely. I finished up with 220 grit sandpaper to make sure I got all of the orbital swirls out of the wood and really smoothed everything out, so I had a blank canvas.
I then went through with a detail sander and finished cleaning up all of the corners that could not be reached with the round orbital sander. All of the small grooves and details had to be hand-sanded, but it was worth it!
Color Washing:

In a ratio of 2 parts water to 1 part paint powder, I created my color wash using Teal Ocean by Miss Mustard Seed’s® MilkPaint™. I applied the wash in small sections with a paintbrush and immediately wiped back the wash with a disposable shop towel.
This worked beautifully, almost like a wood stain would. This color wash only took one coat; I couldn’t believe how well the color deposited into the wood!
After the paint had completely dried, I went back through with a 220 sanding block and very lightly scuff sanded the piece, which blended out the color nicely and smoothed the wood before sealing.
Sealing:
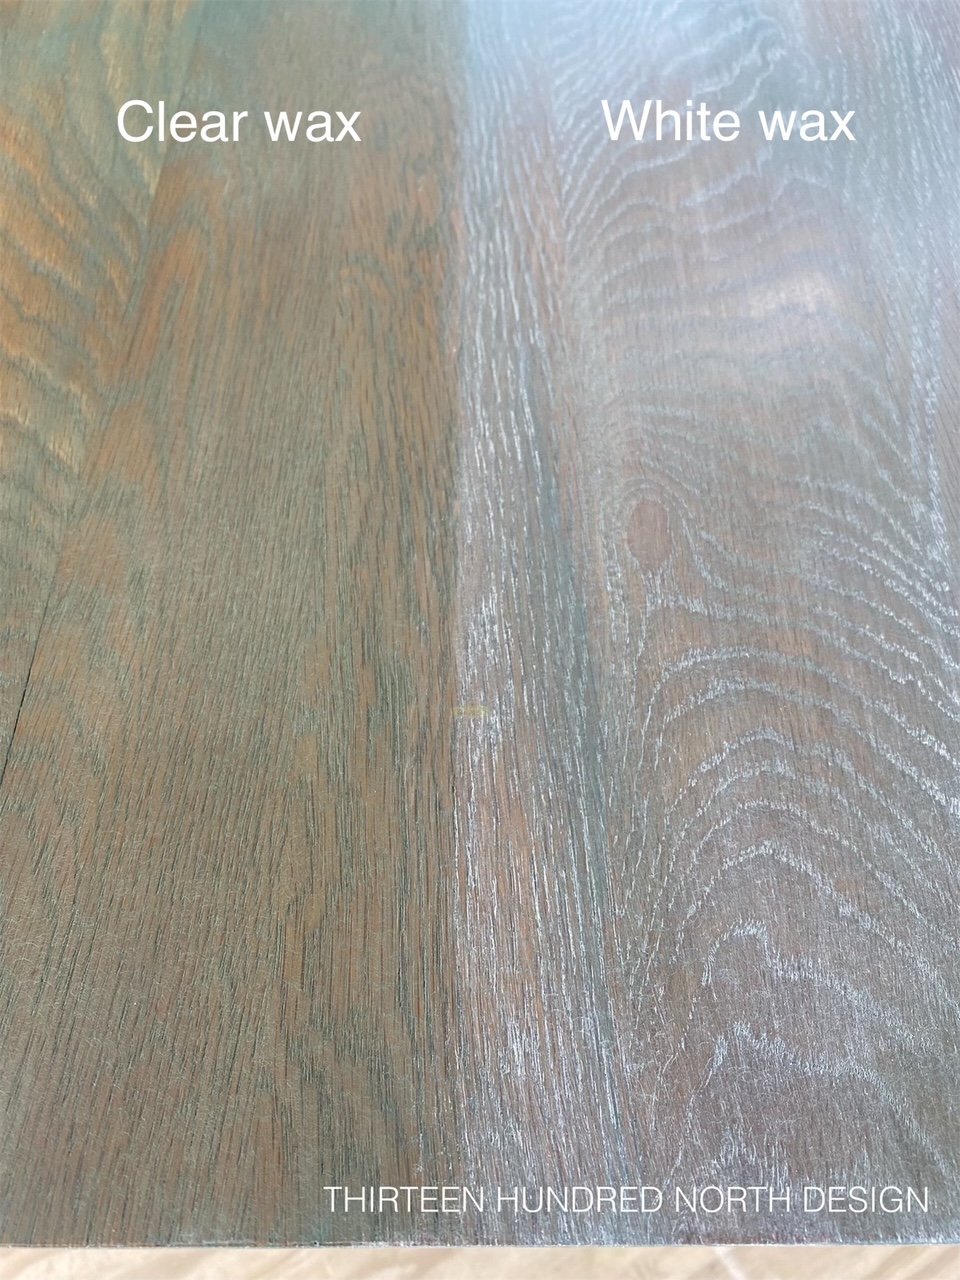
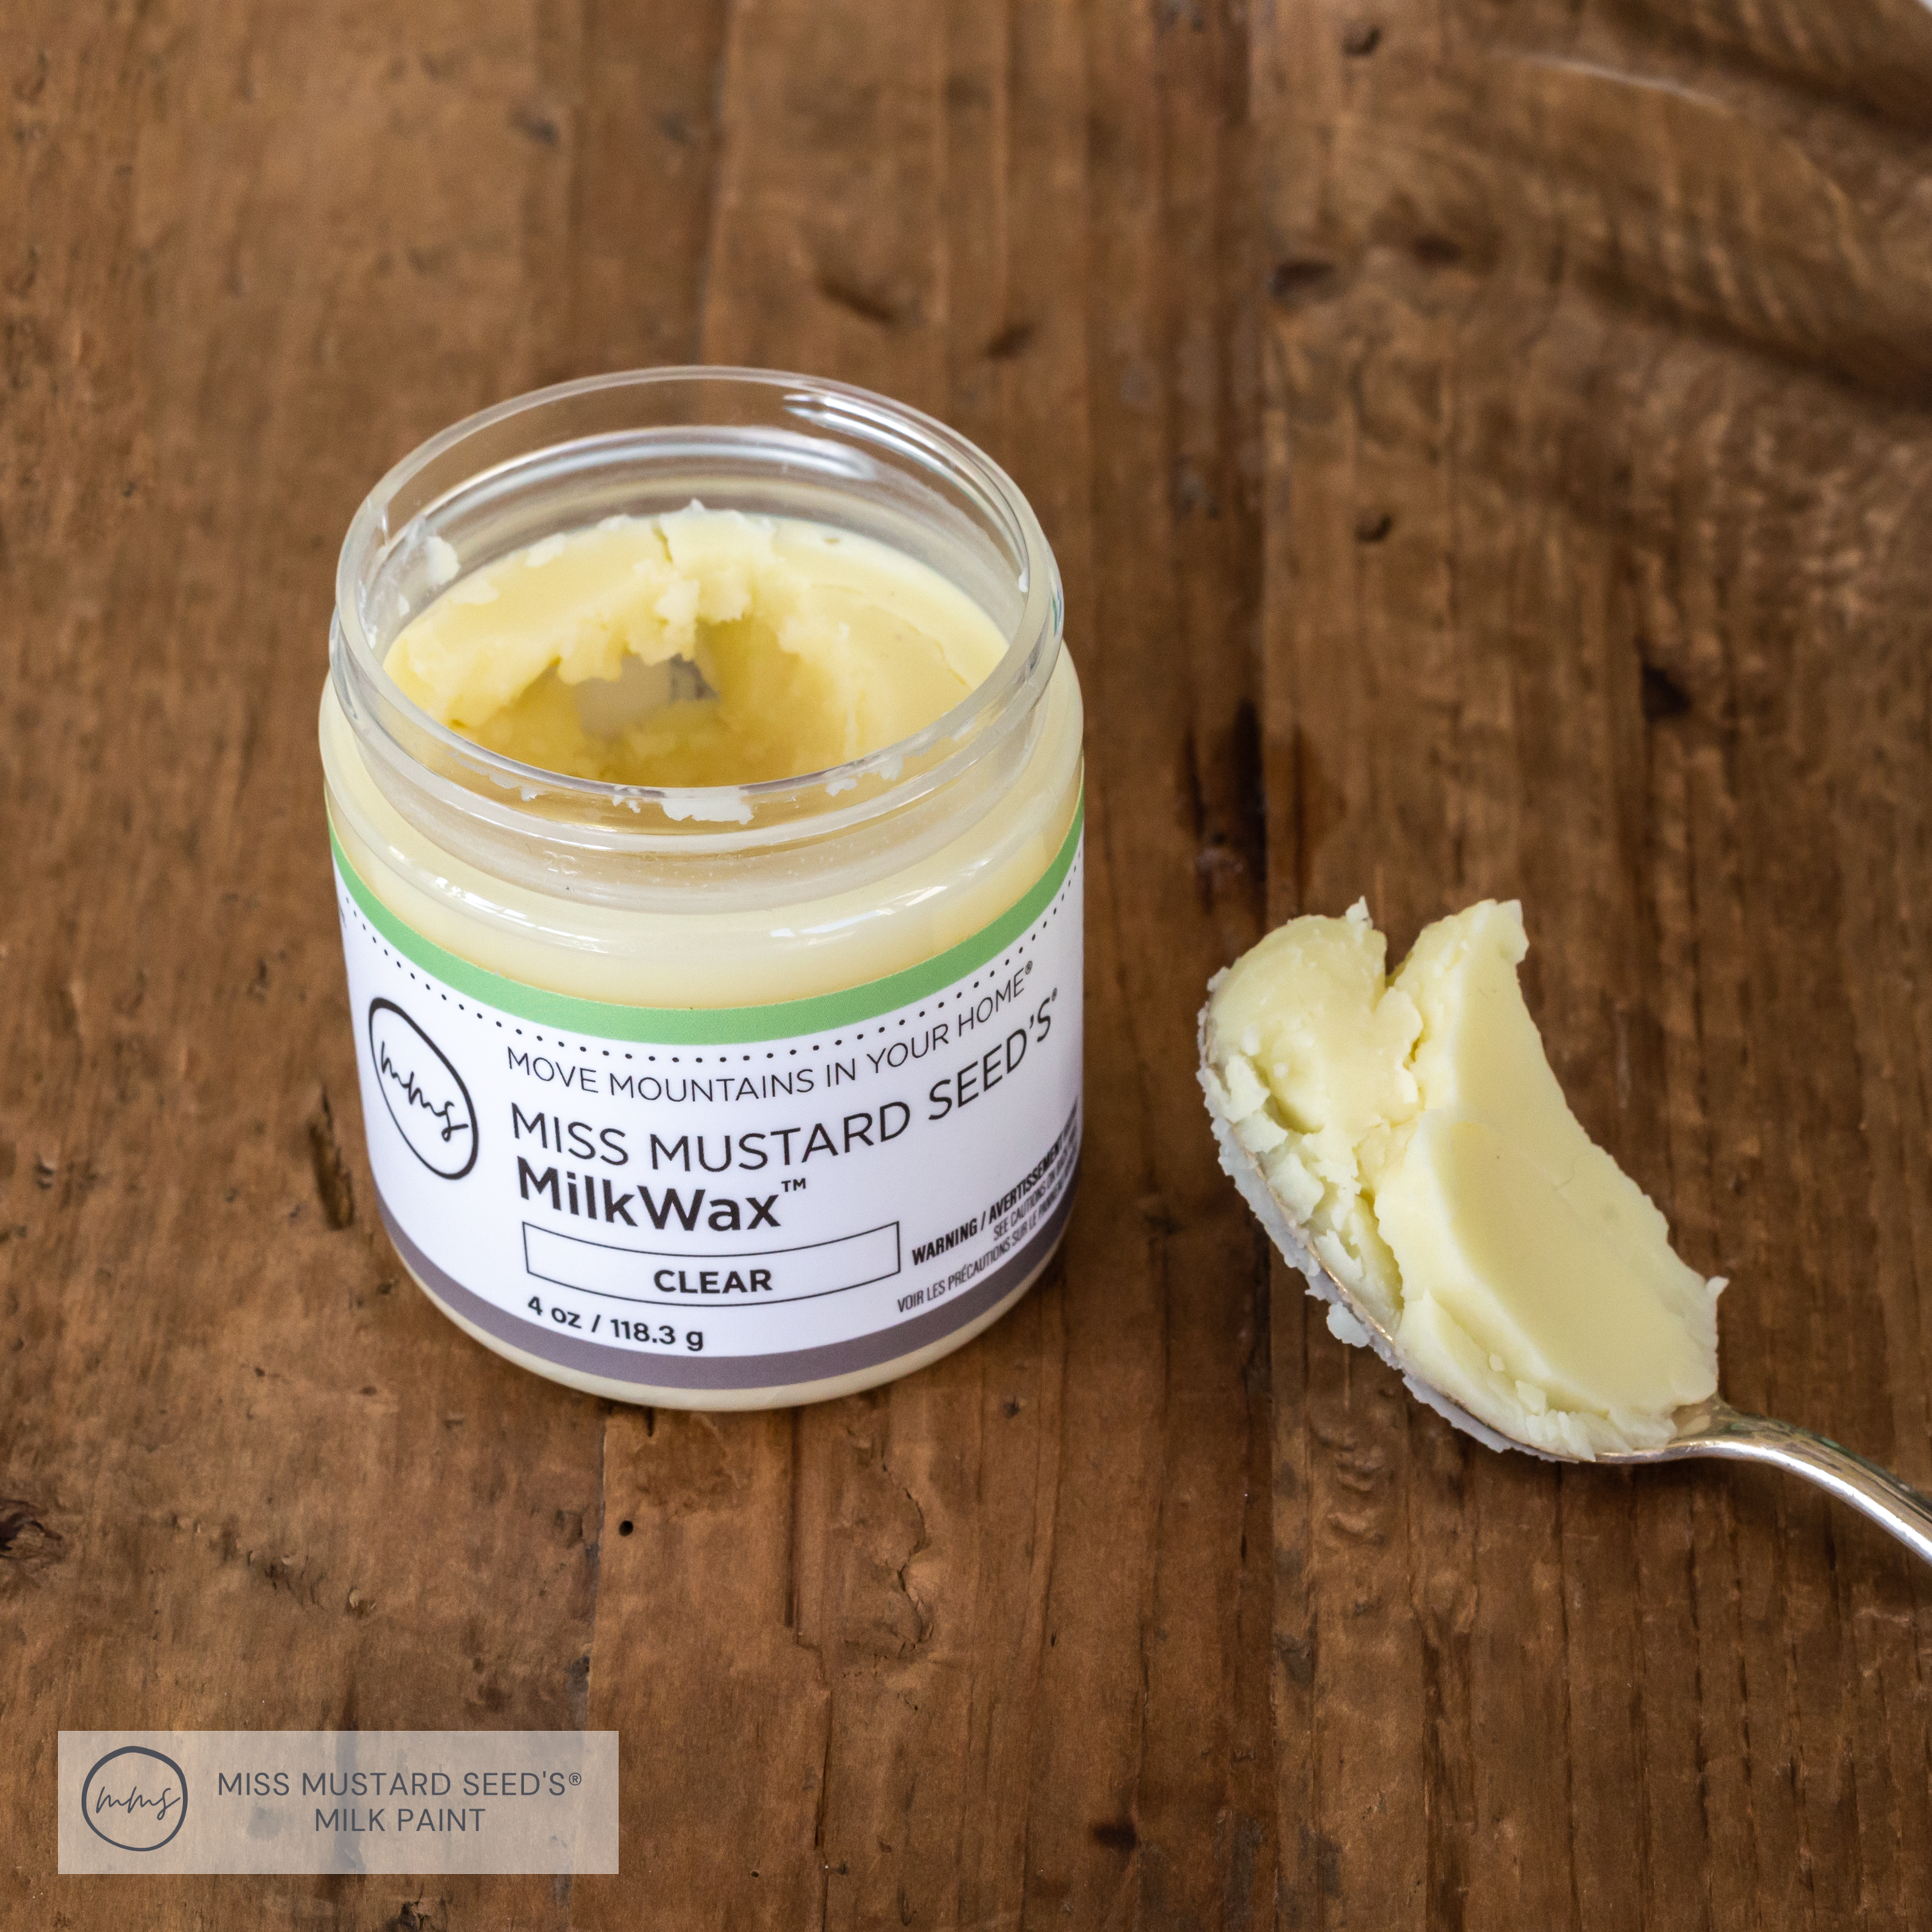
I knew I wanted this piece to look weathered and to have a fairly matte sheen, so I decided to first seal the piece all over in MilkWax™ Clear.
I applied the wax all over with a brush, allowed it to dry, then came back and buffed out the finish with a microfiber towel.
I then used MilkWax™ White to bring in that weathered seaside vibe I was trying to achieve. The white wax settles into all of the wood grain, imperfections, and details of the piece to really highlight the details while calming the color.
The Details:
I decided on a traditional glass handle for this piece, and I think it complimented the color and the coastal feel while keeping with the traditional style of the dresser. The drawers were lined with a nice floral wallpaper, and the seagrass baskets pull it all together and help to update the look!
Staging:
Staging a piece for me is so much fun, but I also think it is such an important part of selling furniture. It shows the customer what the piece could look like in their home.
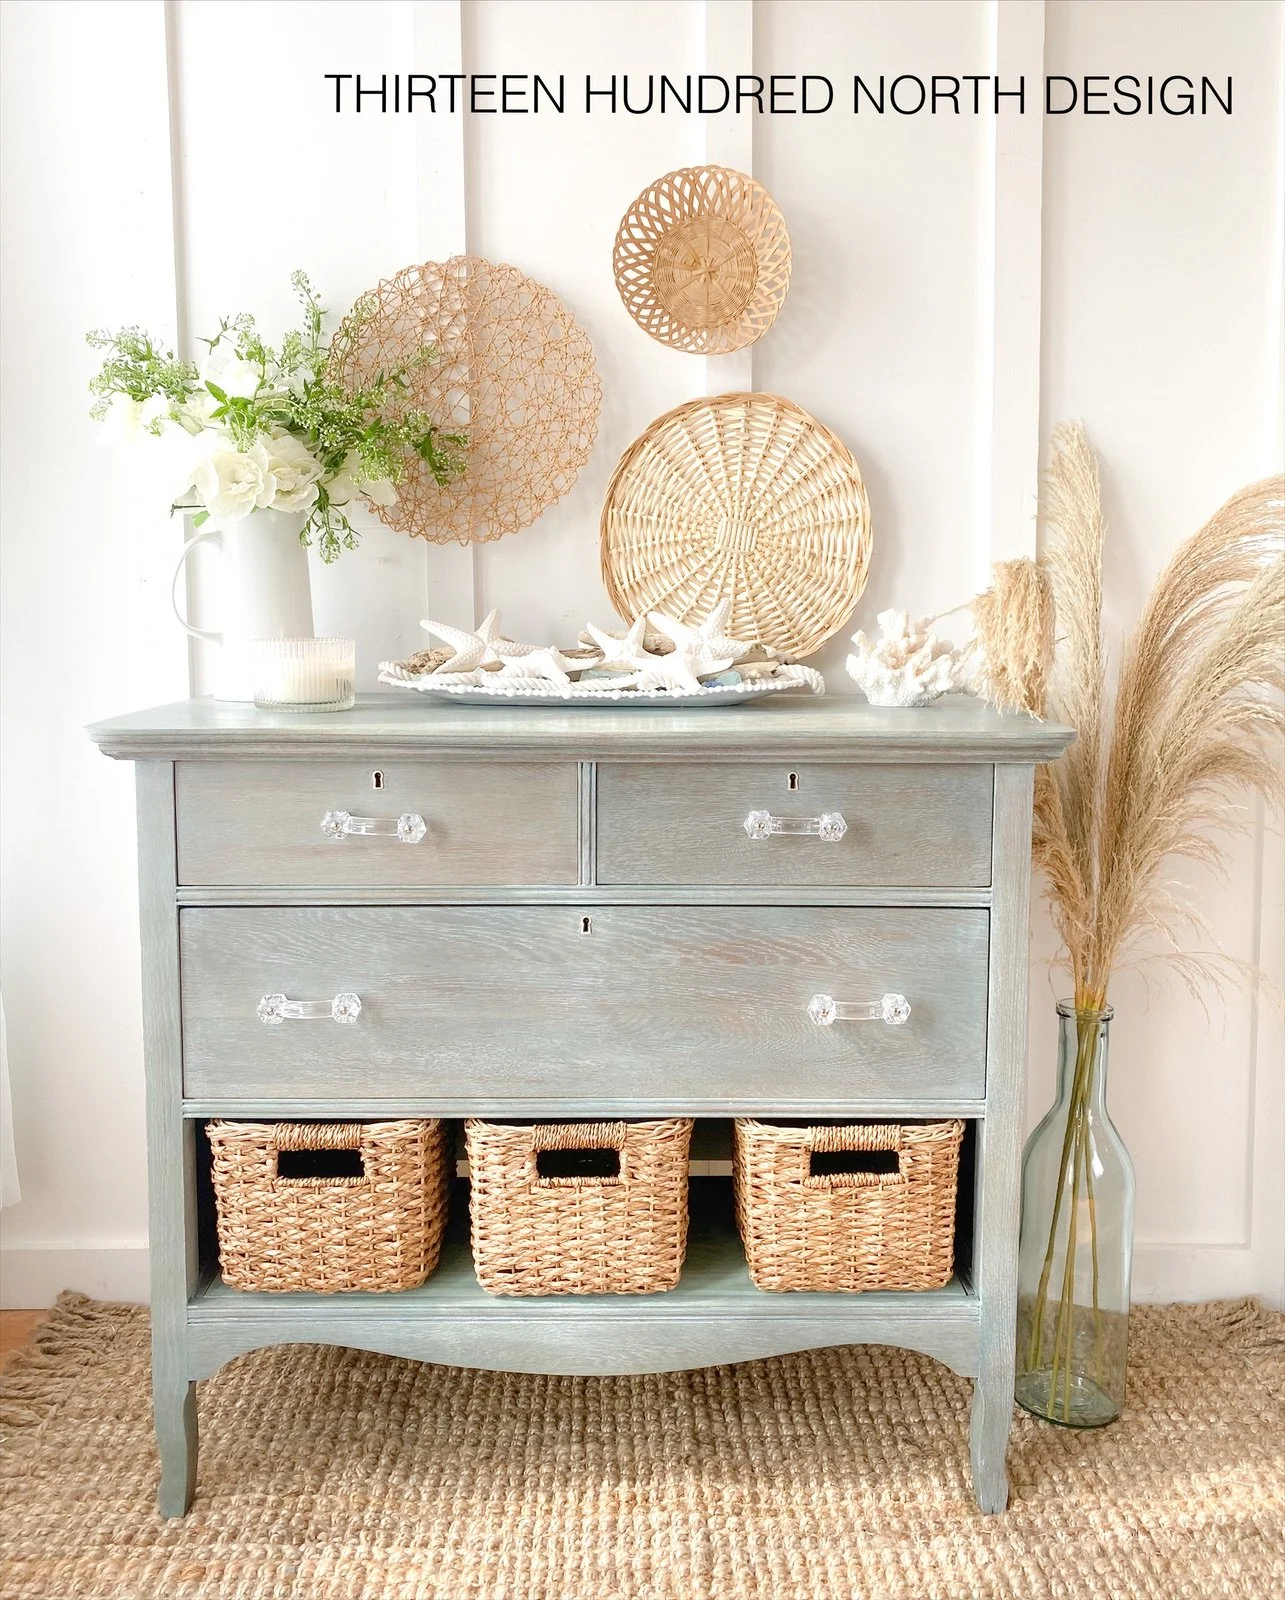
I think by showing the piece against a nice neutral interior wall, it showcases the true shade of the paint or wood, and it gives them a preview of what it could do for their space.
When I was choosing staging items for this piece, I thought it would be fun to use items from the coast, but nothing over the top.
I collected driftwood locally and sprayed it down with bleach, and allowed it to sit in the sun to lighten up a bit. I wanted a little nautical vibe but also wanted someone to be able to picture it with their own décor so I kept it neutral.
I found these fun white starfish, subtle blue sea glass pieces, inexpensive florals, and white flowers from my side yard and added texture with a basket wall!

Conclusion:
I am so pleased with how this piece turned out; a missing drawer and a coastal line of paint turned into my inspiration! Don’t be afraid to rework a piece or think outside of the box in order to give a sad piece of furniture a second chance!