
DIY Milk Painted Paper Star Ornaments
We’re so excited to introduce you to a brand new guest blogger here on our website!
Everyone, meet Kelly Radcliff of The Tattered Pew!

Hi, I’m Kelly Radcliff, and it’s my absolute favorite time of the year, Christmas! I am so excited to combine my favorite season with my favorite paint, Miss Mustard Seed’s® Milk Paint. If you are anything like me, then you have been planning and preparing in your mind how to decorate your Christmas tree this year!

There is something so special and personal about handmade Christmas ornaments, so I decided to incorporate that aspect in my decorating plans for this year. These DIY Miss Mustard Seed’s® Milk Painted paper star ornaments are guaranteed to add instant charm and beauty to any Christmas tree!

If you have been looking for a Christmas project or to give MMS MilkPaint™ paint a try, these ornaments would be great for you whether you are a beginner or experienced painter, or DIYer.
Let’s check them out!
DIY Milk Painted Paper Star Ornaments
I love decorating my Christmas tree each year! I like to challenge myself to give it a new look while keeping things beautiful and budget-friendly.

It’s no secret that I love Miss Mustard Seed’s® Milk Paint and use it in our home for all kinds of projects. My Boxwood dresser is my all-time favorite!

So, when my mom suggested I make paper star ornaments for our tree this year, I immediately knew what would make them even more special - Miss Mustard Seed’s® Milk Paint!
These DIY milk painted paper star ornaments were fun to make and add that “home for the holidays” touch I have been craving lately!
They are truly the “star” of the tree!

Materials You Will Need for Painted Paper Stars
Craft scissors
Ruler or Paper Cutter
Glue or Glue Dots
12 x 12 Cardstock Paper
Paintbrush
Glitter
Yarn, Ribbon, Thread or Baker’s Twine
MMS MilkPaint™

How To Fold the Paper Star Ornaments
This is the time-consuming part of the project, depending on how many stars you decide to make. I wanted to make enough to fill my entire tree, so with my mom’s help, we folded 12 small and 12 large stars. Between my mom and me, I would say it took us a good hour to fold 12 stars each. I did it while I watched TV and this made it go a lot faster!
Let’s get folding!
Step 1: Cut Your Cardstock Into Squares
We made two different sized stars; the smaller stars were 4” x 4” and the larger stars were 6” x 6”. To make one star, you will need two 4” squares or two 6” squares.

Step 2: Your First Fold
On your first square, fold your cardstock in half, and then repeat this for your second square. Make sure to crease your folds well.

Step 3: Flip Your Cardstock Over
Next, turn the paper square completely over, making sure to be on the opposite side of the paper folding the opposite way that you just did. Fold the straight edges to match each other and fold it in half again, but this time on this opposite side, edge to edge. Repeat on your second square as well.

Step 4: Flip It Back Over & Fold Corner to Corner
Then flip it over again, and this time fold corner to corner. Open the paper and fold the other two corners together on that same side.
When you lay the squares flat, you should see fold lines going straight across on each side, plus the corner-to-corner folds making eight total triangle regions.

Step 5: Make Your 4 Marks and Cut
Take a pencil and make a mark a little less than halfway into the center, on the straight edge folds. Cut to these pencil marks on the straight edge side. It is critical that you make these cuts on the center lines and not the corners. These cuts should be a little less than halfway to the center of the square.

Step 6: How to Make the Star Points
First, lay your squares on their backs and fold from the cut to the middle creating a point. Crease well and repeat this on the opposite side of this same point. Continue to create 4 points on your square.

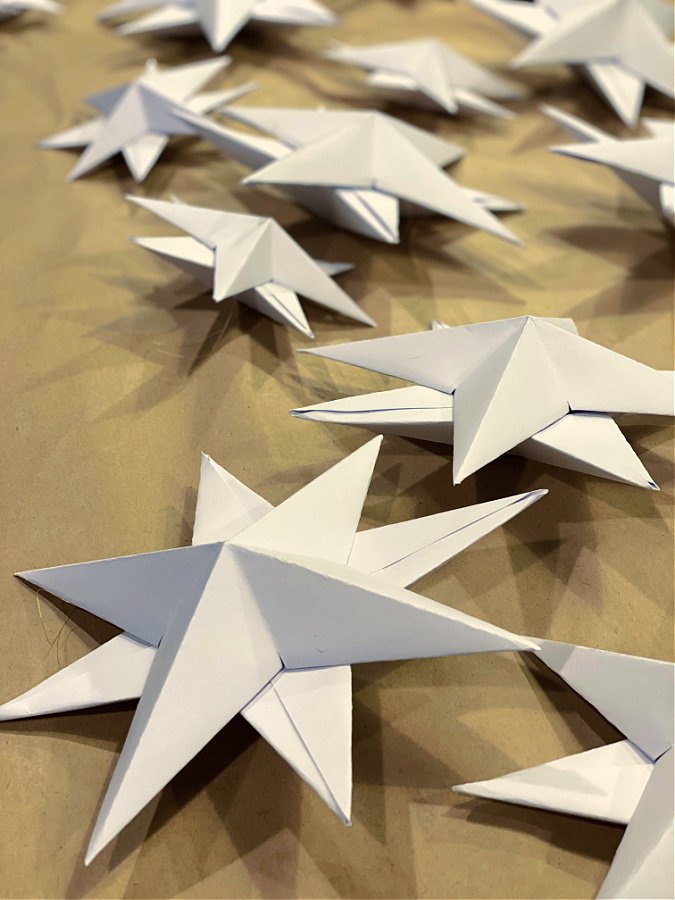
Step 7: Glue Your Flaps to Create Points
You will overlap the flaps and glue each one with a quick hold glue or with glue dots. Continue overlapping and gluing the other three points. You will start to see the 3D stars coming to life!

Step 8: Add Your Thread for Hanging
Finally, attach your thread to make your stars hangable. I used gold thread and glued it to the inside at the base of one of the points. Then I glued all around the inside edge or base of each point.
Lay the other finished square on top of the one with the glue so that flat sides are together, making an 8-point star. Hold your star-making sure the glue adheres, and the points line up.

Now that your stars are made, it’s time for the fun part, paint!
How to Paint the Paper Star Ornaments
First, choose your favorite Miss Mustard Seed’s® Milk Paint color. I chose Mustard Seed Yellow to complement my mustard yellow velvet curtains. Any color would be fun to use as an accent though! Maybe Tricycle, Boxwood, or Bergere? These are 3 of my favorite colors!
Next, mix your MilkPaint™ according to the directions on the packaging — 1 part water to 1 part powder. The consistency should look like melted ice cream. A few lumps are normal, but it shouldn’t be too clumpy like cement.
This video will help you!
Note: For 24 stars, I used ¼ cup of paint and ¼ cup of water, and I had some leftover. This paint is amazing and goes so far! Plus, it will last in the refrigerator for a few days and will only require a good stir!
Paint 1 coat of Mustard Seed Yellow on the front and back of the stars. Let this dry and return the next day to touch up any spots or gaps you may have missed. One coat of paint was perfect for the cardstock and brushed on beautifully!

Tip: Make sure to paint very thin, light coats of paint on your cardstock so it won’t buckle.
It took about 30 minutes for each painted star to dry.
Adding Some Sparkle
For the final touch, add some beads of glue near the center of the star and sprinkle on some glitter or decorate as you desire. Even polka dots would be fun!

Decorating Your Tree With Miss Mustard Seed’s Milk Painted Paper Stars
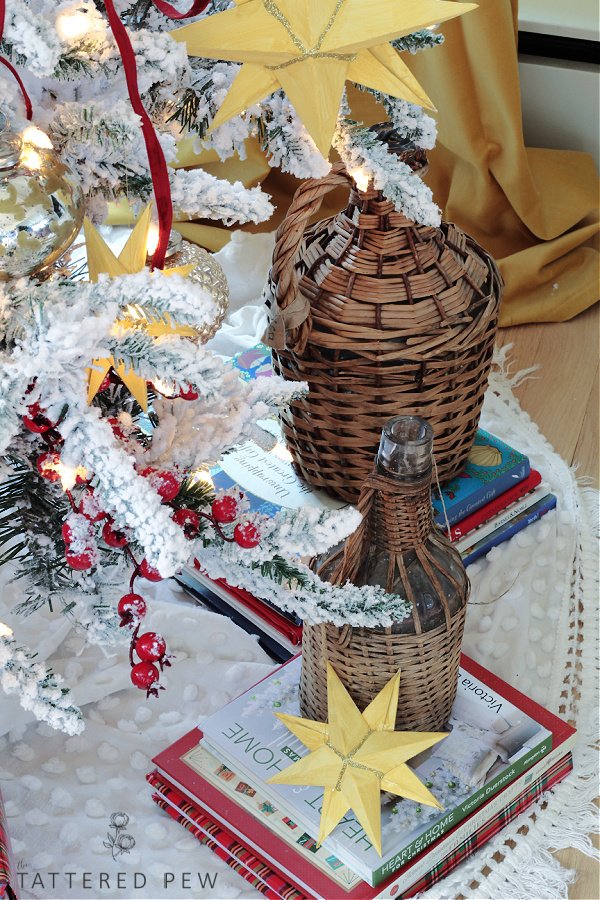
Finally, for the best part, decorating the tree with the DIY Milk Painted paper star ornaments. I have had this vision in my head for so long and to see it come to life is so rewarding.

I love that these stars can also be used to create a garland, embellish a present, or maybe even scattered throughout a pretty tablescape! So many possibilities.
To see this Mustard Seed yellow next to my Boxwood green dresser just makes my heart happy! I hope you enjoy this project as much as my mom and I did.
I would love to know if you make these painted paper stars and what color you chose in the Miss Mustard Seed’s® Milk Paint line! Thanks for hanging out with me today, and drop a comment below if you have any questions!
