
Upcycled Dollar Store Flower Pots With Plaster And Miss Mustard Seed’s® MilkPaint™
Happy March, and Happy almost Spring! Now that Spring is on my mind, I am so excited to garden once more! Today I want to focus on a fun way to upcycle a dollar store pot using plaster and MilkPaint™ that is the perfect complement to your Spring plants.

The beauty of this DIY is that it is inexpensive and customizable. I used flower pots from Dollar Tree, but you can use any pots that you have around your home or find while thrifting. You can also customize it using any beautiful color from Miss Mustard Seed’s® MilkPaint™.
I love how this project turned out! It showcases that MilkPaint™ can make the simplest of projects more upscale and give pieces such a rich story. The texture that the plaster provides and the added beauty of the MilkPaint™ is the perfect touch for these charming, custom flower pots.
Now, let’s get painting!

Video Tutorial
Last week, I went LIVE on Miss Mustard Seed’s Milk Paint Facebook page to demonstrate how to make these textural pots. You can watch the re-broadcast here and follow along with the written tutorial below.
Supplies Needed
To create your own DIY plaster pots with MilkPaint™, you will need:
Miss Mustard Seed’s® MilkPaint™. For this project, I used Bergere, Arabesque, and Boxwood, however, you can use whatever color best fits your color scheme and florals.
Paintbrush
Dollar Store Flower Pots or any flower pot that is looking for a makeover.
Plaster of Paris. I used Dap’s Plaster of Paris, but you can use whatever your heart desires.
Gloves
Plastic Knife
Miss Mustard Seed’s® MilkGrip™ Outdoor Bonding Agent
Miss Mustard Seed’s® MilkOil™ Outdoor (Coming soon!)
Brush or Lint-Free Towel
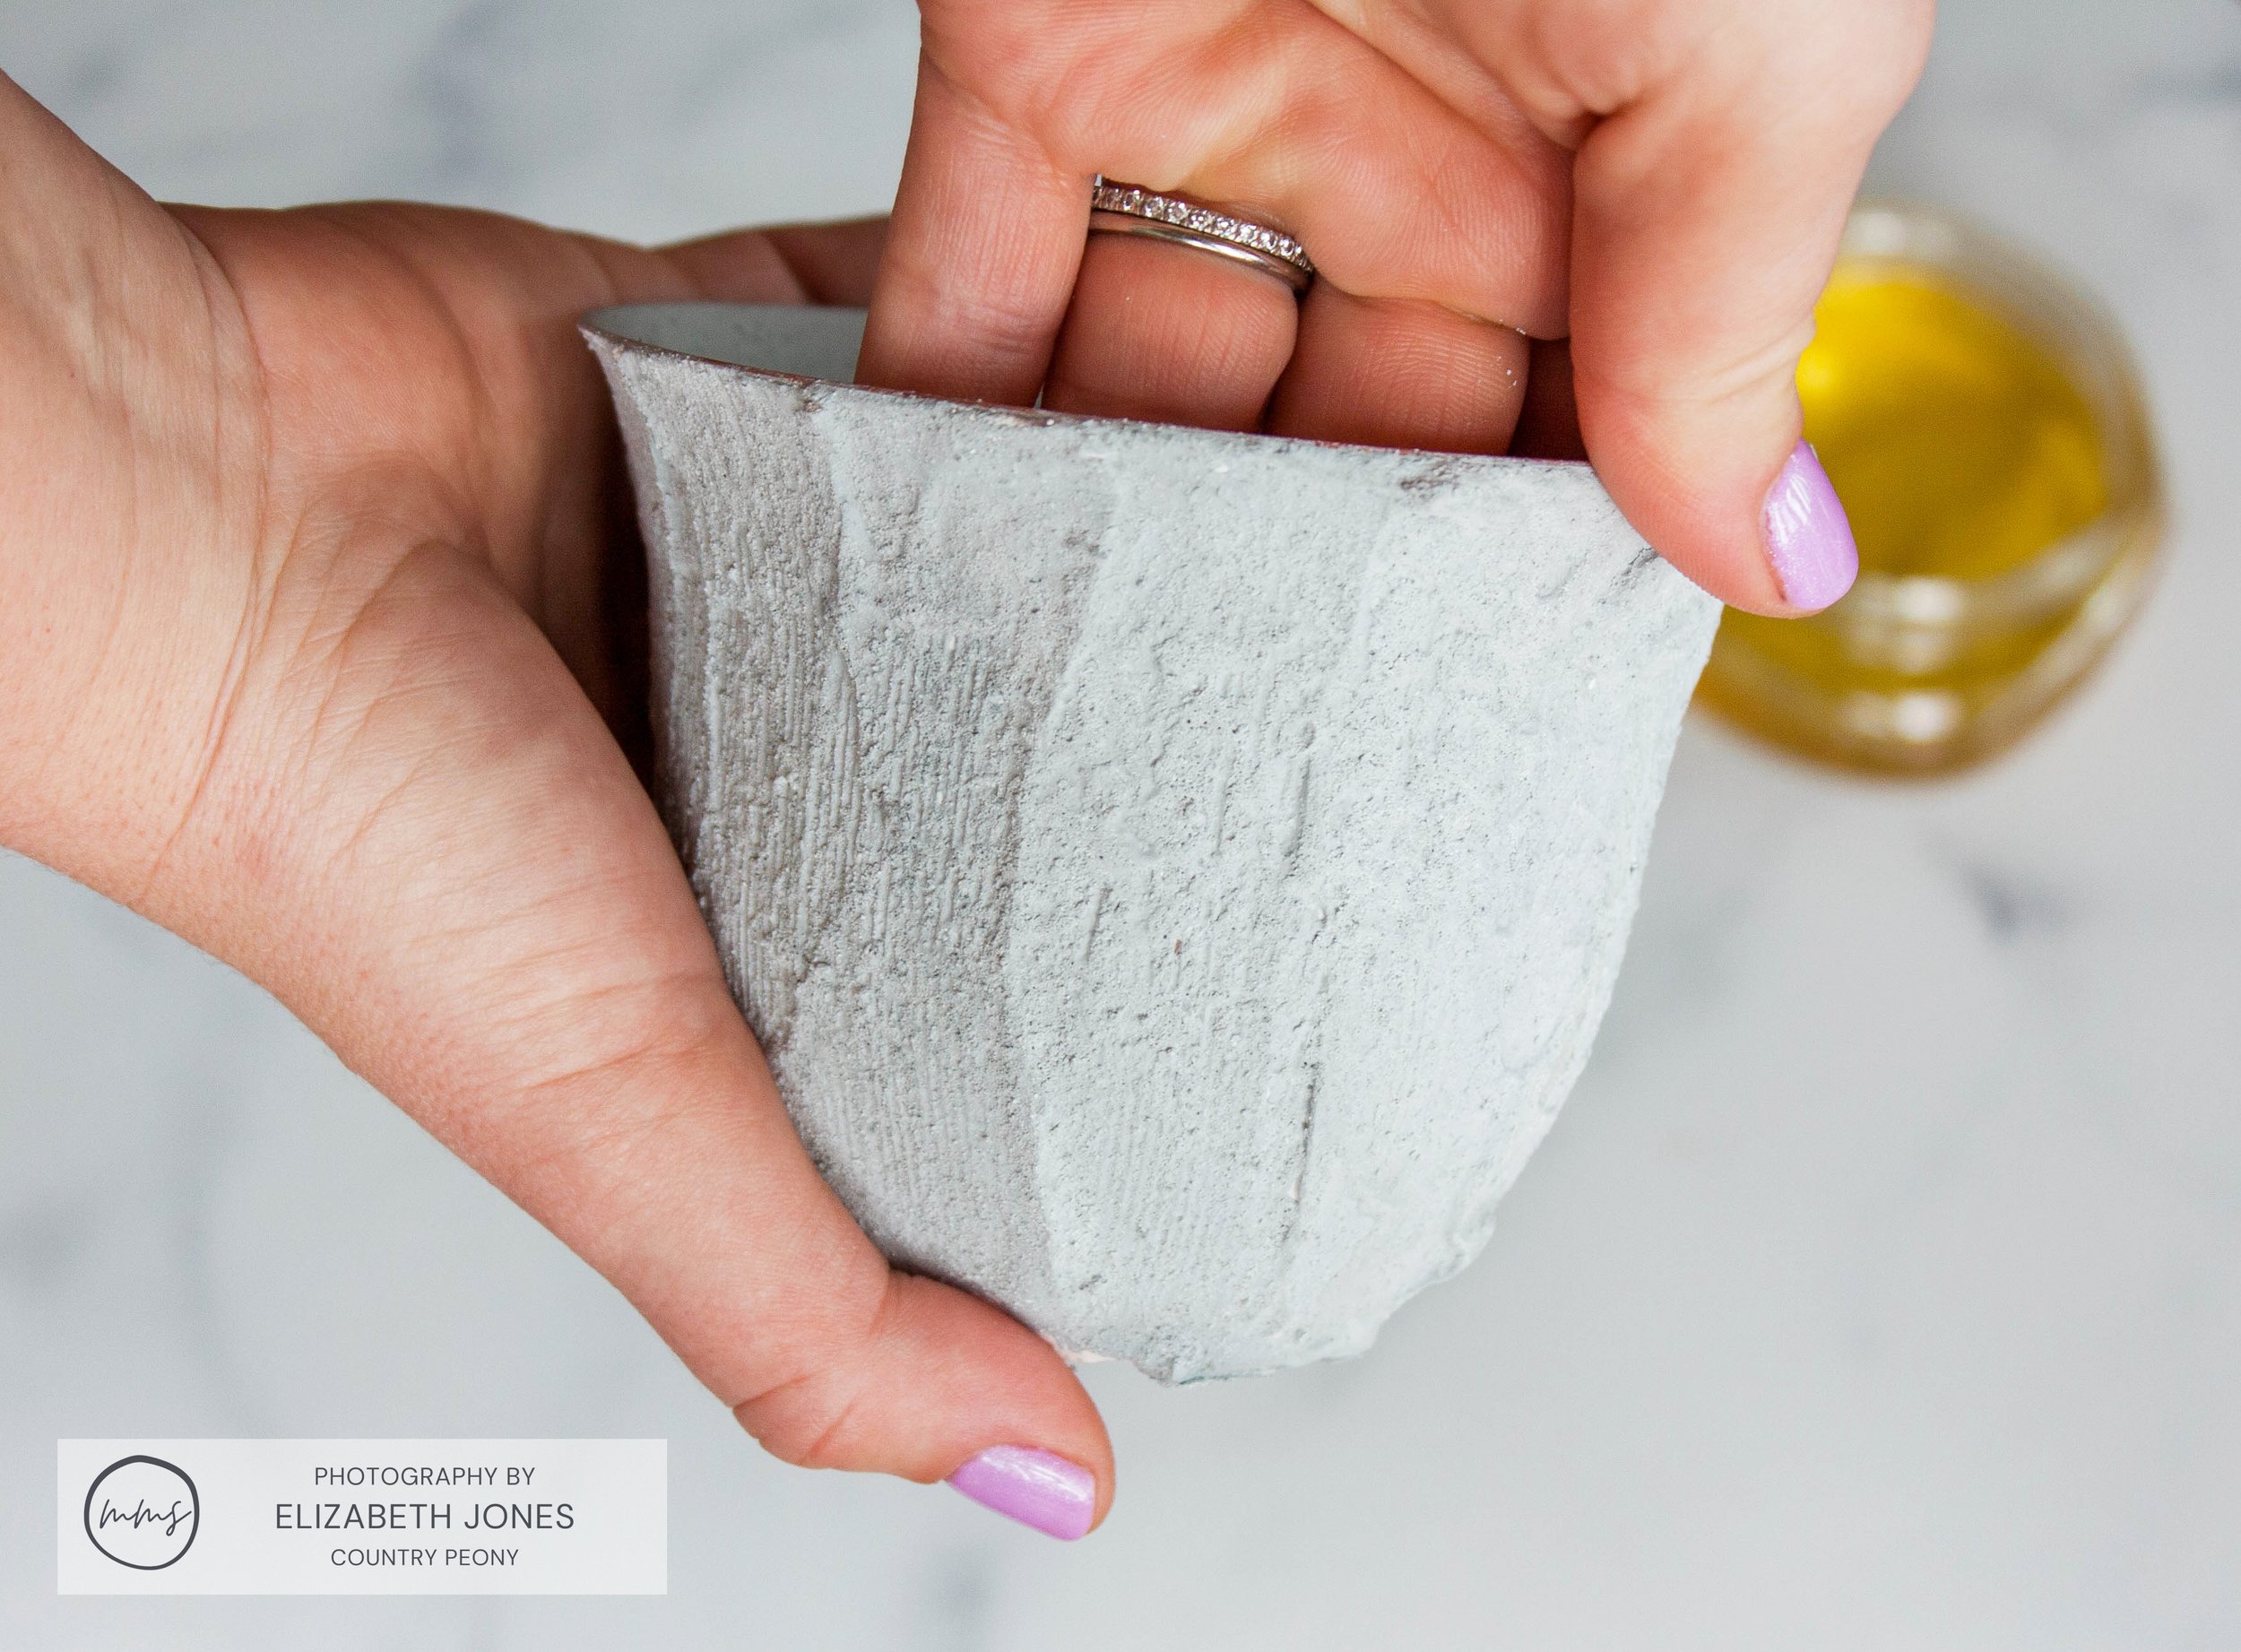
Step 1: Apply The Plaster To The Pot

Protect your work surface and put on gloves, then use a plastic knife to apply the Plaster of Paris.

In a smooth motion from the bottom of the pot to the top, create a thin streak of plaster with the plastic knife.
*This process is like icing a cake. One smooth motion to create one line of plaster to the pot.
*Use a small amount of plaster. Too much plaster may clump up and fall off the pot.
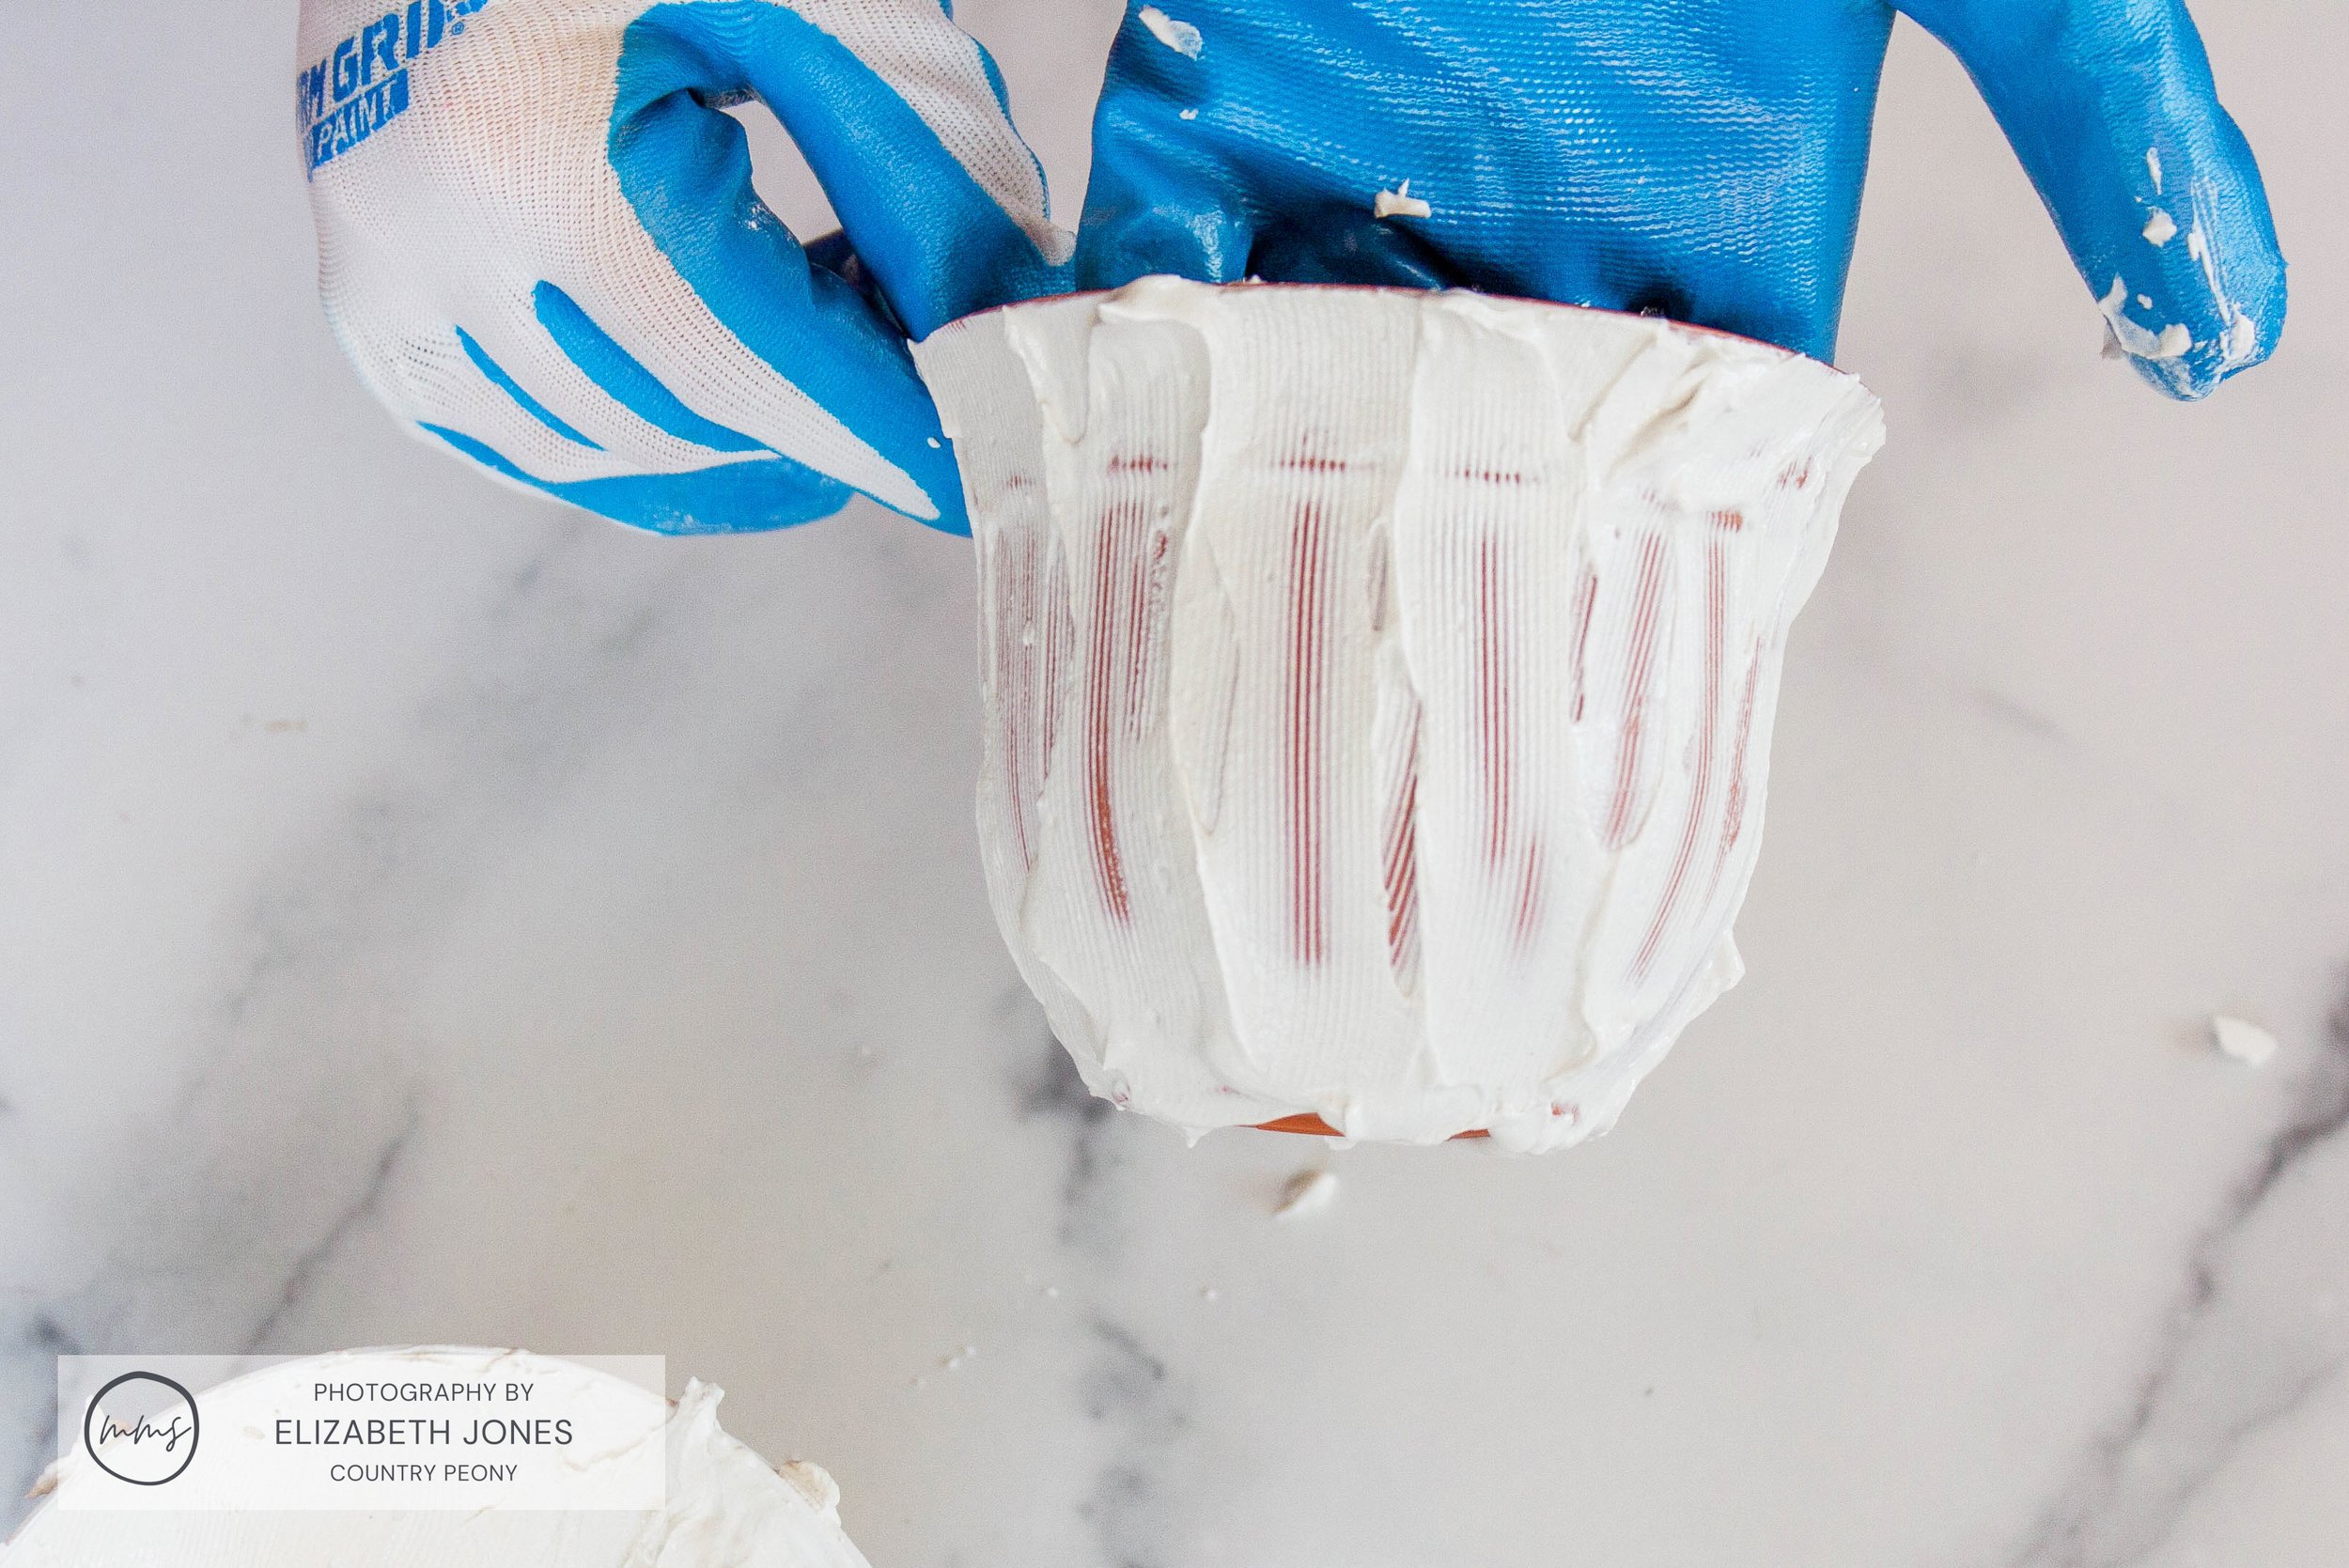
Attach the plaster to the entire pot, then set it aside to dry.
Let it dry completely. About 24 hours.

Continue to add plaster to different pots.
Play around with different methods. I call this one the swirl method. Create a swirl with the knife and the plaster. This will also create a beautiful texture for the MilkPaint™. Let it dry for 24 hours.
*Like painting, this process should be fun. Don’t overthink it, as the more texture you have, the better!

Step 3: Mix The MilkPaint™ And MilkGrip™
Mix 1 part MilkPaint™ to 1 part water. A “part” can be any unit of measurement you wish. I used a tablespoon.
For this project, I used 1 tablespoon of MilkPaint™ to 1 tablespoon of water for each pot.
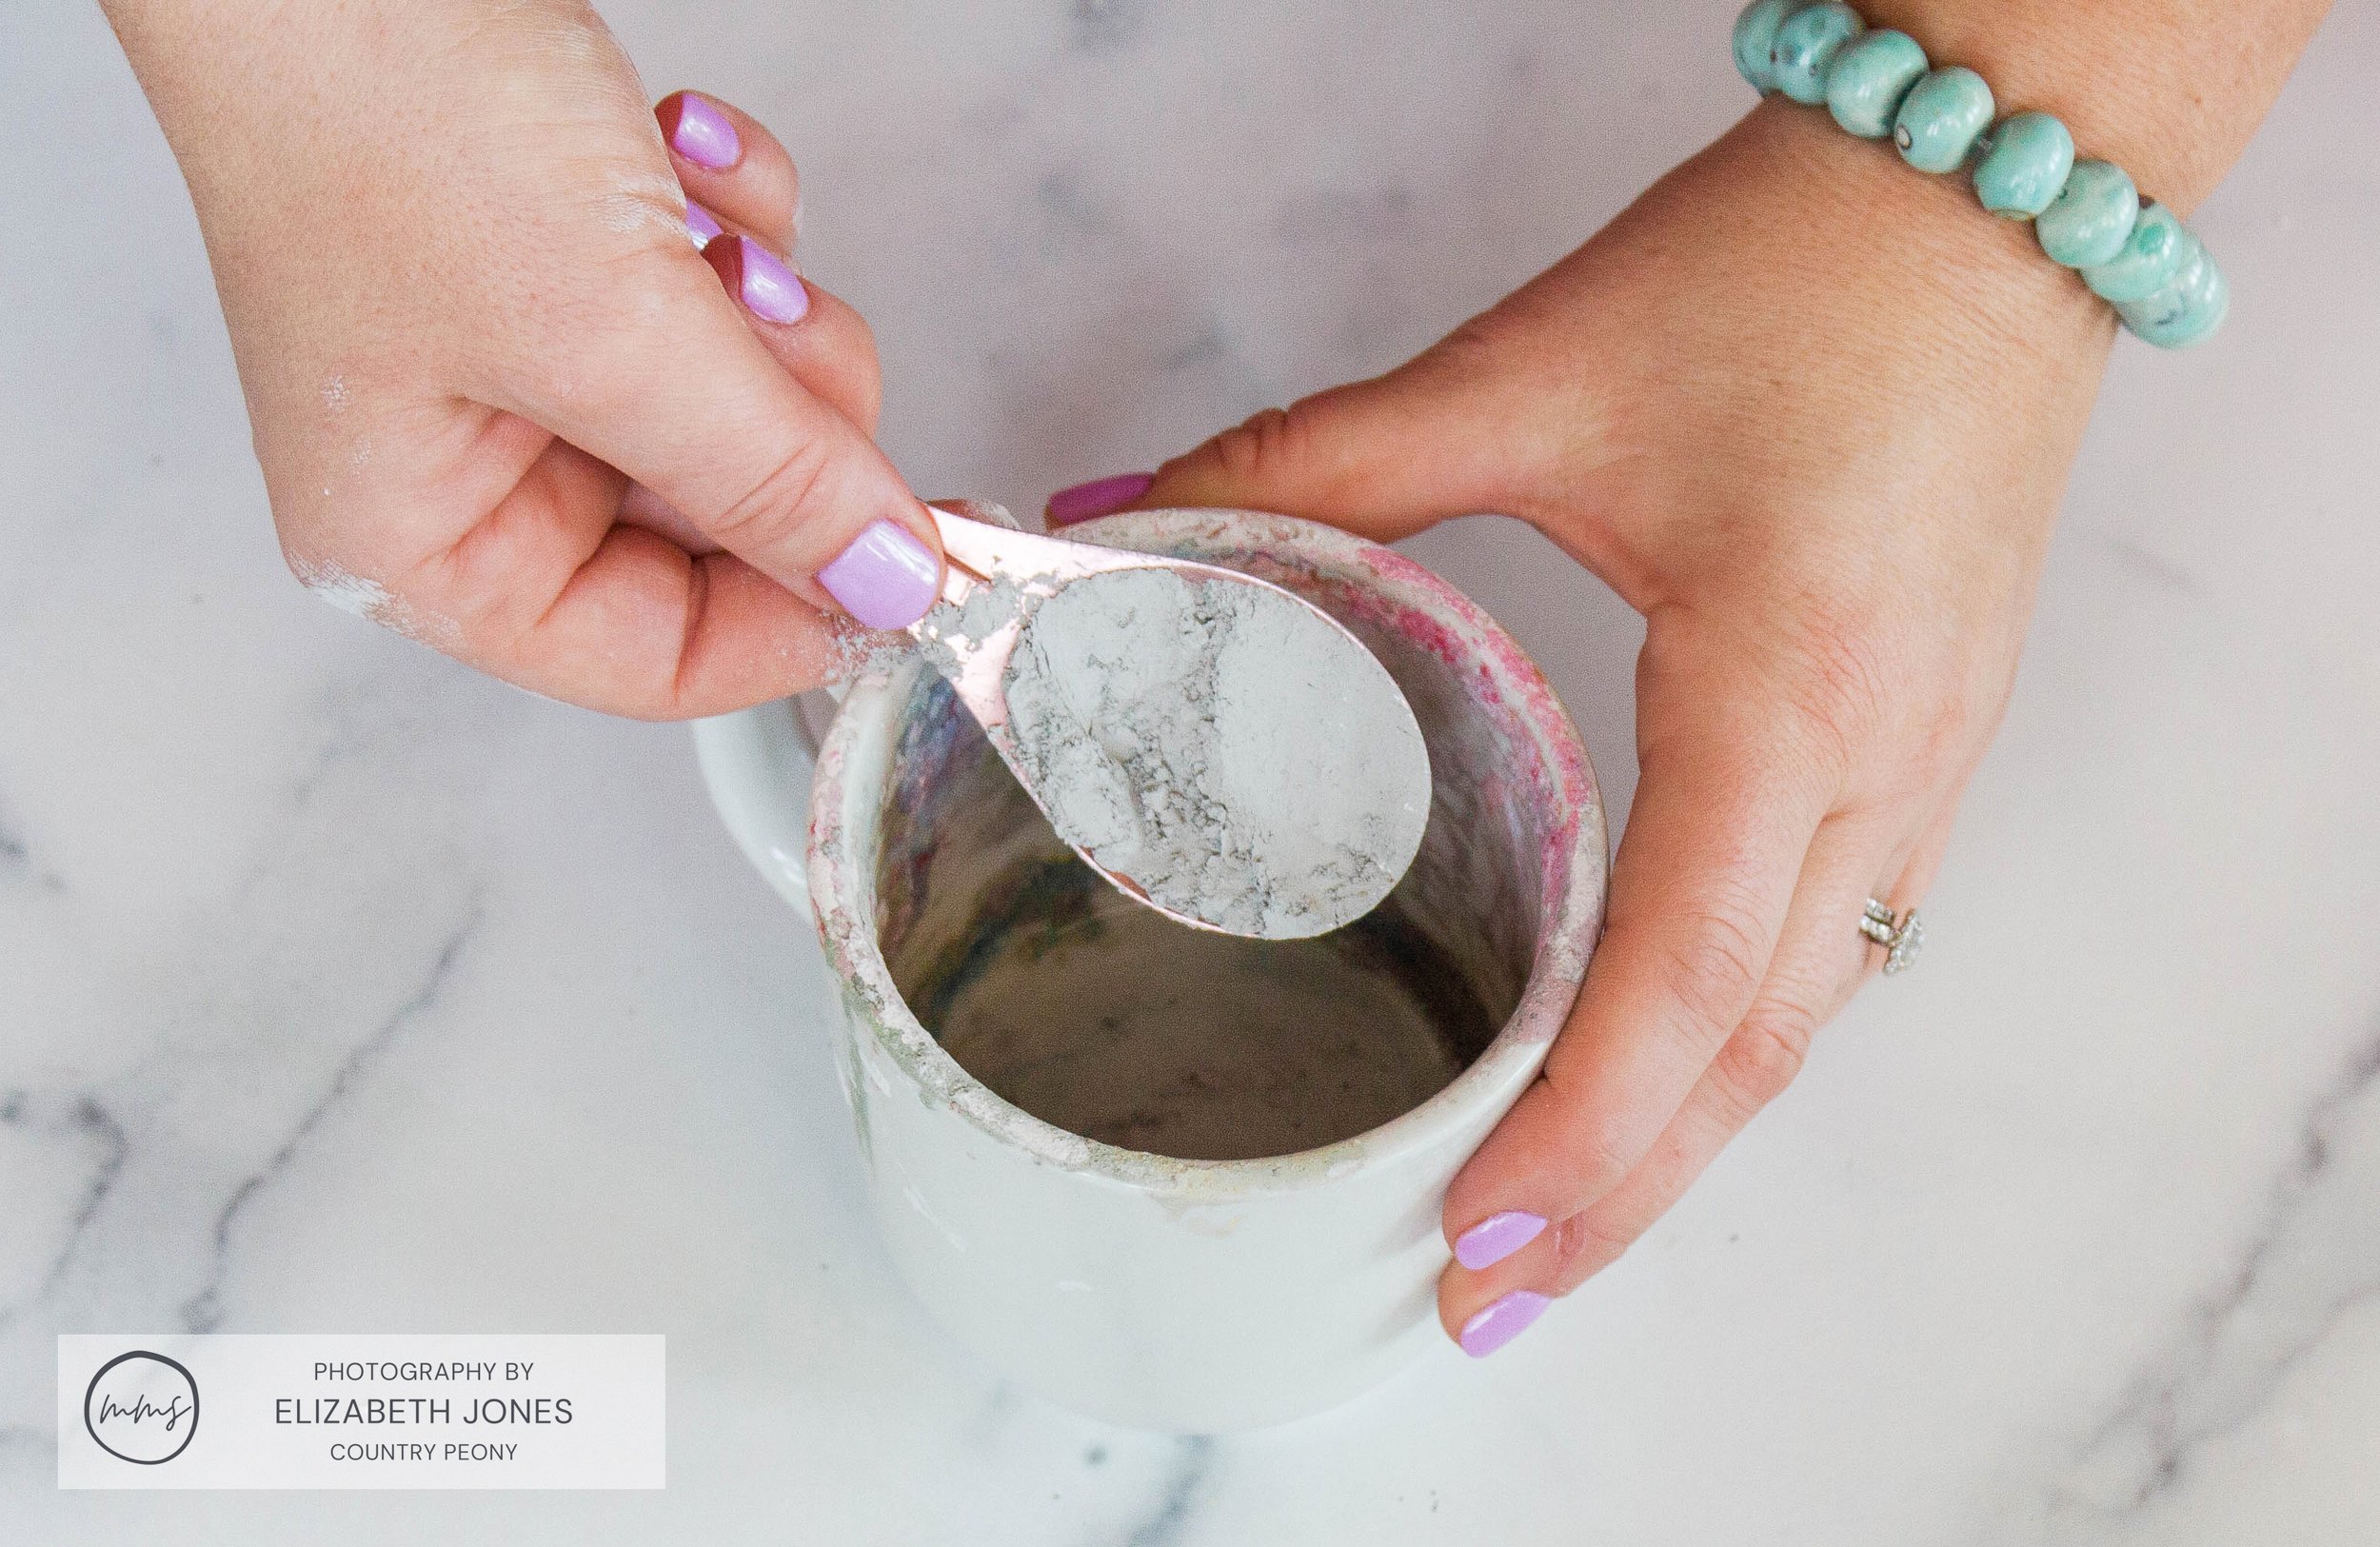
Since we are not painting onto wood and this project is intended for the outdoors, I recommend adding Miss Mustard Seed’s MilkGrip™ Outdoor Bonding Agent to it as well.
*Disclaimer: MilkGrip™ Outdoor will not be released until this Spring.

Add 1 part of MilkGrip™ Outdoor Bonding Agent to MilkPaint™. I added a tablespoon of MilkGrip™ to the mixture.
Then mix thoroughly with a whisk, fork, or a dedicated electric mixer.

Country Peony Tip: For most of my crafting projects, I start with 1 tablespoon. I always recommend starting with less powder than you think you may need. This will help avoid wasting your product. You can always make more paint later. A little bit of MilkPaint™ goes a long way, especially with this small project!
Step 4: Paint The Plaster Flower Pots
Once the plaster is dry, apply one coat of the MilkPaint™ mixture to the flower pots.
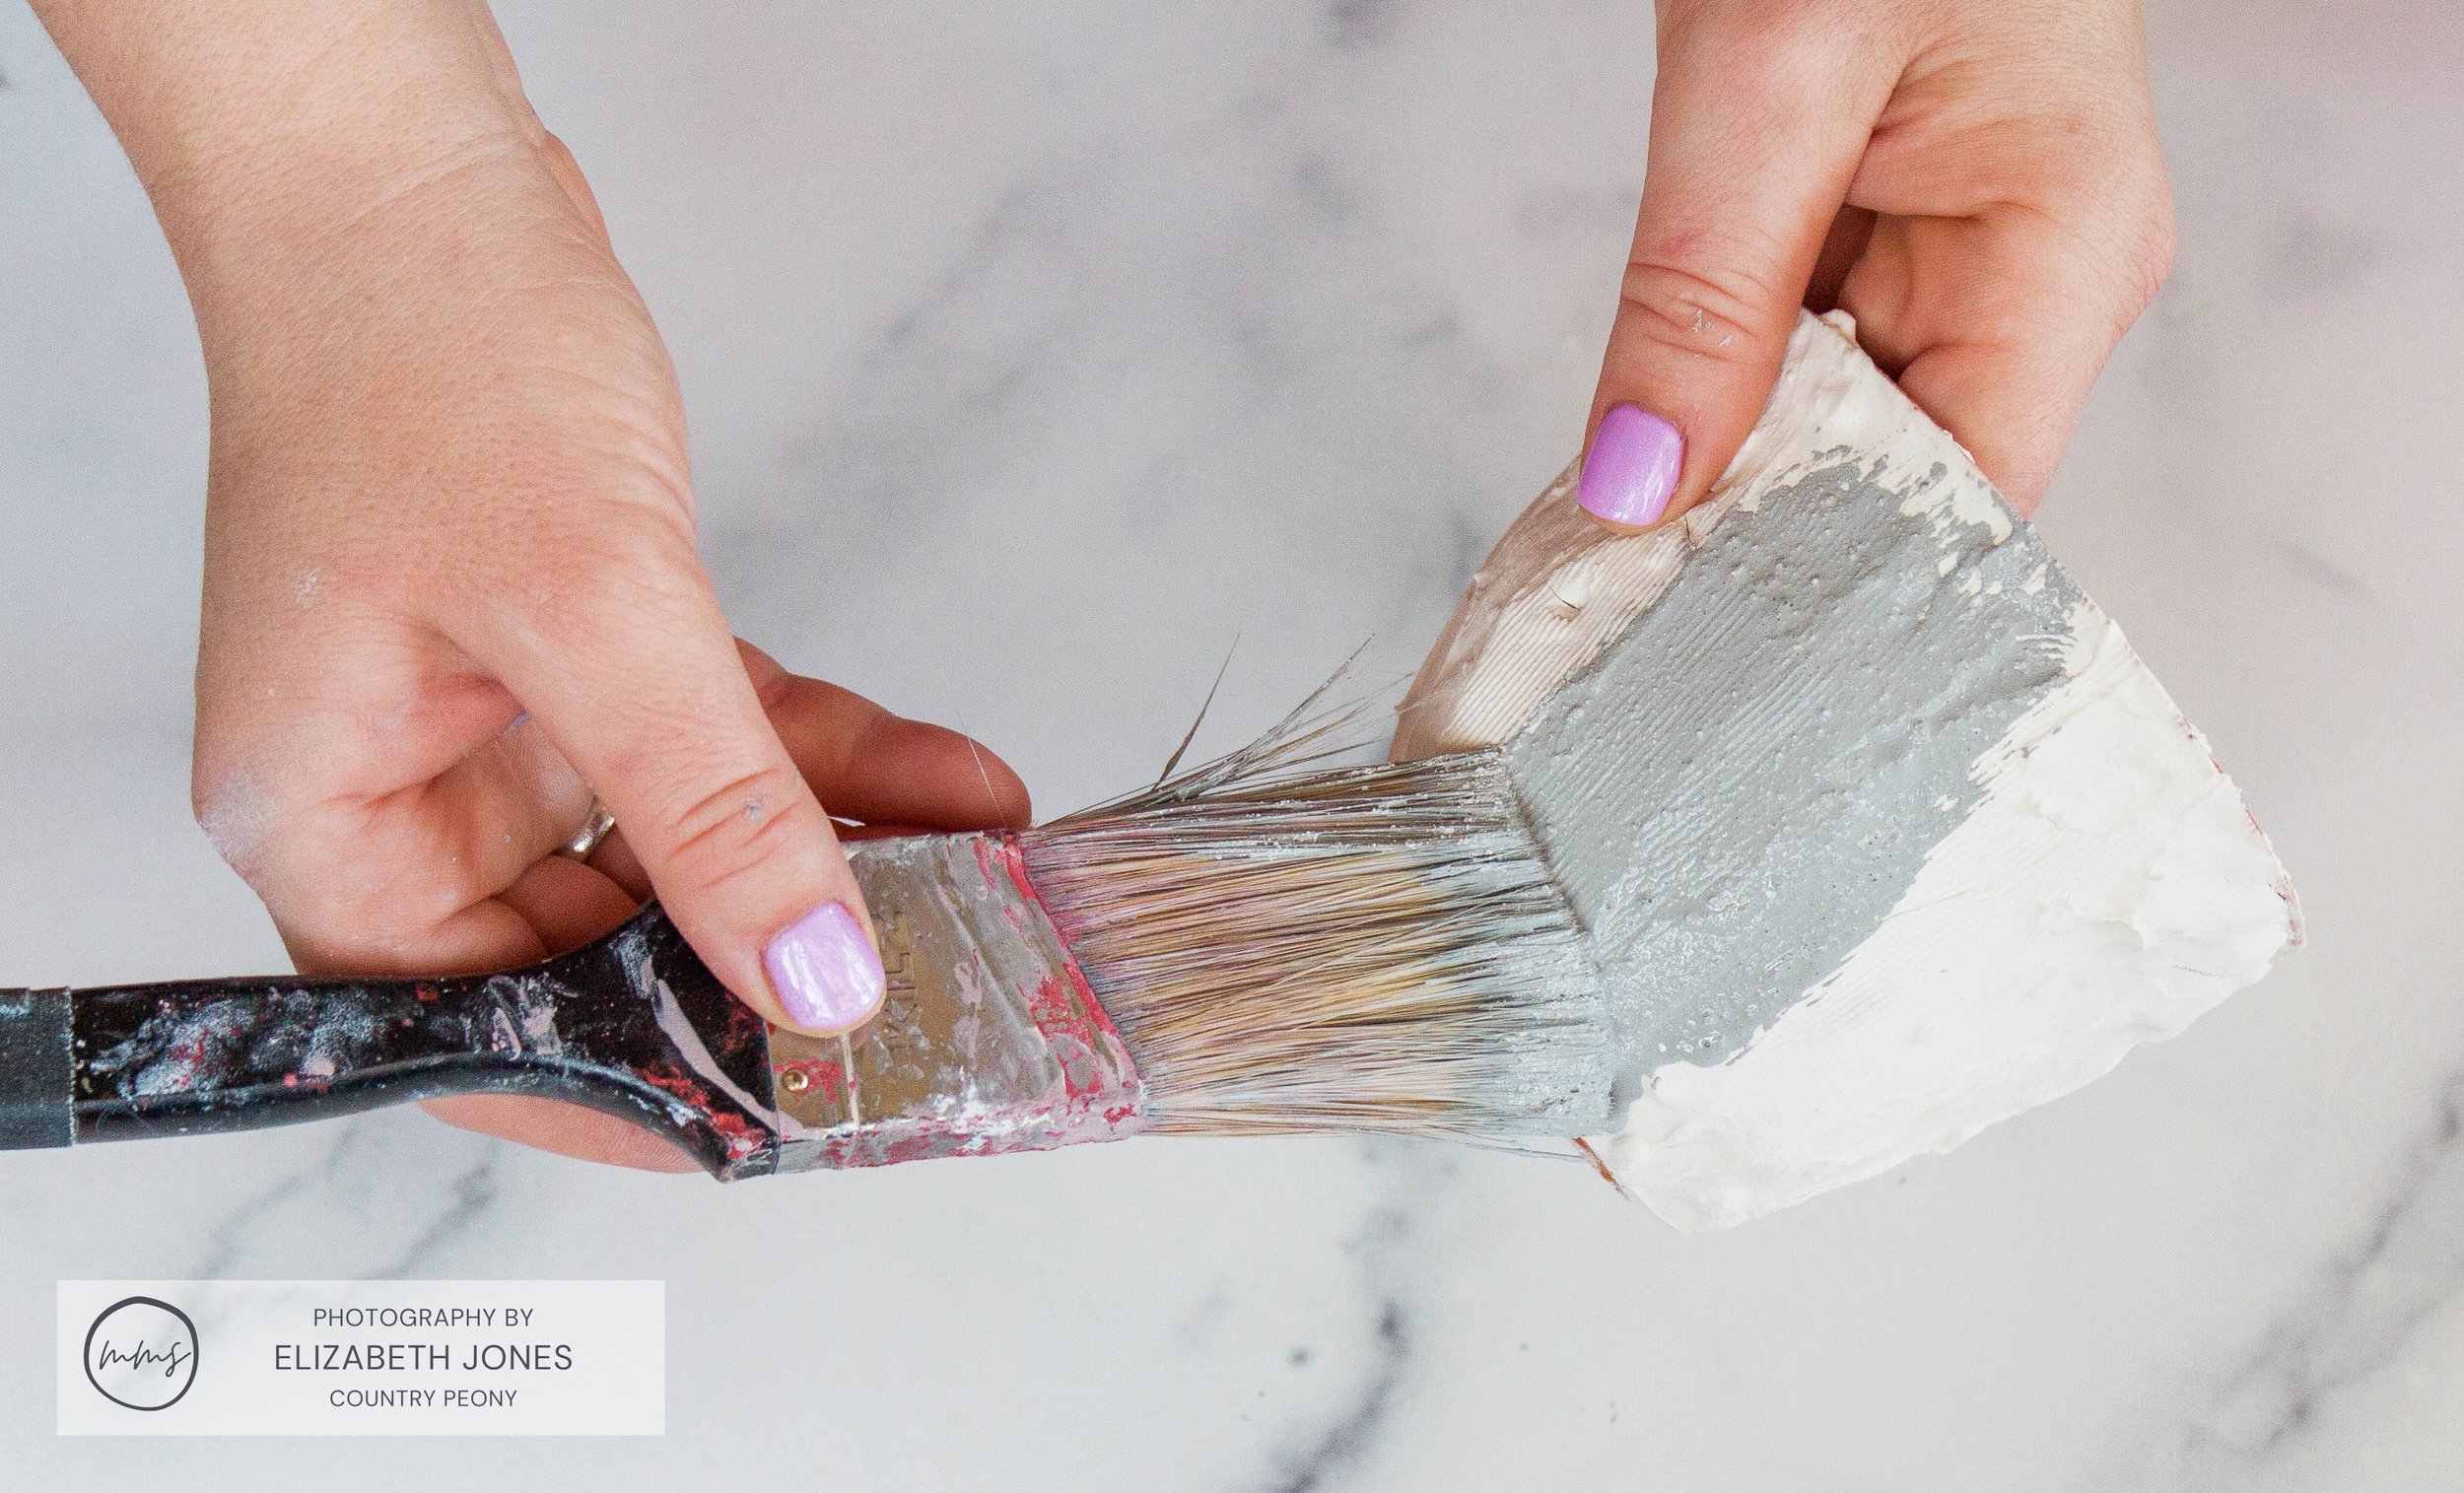
Apply the MilkPaint™ mixture to the inside of the pots as well.
Let the pots dry overnight.

Step 5: Apply The MilkOil™ Outdoor To Waterproof And Seal The Flower Pots
With a paintbrush or a lint-free cloth, apply one coat of Miss Mustard Seed’s MilkOil™ Outdoor to the entire pot.
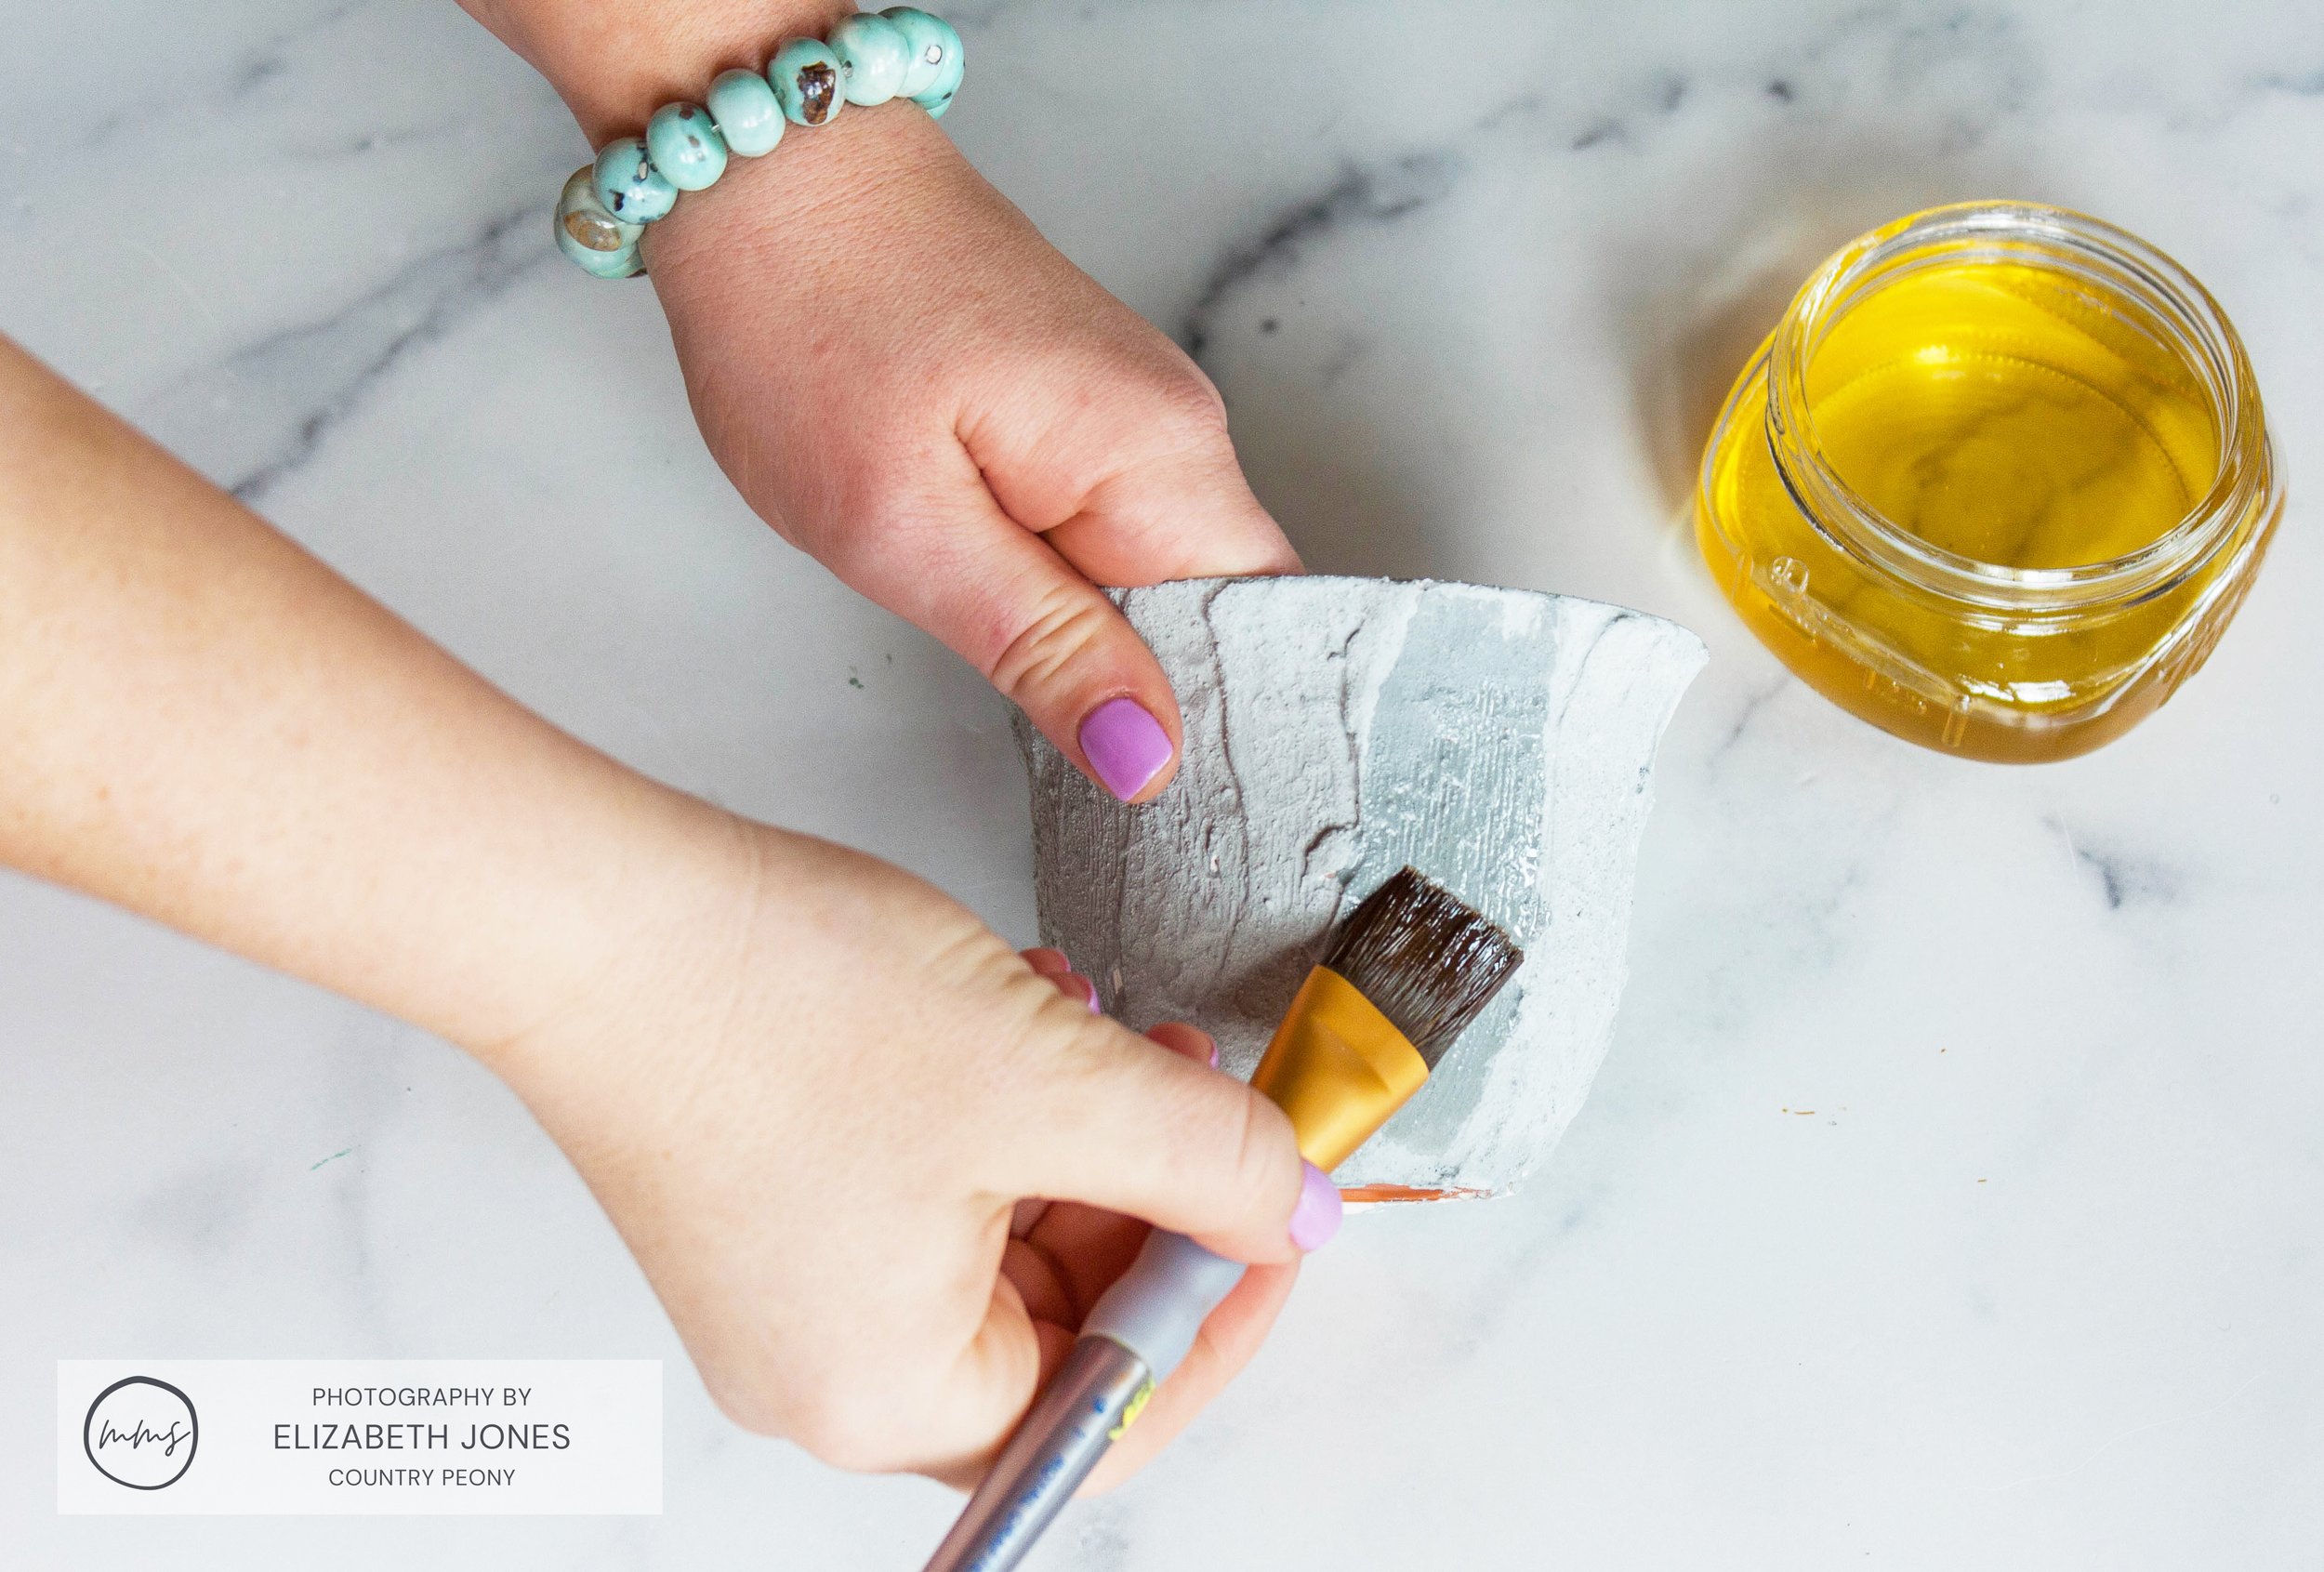
MilkOil™ Outdoor will waterproof and seal the pot so that it can live outside with the beautiful flowers this Spring!
Let the MilkOil™ dry for 24-48 hours. Then, let it cure for 30 days before you place any flowers in it.
*Disclaimer: MilkOil™ Outdoor will not be released until this Spring.
Step 6: Enjoy Your Custom And Affordable Flower Pots
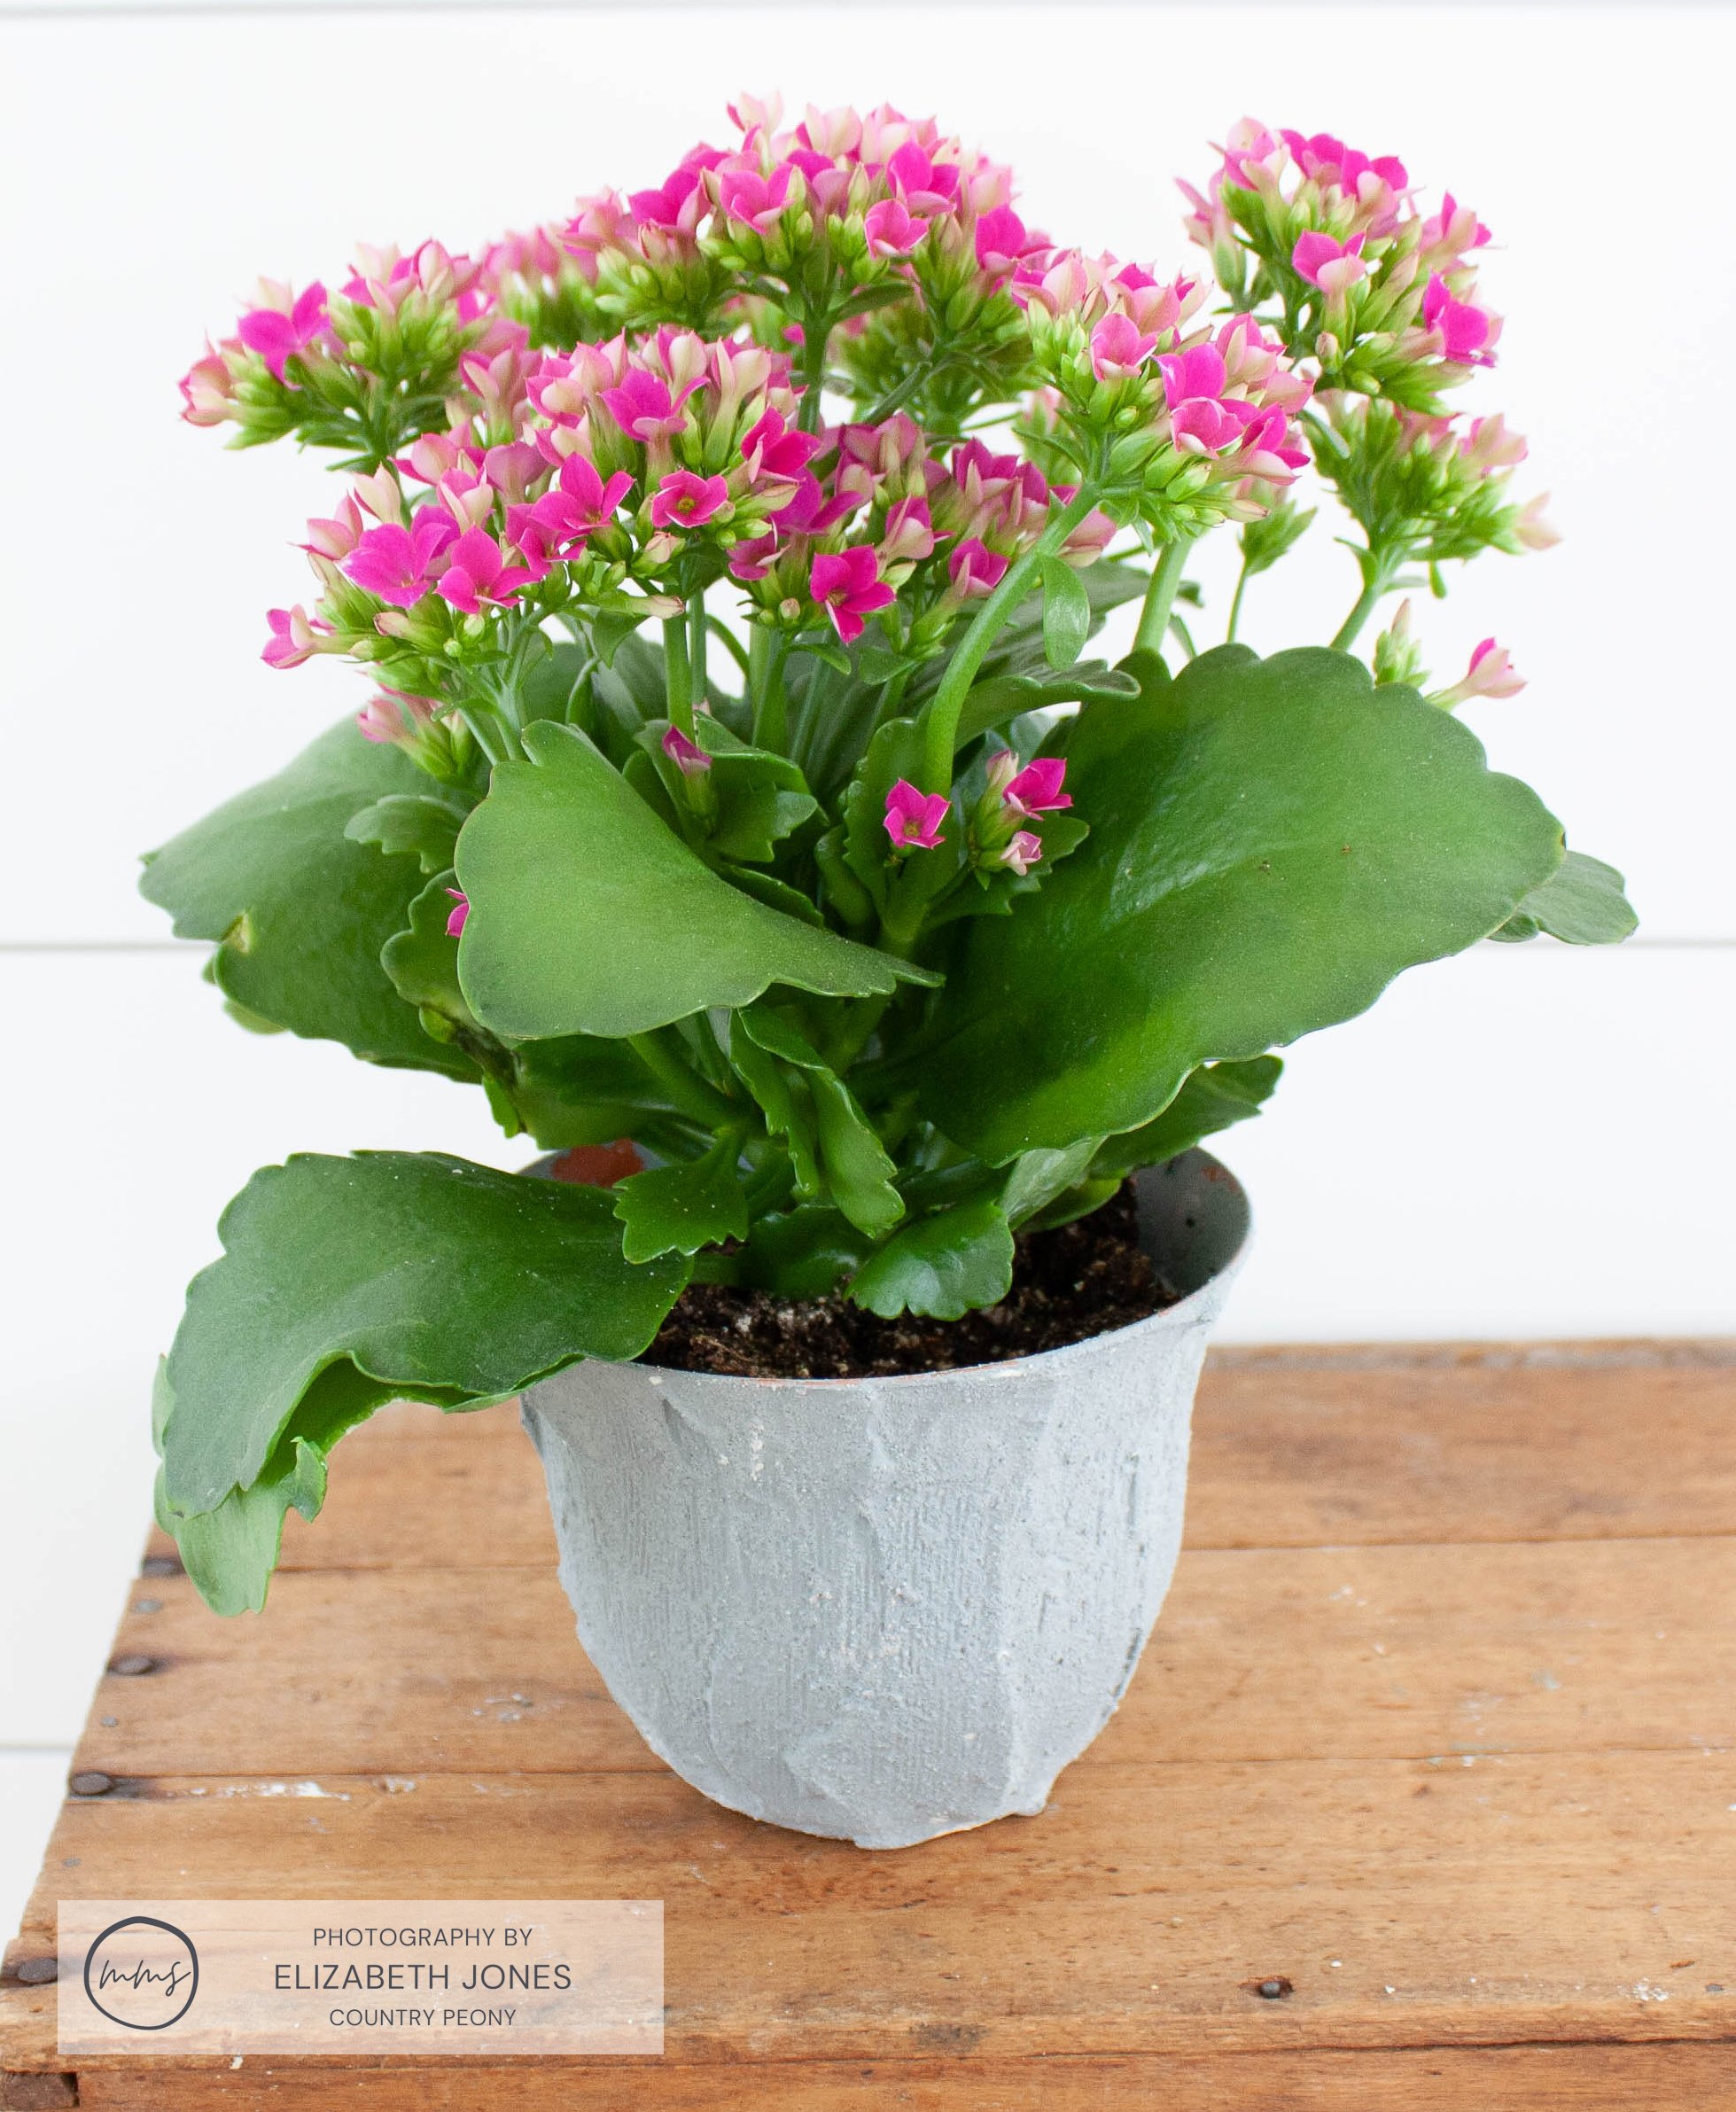

After 30 days, fill your adorable pots with your favorite flowers and enjoy your custom creation!

Thank you so much to Miss Mustard Seed’s Milk Paint for having me, and thank you so much for following along today. I hope you enjoy experimenting with Miss Mustard Seed’s Milk Paint as much as I do!

