
Whitewashing And Updating A Midcentury Dresser
I just returned from a vacation in the Gulf, and I came back feeling so refreshed and inspired. Everywhere we seemed to visit was bright, warm, and airy, and the gulf breeze made everything feel so fresh after the long Midwest winter I had just endured. In fact, on the drive to the airport, I told my husband the thing I was most excited about for this trip was being inspired! I love visiting different places and seeing the culture, the architecture, the décor, the foods, the drinks, the plants, and the people. I always come home with new recipes to try, new home décor inspiration, and a new perspective just from seeing how other people live their lives. I took that inspiration and used it on the piece that I had waiting for me back in my workshop!

Inspiration
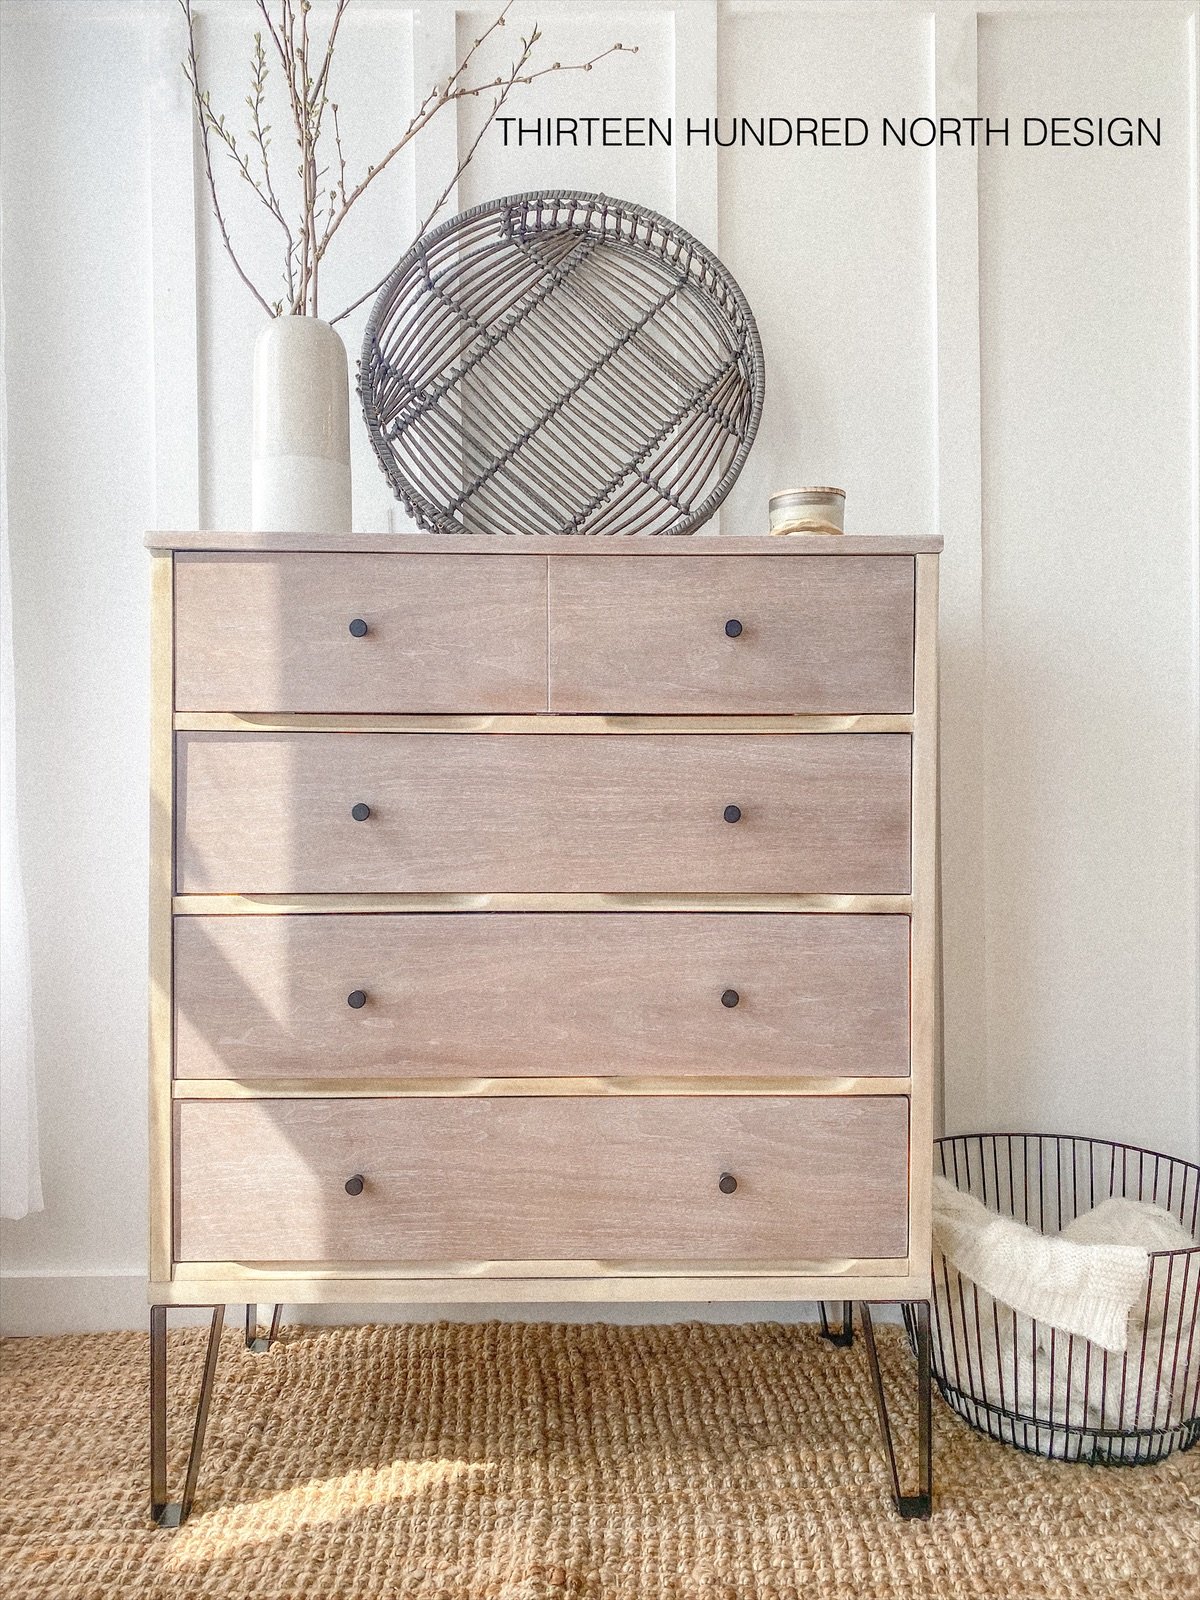
The look I was trying to achieve with this piece was a whitewashed wood look that is ever so popular in many of the home furnishing stores, and on many home décor accounts, it seems to be a fresh take on midcentury furniture. I decided to ditch the existing legs. They were unique; however, they felt a little too groovy for the more modern and coastal vibe I was going for. I love that with a $40 dresser, paint, and new legs, and by adding hardware, I can achieve the look of a $2000 dresser for a fraction of that amount. Not only that, but it is real wood, it isn’t sitting in a landfill, and it gets a new life!

Materials Needed:
Cleaning:
Dawn dish soap
Scrubbing Pad
Vacuum
Microfiber towels
Sanding:
120 grit sandpaper
220 grit sandpaper
Sanding block
Painting and Finishing:
Sponge brush
Miss Mustard Seed’s Milk Paint in Farmhouse White
Microfiber or shop towels
A matte top coat of your preference
Pneumatic Paint sprayer
Finishing Touches (all found on Amazon):
Peel and stick wallpaper (as drawer liner)
Matte black legs
Matte black drawer pulls
Cleaning and Repairs:
I picked up this 4-drawer midcentury piece at an estate sale for $40, and it was the typical veneer-covered orange finish that you see in thrift stores everywhere. It had a broken leg and a few tiny areas where the veneer had slightly lifted, but it had great bones and great potential! I started by gluing and clamping the areas of the veneer that had lifted. There were a few very small areas that had chipped which I filled using a wood-colored paintable, stainable wood filler. I then started vacuuming and scrubbing the dresser inside and out. There was layer after layer of furniture polish that needed to come off before I could sand and be sure that my whitewash would absorb evenly. My go-to cleaning products for prep are - Dawn dish soap, an abrasive sponge, and elbow grease. There are many grease-cutting products on that market that work well, but I always find myself returning to this method.
Sanding:
After the piece was clean and dry, I began to sand with 120 grit sandpaper with my orbital sander. I sanded until there was only the light bare wood veneer, and none of the shiny orange finish was left. I then like to repeat the sanding of any piece I am going to apply a wash to with a 220 grit sandpaper to smooth everything out before applying the wash. Many of the midcentury pieces I have refinished are a solid wood covered in a thin veneer. I am mentioning this because veneer can be tricky to sand; you only have about ¼ of an inch before you sand completely through to the wood underneath, and it is extremely noticeable, so you really want to avoid that and take your time. Be extra careful when sanding near the edges of a veneer-covered piece, corners are the easiest area to sand completely through, and I typically start in the middle of each flat surface and work my way out, just to be safe. Also, when searching for a mid-century piece that you want to whitewash, be sure to take a close look at the top of the dresser or cabinet. Many of the larger dressers are hard resin-type tops with pressed wood underneath; these would not be good candidates for a whitewash finish. You can look at the back of the top, and if you see a pressed board layer instead of a veneer-covered solid wood, you would want to either paint that piece or find a better candidate for your project.
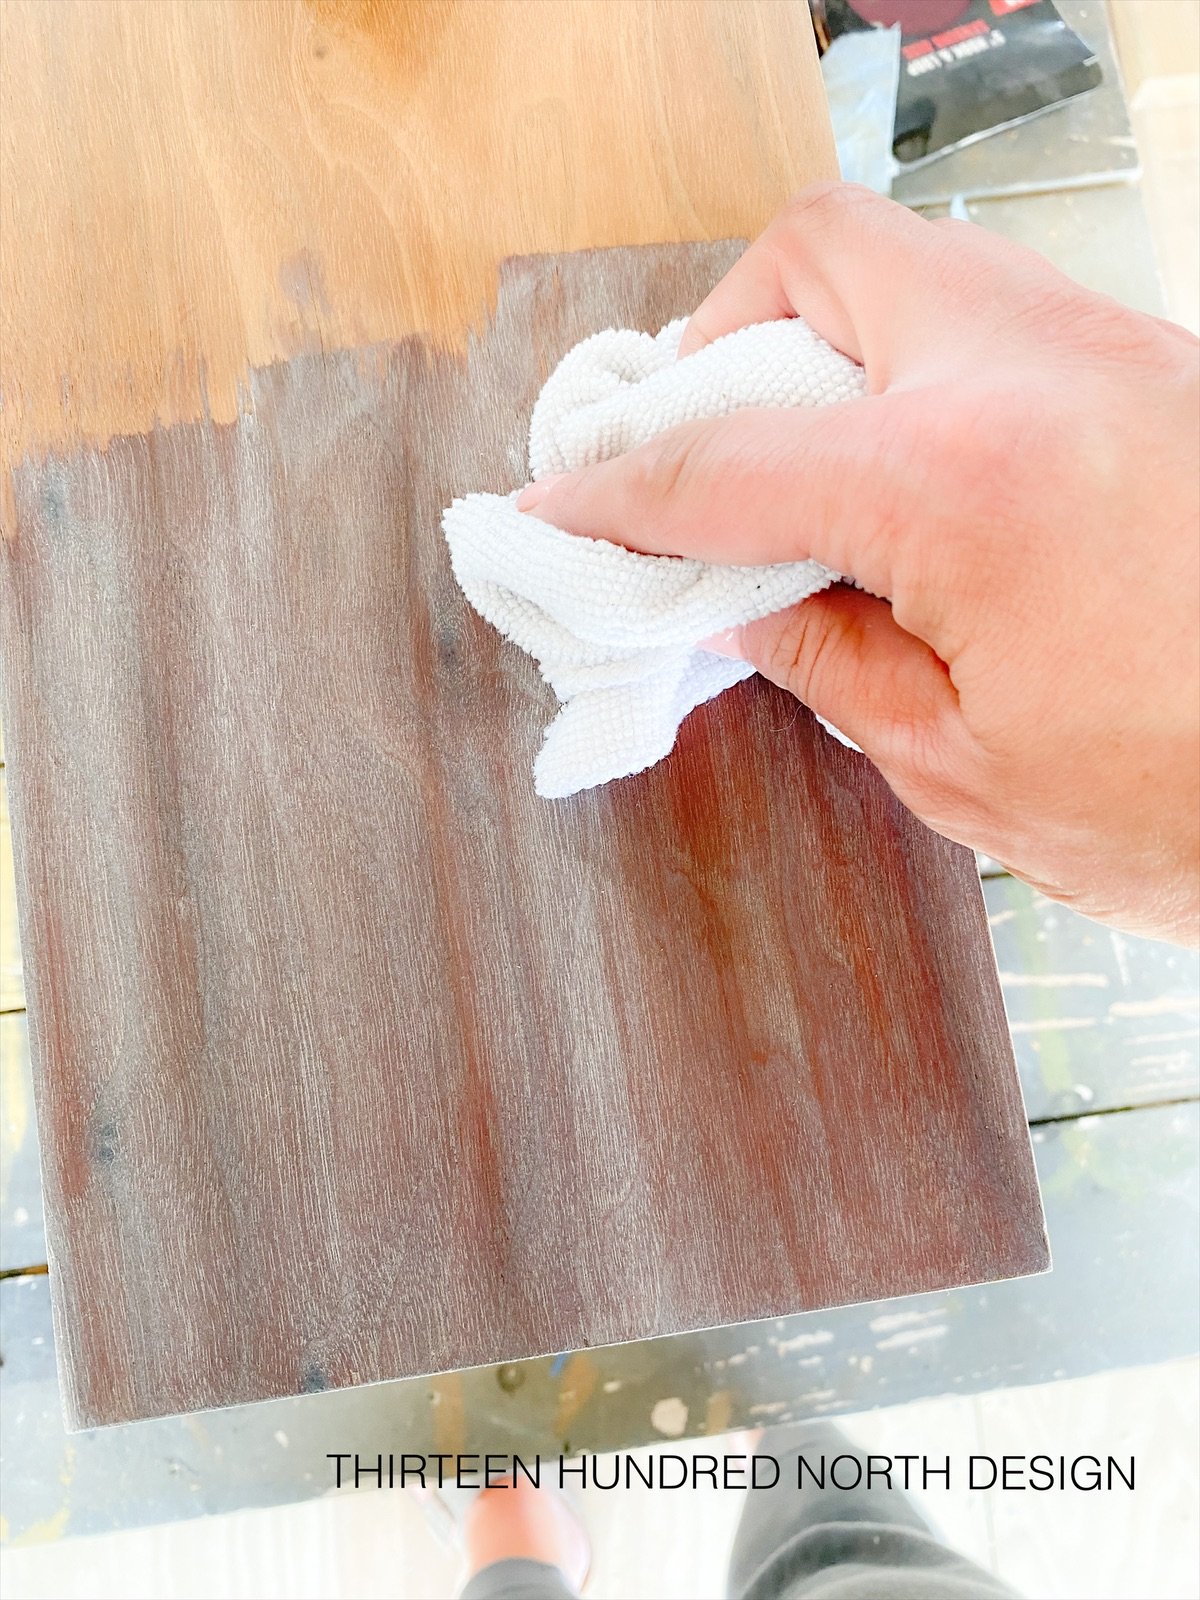
Whitewashing:
In a ratio of 3 parts water:1 part paint powder, I created my whitewash. I used Miss Mustard Seed’s® MilkPaint™ in Farmhouse White. Using a sponge brush, I begin to apply the wash evenly, working in small sections, letting it sit for about a minute, and then wiping it back with a microfiber towel. I continued doing this all over the entire piece until it was completely covered. After you apply the wash and wipe it back, the wood underneath tends to look shockingly dark, but trust the process; it will start to lighten substantially as it dries! I let the piece dry really well and came back with a 220 grit sanding block, and did an all-over scuff sand of the entire piece before applying the second layer of whitewash. I like to also do another scuff sand after the second coat of wash before sealing the piece; because of the moisture in the wash, certain pieces will take on a very rough texture as they dry.

Sealing:
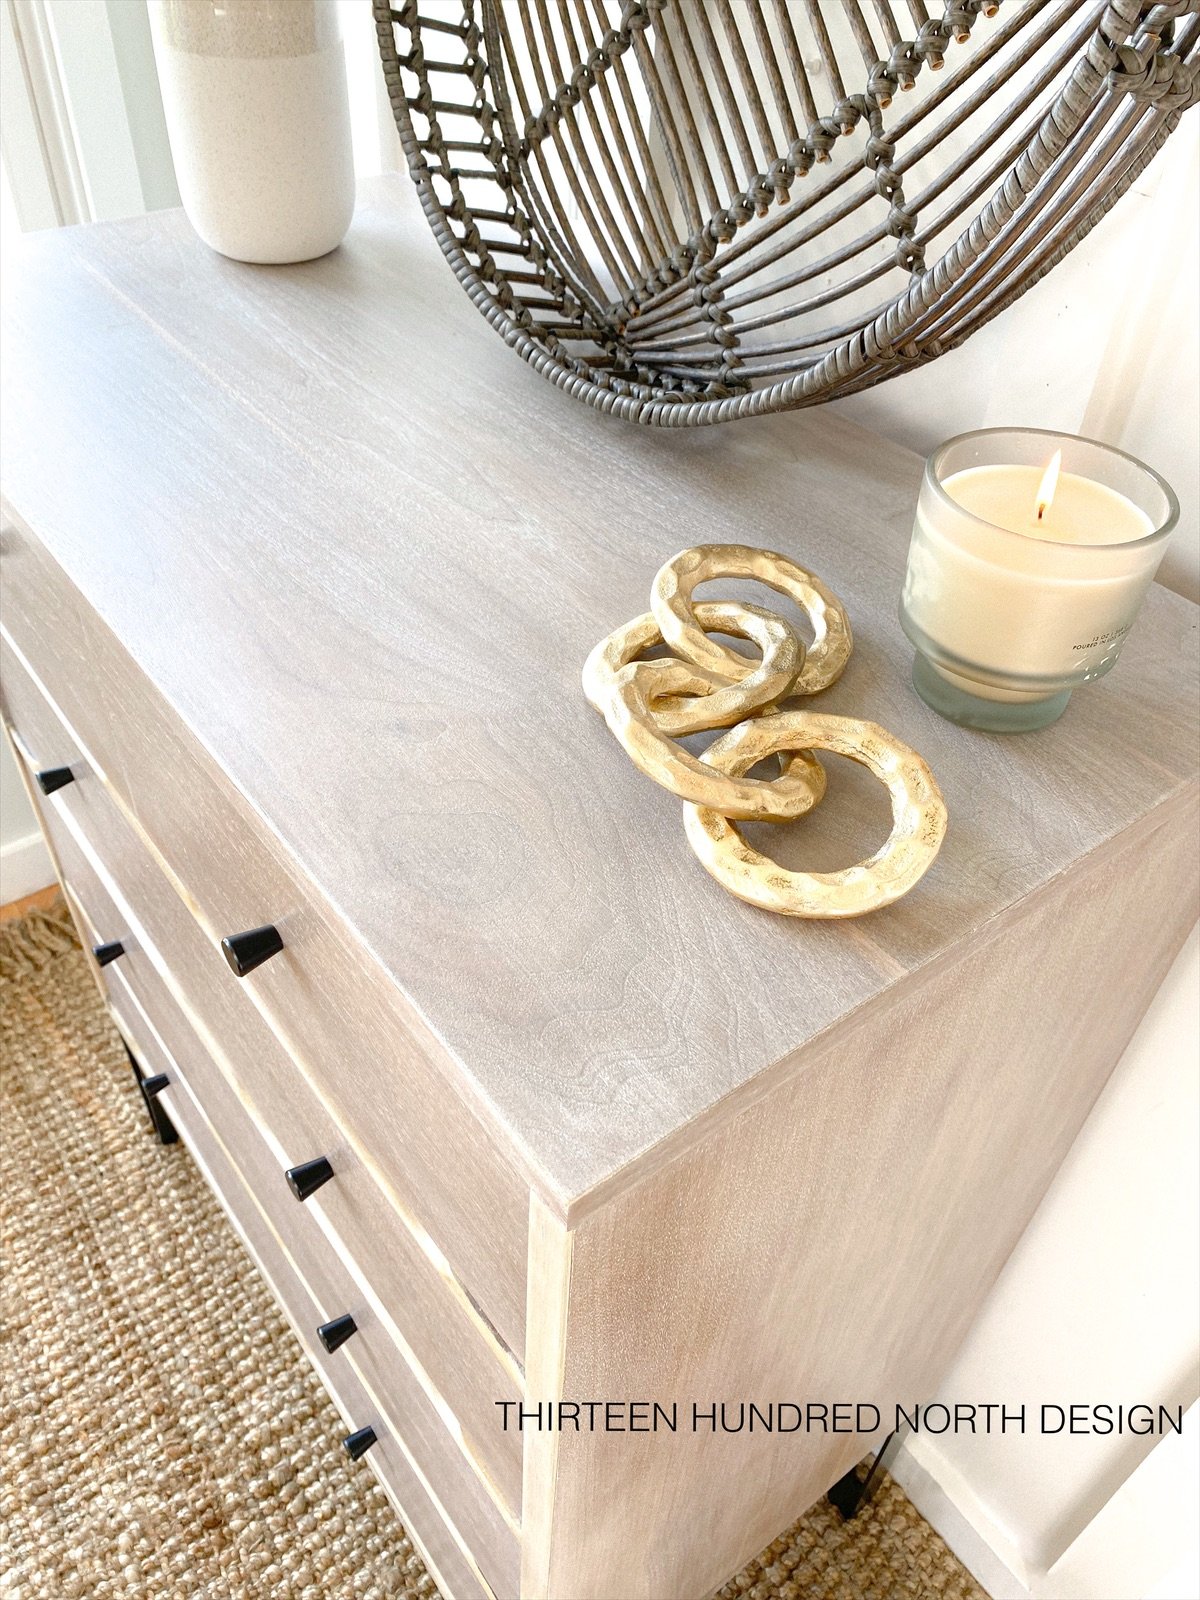
There are a lot of ways to seal a piece of furniture. For this piece, I did a durable clear matte topcoat because I will be selling it. I prefer to spray my topcoat using a pneumatic paint gun to ensure I get even thin layers, and it makes the process much quicker. If I were finishing this piece for my home, I would have likely finished it in clear wax, but I can’t ensure the buyer won’t be setting liquids on top, or that it won’t be placed in a high traffic area, so I went with the topcoat this time for the highest level of durability (in my opinion). For this particular piece, I wanted to retain some of the brown from the wood under the whitewash, but sealing a whitewash in white wax is also an option; it leaves you with a very light-colored piece, but you still get the slight movement and texture of the wood from underneath. I have used that technique in the past, and it was gorgeous.
The Details:
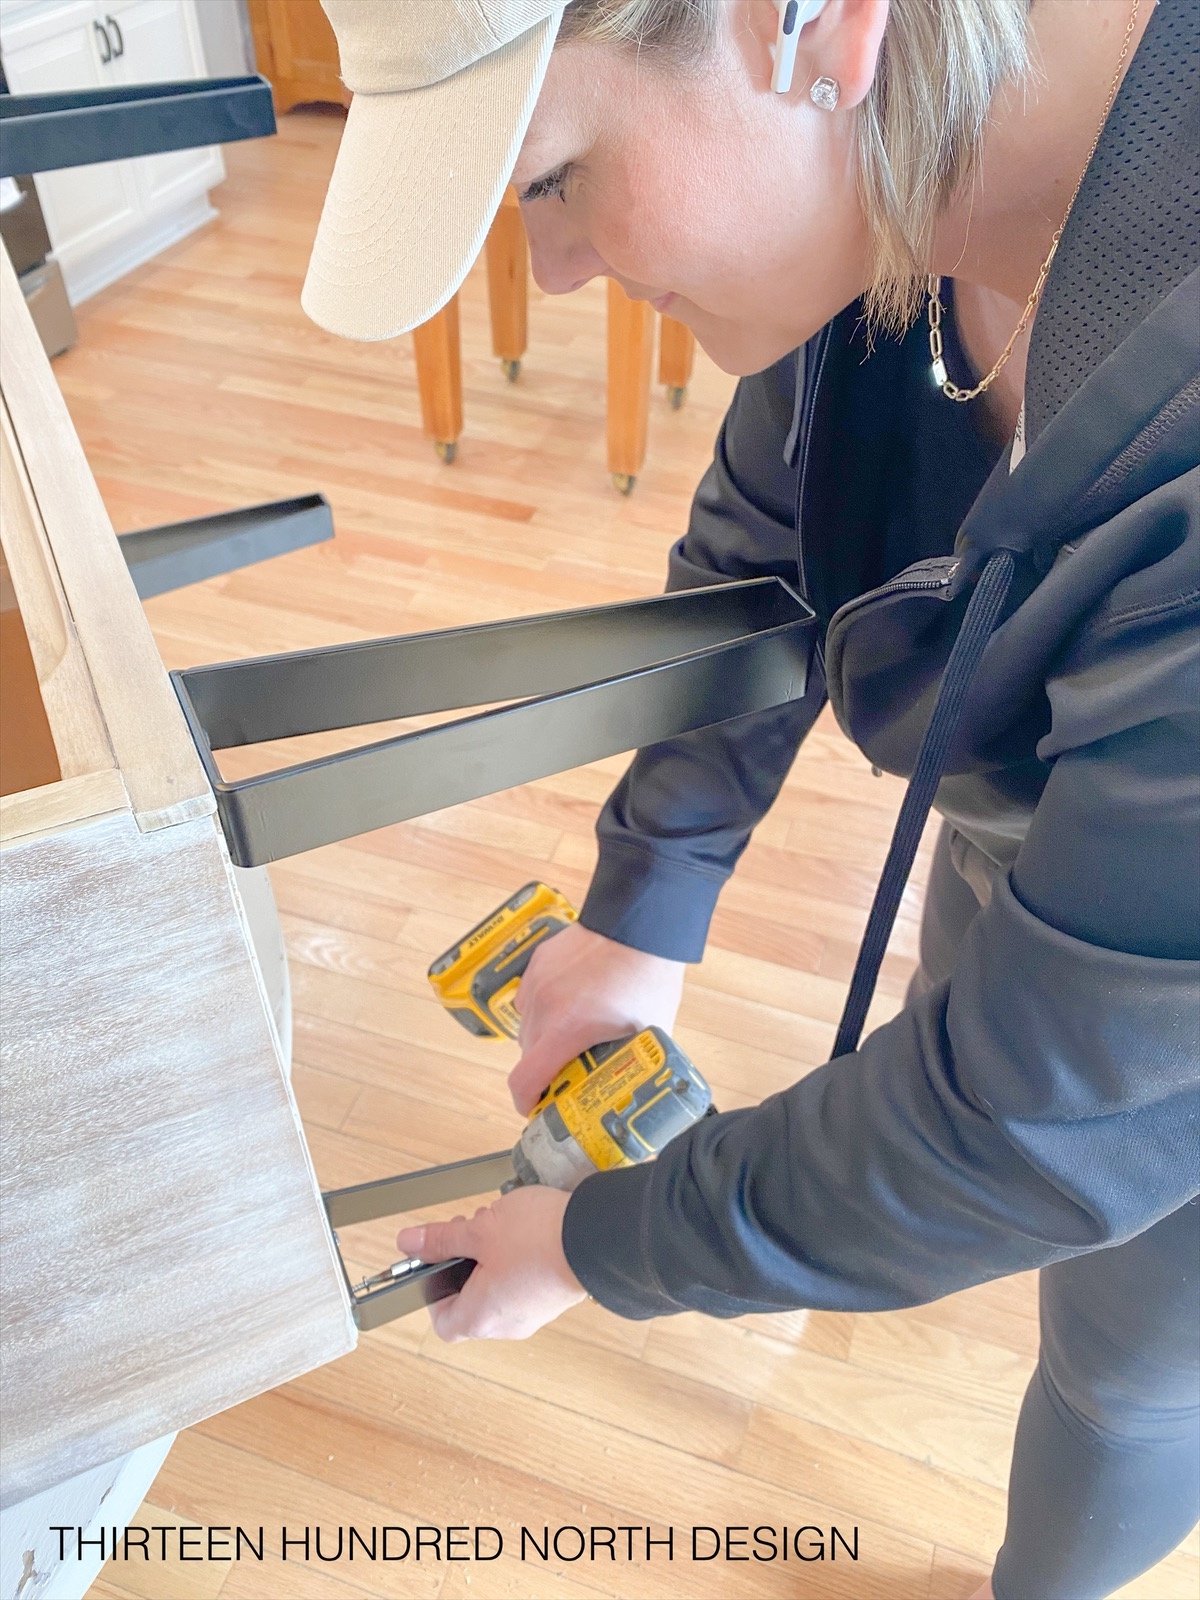
A very simple way of quickly transforming a piece of furniture is to switch out the hardware. You can instantly change the look and feel of a piece by the handles you choose. I chose matte black simple hardware for this piece to update the look but still give a little nod to that midcentury style with the knob shape. This dresser did not previously have knobs, and with a drill bit, it is a simple update you can do! The same goes for furniture legs; you can take a furniture piece in a completely different direction by adding legs to something that did not have legs or switching out the legs already in place. The heavy metal legs I chose had the same shape and angle of typical midcentury-style legs but added that updated, more modern feel with the smooth metal and black color.
The last detail I love to add to each piece I refinish is a drawer liner. I typically use a peel and stick wallpaper, or I fabric line the drawers. It is such a fun way to add a little pop of color or pattern. My customers love the drawer liners; I have had so many of them pop open the drawers upon delivery just to see what liners I used in the drawers.; it is like the cherry on top. Not only is it beautiful, but it is a great way to protect your clothing and refresh tired or unattractive drawer bottoms.
Staging:
Finally! This is my absolute favorite part! Staging day! I was so excited to stage this piece I could not get it done quick enough. Like I had said before, my inspiration for this piece came from my coastal vacation; I am so excited that I am seeing the coastal vibes creeping into the current trends! I am not talking about themed items such as anchors, seashells, and fish statues, but a more abstract aesthetic using natural textures, light, and bright colors, weathered woods, and clean lines. I kept that in mind when I staged this piece. I tried to stick to simple, light-colored items and items with a natural texture. I settled on this cute, oversized basket as my background, a tall white vase with great texture, a small fun-shaped candle with a frosted texture that reminded me of sea glass, and a fun gold chain piece to bring in a little understated sparkle.
Conclusion:
If you made it this far, thank you! I hope you were able to pick up a few tips and tricks for whitewashing a piece of furniture using Miss Mustard Seed’s® MilkPaint™! I hope that by explaining my thought process, it sparked your creativity. I am off to work on my next project; take care!
