
DIY Fabric Pumpkins
DIY Fabric Pumpkins for a Thanksgiving Tablescape with Miss Mustard Seed’s MilkPaint™
Thanksgiving is around the corner, and I love to make a table that is as custom as the family and loved ones that surround it. A great way to add a custom feel is by adding handmade elements and choosing a unique color palette. Today I am sharing how to create charming fabric pumpkins for a Thanksgiving tablescape with an unexpected color palette. Please follow below for the full tutorial.
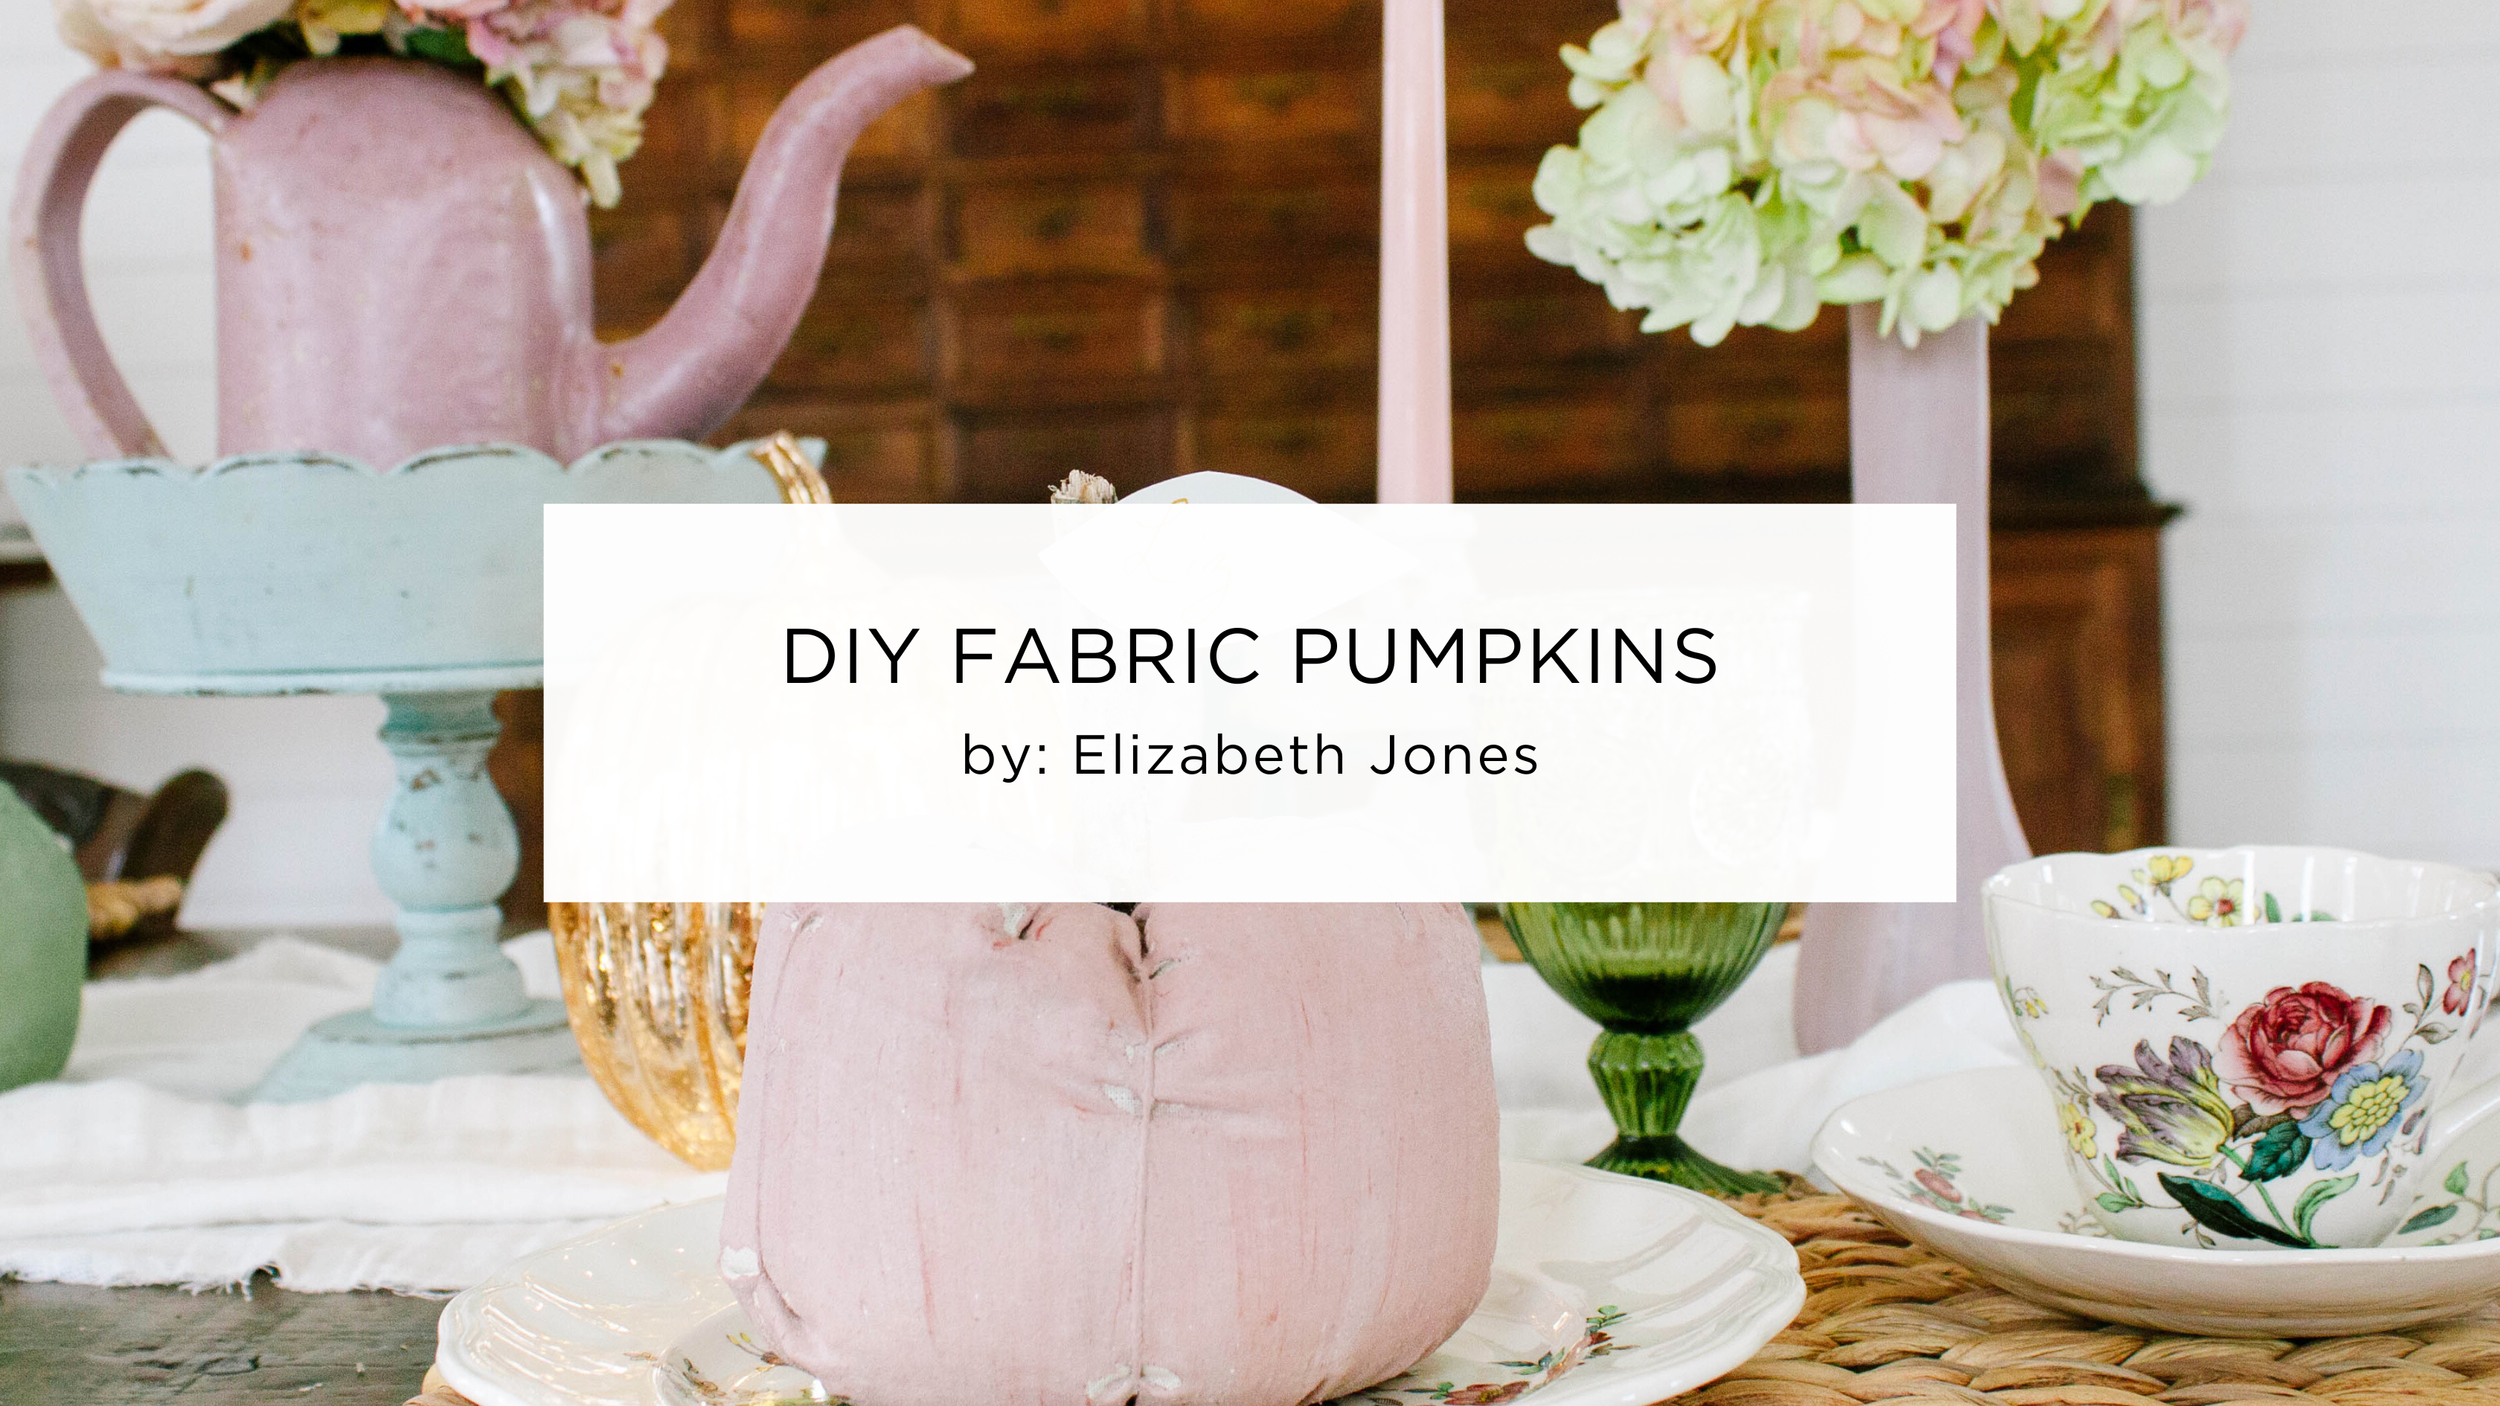
Before we start, I want to talk about the inspiration piece. The first thing I do when I start on a project is to determine the color palette that stems from an inspirational piece. I thrifted a beautiful plate years ago, and that was the starting point for this color palette. It has wonderful Fall-like colors, but it doesn’t shout Fall.
I pulled three colors from Miss Mustard Seed’s® paint line to incorporate into the design. I thought Aqua Sky was a beautiful nod to the blue in the plates, Arabesque is a lovely play on the blush in the flowers, and Lucketts Green adds the fun element.


For the final look, I pulled items that I painted from a tablescape several years ago. You can see that HERE.
Since this project only requires a little bit of Miss Mustard Seed’s® MilkPaint™, you can use paint leftover from another larger project. And, since Miss Mustard Seed’s® MilkPaint™ is non-toxic, your children can help make and paint the pumpkins as well!

For your convenience, I created a step-by-step video tutorial for you to create your own fabric pumpkins for your Fall tablescape. You can watch it below. Then follow along for the step-by-step picture tutorial.
Now, let’s get painting!
To create your own DIY Fabric Pumpkins with MilkPaint™, you will need:
Miss Mustard Seed’s® MilkPaint™. You can use whatever color you have on hand, but I chose Arabesque, Aqua Sky, and Lucketts Green to achieve this fun Thanksgiving tablescape. *Use code “10OFFCP” for 10% off your purchase at Miss Mustard Seed’s® MilkPaint™.
100 % cotton fabric. I used muslin for this project.
Premium Fiber Fill
Large Eye Needle
Embroidery Floss
Fabric Glue
Cut Branch to Act as the Stem
Craft Paintbrush
Create the Fabric Pumpkins

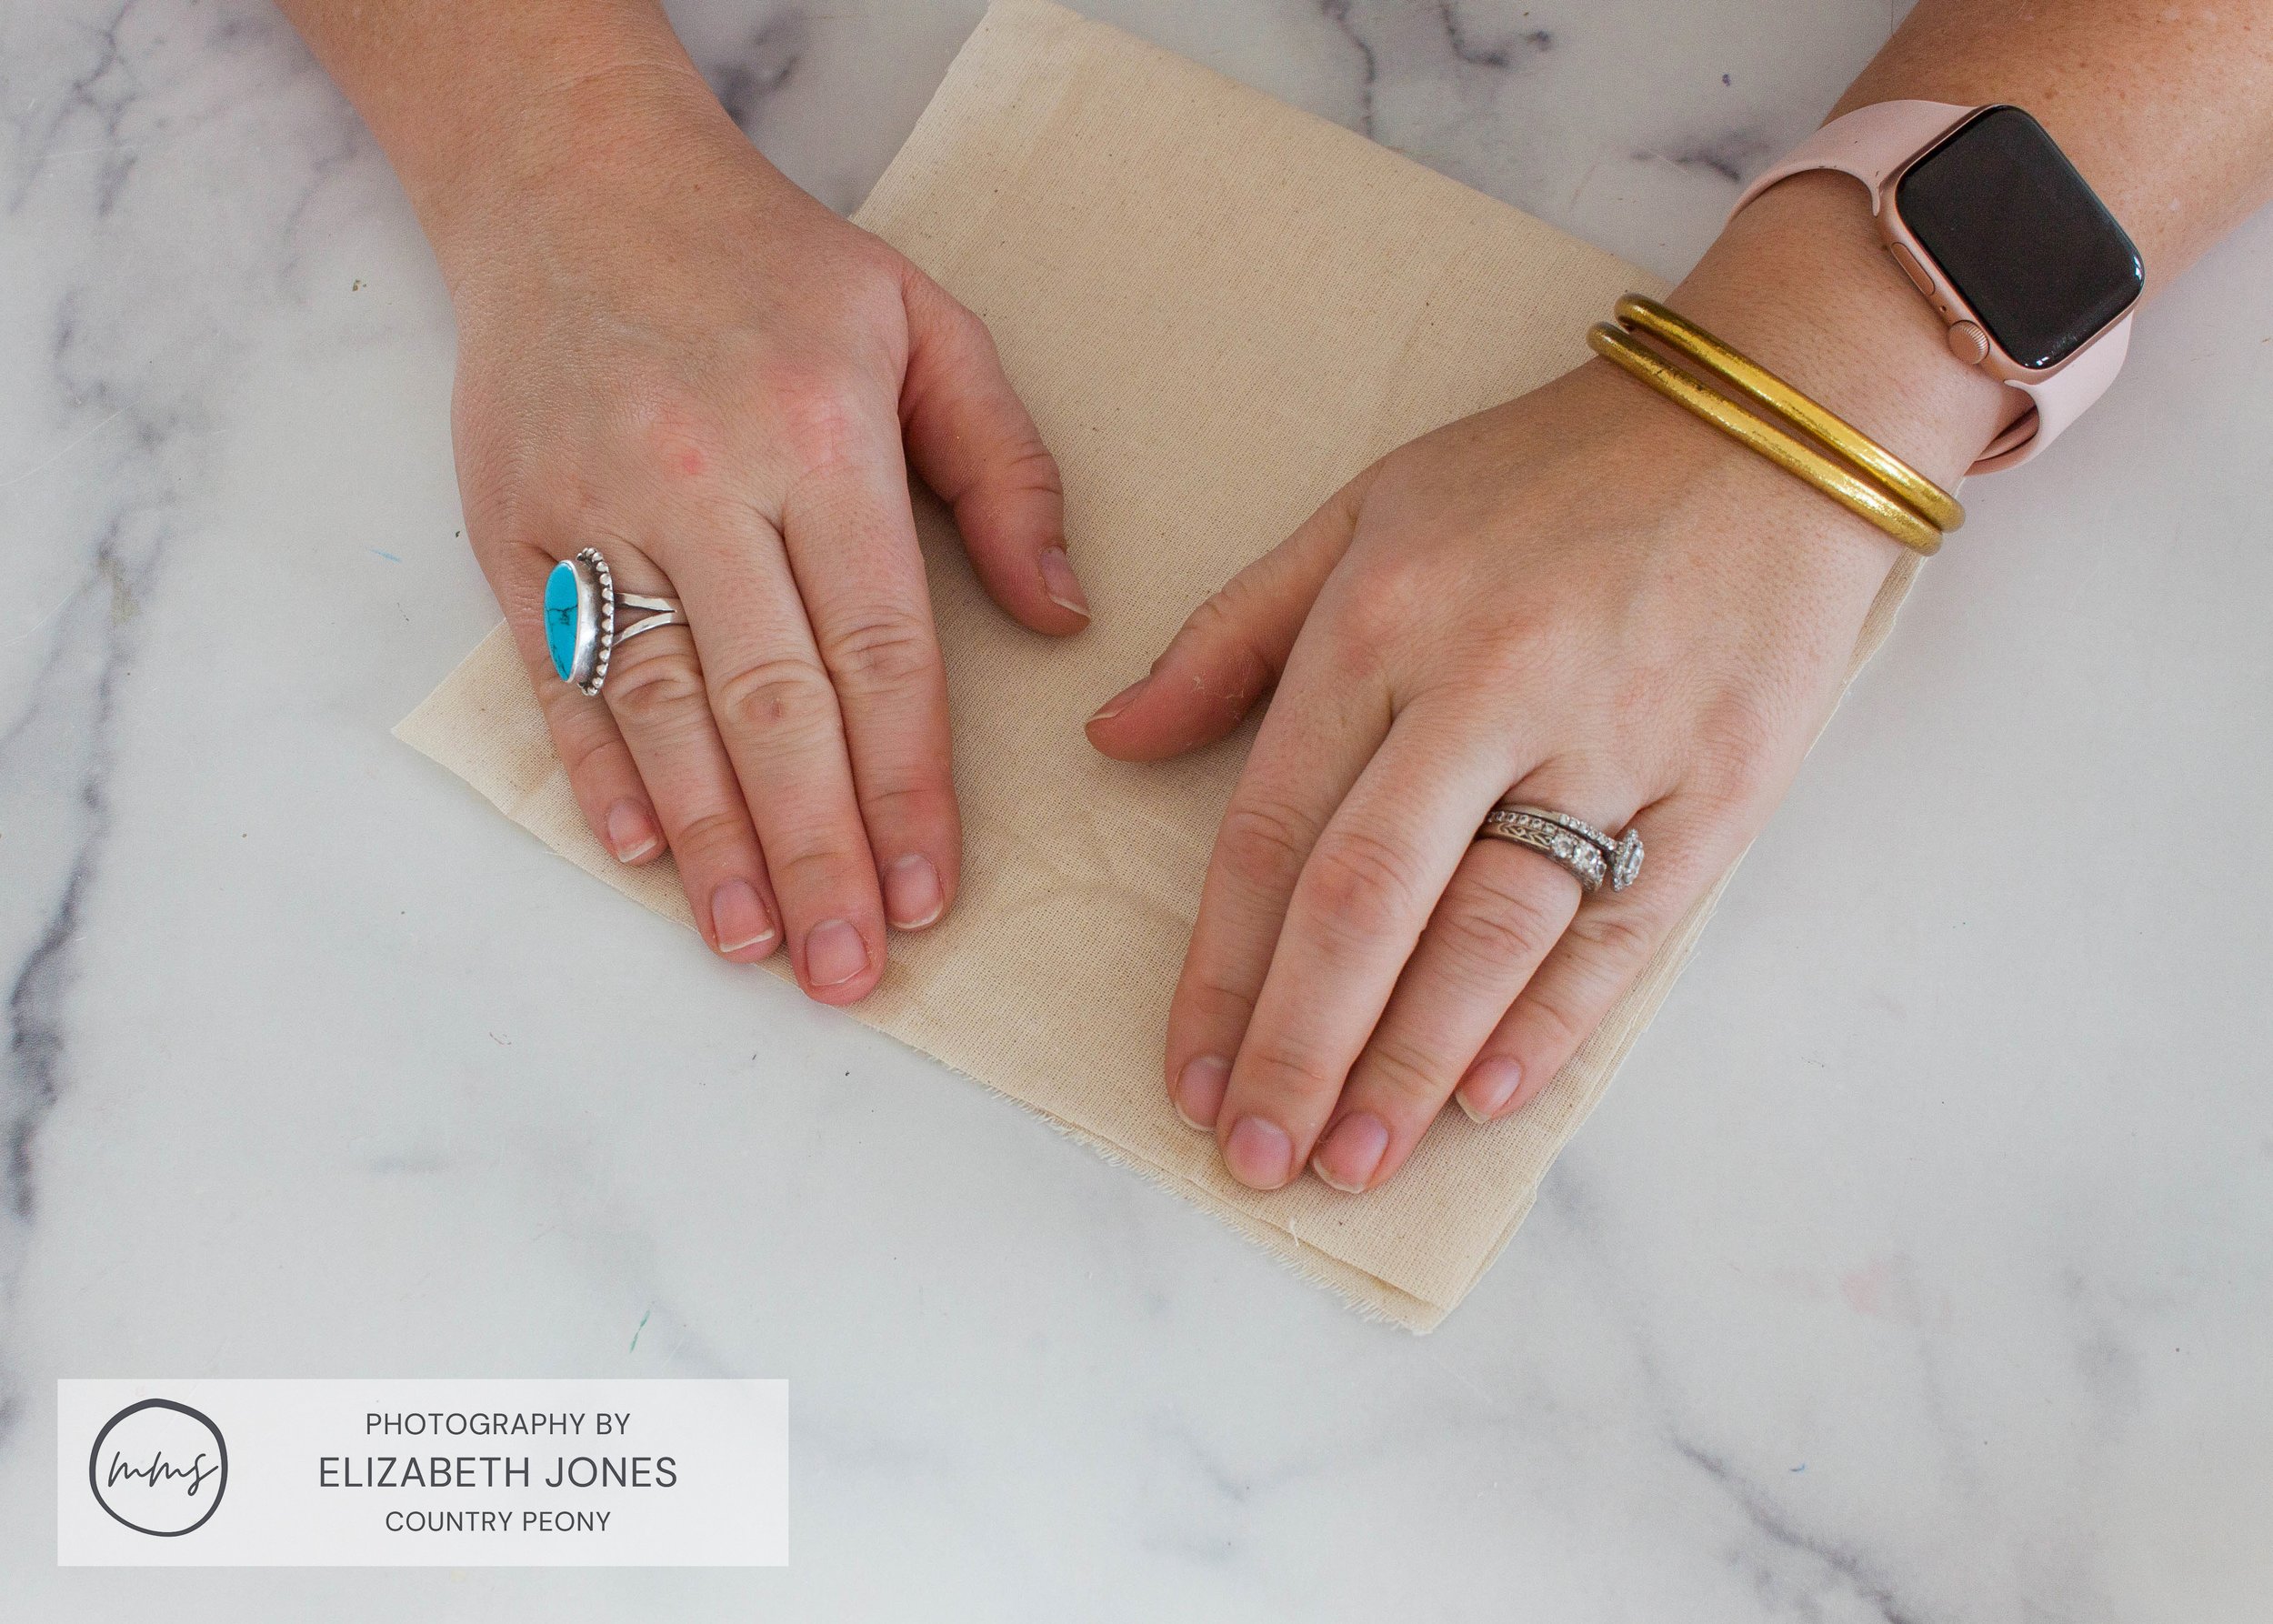
Start by cutting a piece of muslin fabric into a 16-inch by 8-inch fabric rectangle.

Fold the long ends together, and attach the end with fabric glue to create a fabric circle.
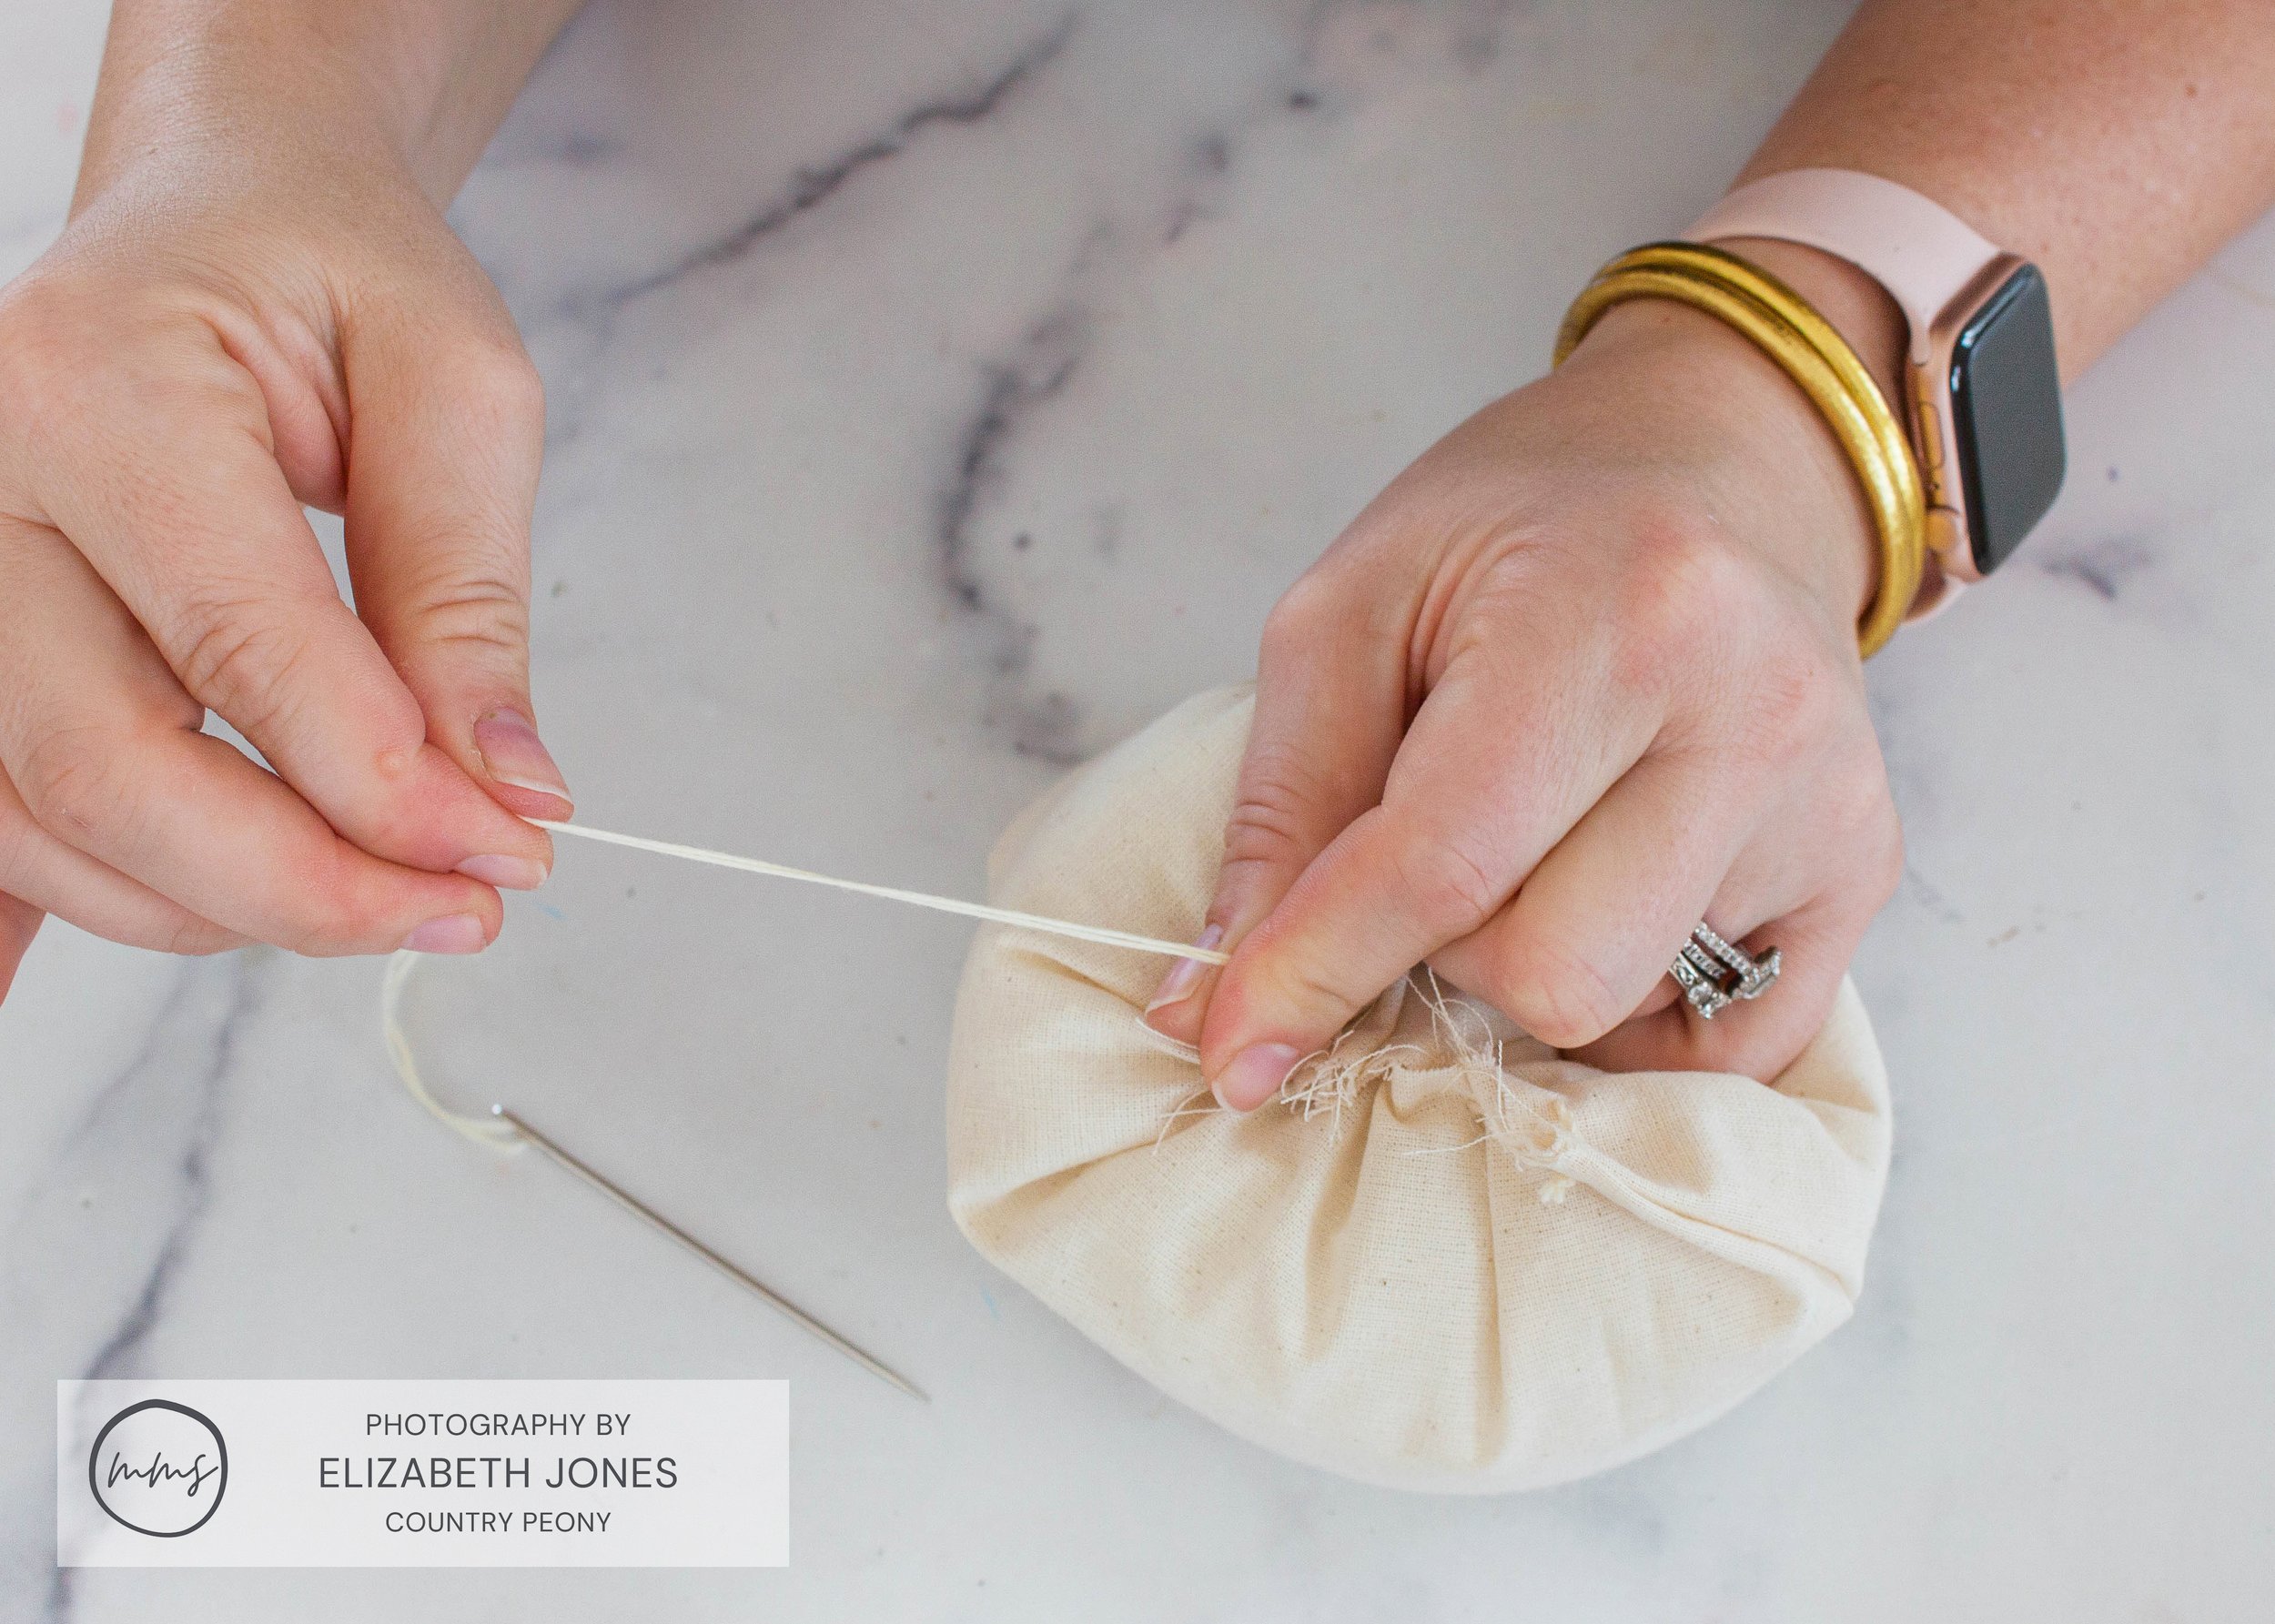
Once the fabric glue is dry, use a large eye needle and some embroidery floss and sew a loose stitch along the top of the fabric square.


Once you sew all the way to the end, pull the embroidery floss to cinch the top of the fabric square.

Then double knot the cinched end.

Trim the embroidery floss.

Turn the fabric square inside out.

Fill the fabric pouch with fiber fill.

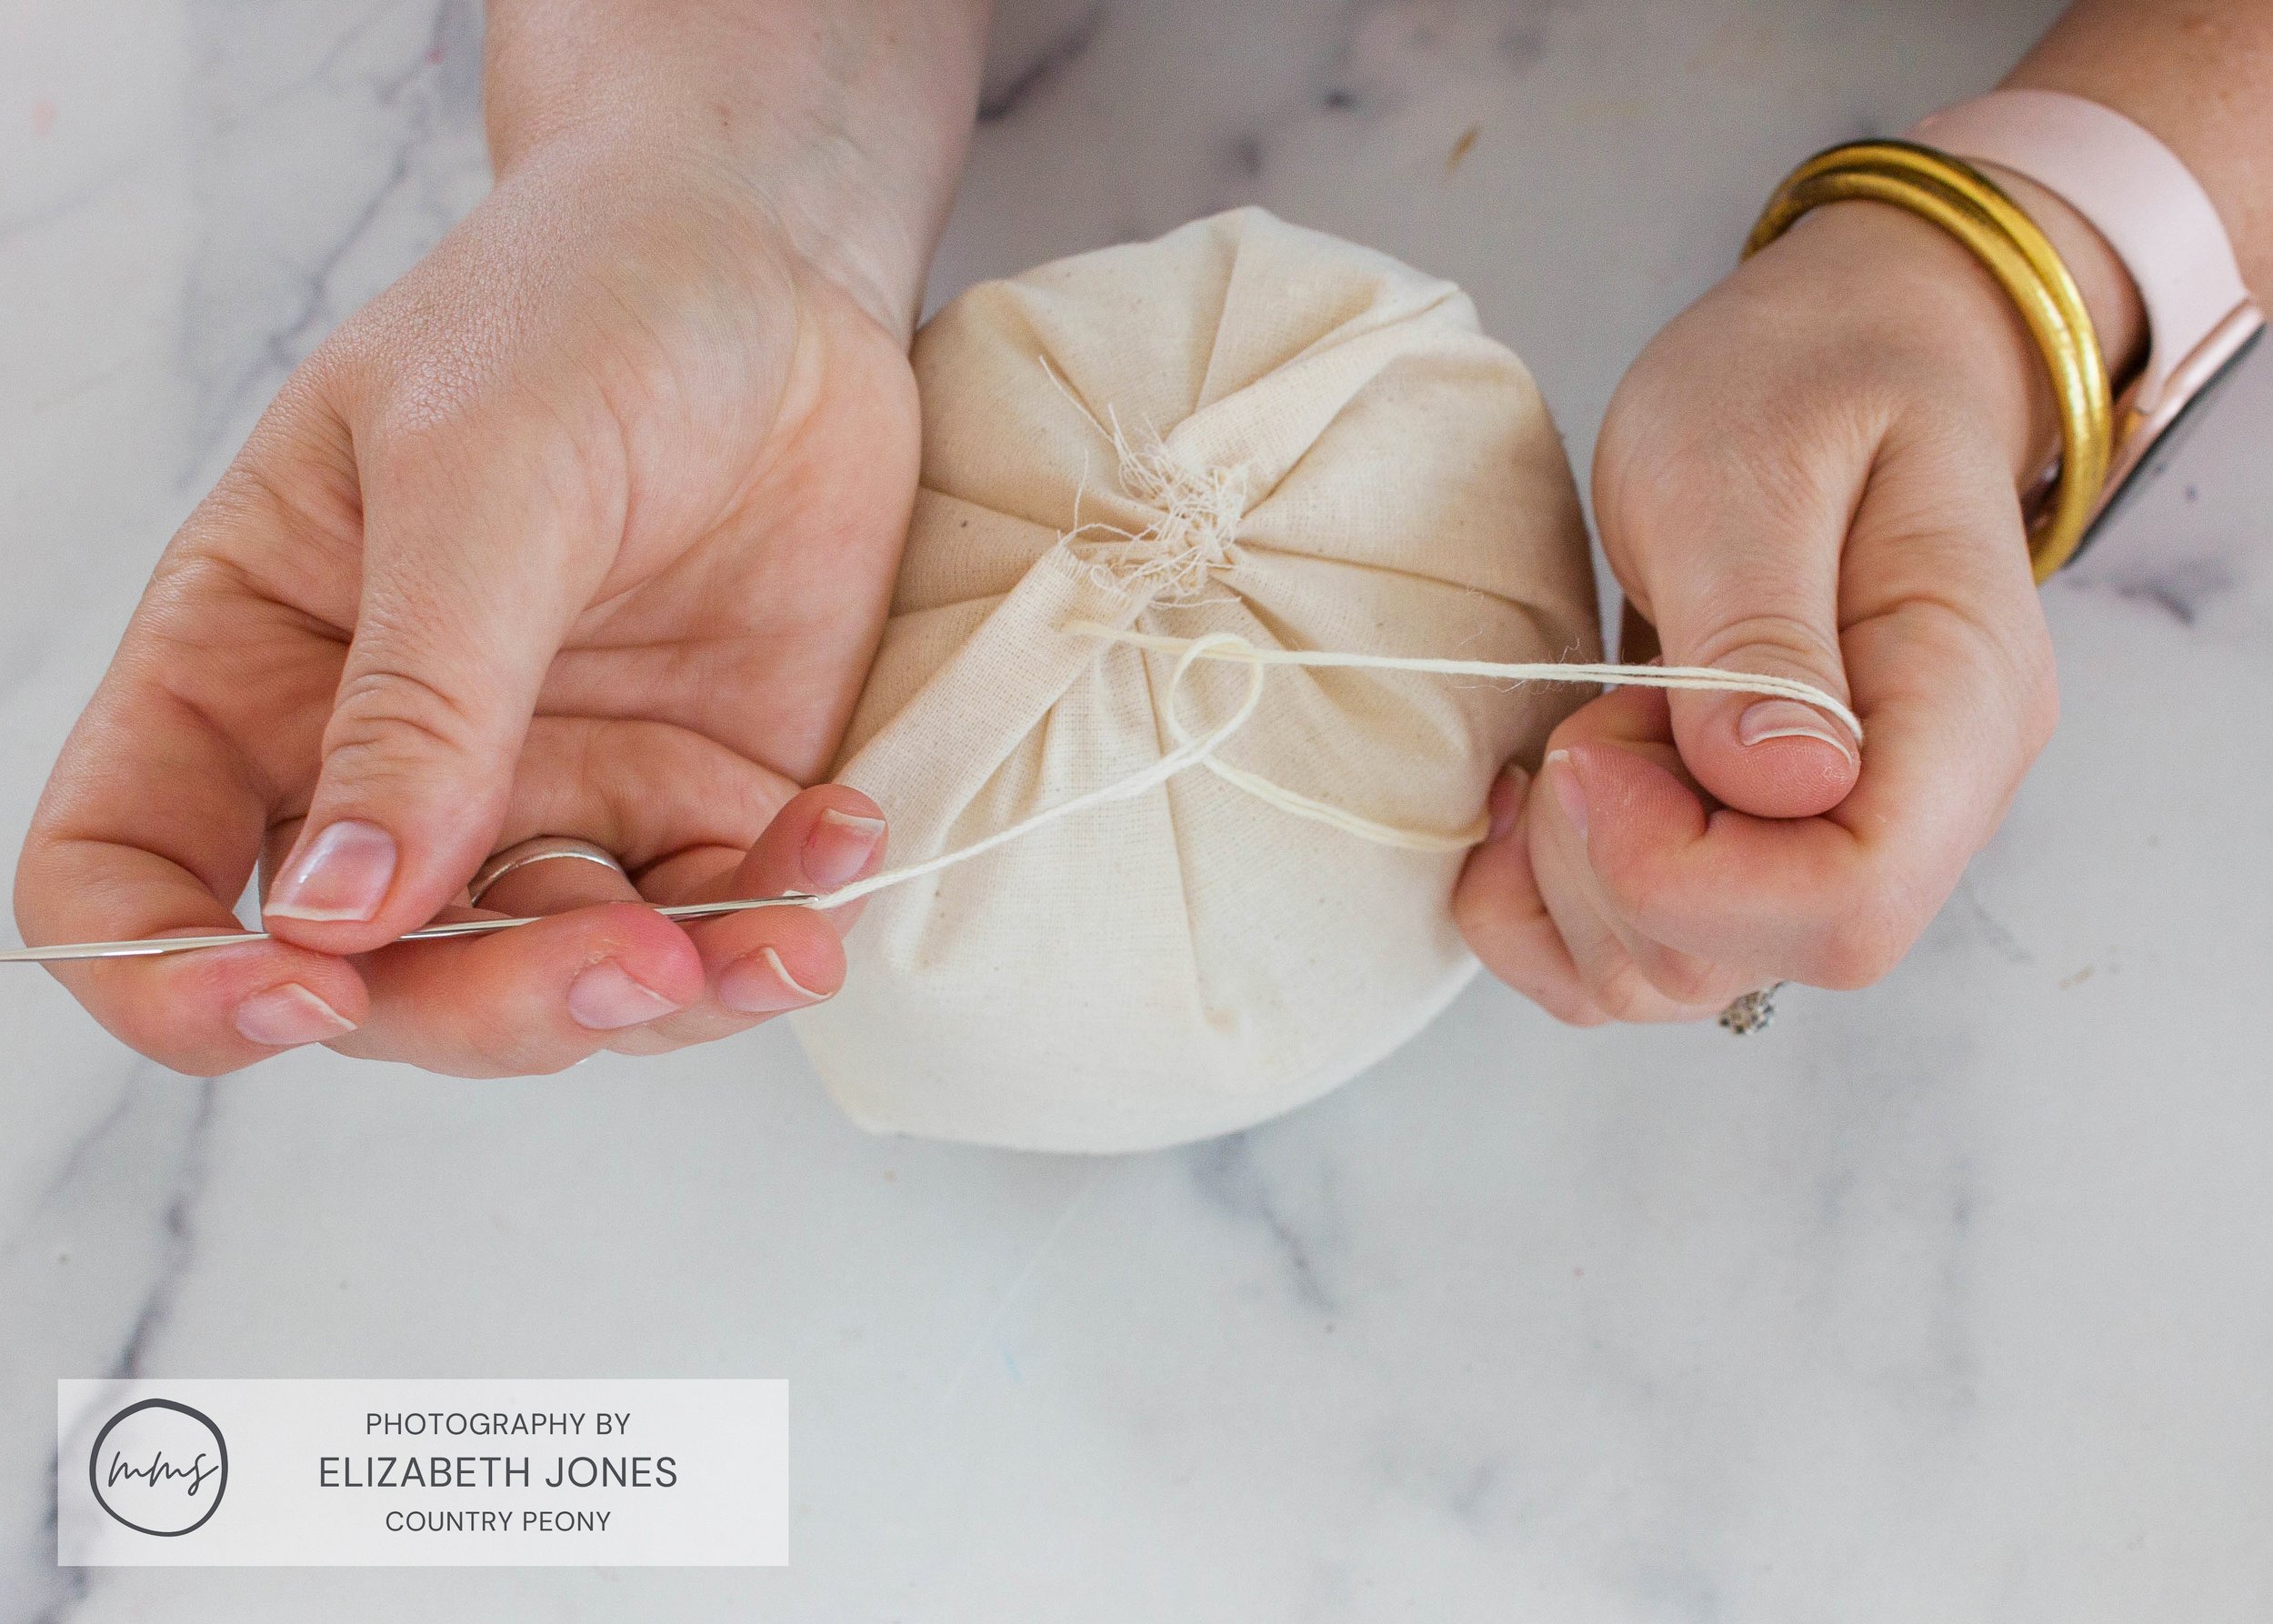
Then, use the large eye needle and embroidery floss again to loosely stitch the other end of the fabric square to create the pumpkin.

Tighten and cinch the top of the fabric pumpkin.
Double knot the top of the pumpkin.
Insert the embroidery floss and large eye needle through the middle, and top part of the pumpkin through to the bottom, the middle part of the pumpkin.

Then, wrap the embroidery floss around the outside of the pumpkin to create the pumpkin ribs.

Continue to bring the embroidery floss through and around the pumpkin to create the pumpkin ribs.


I created 4 ribs for each pumpkin, but you can create as many as you like.
*Remember that just like in nature, no pumpkin is perfect. So have fun with it!
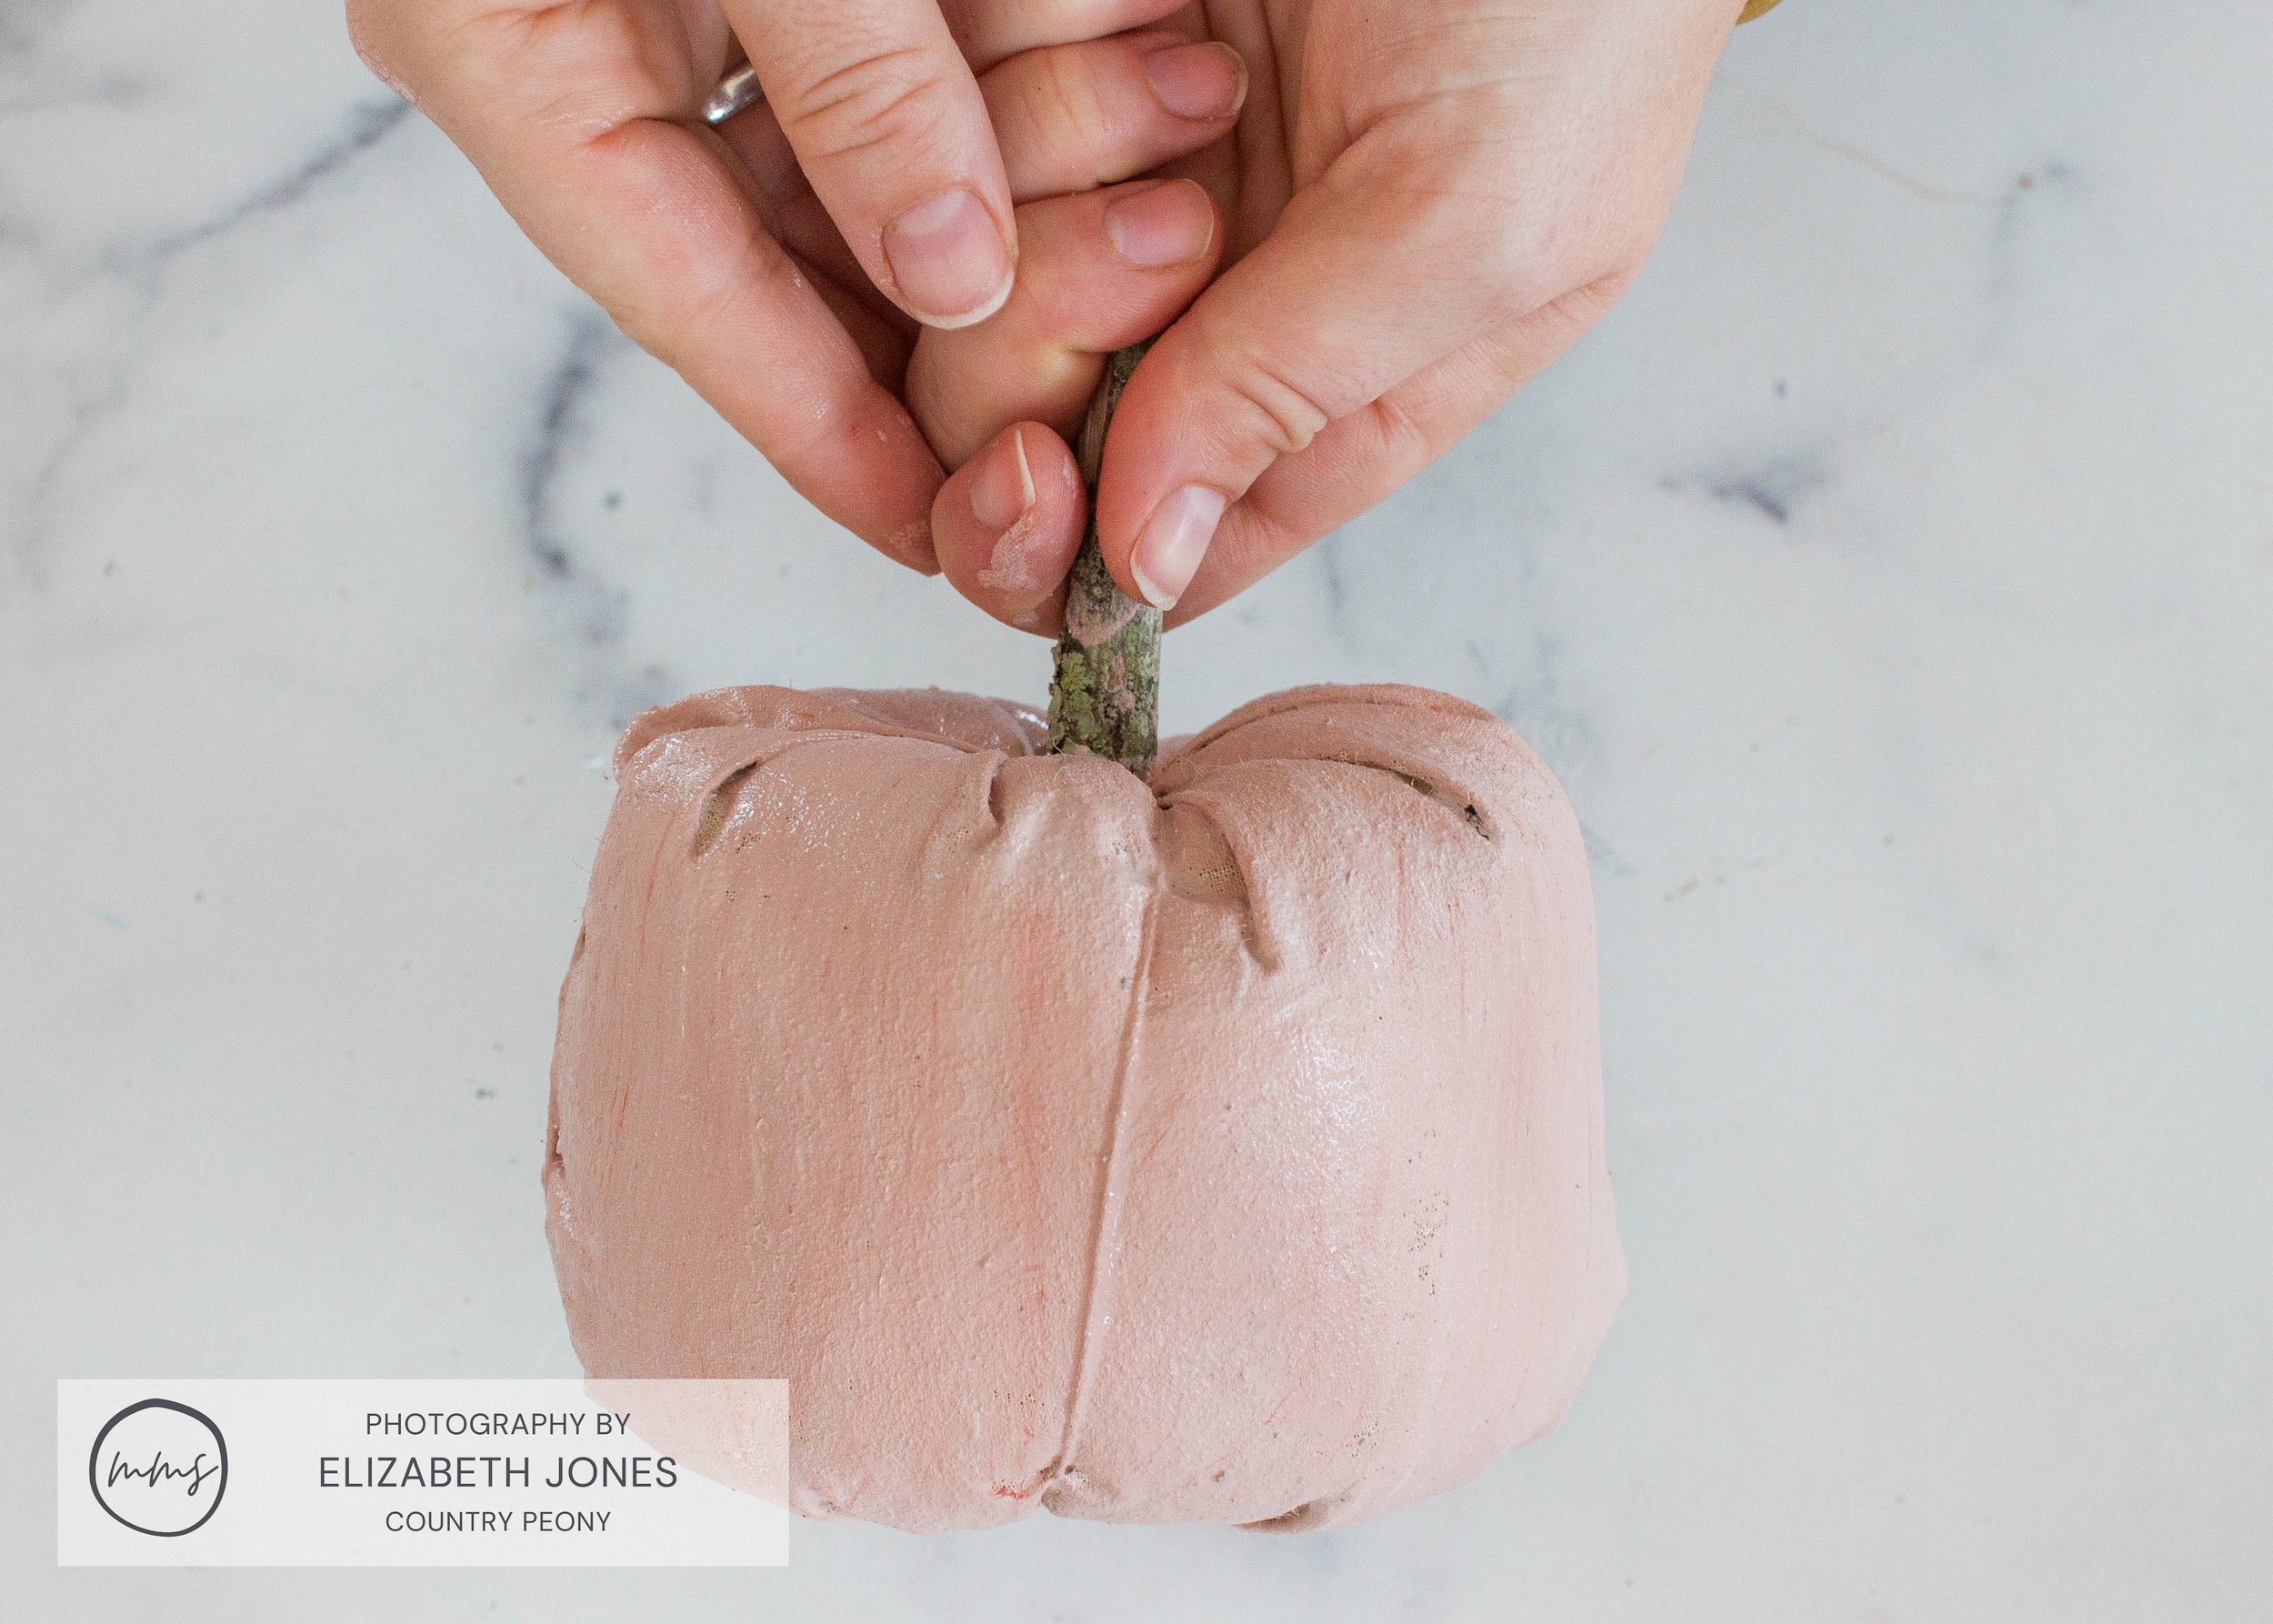
Forage a small stem from a branch from your backyard and hot glue it to the top of the pumpkin to act as the pumpkin stem.


Mix the MilkPaint™
Mix 1 part MilkPaint™ with 1 part water. A “part” can be any unit of measurement you wish. I used a tablespoon.

For this project, I used 1 tablespoon of Miss Mustard Seed’s MilkPaint™ in Arabesque, Aqua Sky, and Lucketts Green to 1 tablespoon of water.

Paint One Coat of MilkPaint™ onto the Fabric Pumpkins
Apply 1 coat of MilkPaint™ to the entire outside of the fabric pumpkin.
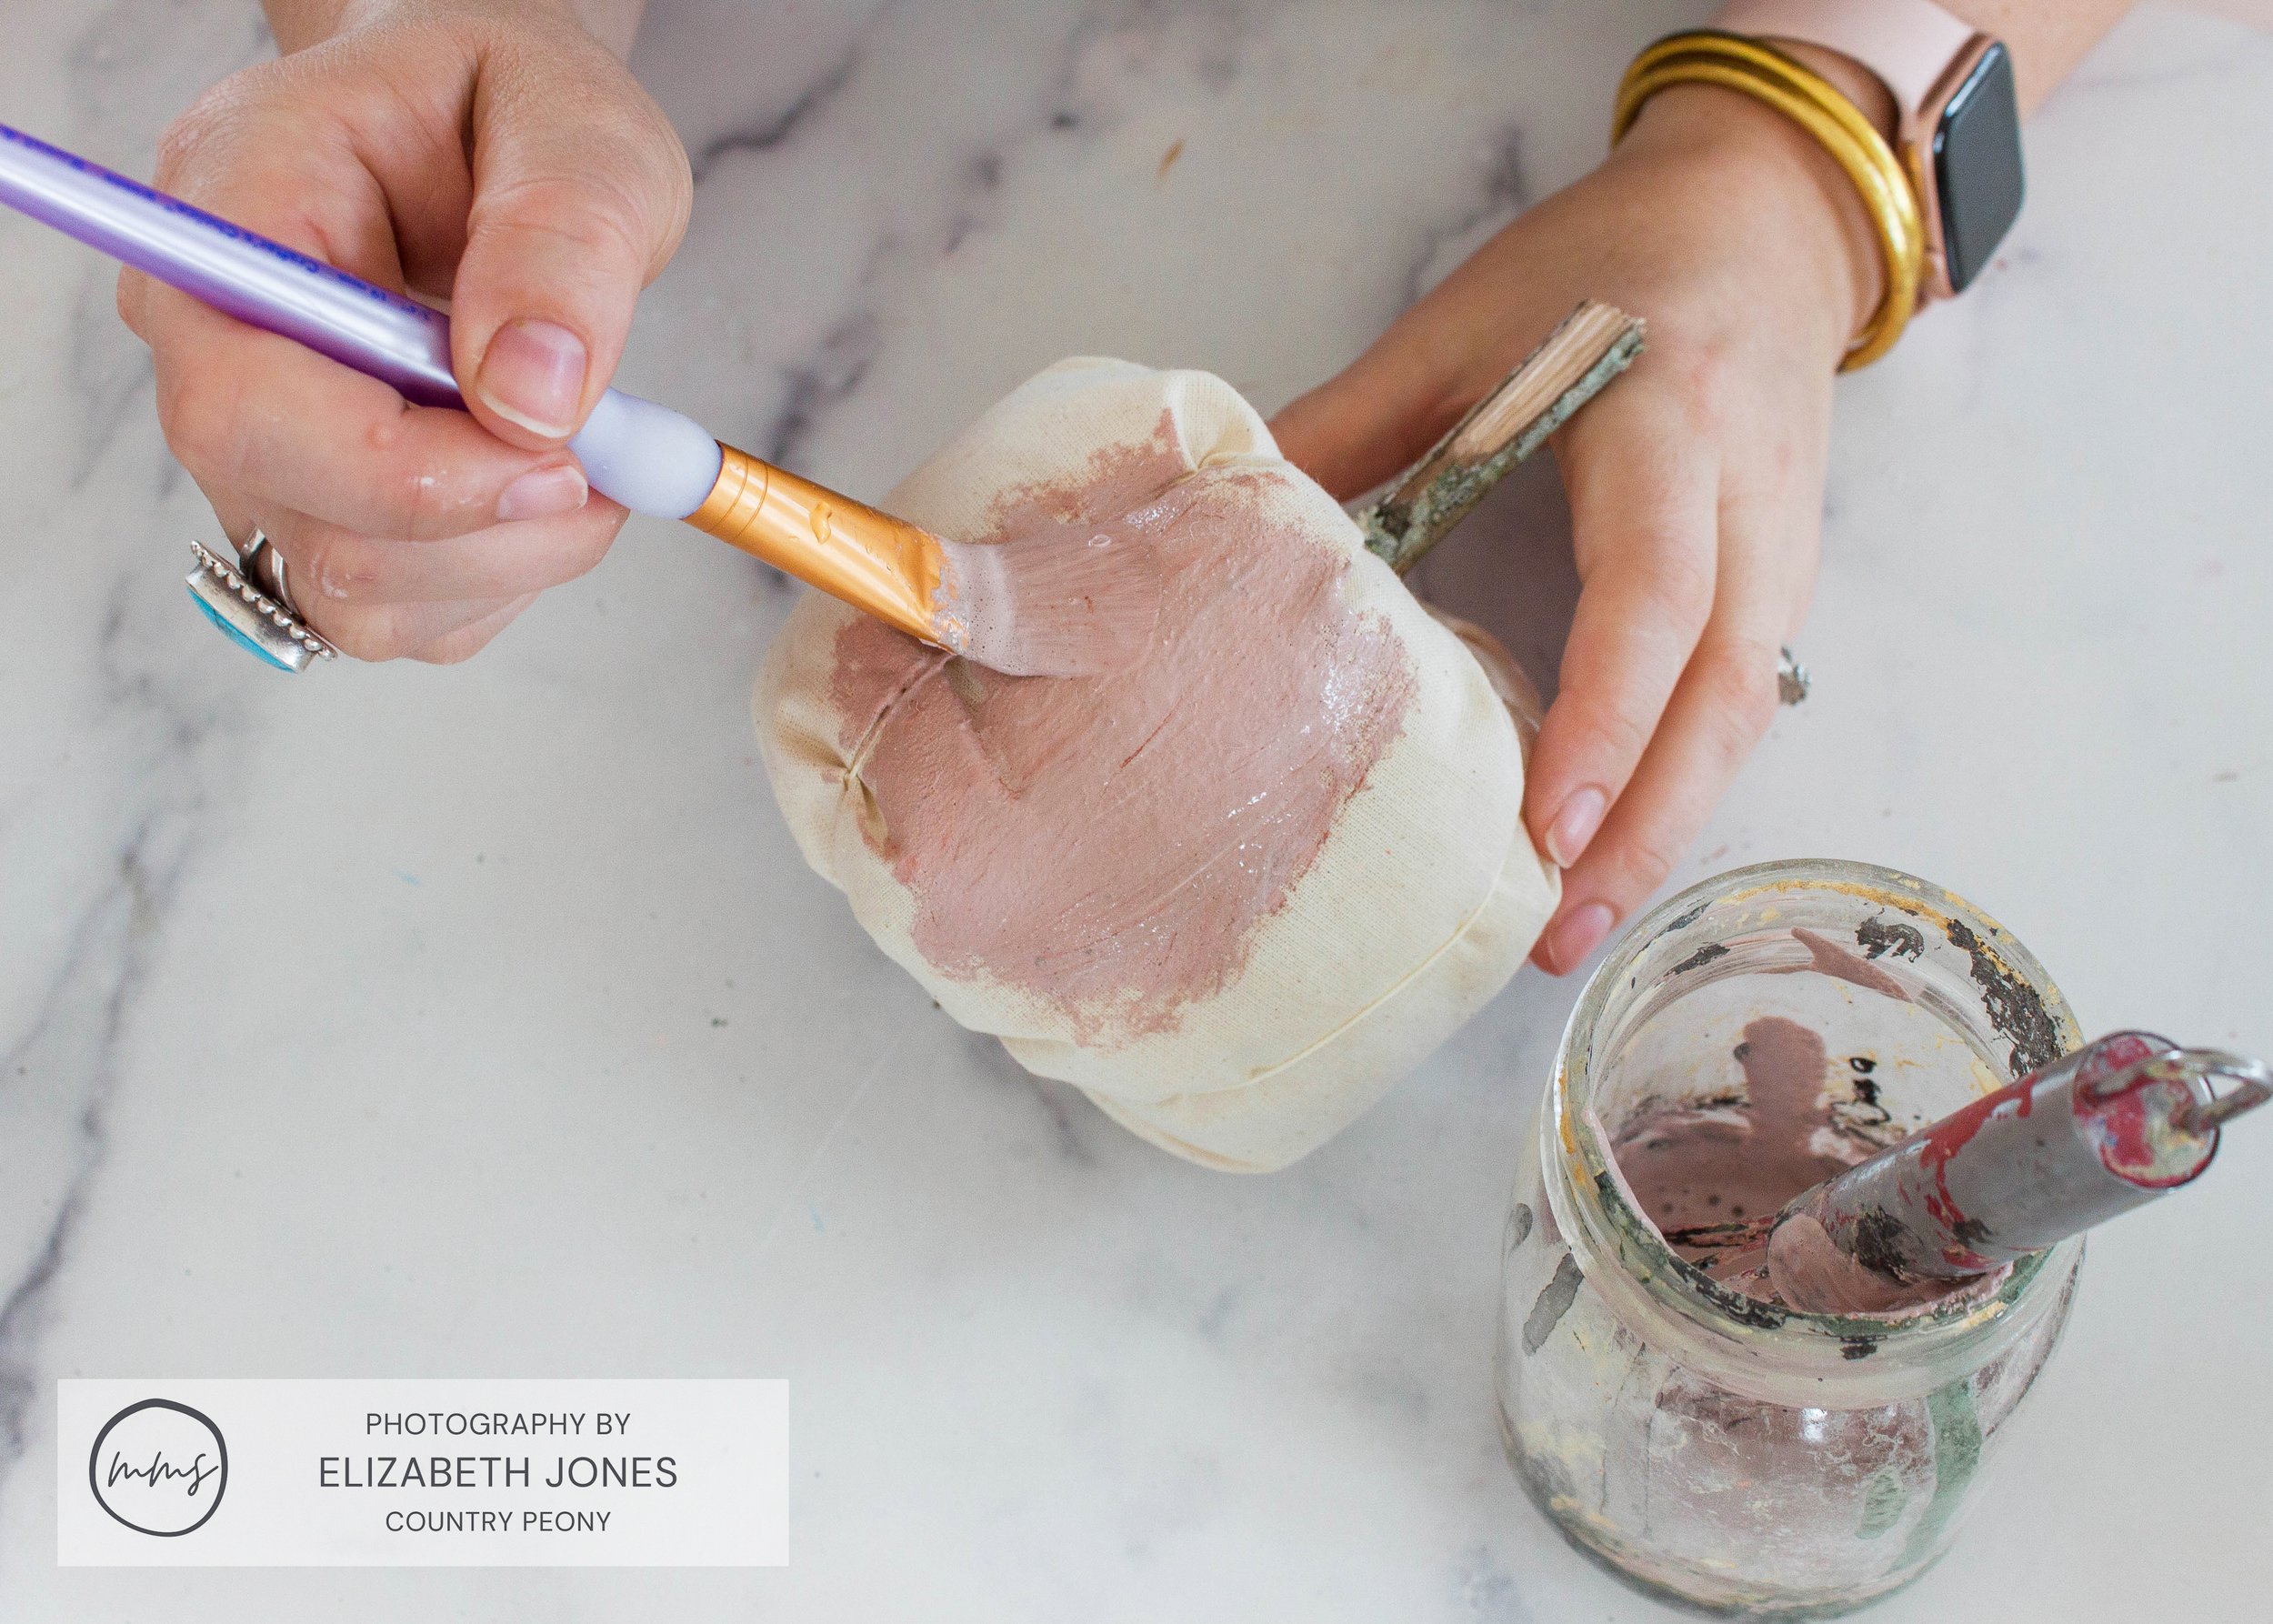
Set the pumpkin aside to dry.
Set your Thanksgiving Table with the Fabric Pumpkins
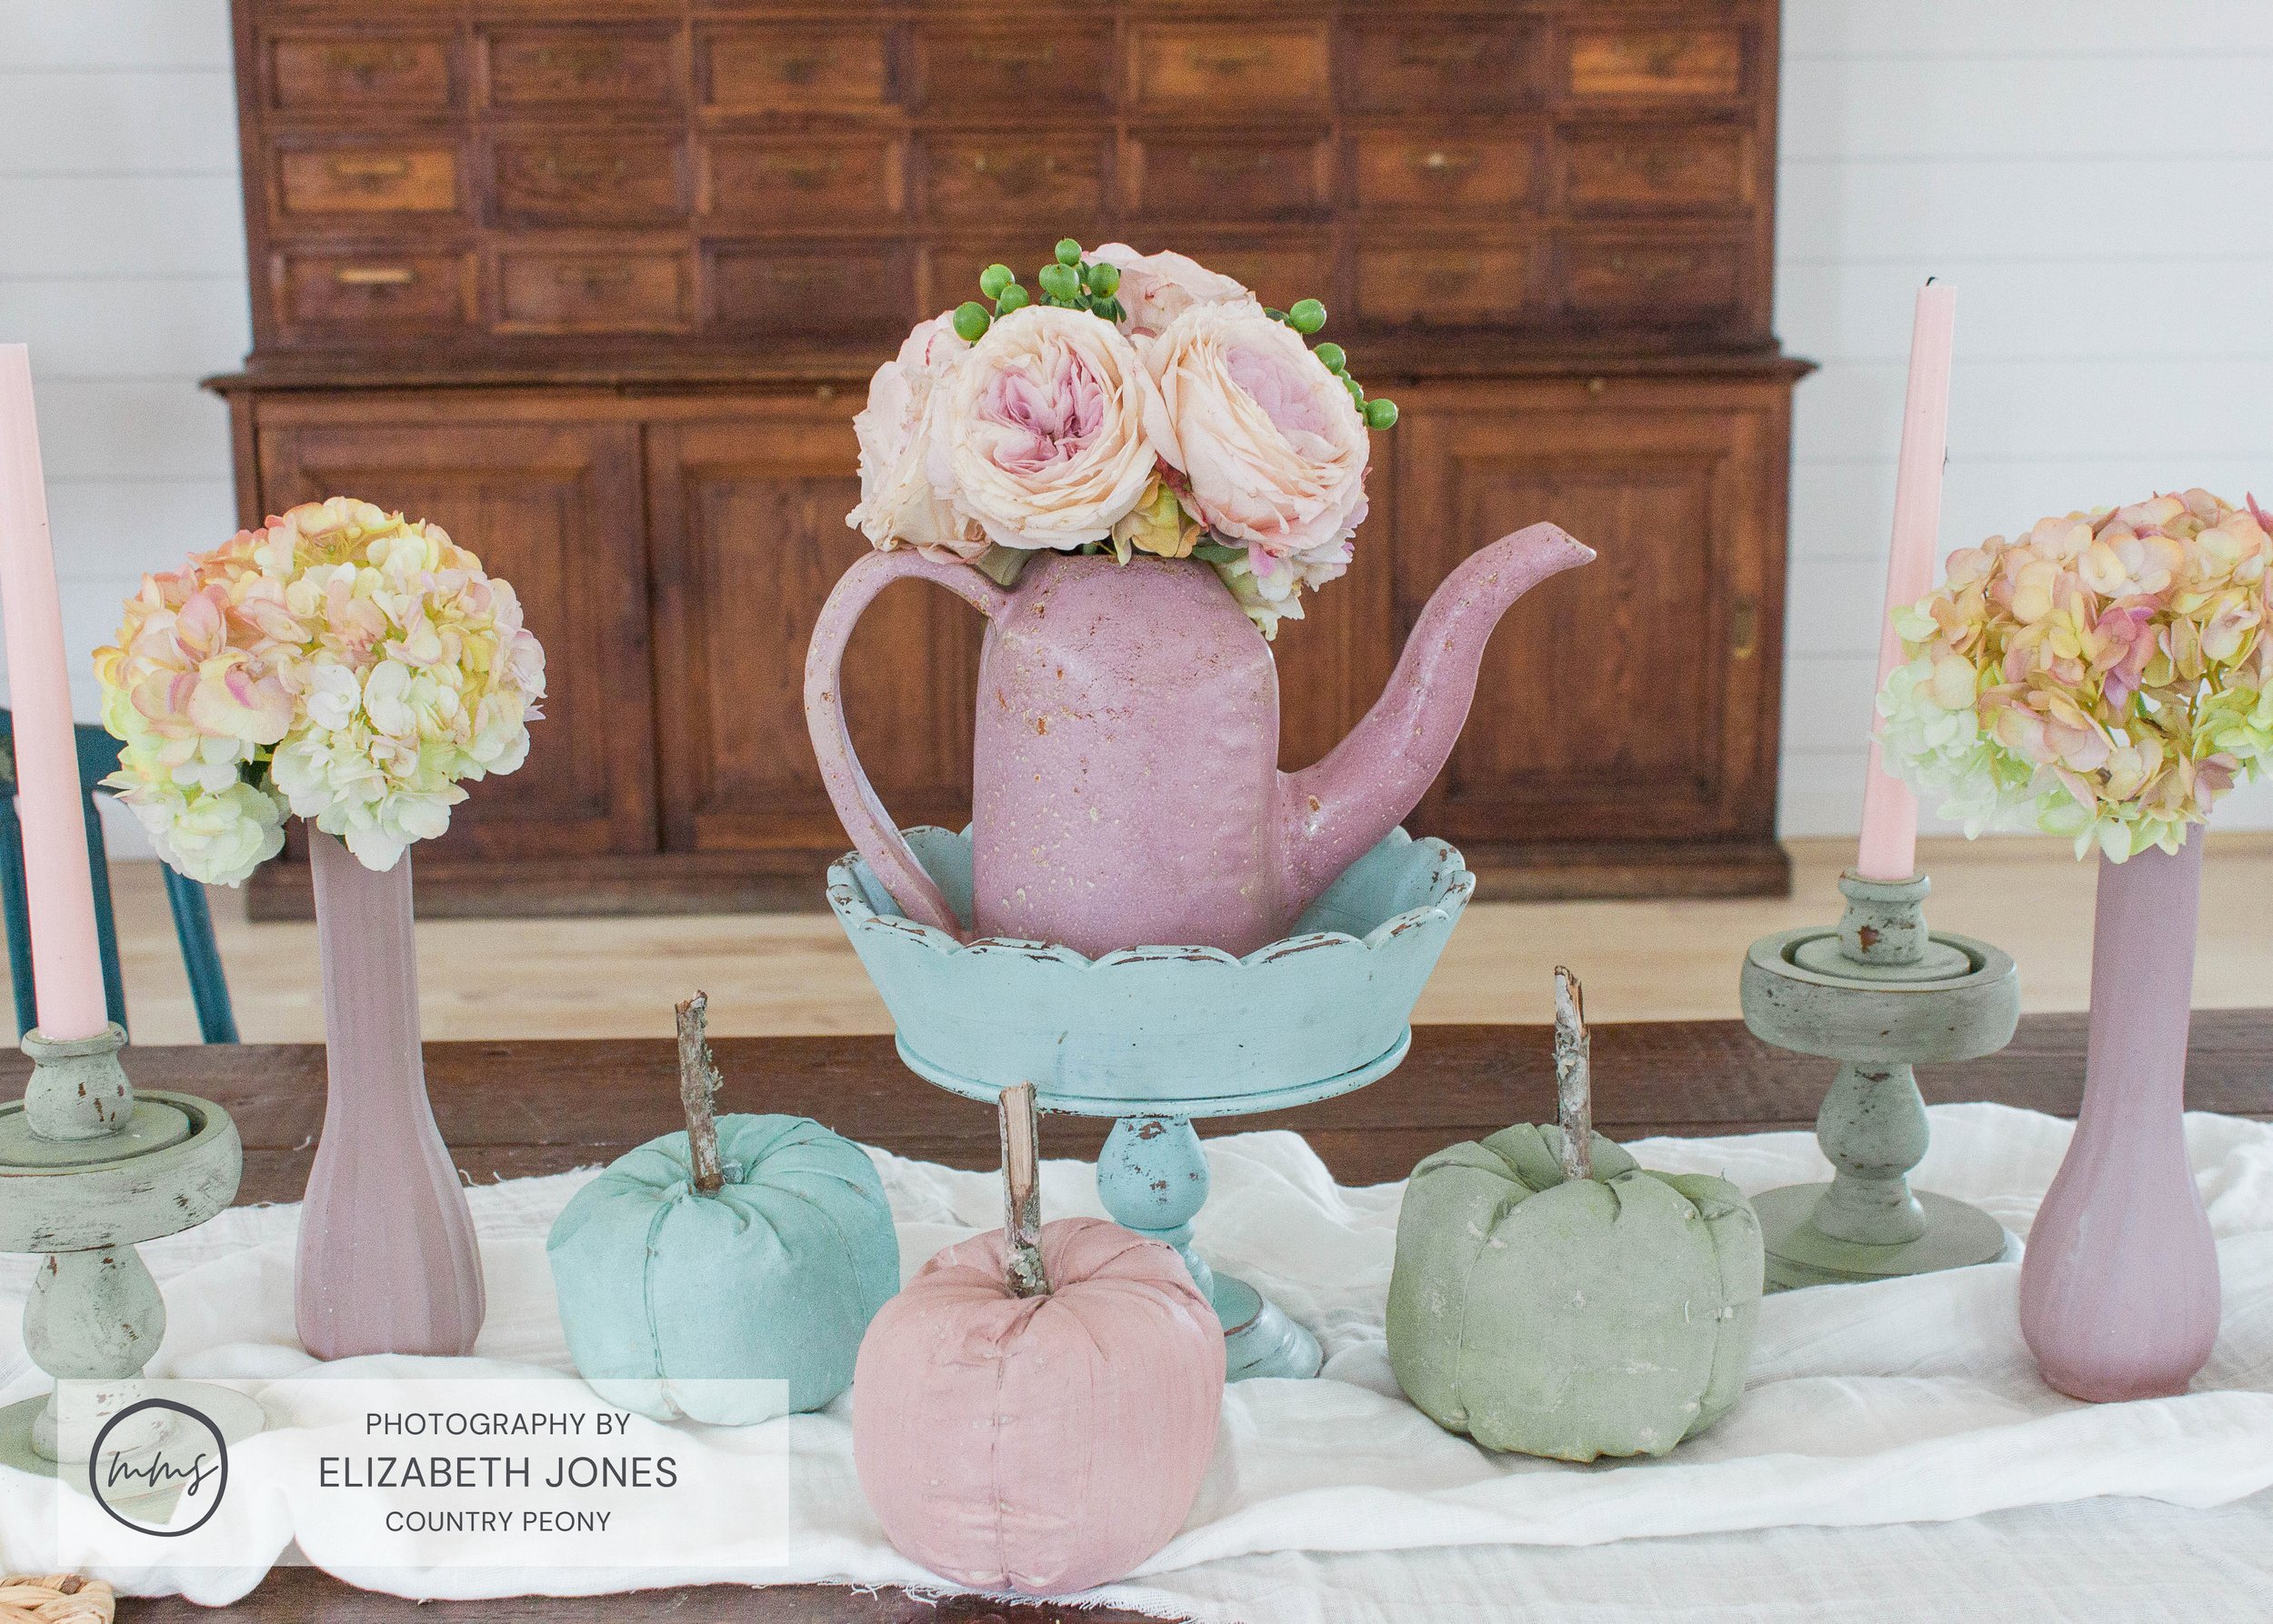
Set your Thanksgiving table with a linen table runner and some milk-painted candlesticks, vases with flowers, and cake stands for height. Then, light the candles and add the pumpkins for a charming feel.

Set out thrifted plates and colorful glassware to finish the look.

The pumpkins are also the perfect size to act as a place setting. Glue a leaf-shaped nameplate to the pumpkin stem, and enjoy a cute way to welcome your guests to the table this Thanksgiving.

I love how these colors play together and set the tone for a calming and playful Thanksgiving table. I hope you enjoy making these pumpkins this Fall.
This DIY was so simple and fun, and it proves the charm that Miss Mustard Seed’s® MilkPaint™ can bring to any project, big or small.

If you want to try Miss Mustard Seed’s® Milk Paint, please use my code “10OFFCP” for 10% off your purchase.
Thank you so much to Miss Mustard Seed’s® MilkPaint™ for having me, and thank you so much for following along today. I hope you enjoy experimenting with Miss Mustard Seed’s® MilkPaint™ as much as I do!

