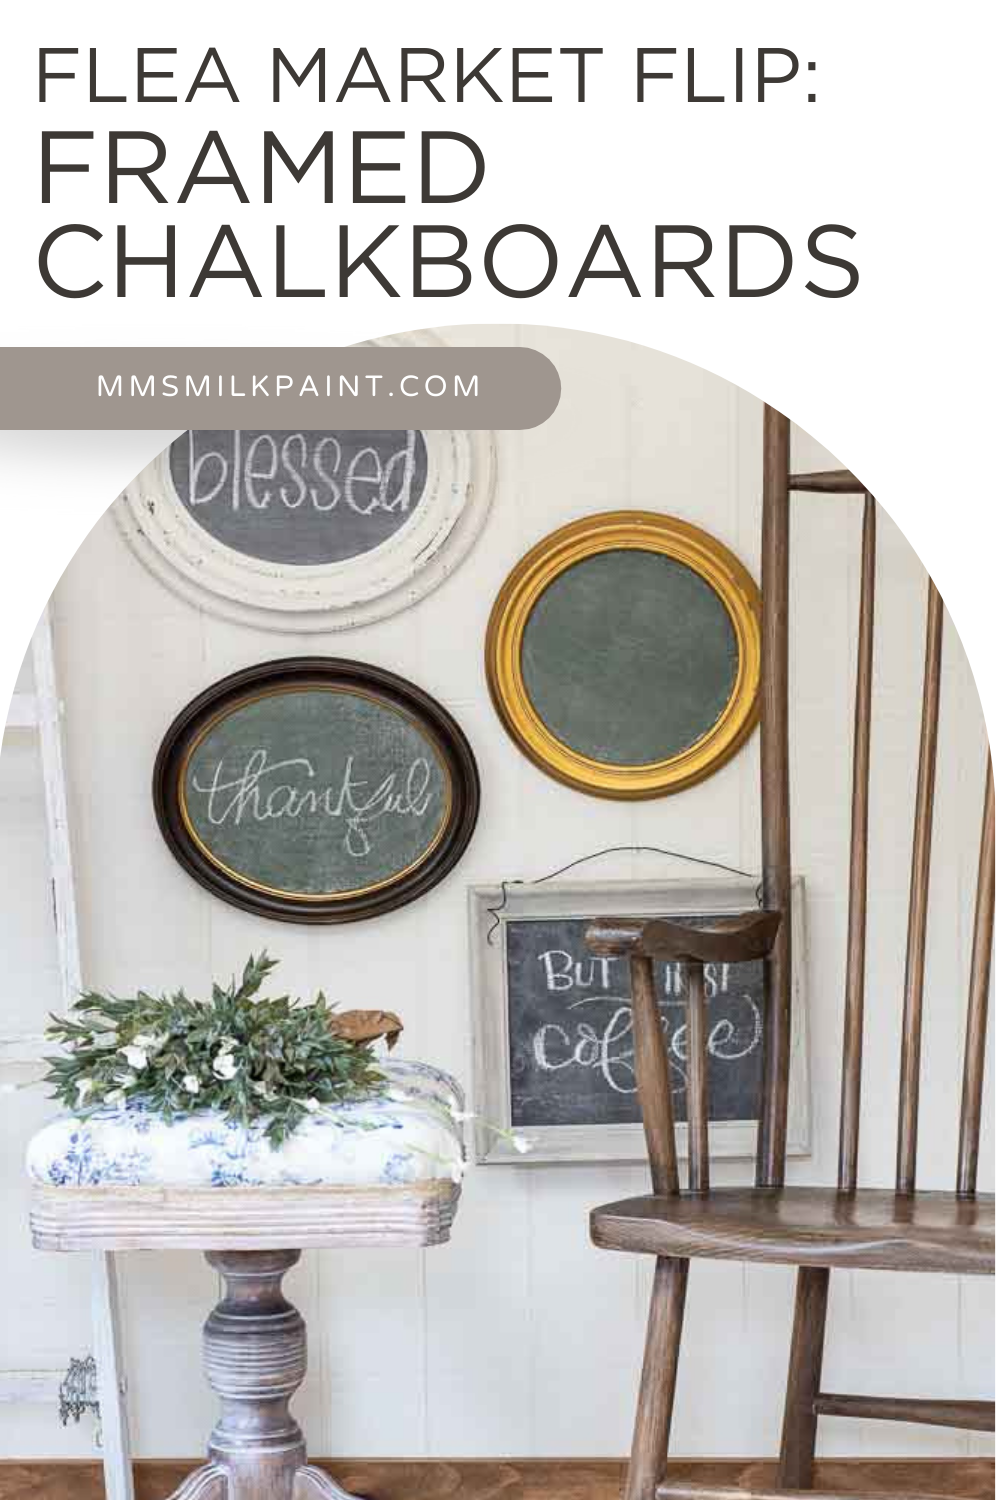
Flea Market Flip: Framed Chalkboards
Here is an idea for you for a flea market flip upcycle. Vintage framed chalkboards! They are easy to make in batches and are a great way to upcycle a vintage piece like a frame!
Flea Market Flip Upcycle Idea
If you shop at your local thrift store, you are bound to see old frame artwork. The art is usually outdated, but the frames can be gorgeous and undoubtedly useful for this project. They just need a new home!
They are also a great flea market find. Yard sales and garage sales are other places to shop. Or maybe in your own attic (or your grandma’s!) - that is another great place to find these kinds of pieces.
Work in batches
I like to shop often and get a stack of frames. That way, I can make the framed chalkboards in batches, and my mind gets stirred with creative ideas for the old frames! I turn on an audiobook and make a build day out of the process!

SUPPLIES:
Old frames
A small sheet of luan wood (¼” thick)
Carpenters T-square or straight edge
Typewriter MilkPaint™
Boxwood MilkPaint™
Ink Blue MilkPaint™
Ironstone MilkPaint™
White Wax (dark wax would be another option)
Tepid water
Container
Paintbrush
White chalk
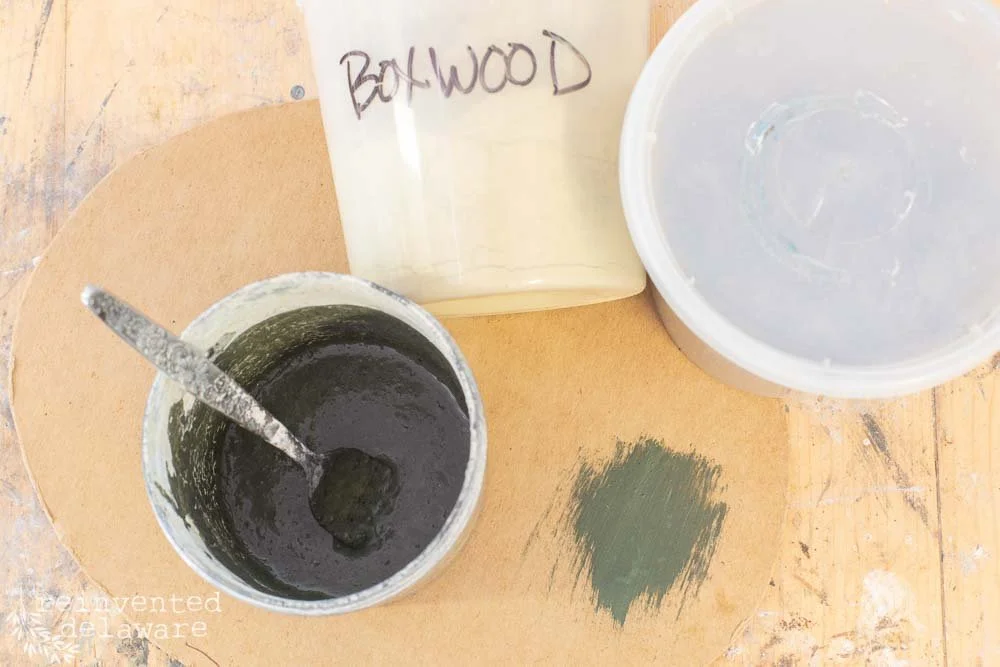
Mix Milk Paint
Let’s start by mixing the milk paint. I like to mix the milk paint before I am ready to paint so that it has plenty of time for the dry powder to soak up the water. MMS Milk Paint has a great video to show you how to mix the milk paint.
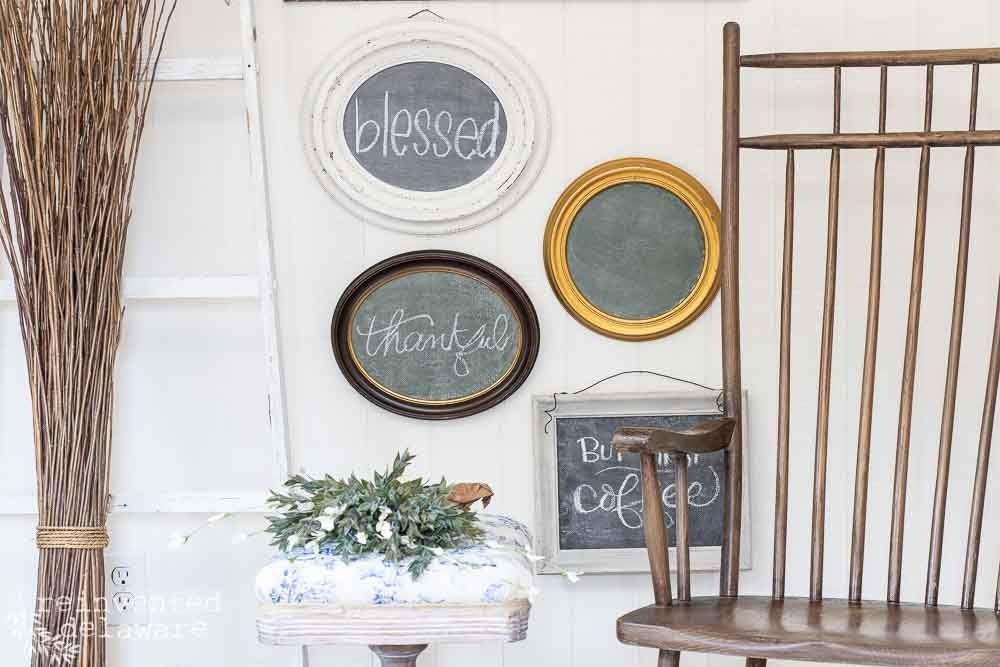
Today I am using Typewriter to create a traditional black chalkboard, and I am also using a custom mix of Ink Blue and Boxwood to create a vintage green chalkboard (my personal fave!)
The vintage green chalkboard color is created by mixing 3 parts of Boxwood with 2 parts of Ink Blue. This is a recipe I have used over and over. In fact, I have it written on my workbench!
After mixing the dry powder, go ahead and add it to the water. I think it mixes better if you add the dry milk paint powder to the water instead of the other way around.
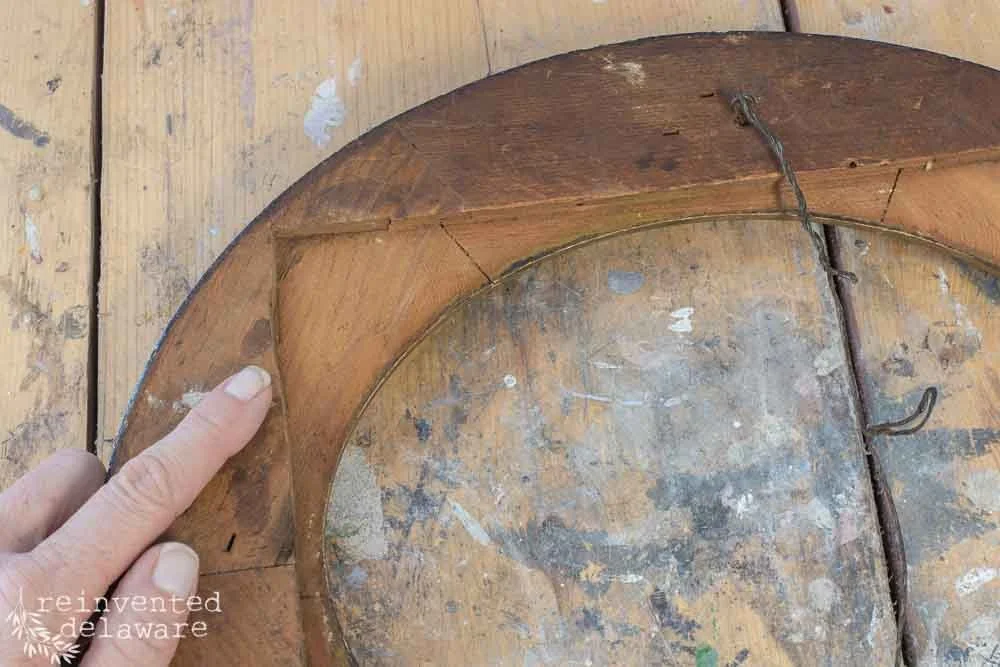
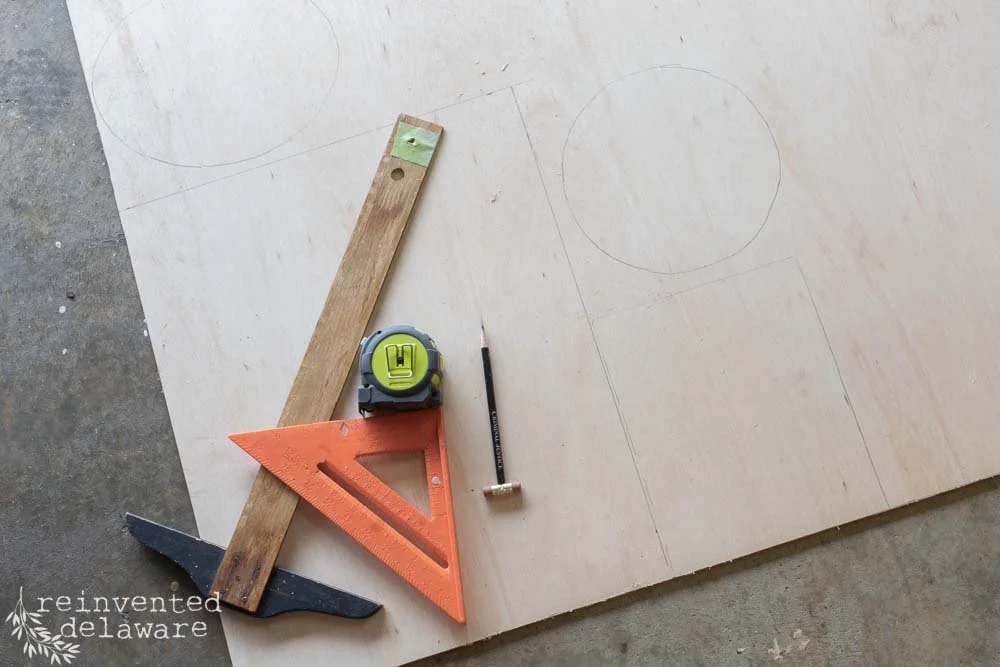
Cut the luan wood
Next, let’s make a template for the wood insert that will be used as the chalkboard. Some of my frames are round and oval, so I used a piece of paper, drew around the inside of the picture frame then added about ¼” to compensate for the inset where the wood would sit.

For the square and rectangle picture frames, I used my tape measure and measured the inside inset on the back of the frame. Then I transferred those measurements to the luan board.
Once my measurements were transferred, I used my power jigsaw to cut out the pieces. I made a total of five this time, but I have made as many as ten at a time. Batching this project is so easy!

A light sanding is necessary on the ‘good’ side of the luan wood. I’ll explain that more in the video with this flea market flip upcycle post.

Create the chalkboards
Once the pieces are lightly sanded and dusted, it is time to paint! I love this part so much! I think I could give something a fresh coat of paint every day with milk paint! That sounds like fun, doesn’t it??
The hard part of batching this flea market find is deciding which color to use with which frame. Sometimes I paint the frame, sometimes I wax the frame, sometimes I just clean the frame and give it a good clear wax. Any way you choose, you will give these unique items a whole new look!


These are the decisions to make for DIY projects, and I’m not complaining one bit!
One of the oval frames had pretty detail that I knew would look so cute with a light-colored chippy paint finish. Ironstone is my go-to white milk paint.
Oh, who am I kidding - I love all of the light-colored neutrals MMS Milk Paint offers!
The extra large frame had beautifully carved details that I wanted to highlight. I gave it a good cleaning and then one coat with MMS MilkWax in White. You’ll see how I distressed the frame in the YouTube video.

After applying two coats of milk paint to all of the chalkboard inserts, I lightly sanded each one to smooth out the surface.
Then using the side of a piece of chalk, I rubbed it all over the surface. Then I lightly wiped off the chalk with a dry paper towel. This creates an aged chalkboard look on the Typewriter and vintage green chalkboards.

The last step is to reassemble the parts of these flea market flip ideas. Depending on the style of your frame, you might have to use glazing points to hold in the luan chalkboard. That is what I used for each of my chalkboards.
You could glue and clamp the DIY chalkboards in place, but I caution you to be careful that the wood glue doesn't ooze out of the front of the chalkboard.

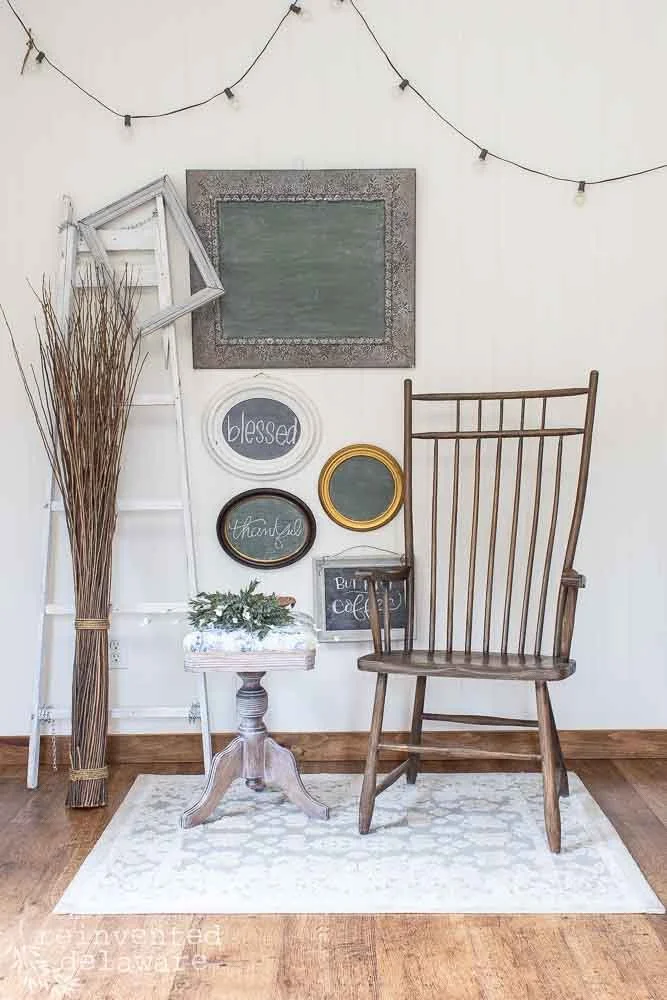
Creative uses for DIY chalkboards
Let’s chat about a new way to use these framed chalkboards. Here are some ideas for you:
1. Put a small chalkboard on a small easel and place it on your end table or coffee table with a single word of encouragement like ‘thankful’ or ‘blessed.’
2. Place a small framed chalkboard on a stack of vintage suitcases with ‘welcome’ written on it and use the display in a guest bedroom.
3. Hang a medium size vintage frame chalkboard with your wifi password so guests can use it while visiting you.
4. Hang a larger size vintage chalkboard at the end of your kitchen island to keep a running grocery list your family members can add to. When it’s time to shop, snap a photo of the list and head to the store!

Do you have any more ideas on how this flea market flip upcycle project could be used? Let's get our creative juices going and share ideas in the comments section! We want to hear from you!


So what do you think of these vintage frames with a new life? With a little time and a love for vintage goodies found at antique stores, antique malls, or maybe your local flea market, you can take old frames and make them useful and adorable for yourself, your friends & family, or maybe your customers in your own vendor booth!
Thanks for joining us today for this flea market flip upcycle that I am sure you will make many times!