
How To Prep Furniture For A Crackle Finish
Creating A Crackle Finish On Furniture
Do you love the look of vintage furniture with cracked paint? I sure do! Today, I want to share with you the way I prep furniture to get a crackled finish that looks authentic!
Prepping furniture is the most important step in any makeover. Many people think you can paint furniture without any prep at all. At the very minimum, the piece has to be cleaned and inspected for repairs.

A $2 Communion Table
Let’s look at the piece I will be working on today. It’s a church communion table that my hubby picked up at auction for an unbelievable $2! But, along with that amazing price tag, came dirt from the auction and from sitting in a barn somewhere for who knows how long - spider webs galore, and years of furniture polish!

Cleaning And Vacuuming The Piece
The first step in cleaning is going over the piece with a vacuum. A shop vac in the workshop is a must! You can go over the whole piece using the brush attachment to loosen dirt, cobwebs, and any little insects that might be hanging out on the underside of the piece!
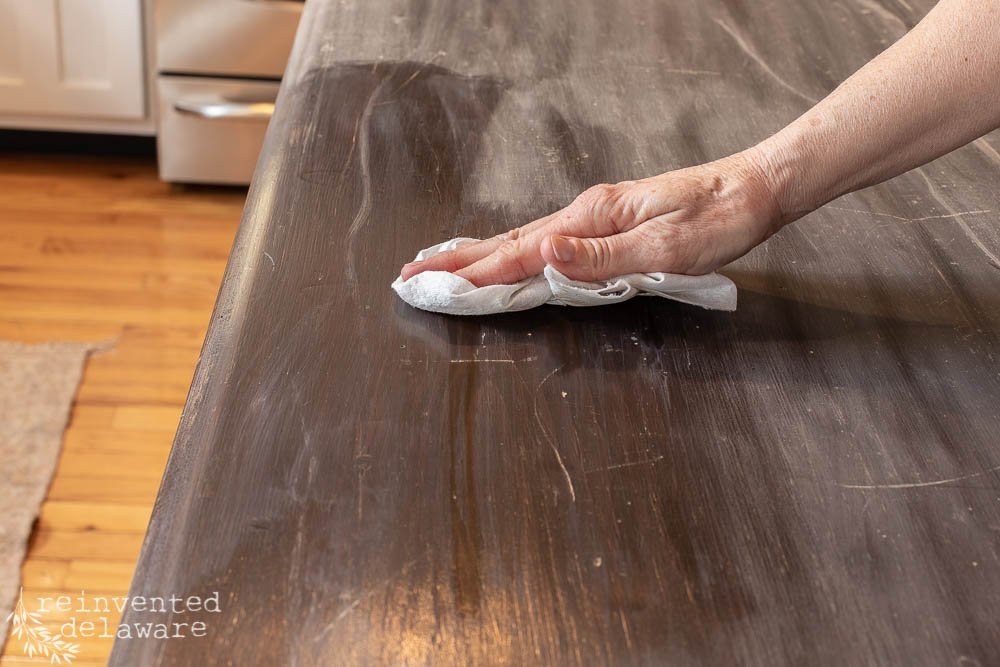
The next step is to wash the piece. One of my go-to cleaners is Dawn® dish soap. It cuts grease and grime like no other cleaner, and it’s not too harsh on your hands. I filled an antique enamelware basin with hot water and Dawn® dish soap. Using a microfiber cloth, I cleaned the entire table. The cloth had to be rinsed in clear hot water several times because the communion table was filthy!

Extra Dirty Pieces
If the piece is extra dirty, I suggest washing with soapy water, a scrub brush, a hose, and good ole’ sunshine. This method is best done outside, of course!
The piece can be turned on its side so that you get into all the nooks and crannies. After hosing all the soap off, tilt the piece to an angle so that the water will run off. Allow it to dry in the sunshine all day long!
Scuff Sanding
After I cleaned the piece completely, I used a fine grade sanding sponge to slightly scuff sand the surfaces. It might seem a bit strange to do this scuff sanding after cleaning since the sanding will create some dust. Let me explain.

If you scuff sand before cleaning the piece (or any kind of sanding for that matter), you could be pushing the grime, grease, and oils into the wood. That just sounds yucky! Clean the piece first, then scuff sand. Afterwards, wipe down the piece with a dry microfiber cloth to capture the dust.
Creating A Crackle Finish With Shellac
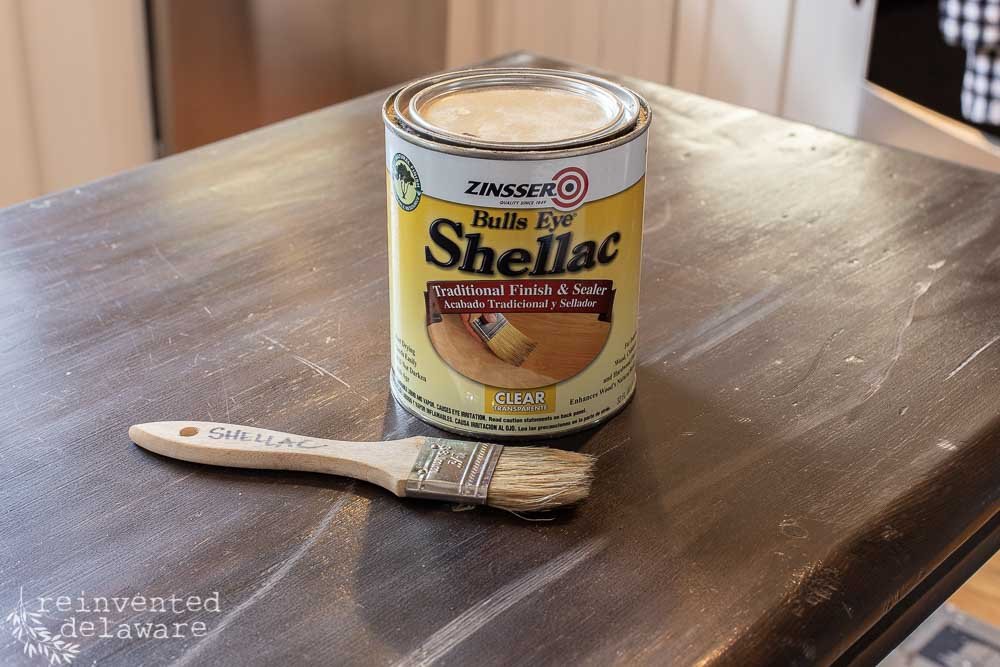
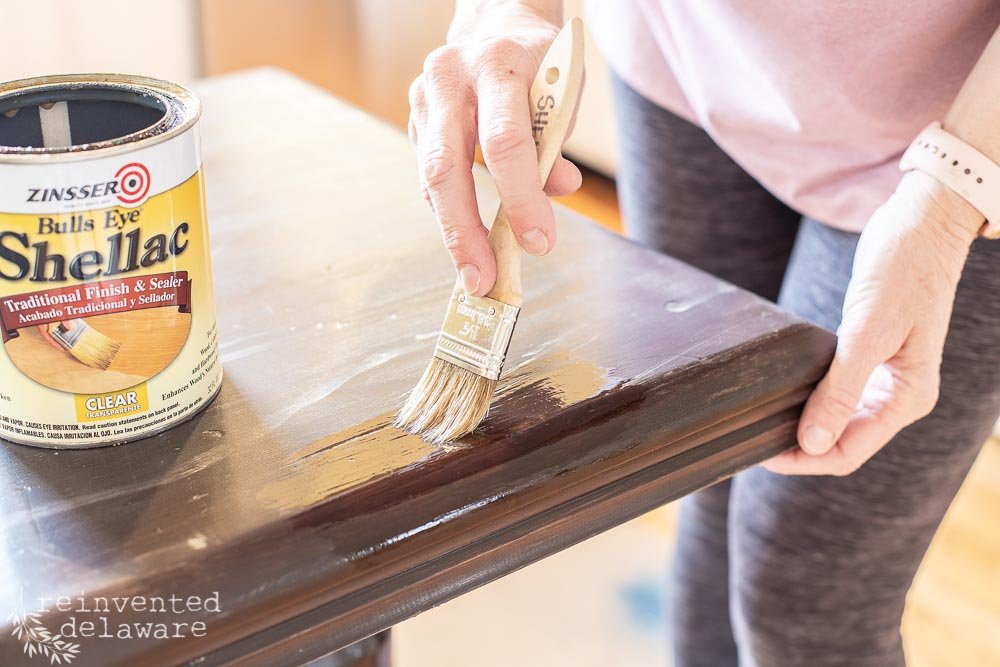
For this piece, I wanted to create a crackly kind of finish. So I applied two coats of Zinsser Shellac. It is an all-natural, non-toxic sealer that has been used for years by wood craftsmen. It has been a staple supply in my own workshop for years.
I applied two coats, allowing it to dry completely between coats. The Shellac goes on perfectly with a chip brush that I toss after use. You can clean the brush with alcohol or a mixture of ammonia and water. Be careful if you use either of these cleaners - protect your hands and your eyes!
Time To MilkPaint™!
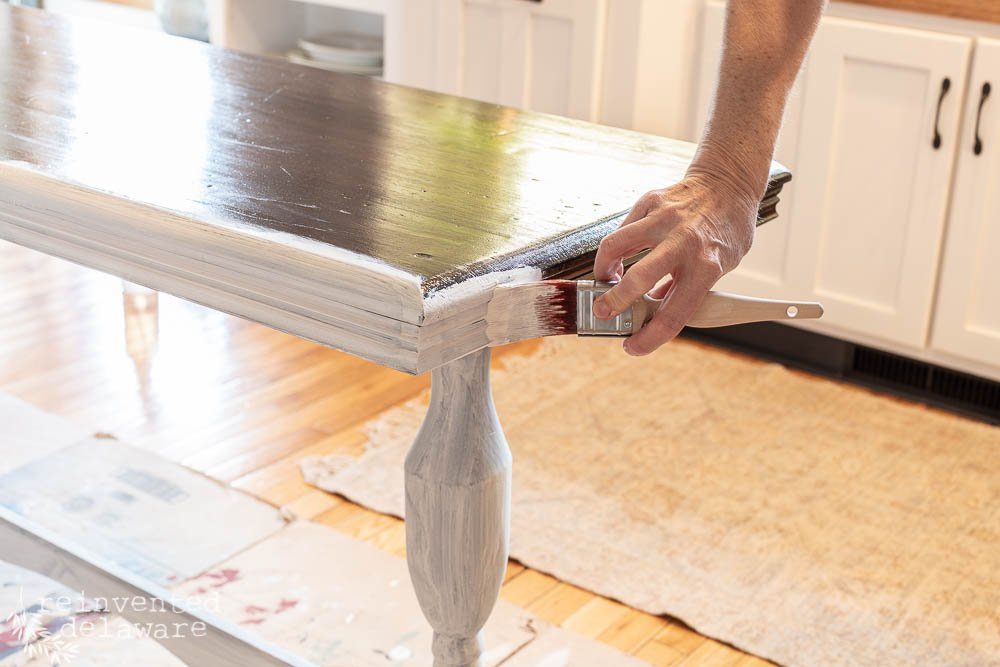
Once both coats of shellac are completely dry, it’s time to paint! Painting over the shellac is so easy. Even though it has a slick appearance, Miss Mustard Seed’s® MilkPaint™ adheres perfectly to it. For this communion table, I am using Ironstone. Milk Mix-EZ™ helps to reduce any foaming that might occur when mixing.

It’s really magical what happens between Miss Mustard Seed’s® MilkPaint™ and shellac - as the paint dries, a natural and authentic crackling will happen. Even if you paint more than one coat, the crackle will appear!

A Summary Of The Crackle Process
Let’s review the steps to prep a piece for MMS MilkPaint™:
Shop-vac the entire piece. Turn it upside down, remove any drawers, and vacuum every nook and cranny! Use the brush attachment to loosen any dirt and cobwebs!
Clean the piece with soapy water and a microfiber cloth. Go back over the piece with a clean damp cloth to remove any soap residue. You can also wash the piece outdoors with soapy water, a scrub brush, a microfiber cloth, and a hose if the piece is extra yucky!
When the piece is dry, do a quick scuff sand over the entire piece.
Wipe away sanding dust with a dry microfiber cloth.
Apply two coats of shellac, allowing the proper drying time between coats.
Paint the piece as usual!
Crackle Paint Finish Video Tutorial
If you’d like to see my video tutorial of the entire process, click below to enjoy!
Did you find these steps helpful to you when you are looking for a way to create the crackle paint finish on a piece of furniture? Let us know in the comments section! If you have any questions, feel free to ask in the comments as well!
Thanks for joining us today!
Want to see the final look? Click here to see the finished table!
