
How To Turn A Bookshelf Into A Faux Fireplace Mantle
Yep, you read that right. I’m going to teach you how to take a bookshelf and turn it into a faux fireplace mantle!
For this DIY project, you’ll need a bookshelf (or display cabinet) like this:

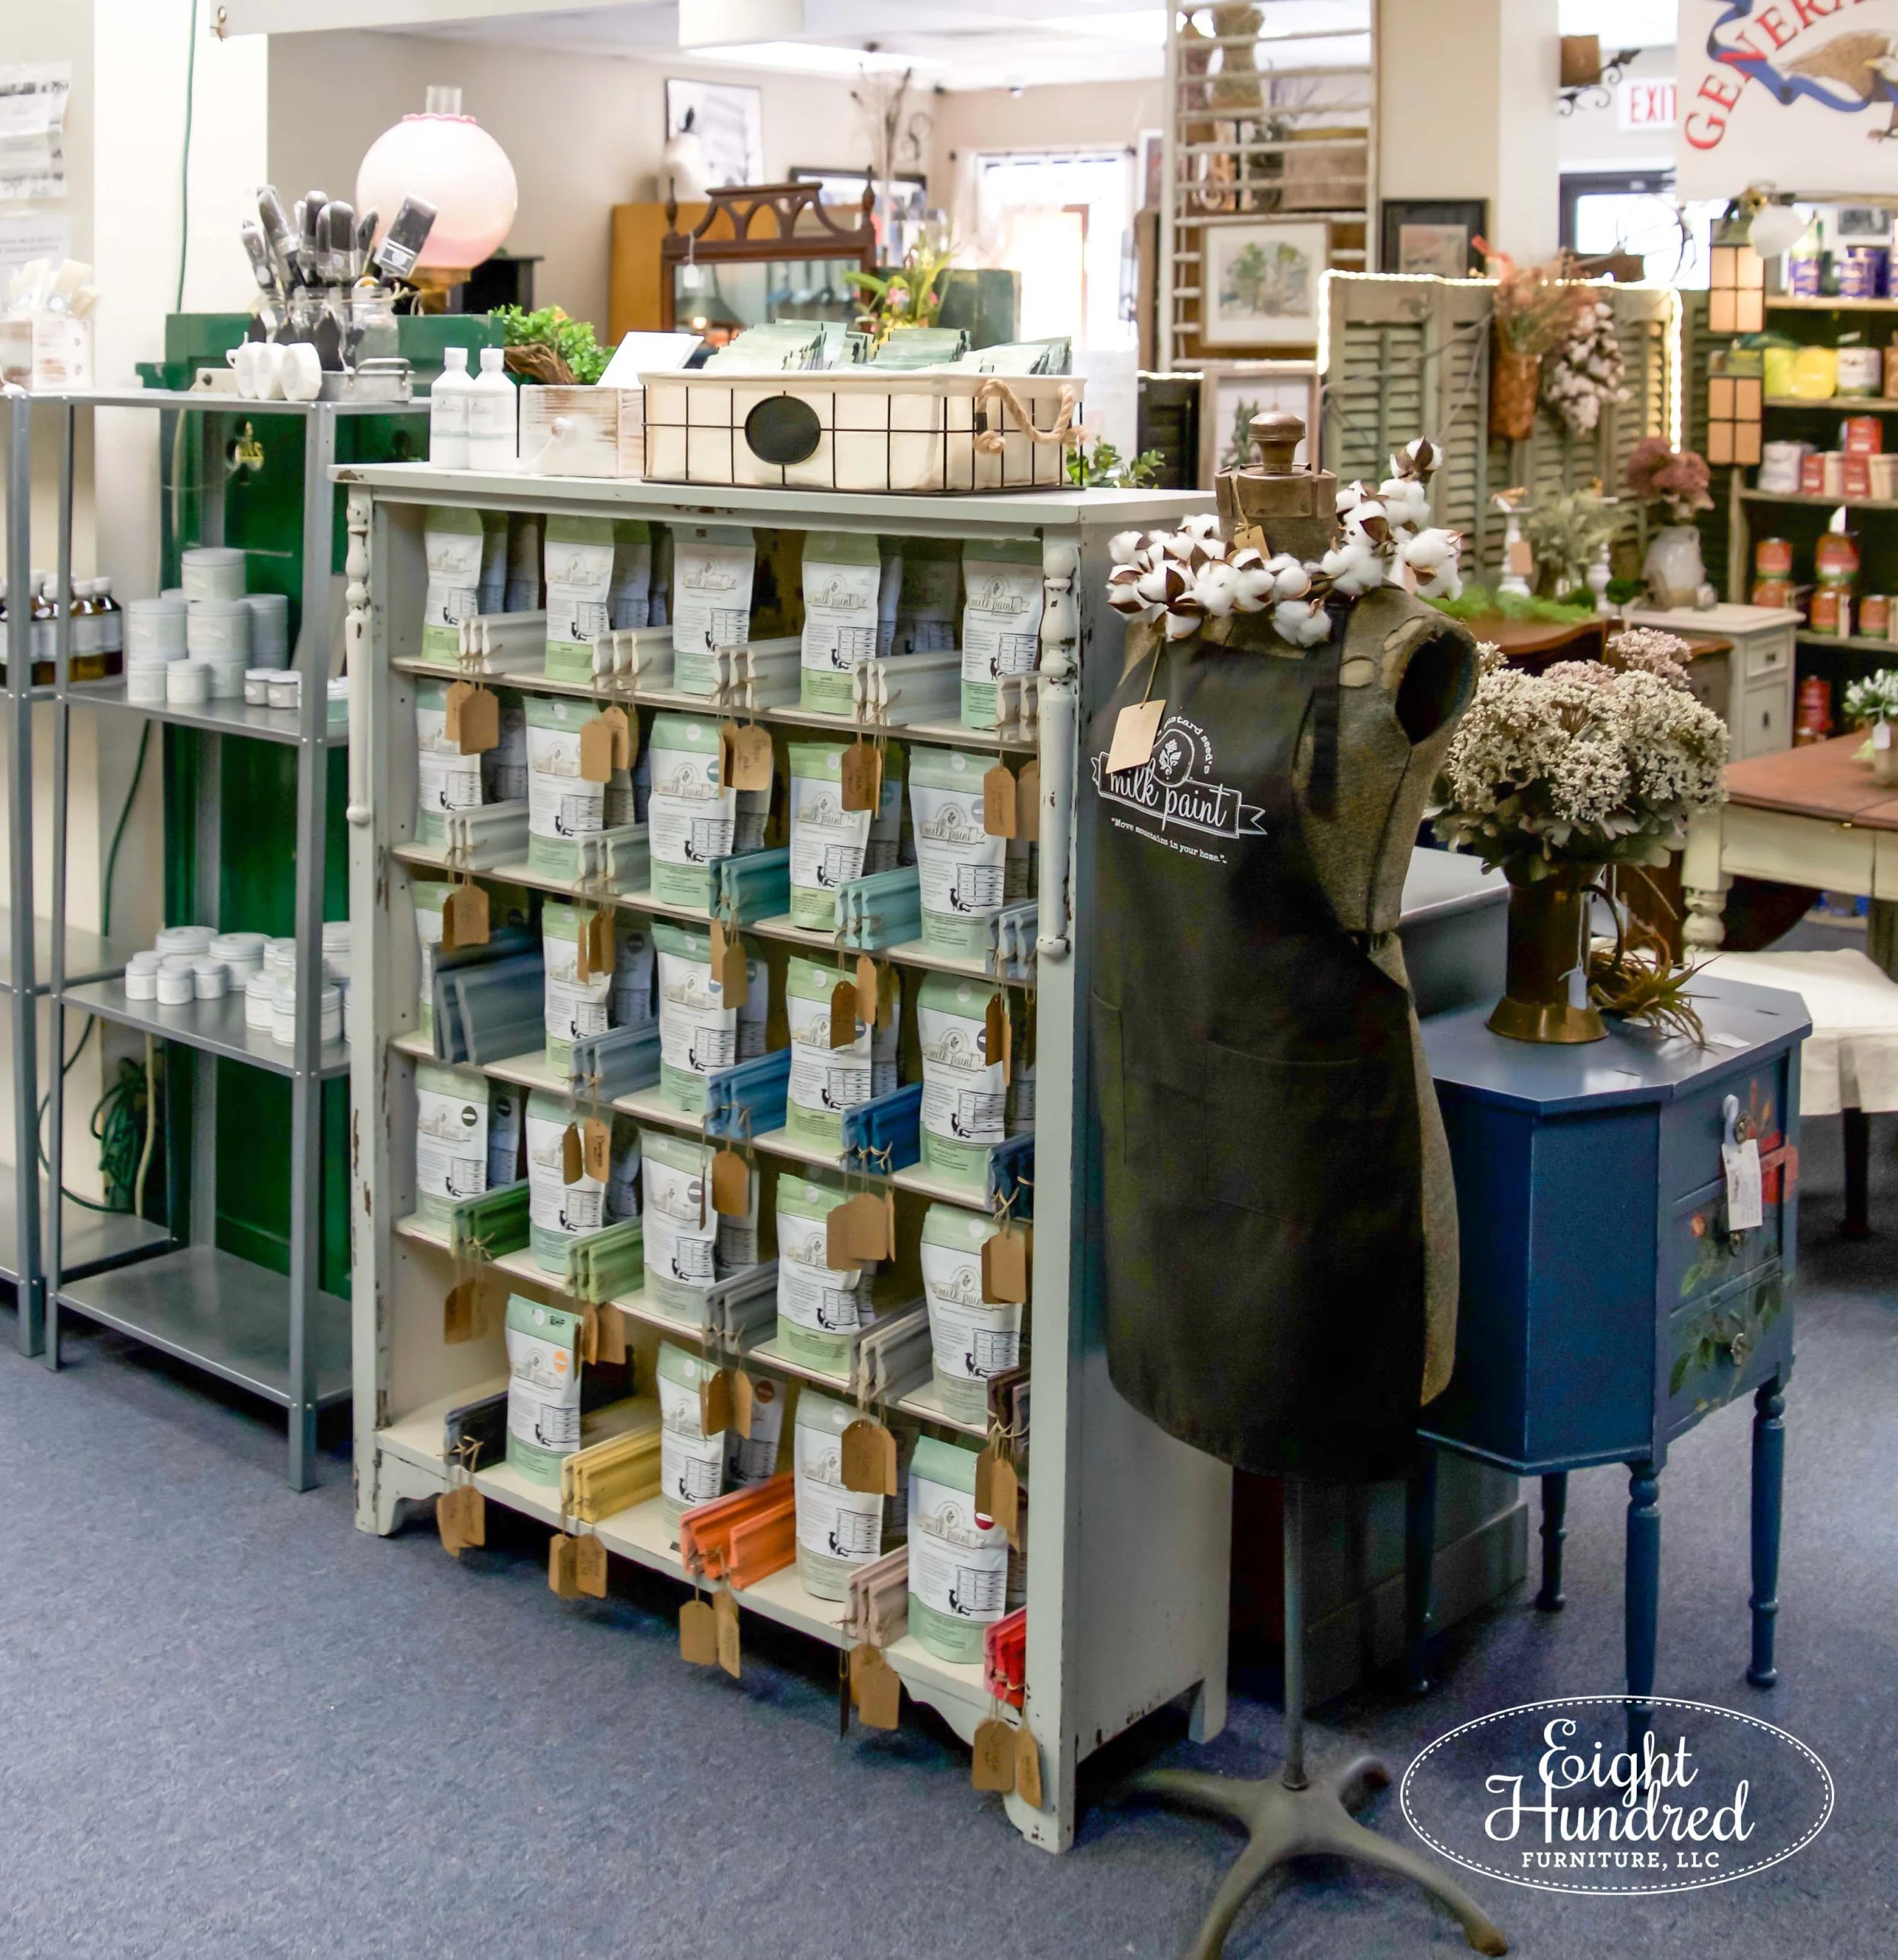
This vintage cabinet came from my days as a MMSMP retailer. I used it in my antique booth to hold all of my samples and pouches of paint. It used to have doors on the front, but I actually sold them!
The whole idea of turning this bookshelf into a mantle came from an amazing blog post by Tonya of Love of Family and Home. She described how she turned a thrifted bed frame into a faux mantle!
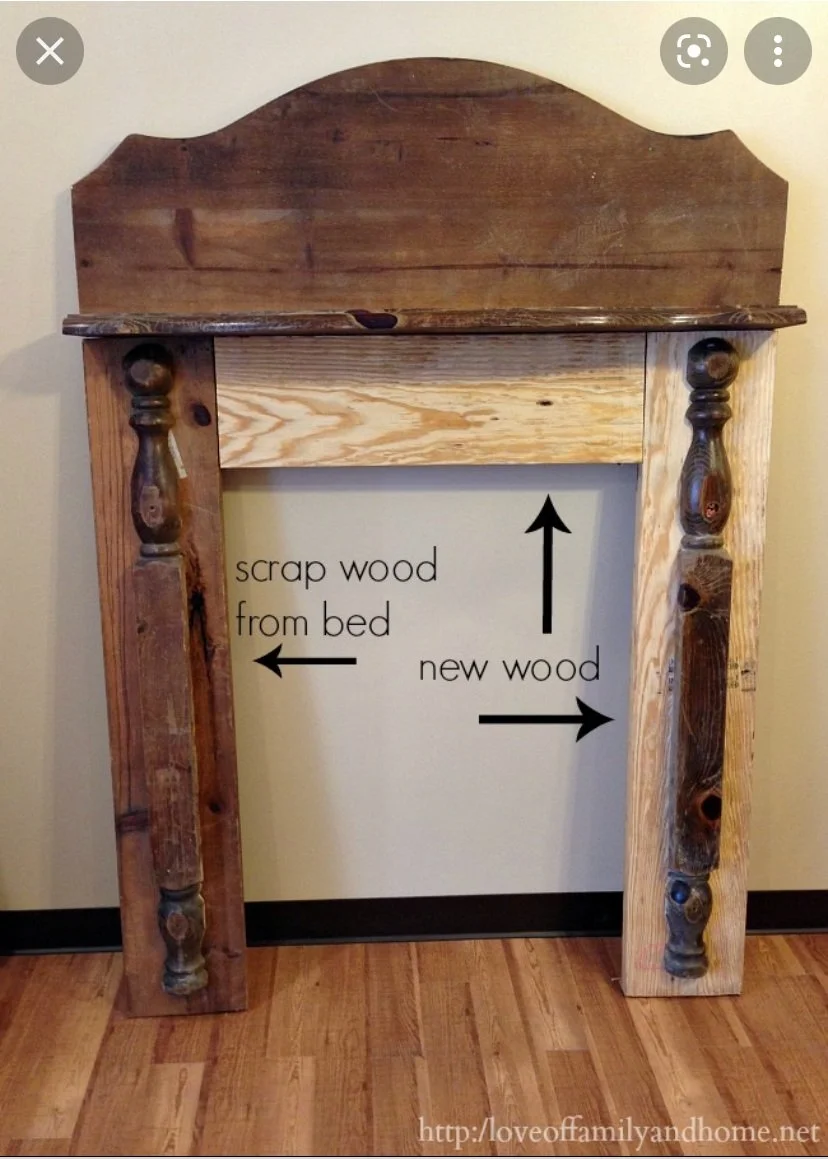
After studying her diagram, and reading through her post, I thought, “Hey! I can do that with my bookshelf!”
Let’s dive into the process I went through, and perhaps you might be inspired to repurpose a bed, bookshelf or display cabinet of your own!

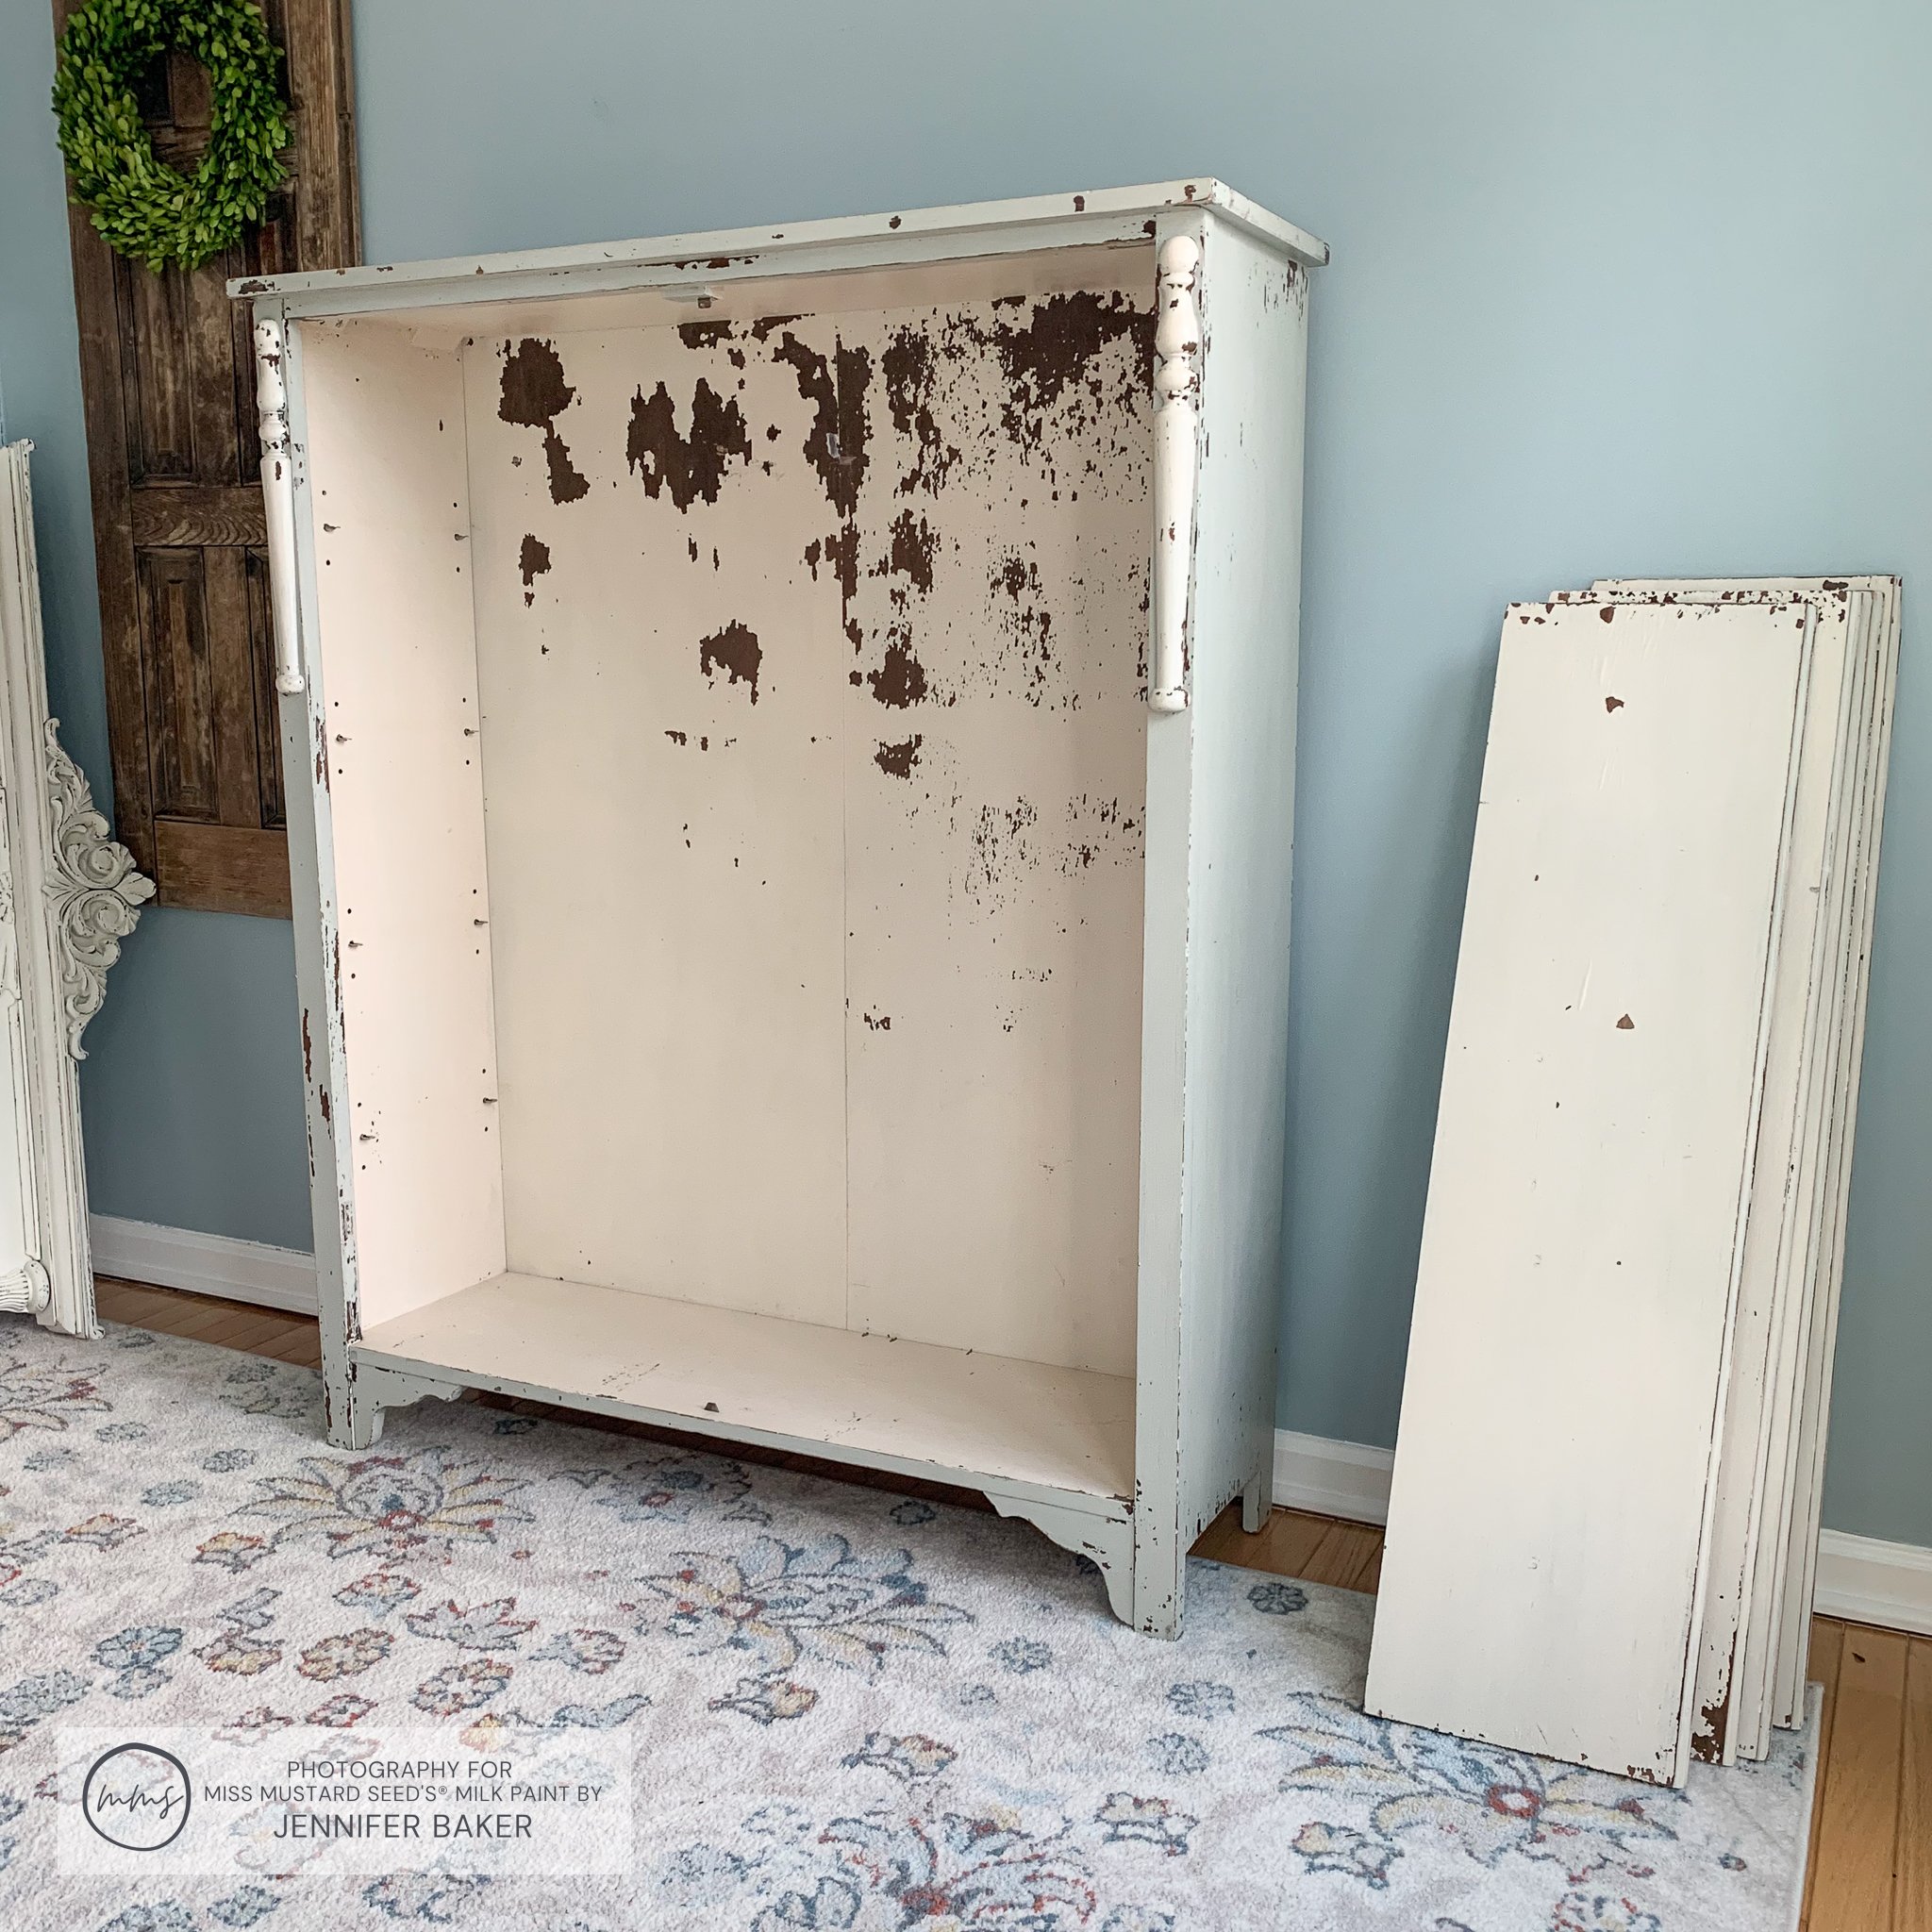
Dismantling The Display Cabinet
To start off, I made loooots of room in the dining room by moving our table and chairs.

Once I had space to work, I took all of the shelves out and removed the back panel carefully with a hammer. The decorative accents on the front were much too pretty to lose, so I gently pried them off with a chisel and flat head screwdriver.
I kept these shelves for other projects around the house

These are the decorative bits on the front that I wanted to keep
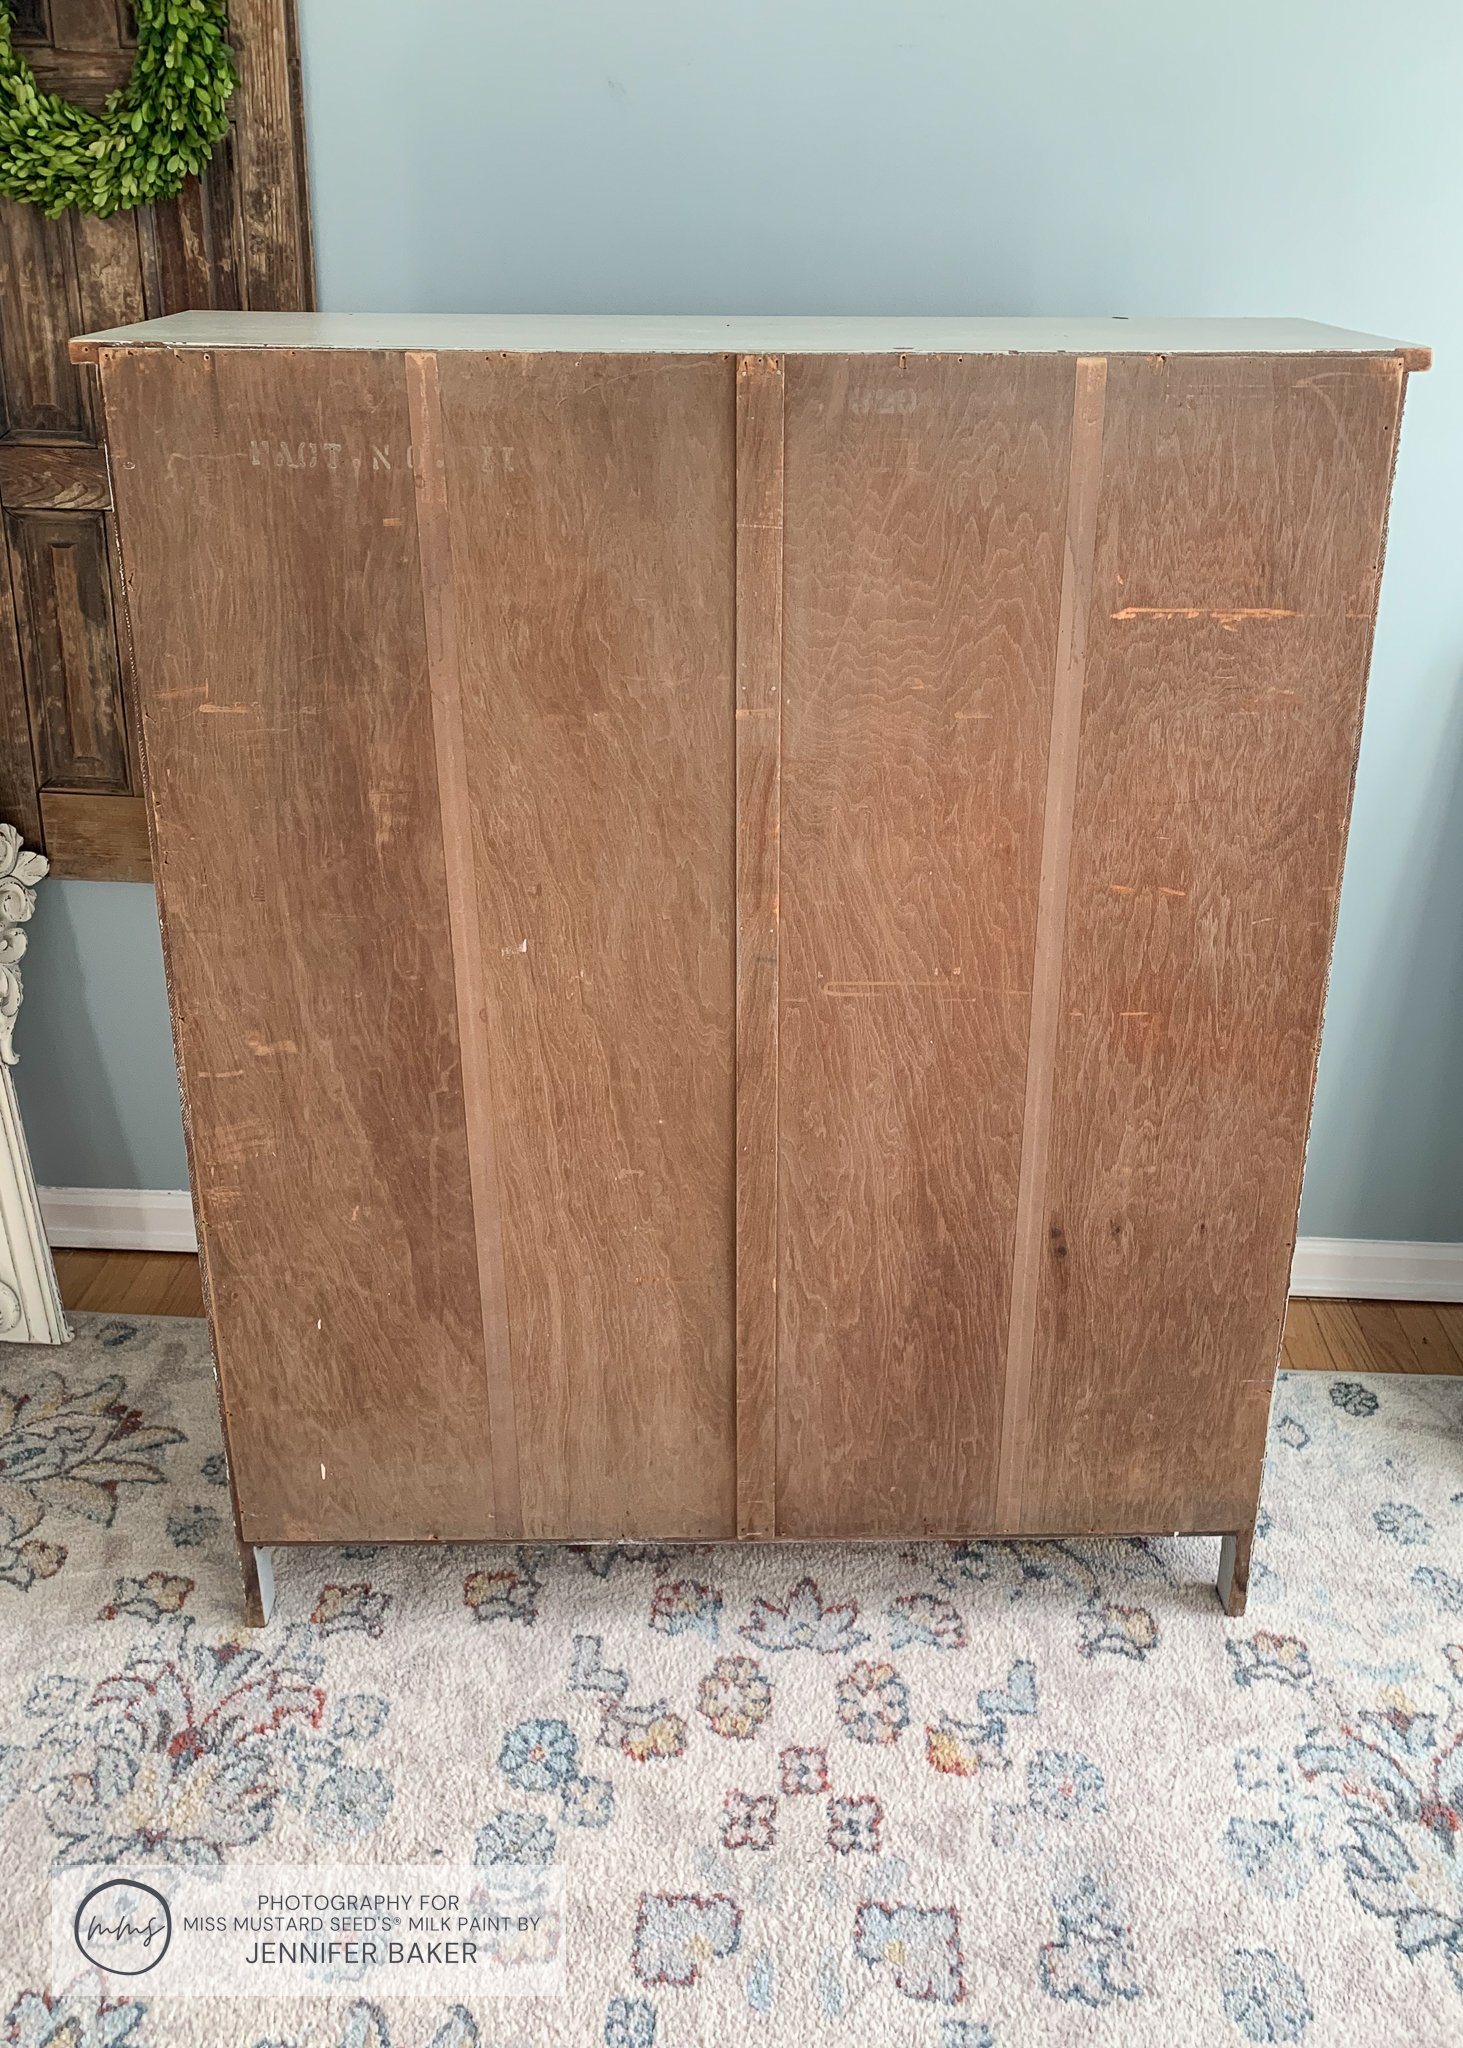
The back was held on with small panel nails

The back peeled off in no time.
Then, I laid the empty “box” down on the floor and carefully knocked it all apart with a hammer.

When I was finished, I took the pile of wood over to my parents’ house so I could clean it up and cut it to size.
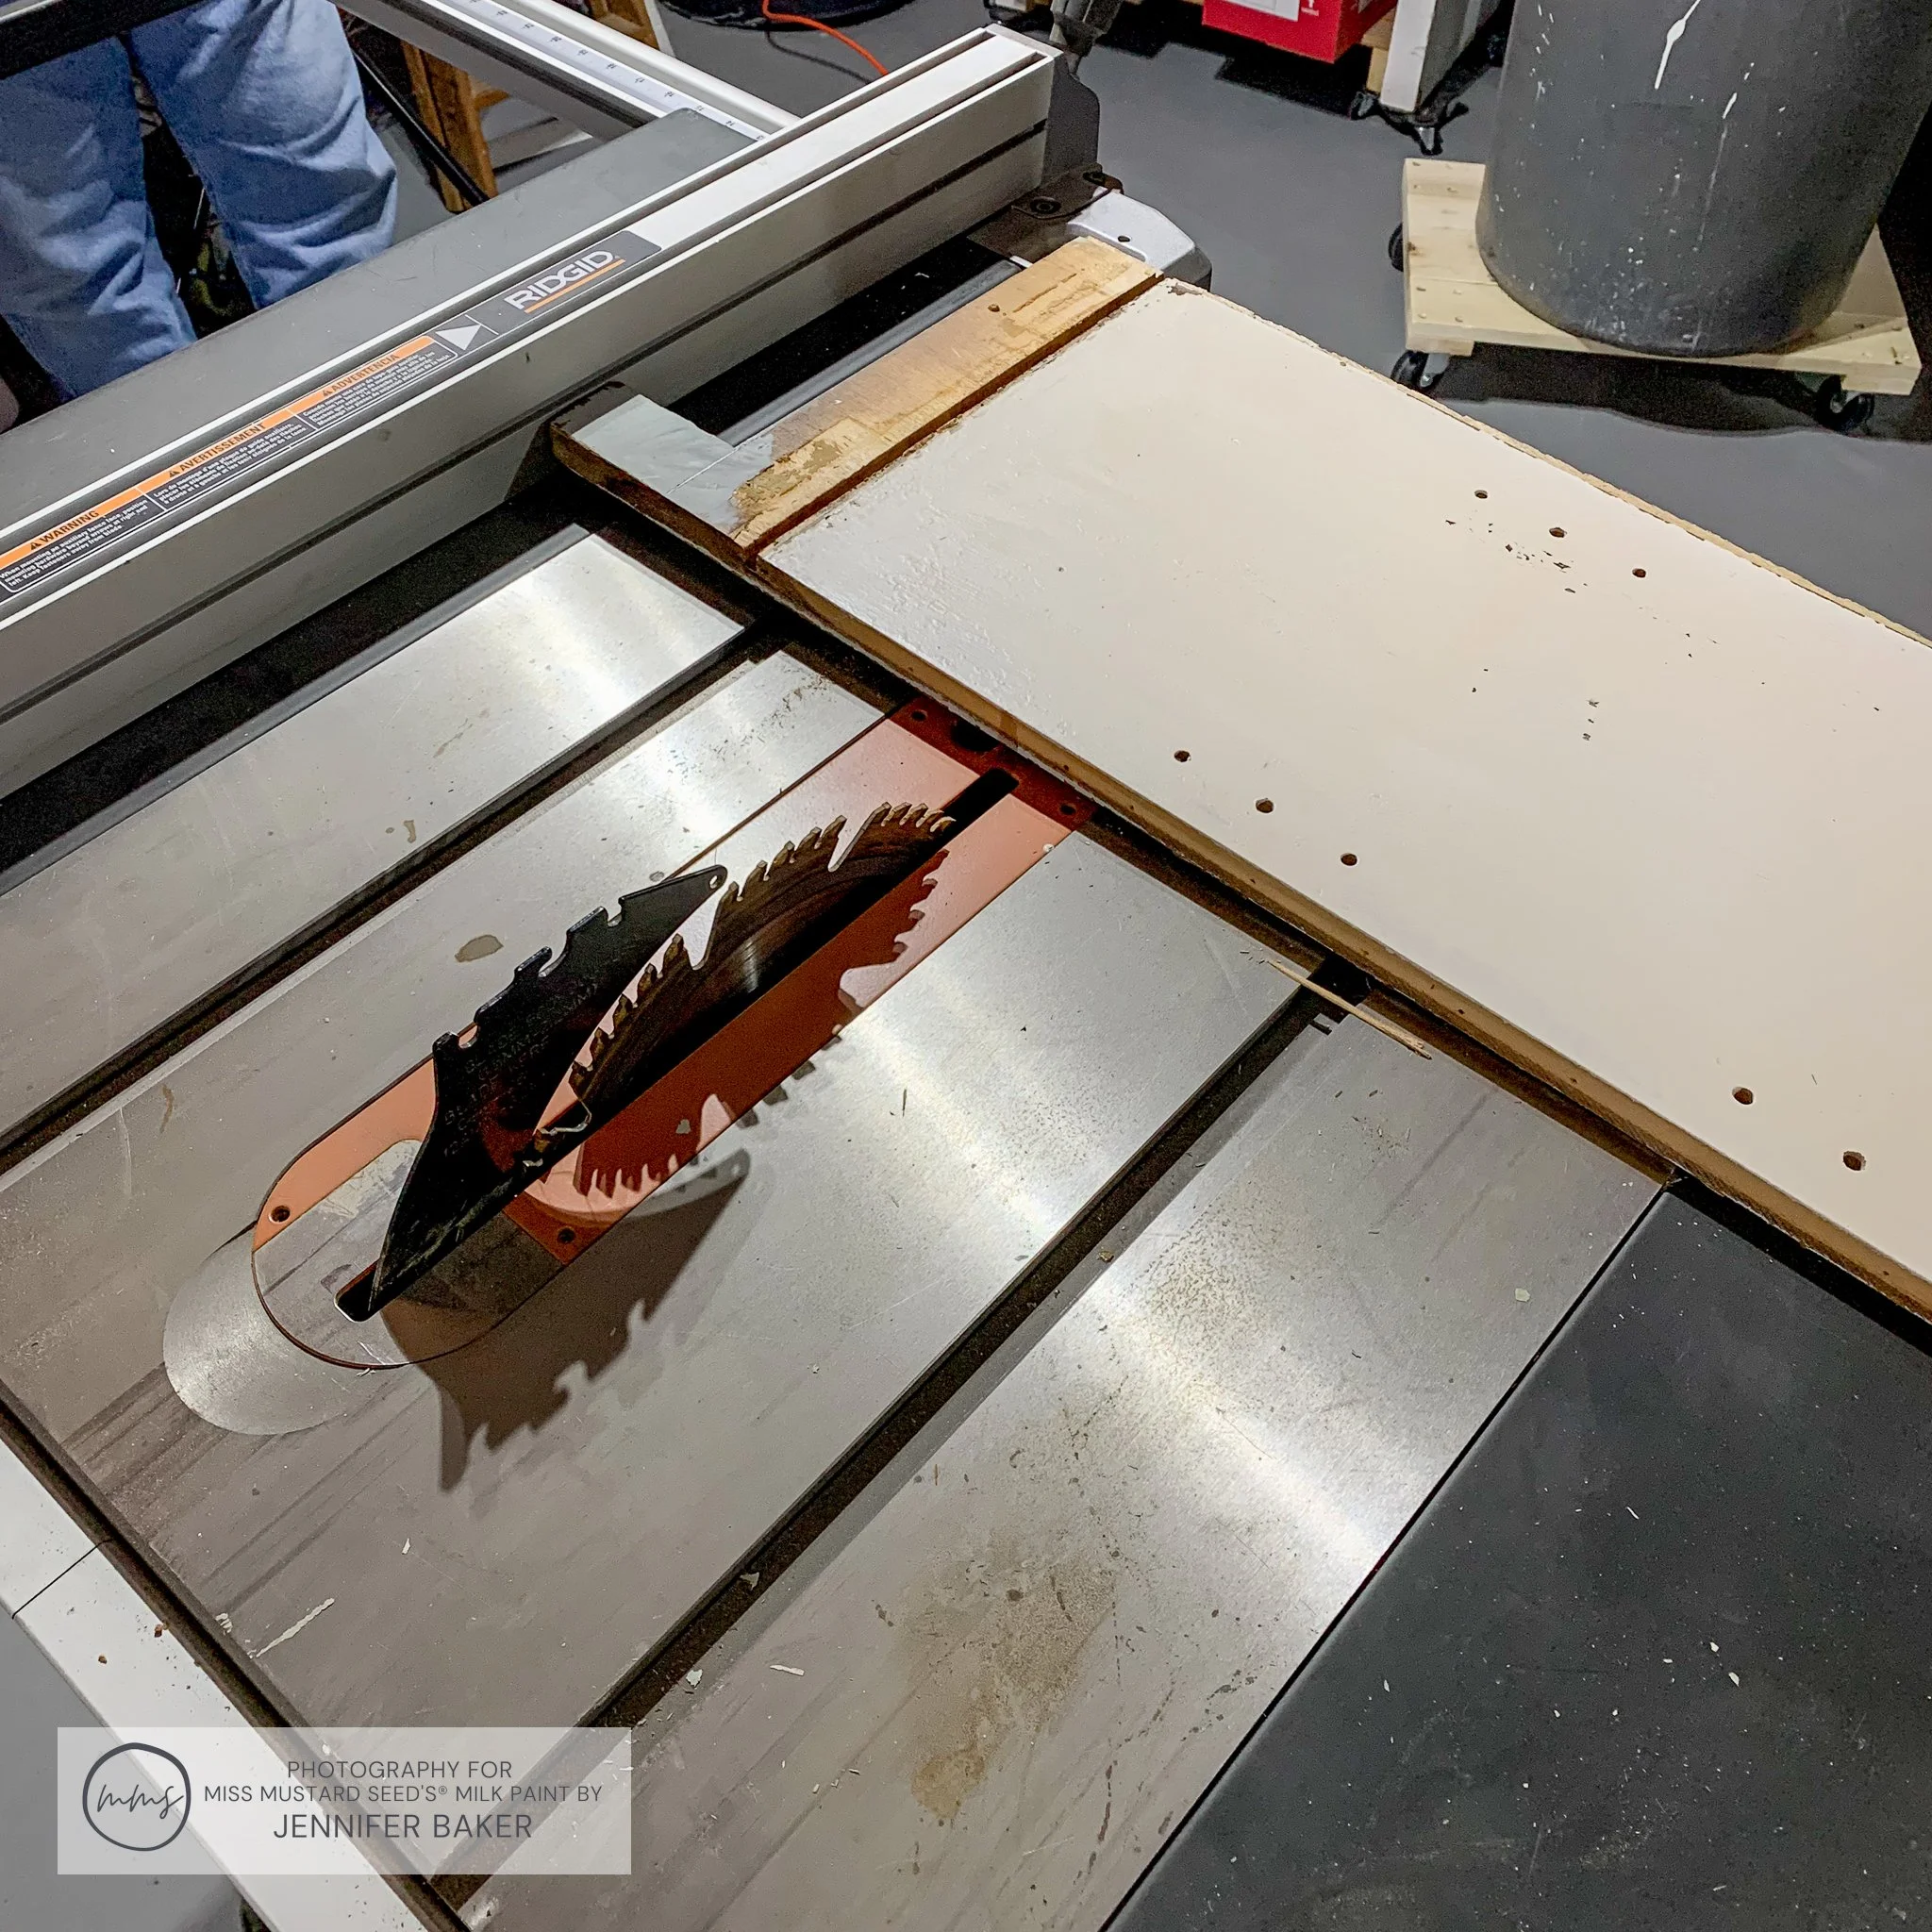
Cutting The Pieces To Size
Using a table saw, my Dad and I squared off all of the salvaged pieces of wood. We had to cut the feet off from the side, and some boards needed to be ripped down to remove damaged parts from the initial demo.
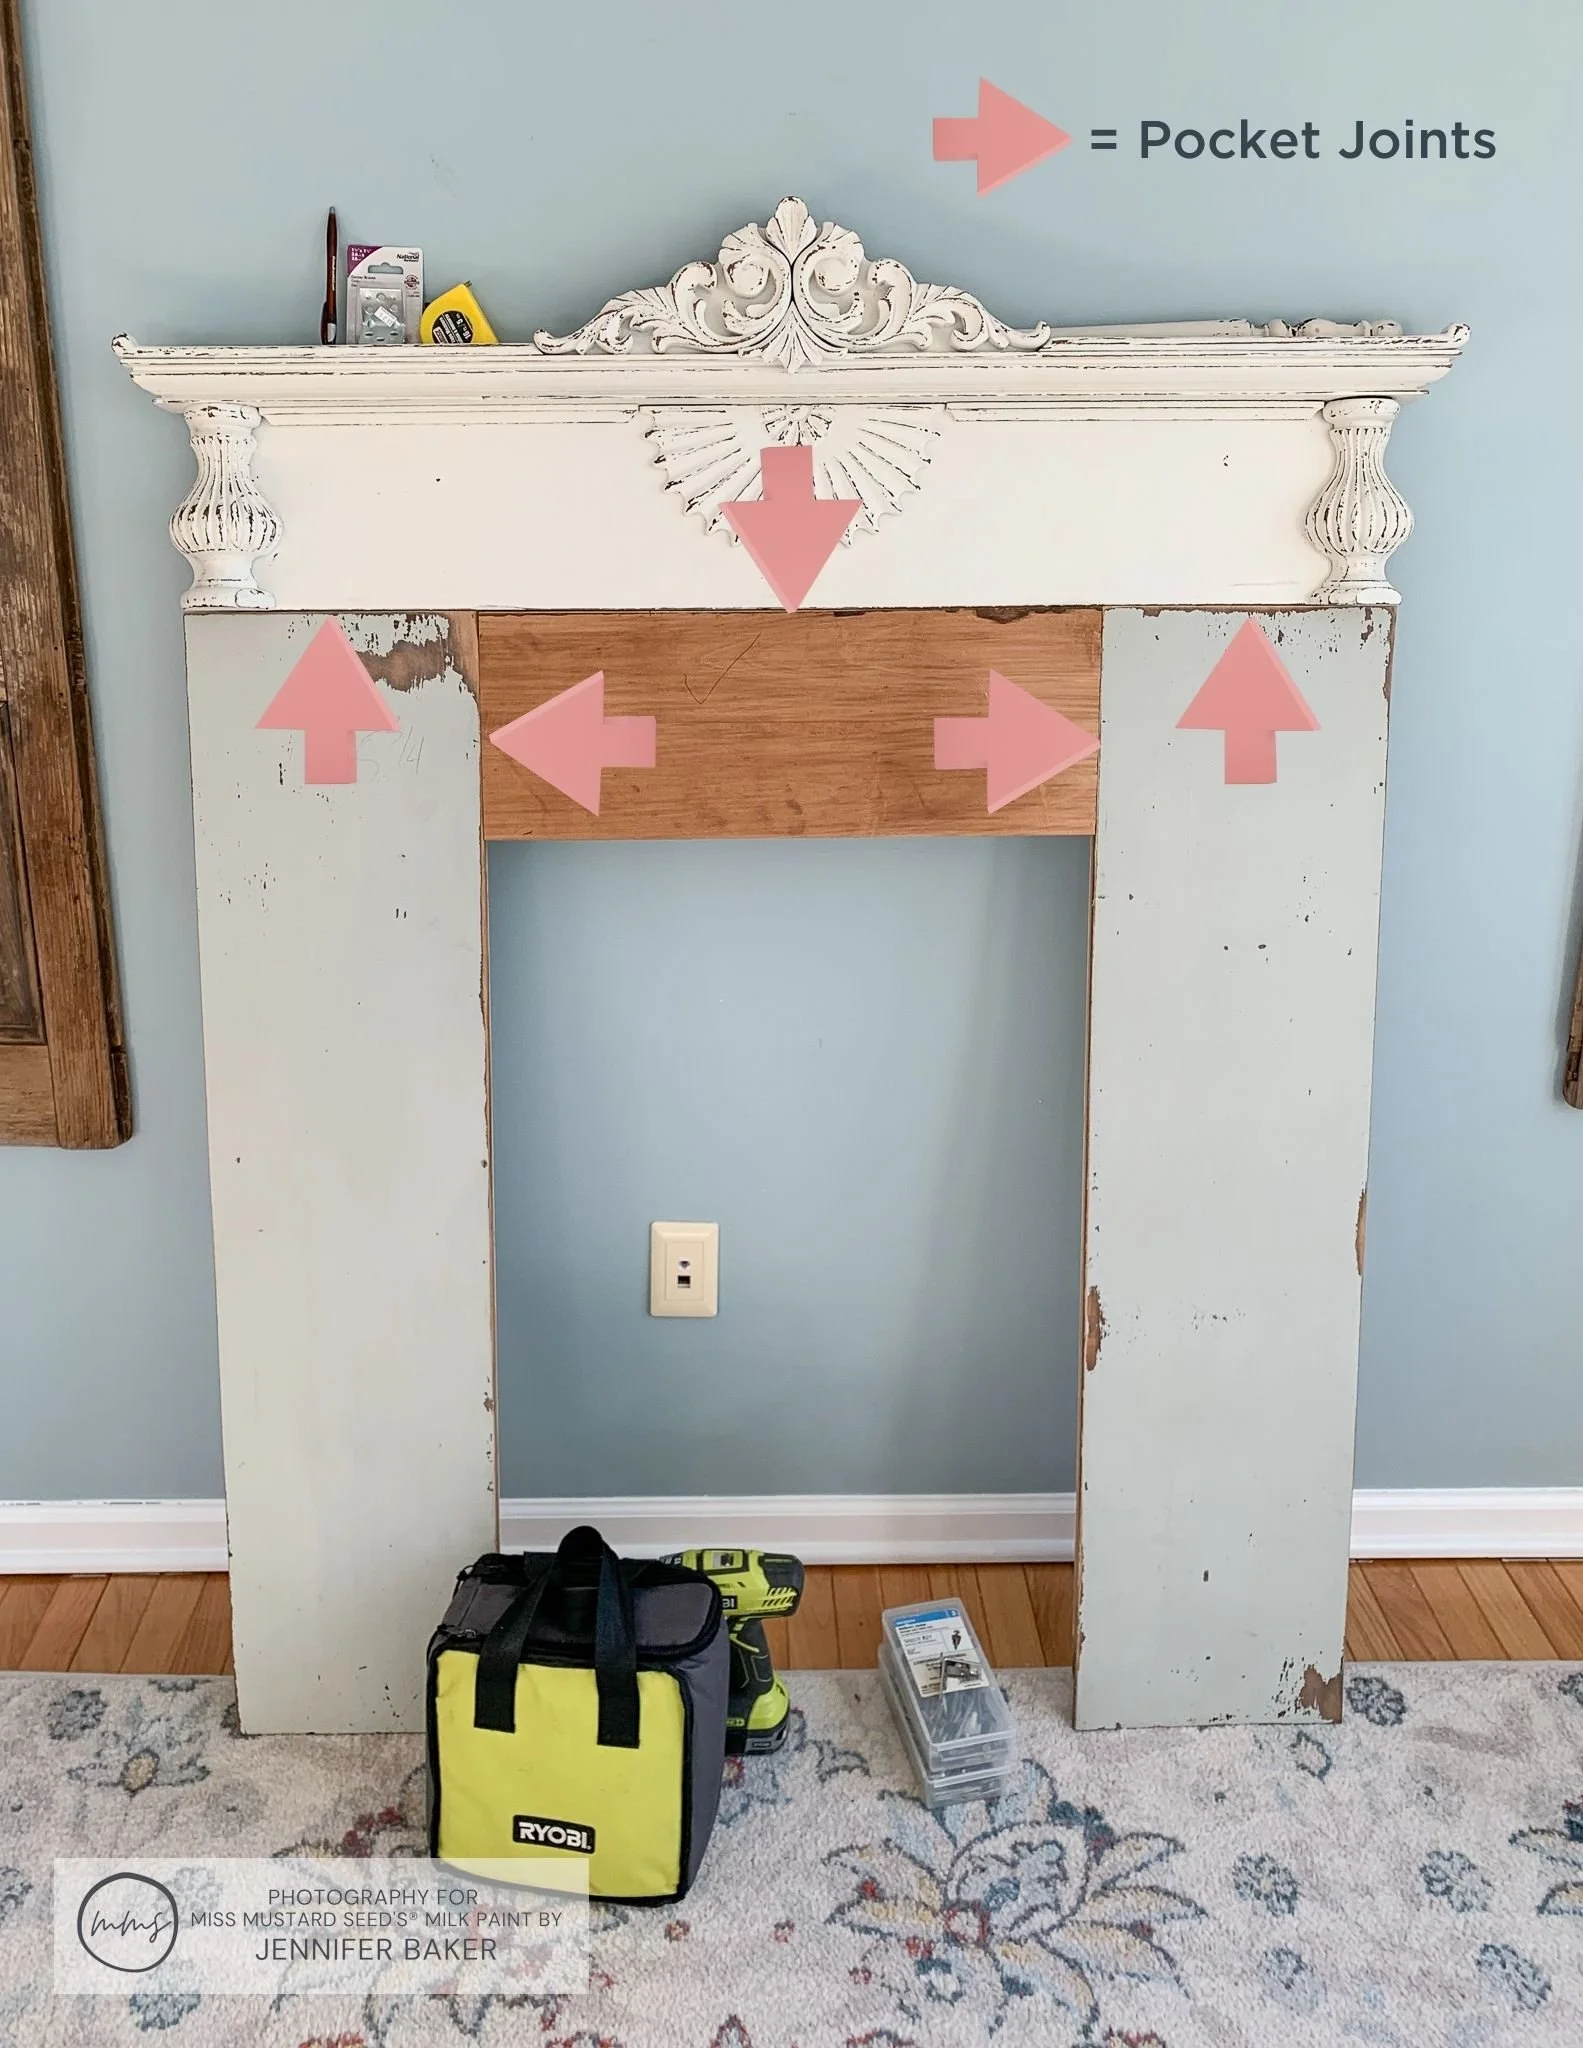
Building The Faux Fireplace Mantle
My goal was to get two long boards cut to the same length (46 inches). You can see them in the photo below. They’re actually painted in Mora!
I needed a middle piece to go in between them to stretch the fireplace mantle to the width I had determined. Your measurements will be different than mine. I needed to squeeze mine in between 2 pairs of shutters, so my width was roughly 49 inches.

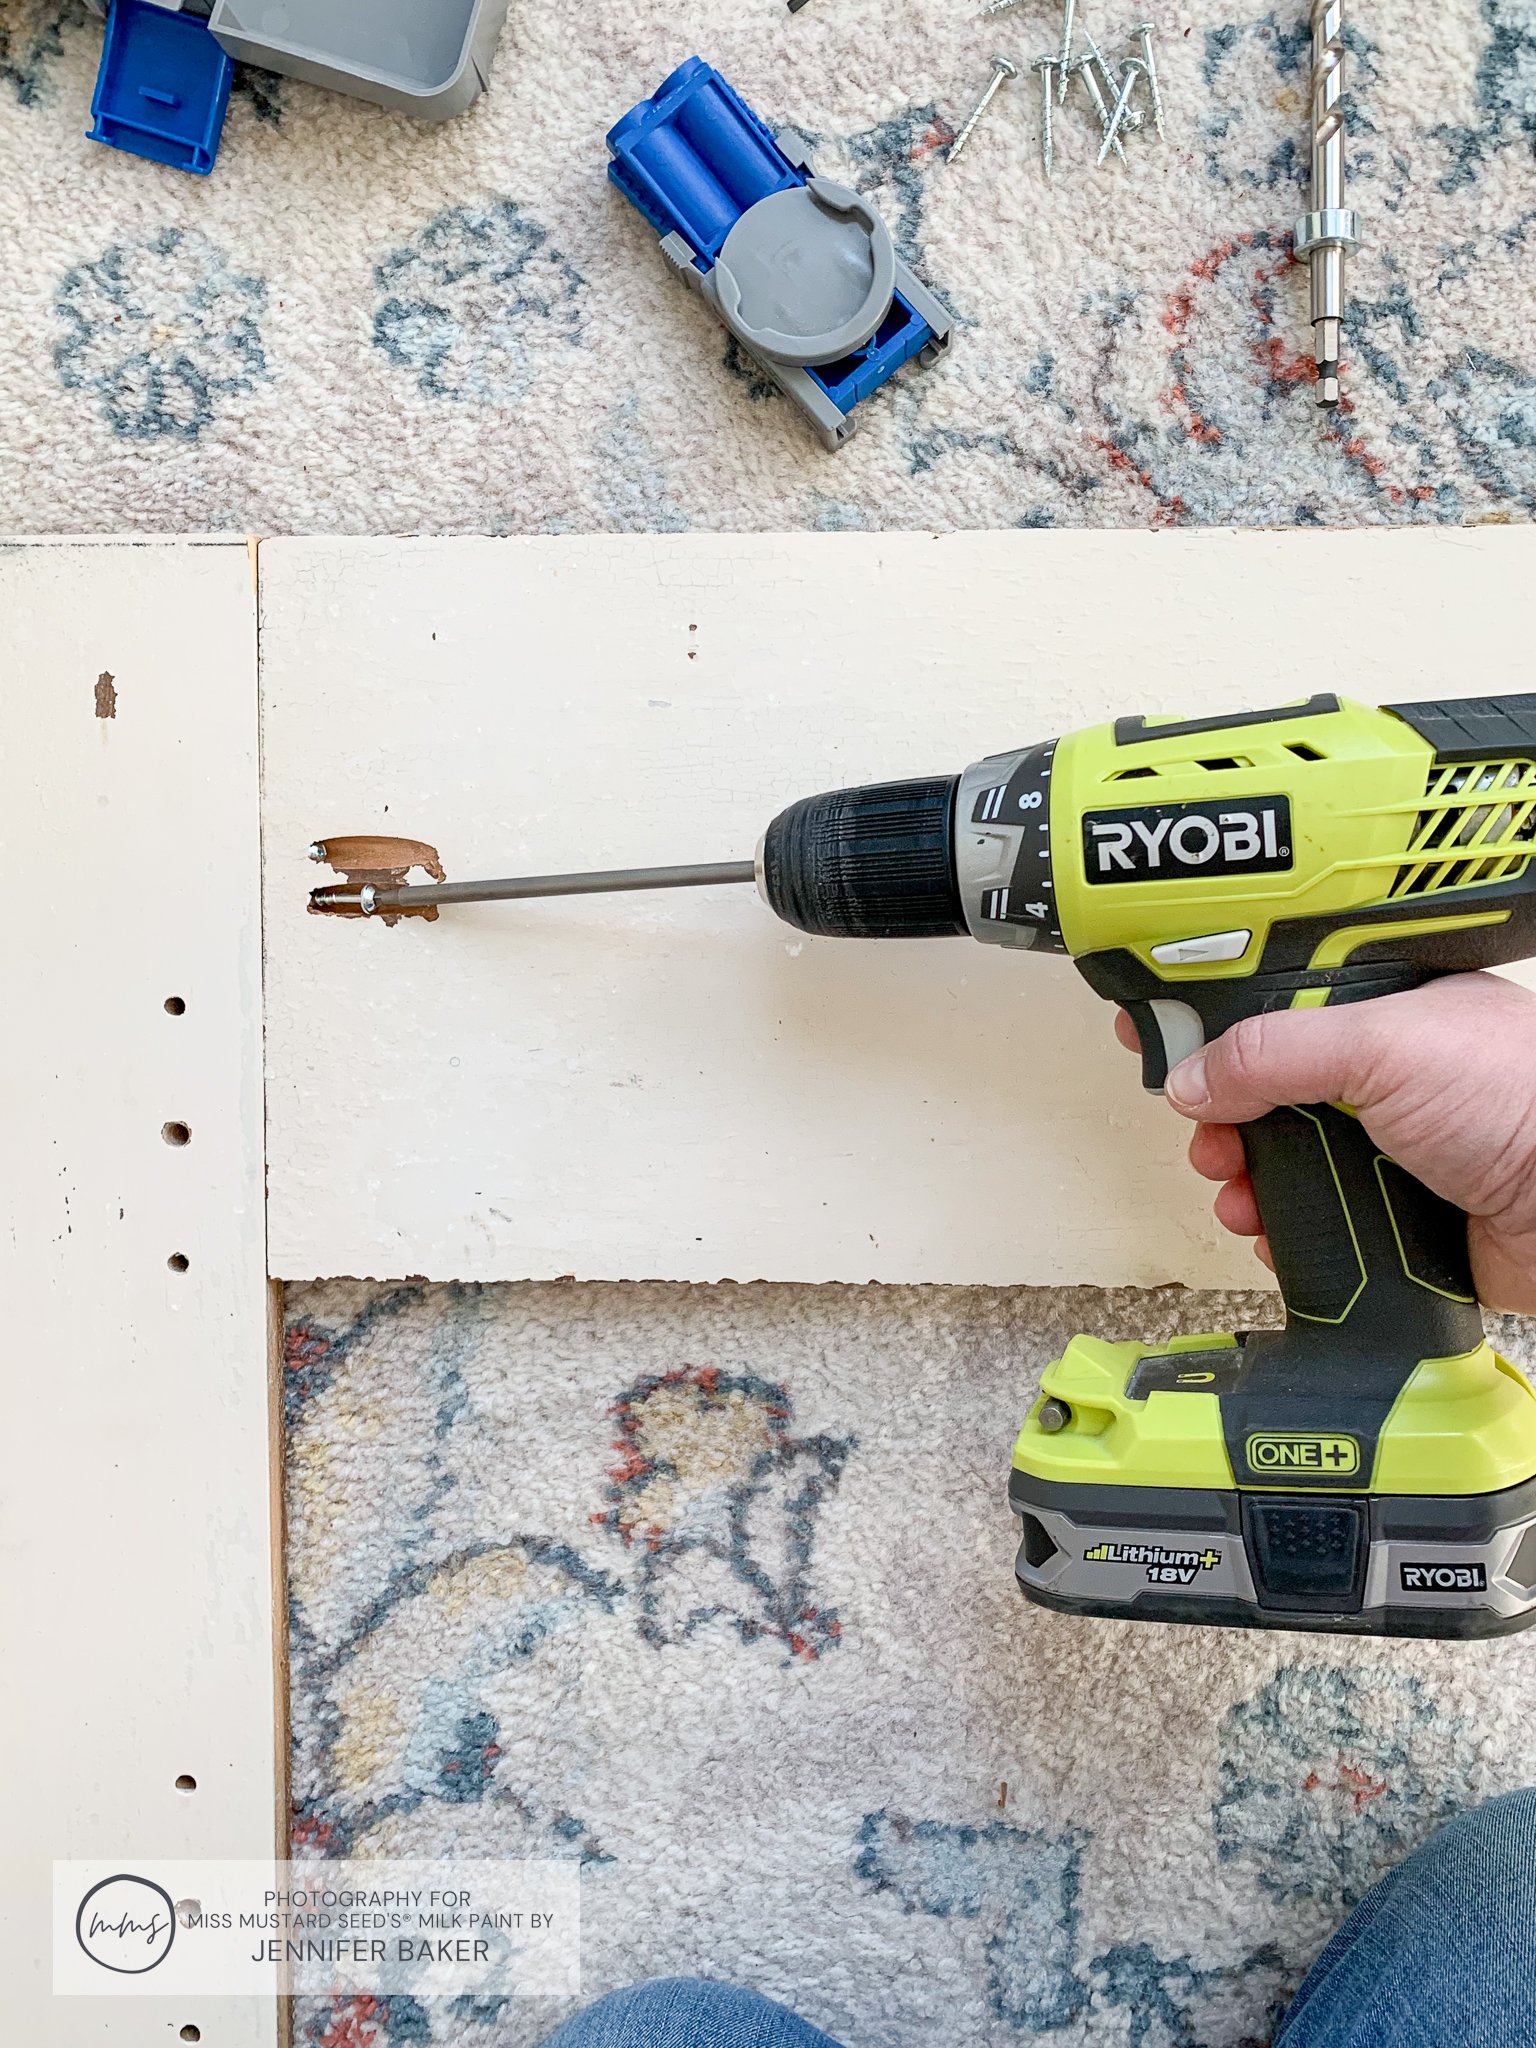
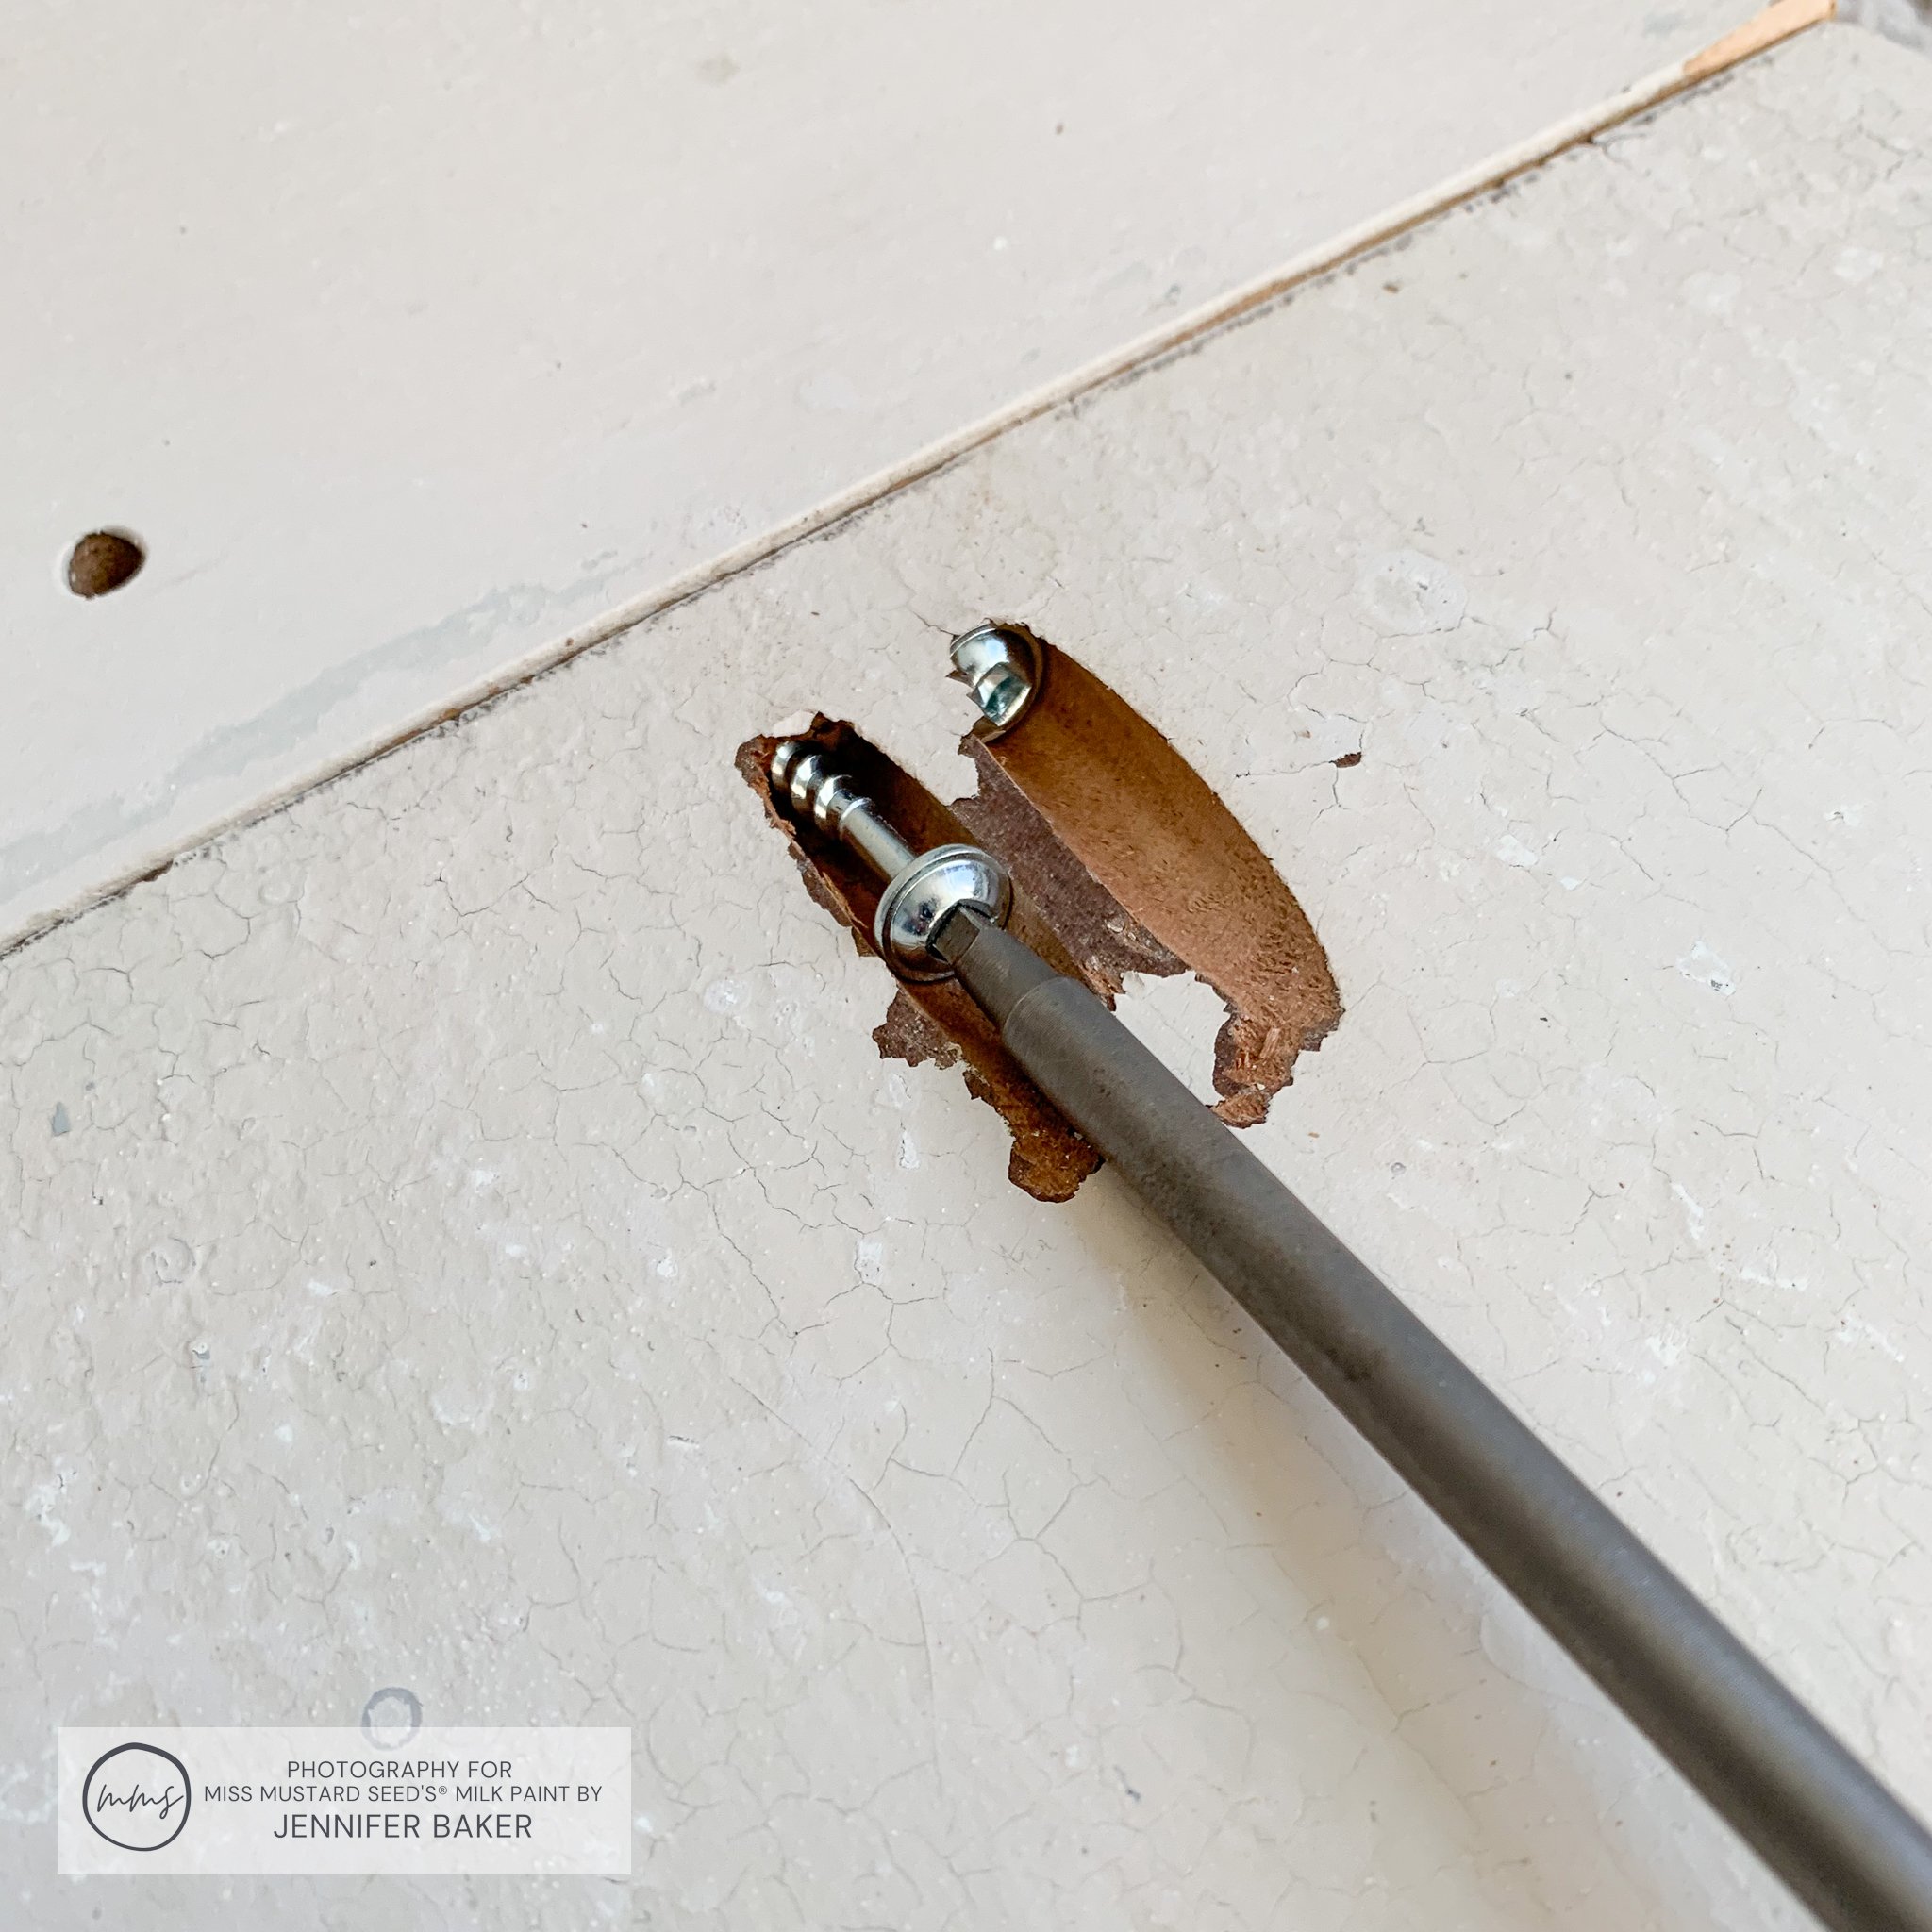
To secure these 3 pieces together (left, right and middle), I used a Kreg Pocket Joint Kit. It’s a handy little kit that helps you drill pocket holes to join two pieces of wood together in a tight, flush joint. It comes with a jig, drill bit, screwdriver bit and an assortment of screws.

First, you measure the thickness of the material you’re joining. My pieces of wood were 3/4” thick. I set the jig and the drill bit to that depth, then drilled a series of pocket joint holes. They look like little ovals.

The kit provides you with the right screws to use based on the thickness of your materials. You don’t want to punch them out on the other side, you know?
At this point, I had the basic shape of the mantle - sides and middle.
Adding A Top, Shelf And Embellishments
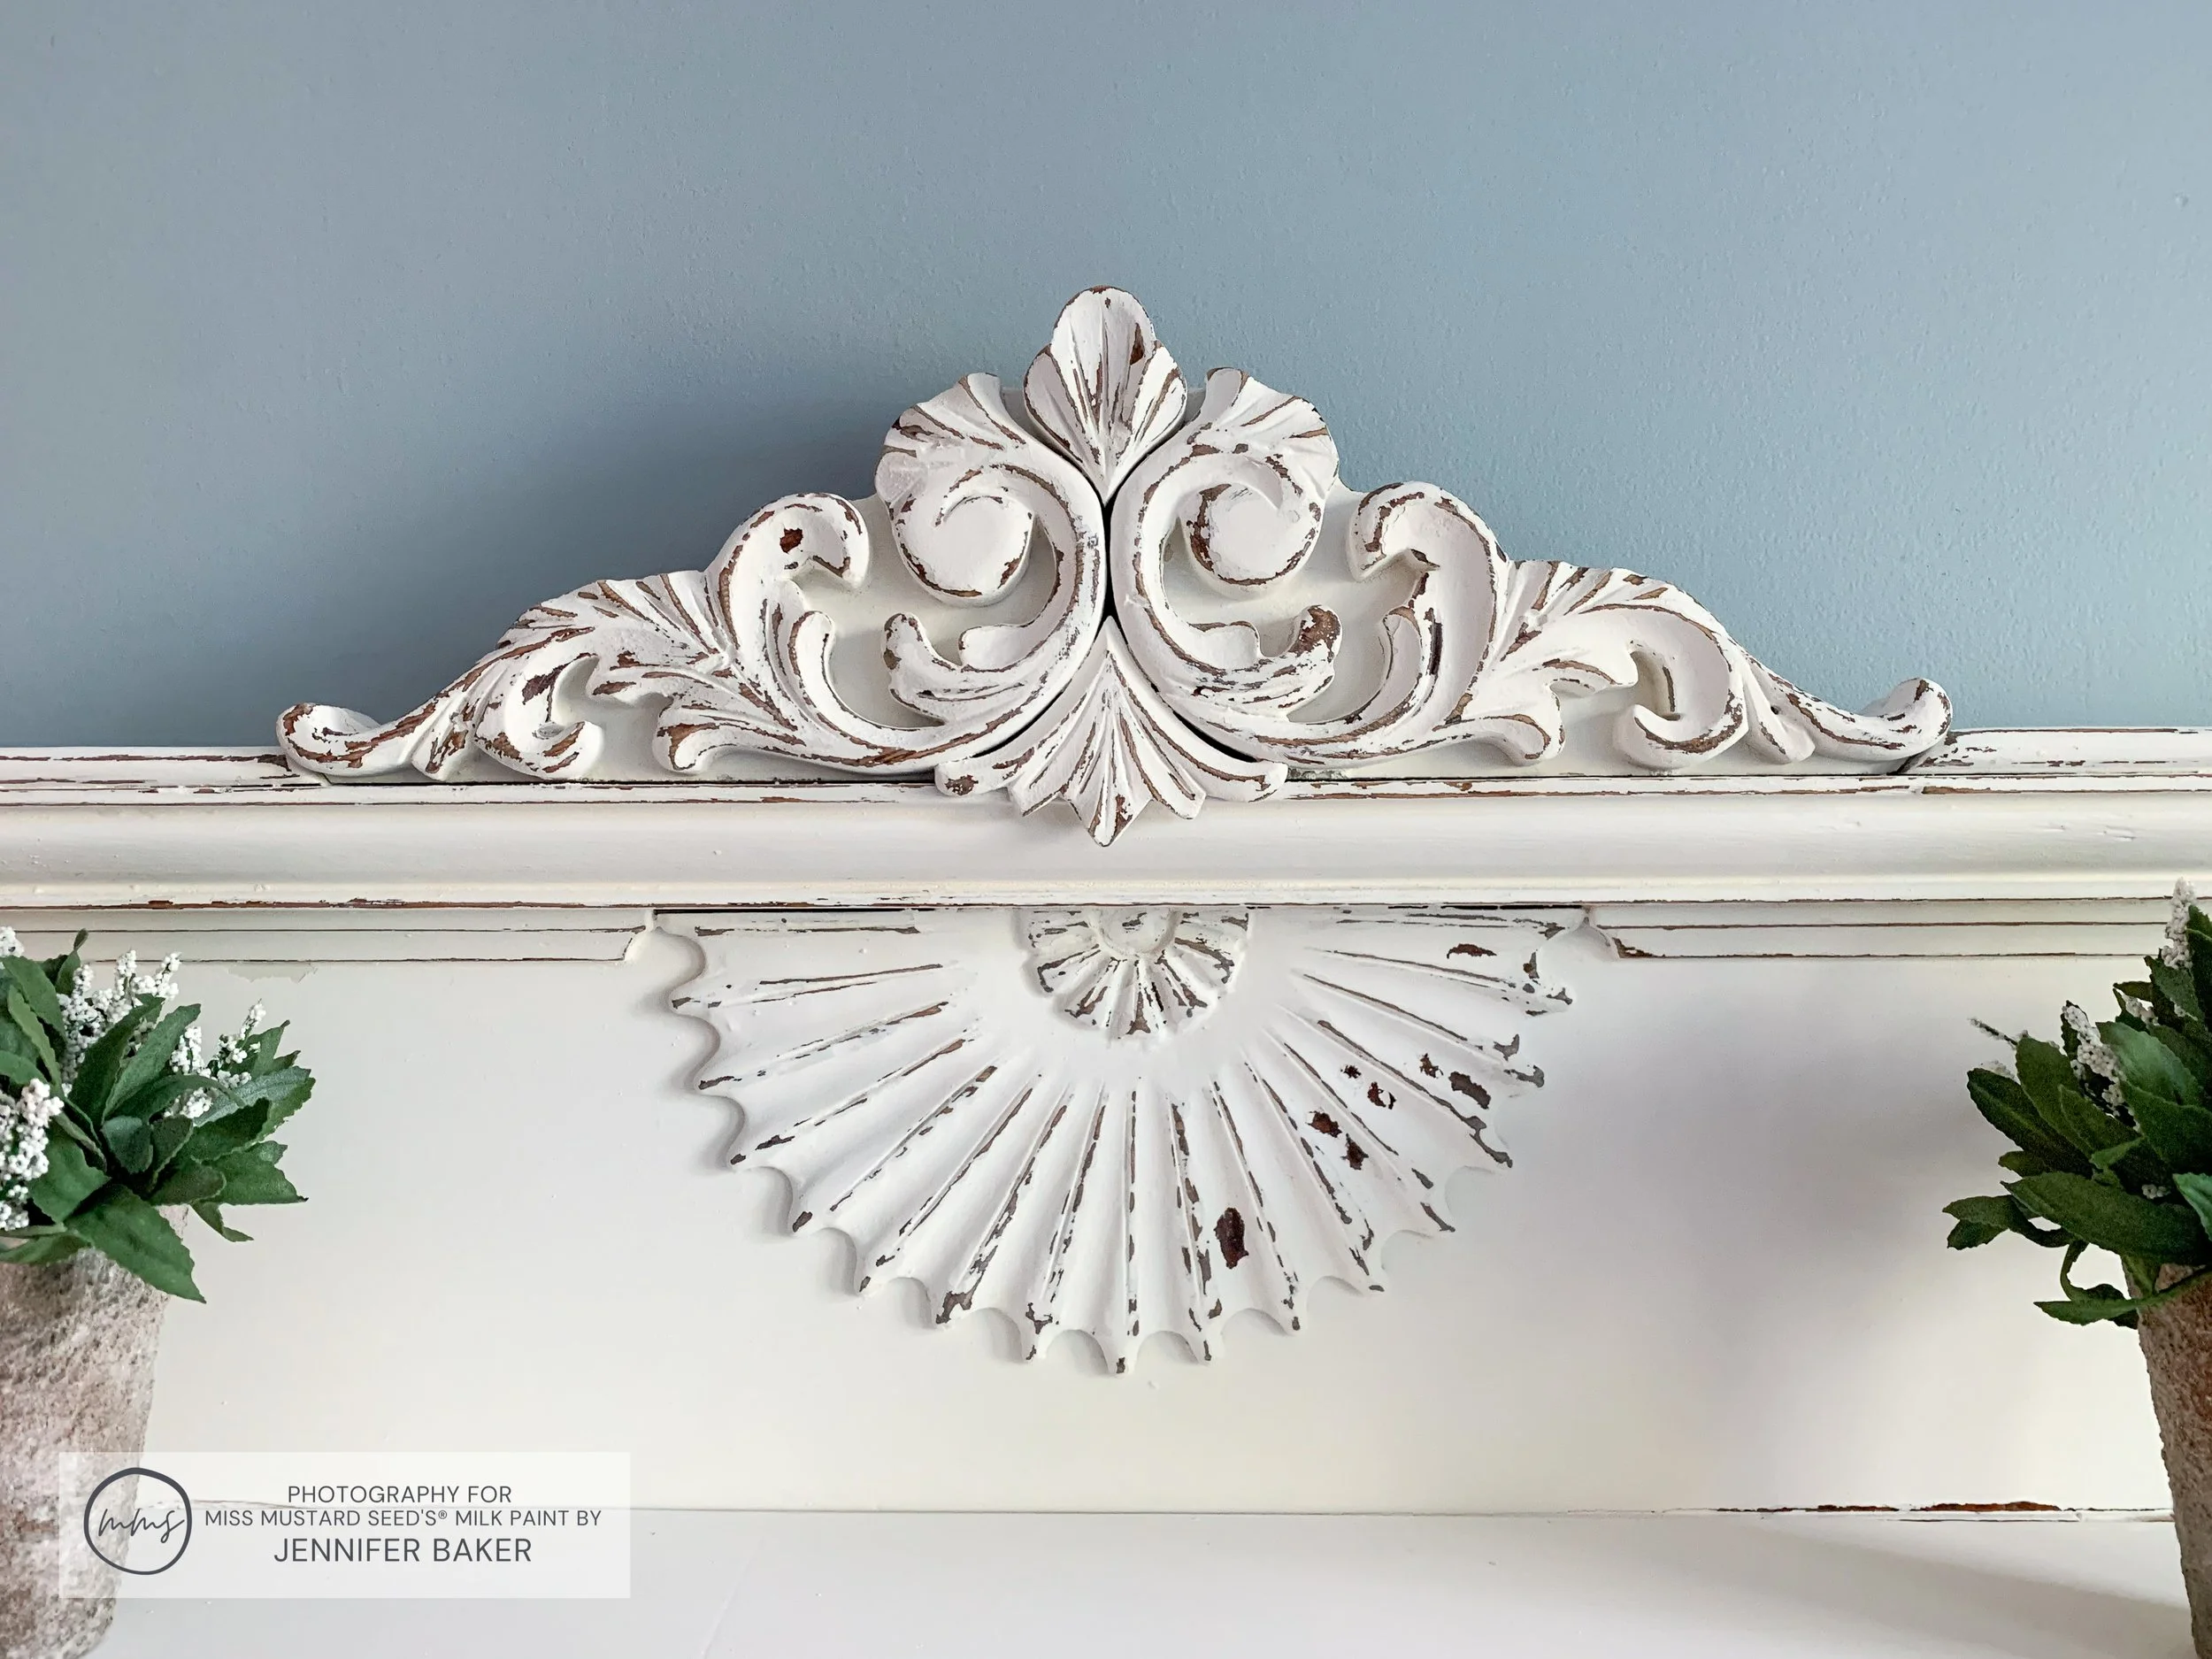
To zhoosh up the mantle, I topped it with a piece of architectural salvage that I’ve had in my stash for a few years. It was painted in Ironstone and I was never really sure what to do with it before now. What a fitting way to repurpose it, right?
This diagram shows you where I placed all of my pocket joints.
Next, it was time to add the shelf. Because the mantle was going in our dining room, the shelf couldn’t stick out too far. Otherwise, people would snag their shoulders on the corners as they walked around the table.
I went to my local hardware store and picked up a piece of 1 x 4 lumber along with 2 wooden corbels.

Next, my husband and I took some measurements and hung the corbels in the middle of the side pieces. The height was just enough to allow the shelf to slide in between the corbel and the architectural salvaged top.
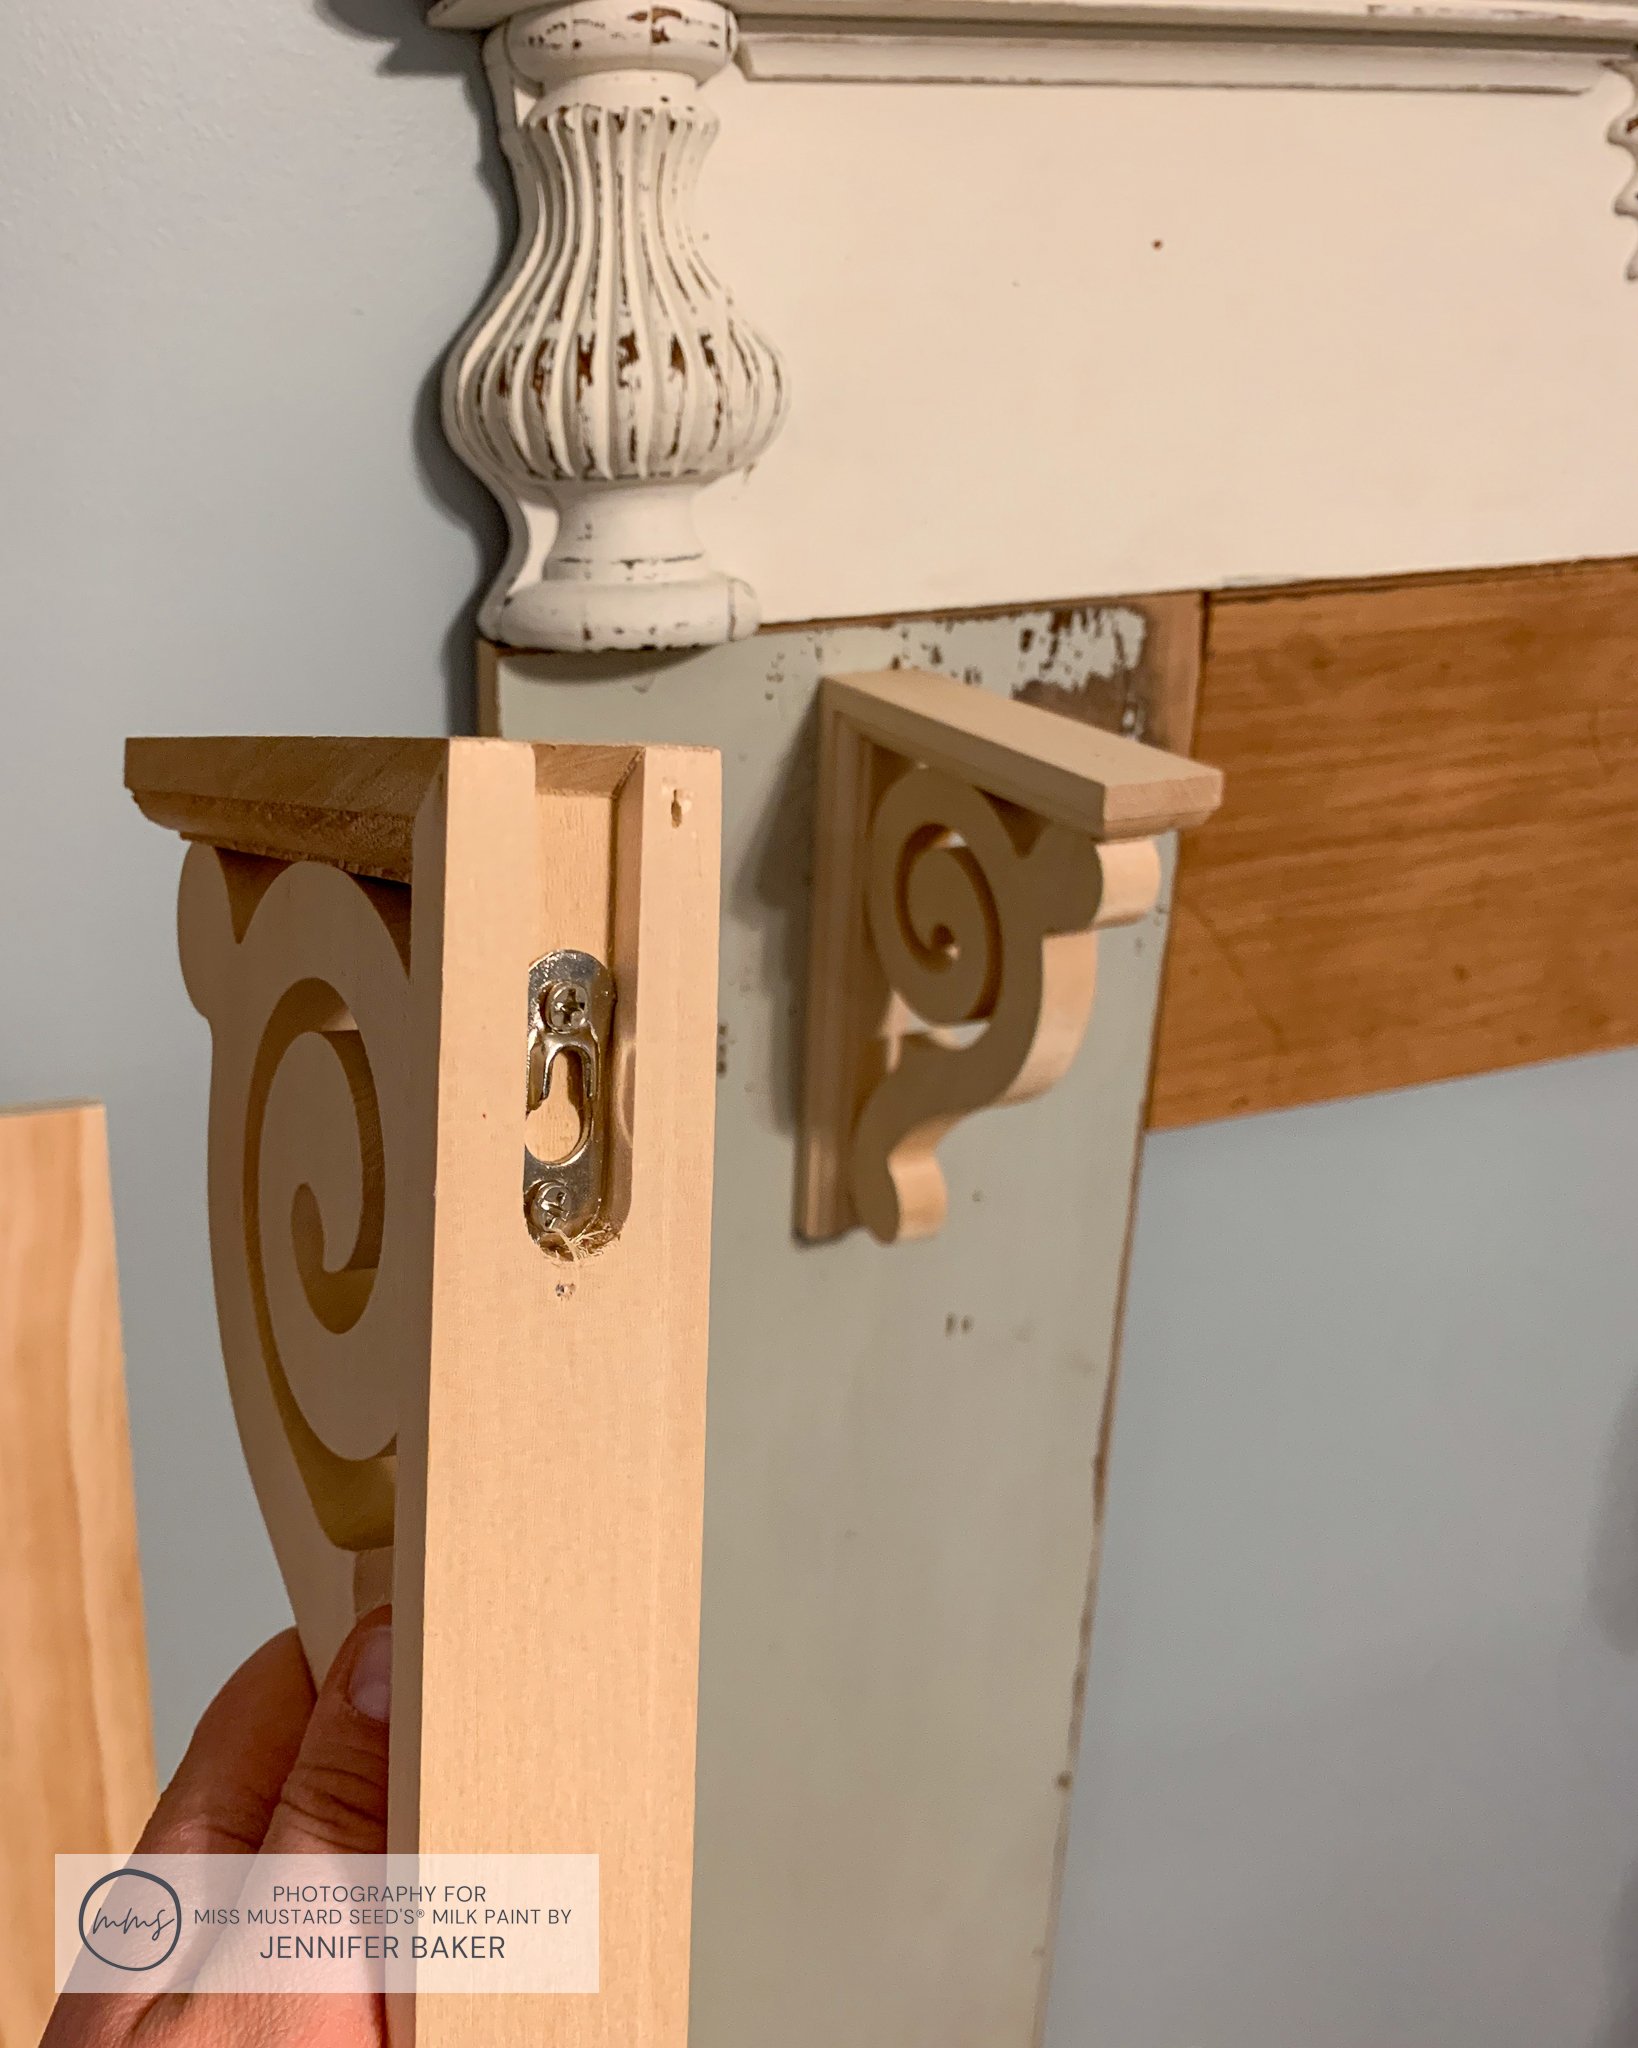

Once we had the placement of the shelf figured out, we decided where we wanted to put the salvaged embellishments from the original display cabinet. We decided to put them a few inches below the corbels, but right in line with them.
Using a hammer, we gently nailed them back on.


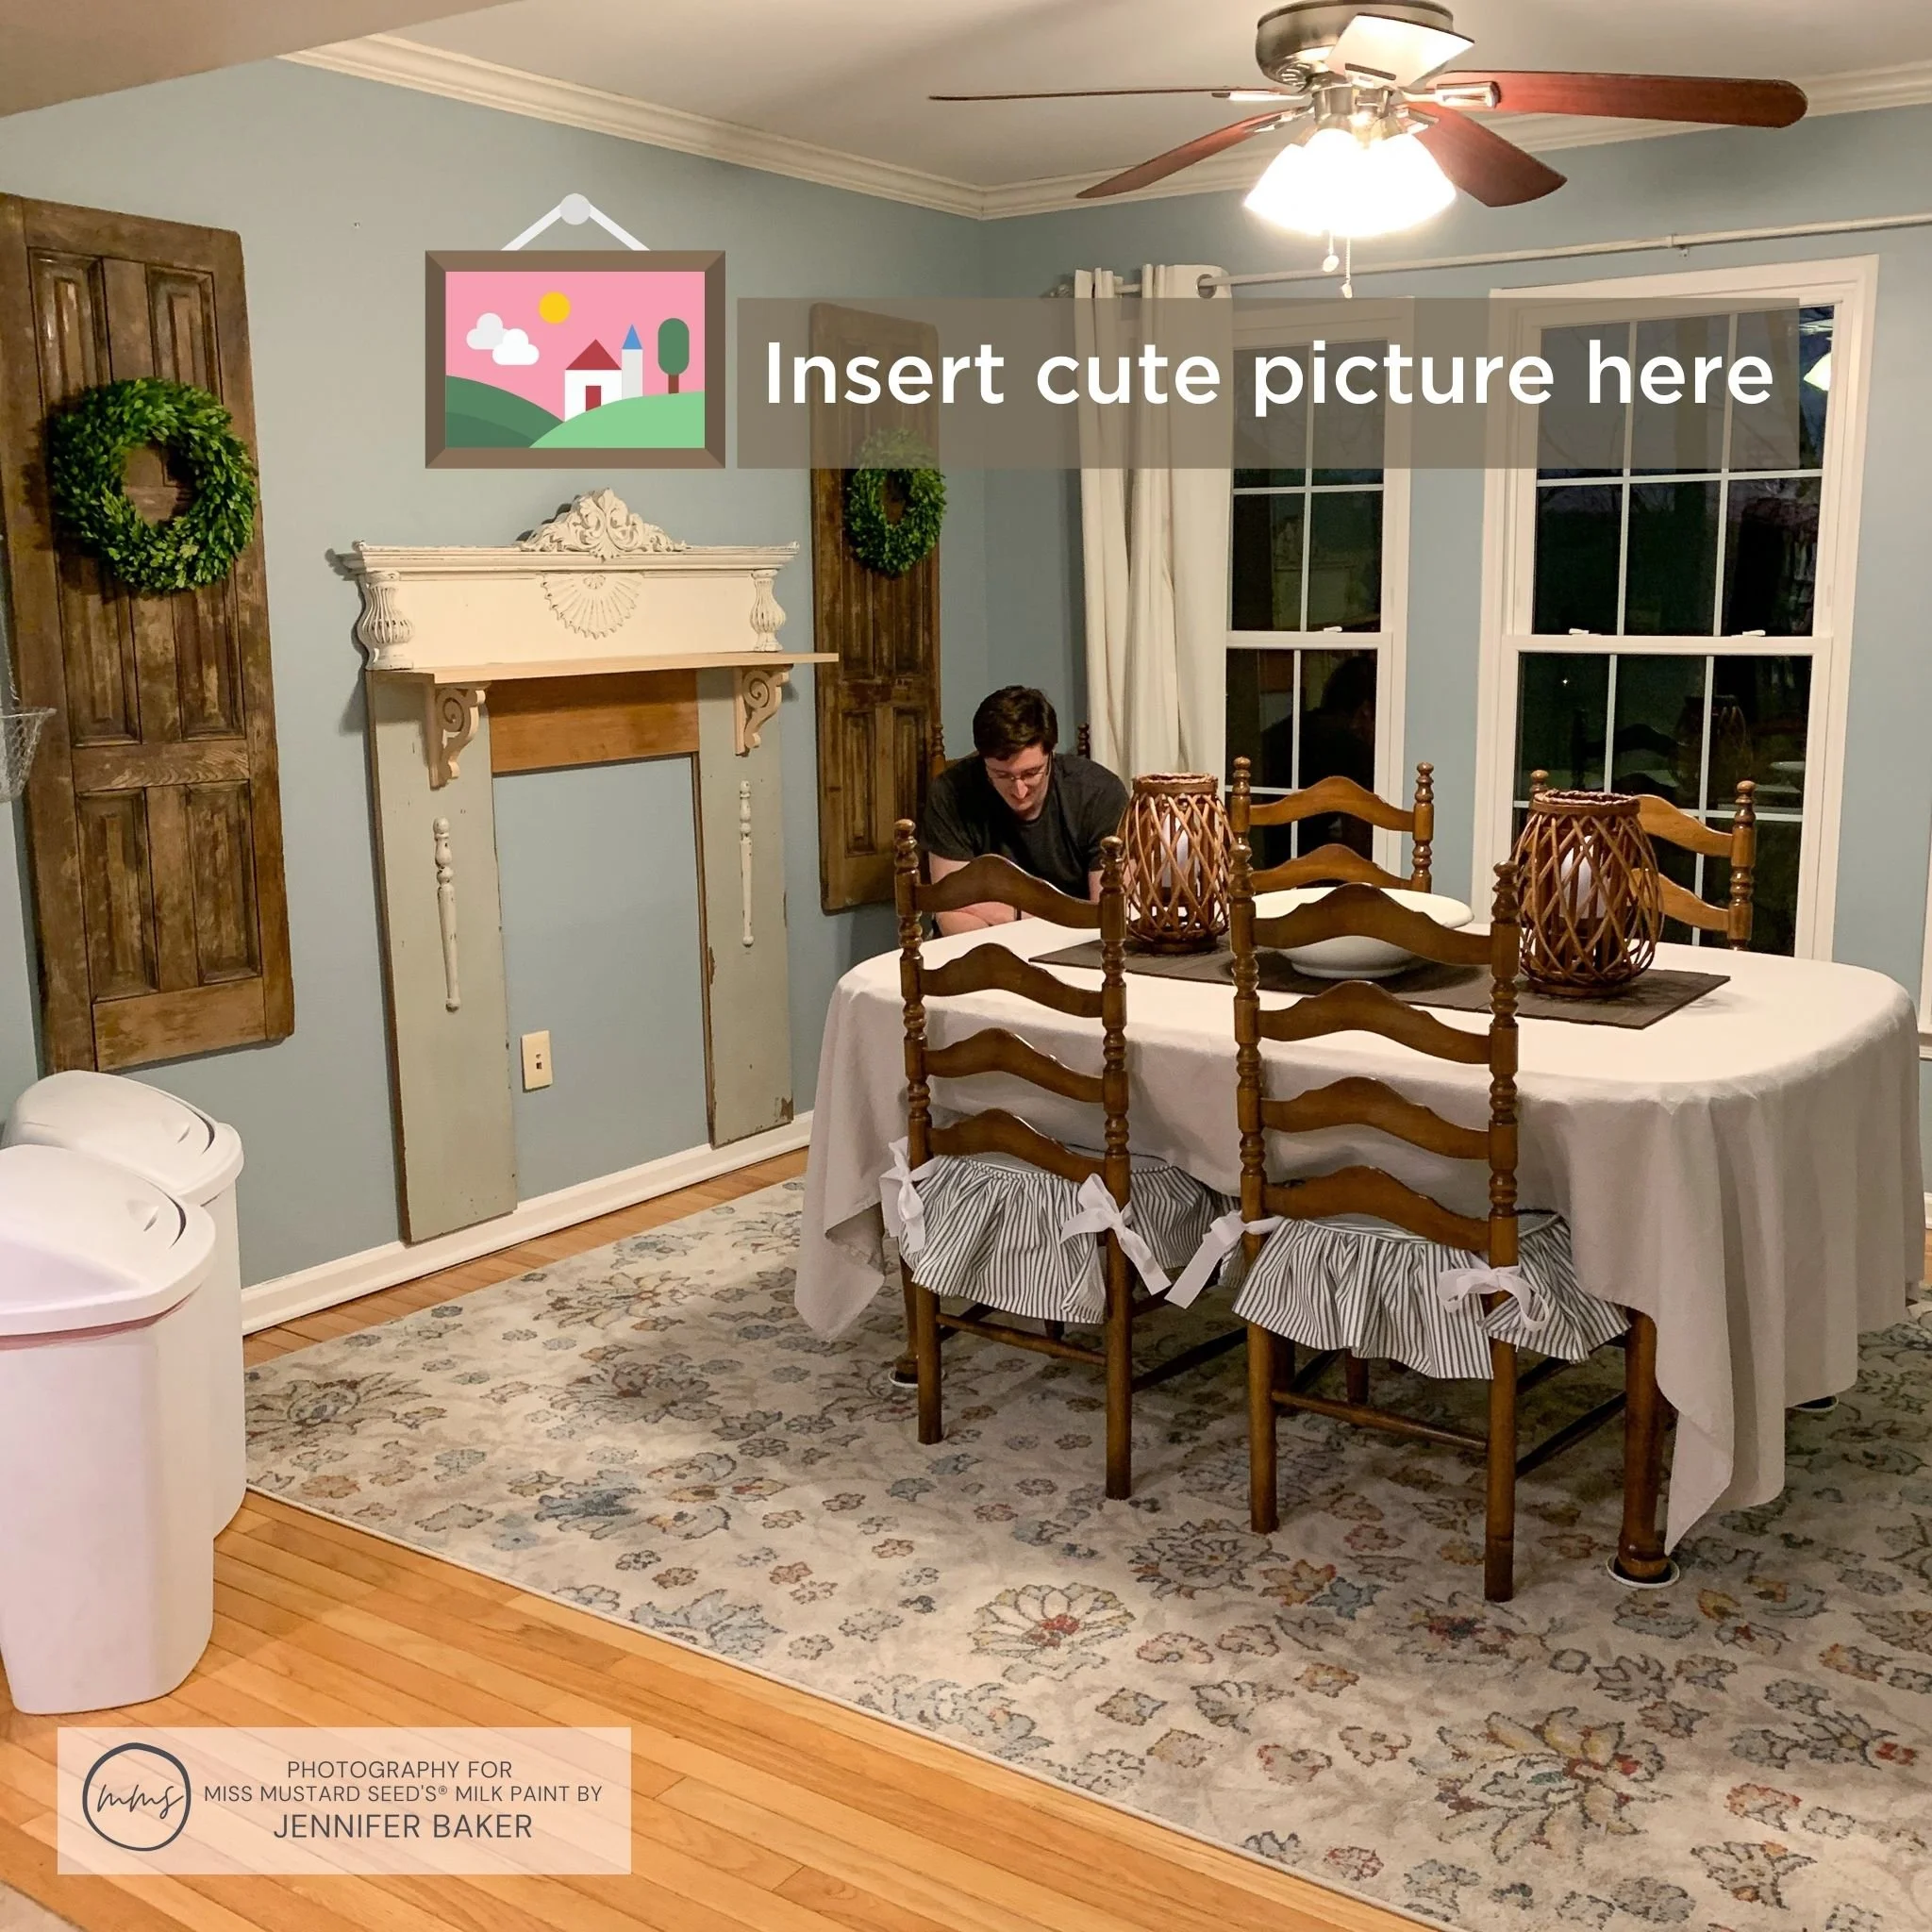
To make sure everything was looking good, we hung the mantle up on the wall and moved the furniture back in. The fireplace is on the shorter side (because the bookshelf itself wasn’t that tall), so we thought a landscape photo from our wedding would fill the wall space above it nicely.
Priming And Painting The Mantle
I decided to paint the faux fireplace mantle in Ironstone. Not only would it match the architectural piece on the top, but it would pop nicely against our dining room wall, which is painted in Oceanic Climate by Behr.

I had already scuff sanded everything by this point. Actually, I used a sander to scuff everything up when I was cutting the boards to size. It certainly paid off at this point!
To prevent bleed through, I applied 2 generous coats of General Finishes Stain Blocker. It’s my absolute favorite primer, and I always use it to seal in any troublesome stains. It’s water-based which means soap and water clean up. It also doesn’t smell strong, like shellac does, so it’s great to use indoors!
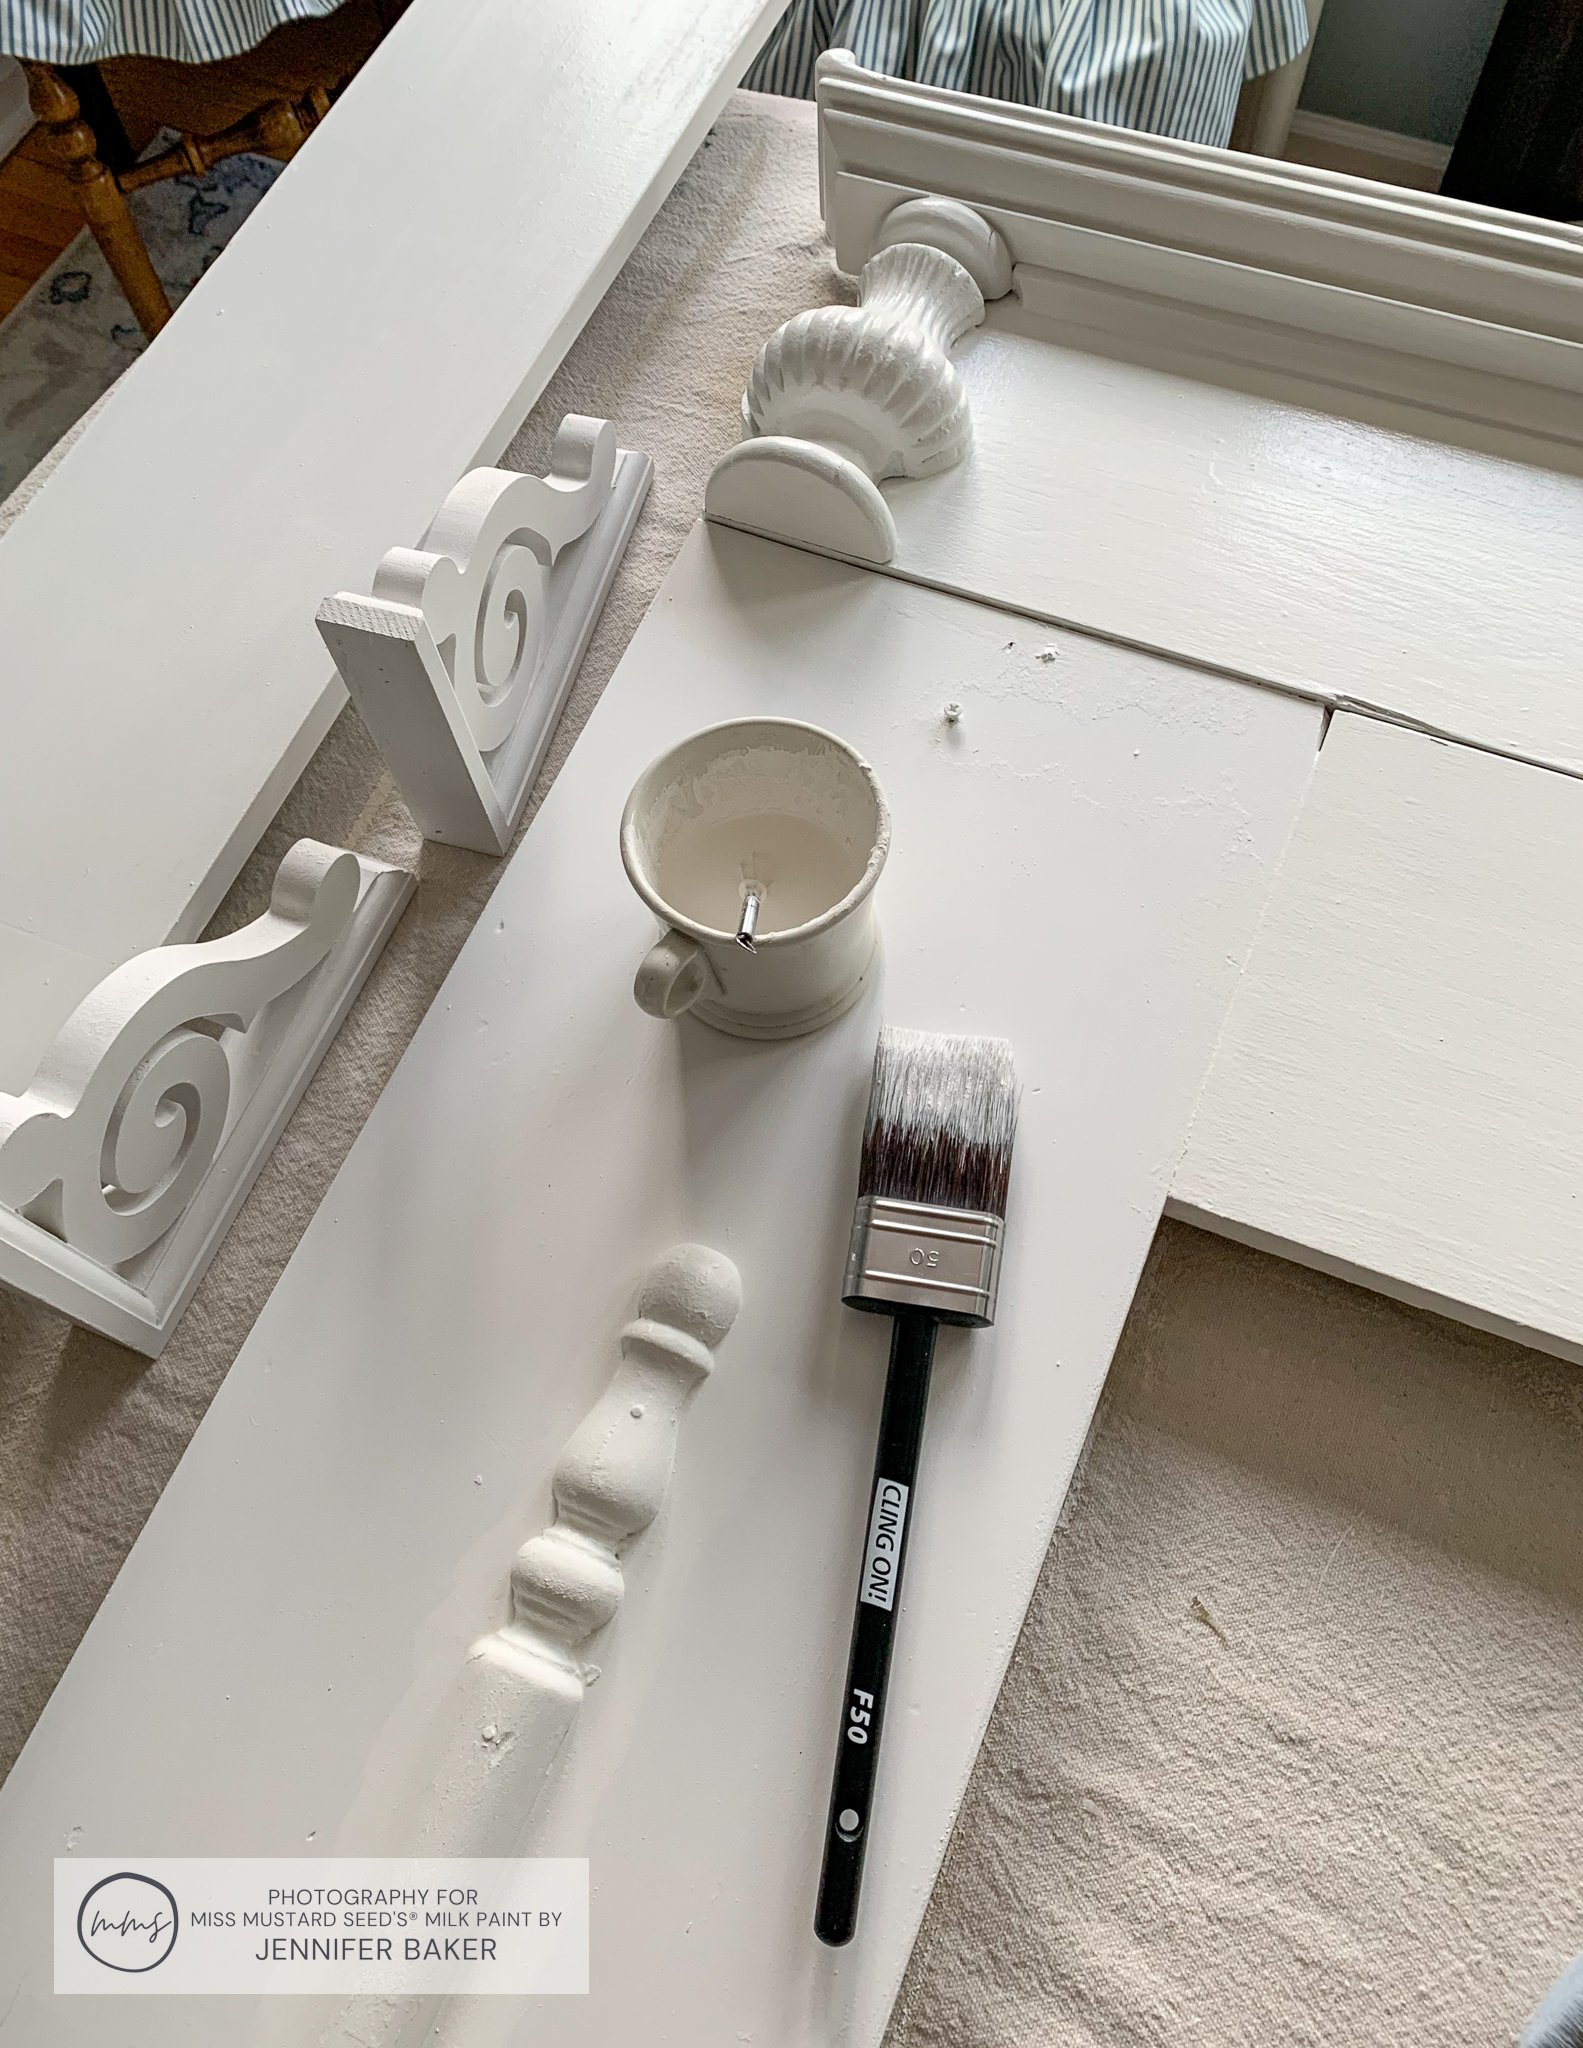
After the 2 coats of primer were dry, I painted on 2 coats of MMSMP’s Ironstone. Since it was going over a surface that was already white, it covered easily in 2 coats. That’s another benefit of using a white primer when you’re painting with white paint.
I also re-painted the top architectural piece. The color of the old formula of Ironstone didn’t quite match the new formula I had, so it was better to paint the entire piece so the color was consistent across the whole project.
Distressing The Faux Fireplace Mantle
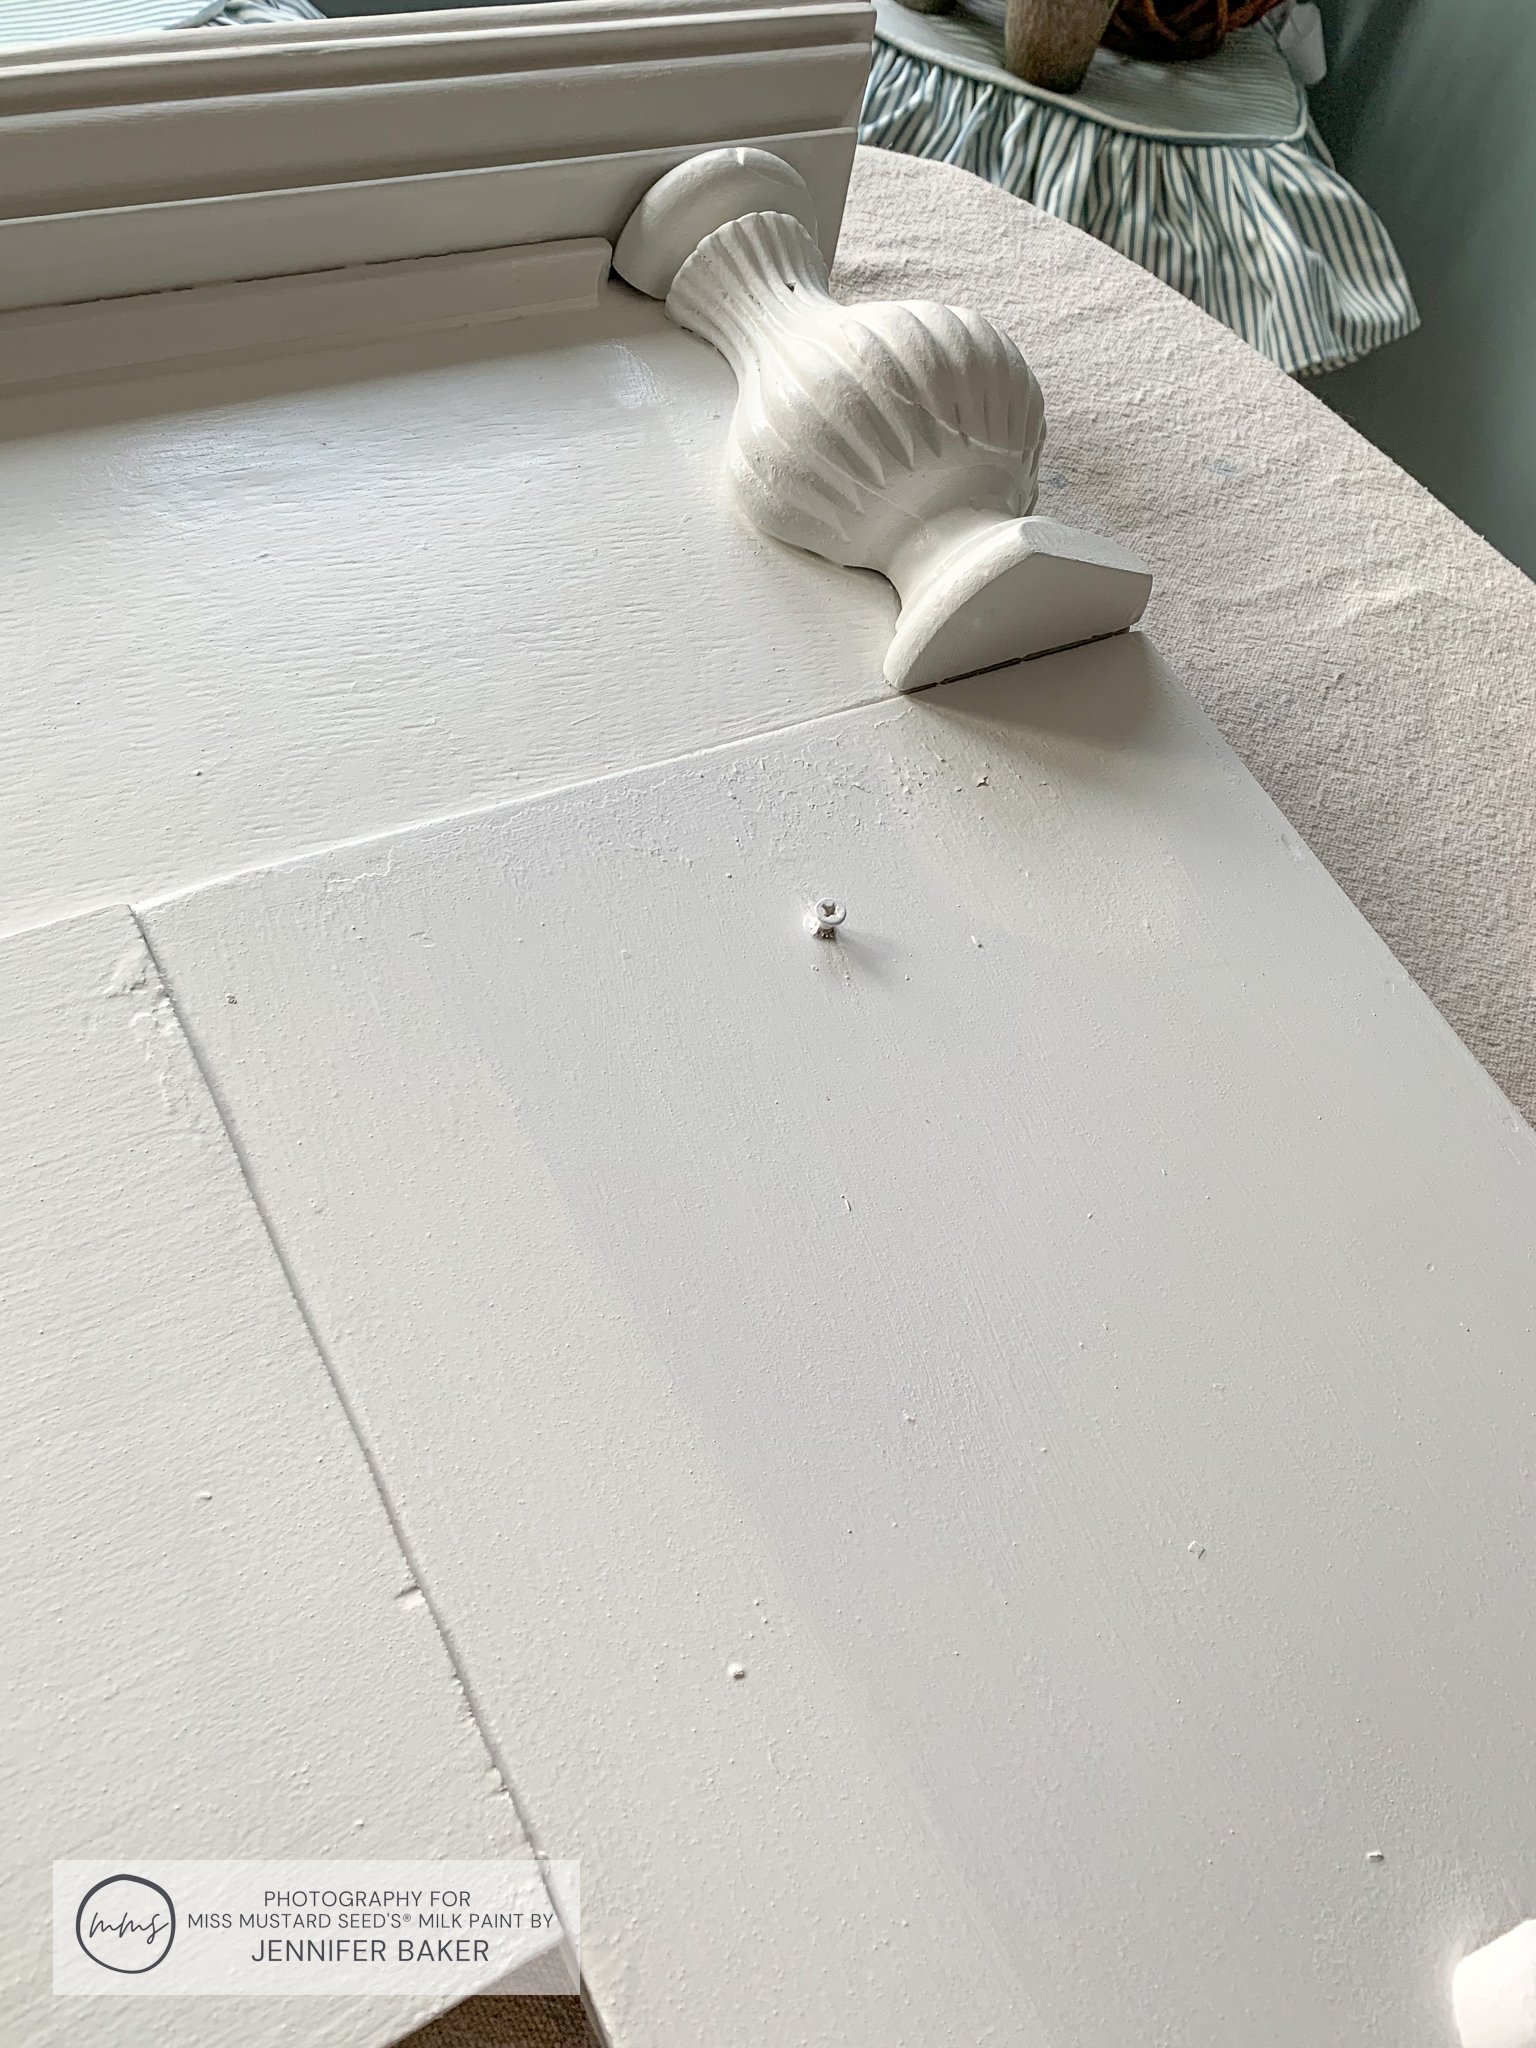
To add age and character to the mantle, I used an assortment of sandpaper grits to distress the edges and high points.
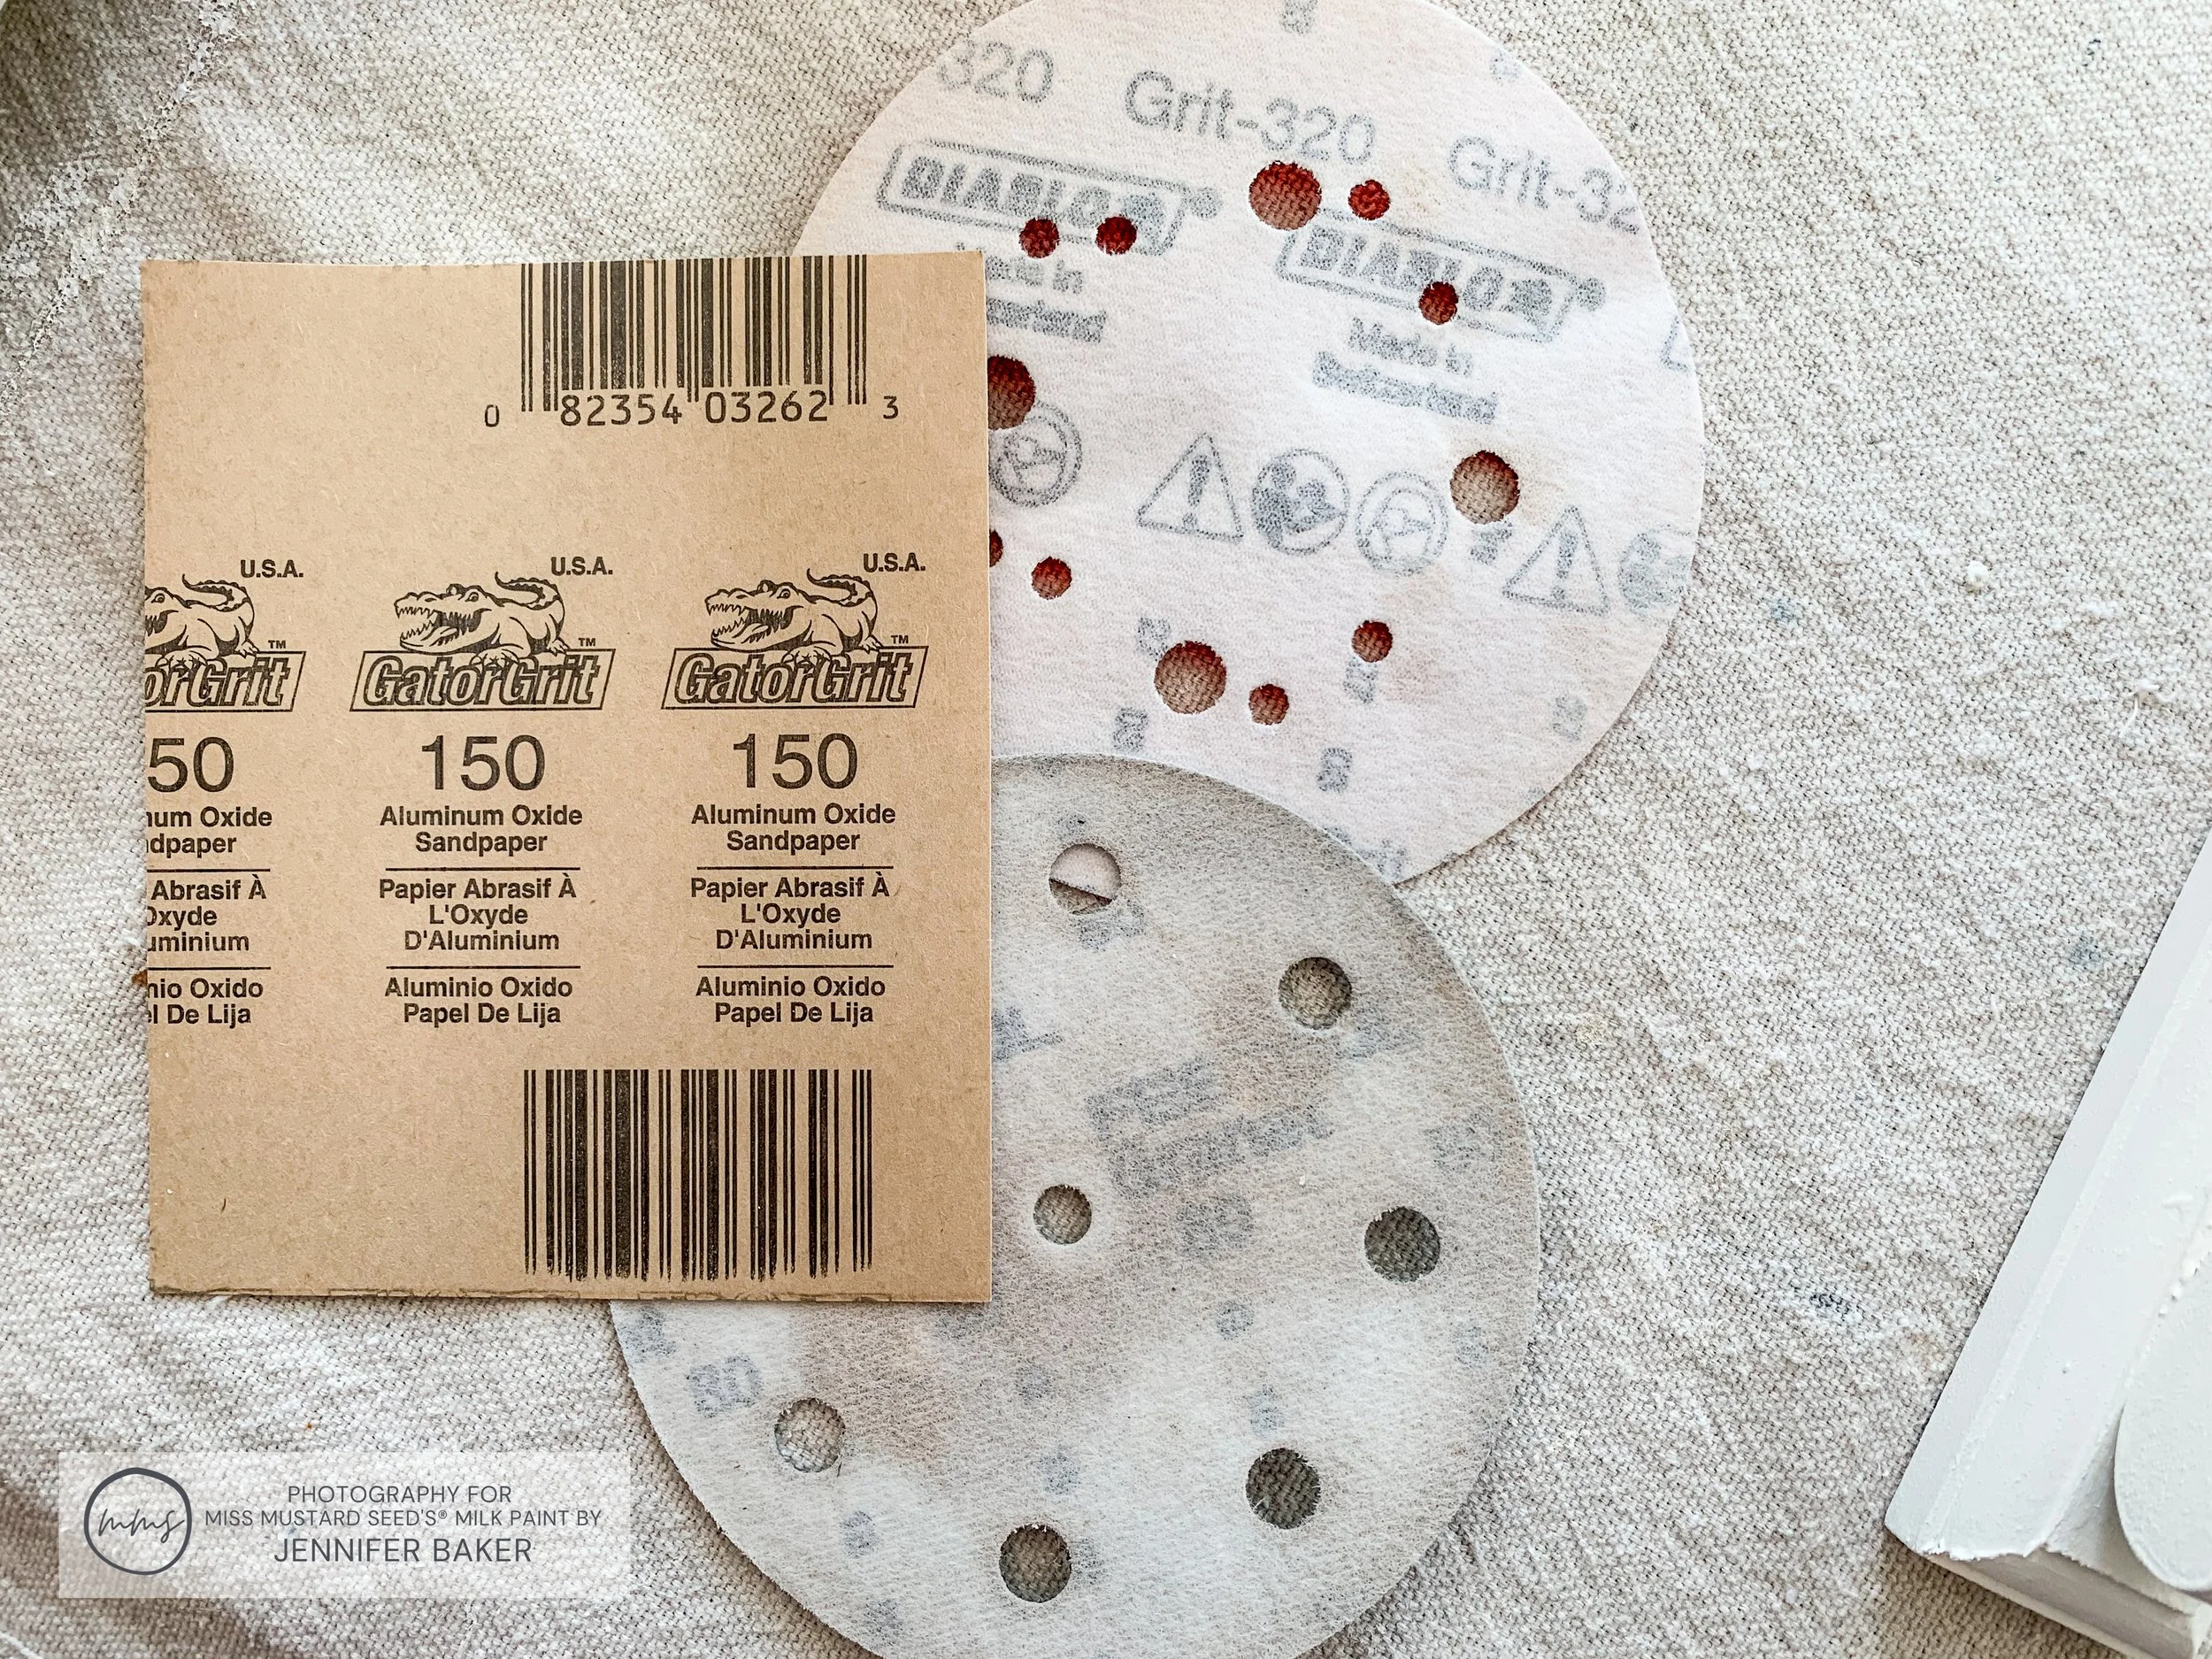
I pushed hard enough to sand the paint away and reveal the wood underneath. That’s where the 80 grit came in handy. (Exposing the wood and sanding through the primer was okay. I’ll talk about why in a second.)

Attaching The Faux Mantle To The Wall
Once everything was distressed and dusted off, Marc helped me attach it to our dining room wall. I decided not to put a topcoat on the mantle because it’s a wall decoration. The only part that will receive wear and tear is the shelf. I only plan on putting candles and a few light weight faux florals on the shelf, so I will probably jut put on a few coats of MilkWax™ - Clear and call it a day.
This is why it was okay to sand through the primer to the wood. I didn’t plan on getting it “wet” by applying a liquid topcoat, so I didn’t have to worry about stains coming through again. It’s liquid that activates stains (like a water-based topcoat), so a wax would be the best option.
We used a set of brackets and drywall anchors to attach the mantle to the wall. They’re hidden behind a removable part of the top. Again, we’re not planning on putting anything substantial on the shelf, so the weight of the mantle is well within the limit of the brackets.


When you hang yours, you’ll have to evaluate where to place your brackets. You might want to screw your mantle directly onto the wall using anchors or by drilling into a stud. You can use wood filler to hide the screw hole when you’re finished.
That’s the beauty of this project - you can make it what you want and need it to be! The basic structure involves two sides and a middle part. You can add a shelf with corbels and bam - you’re done!
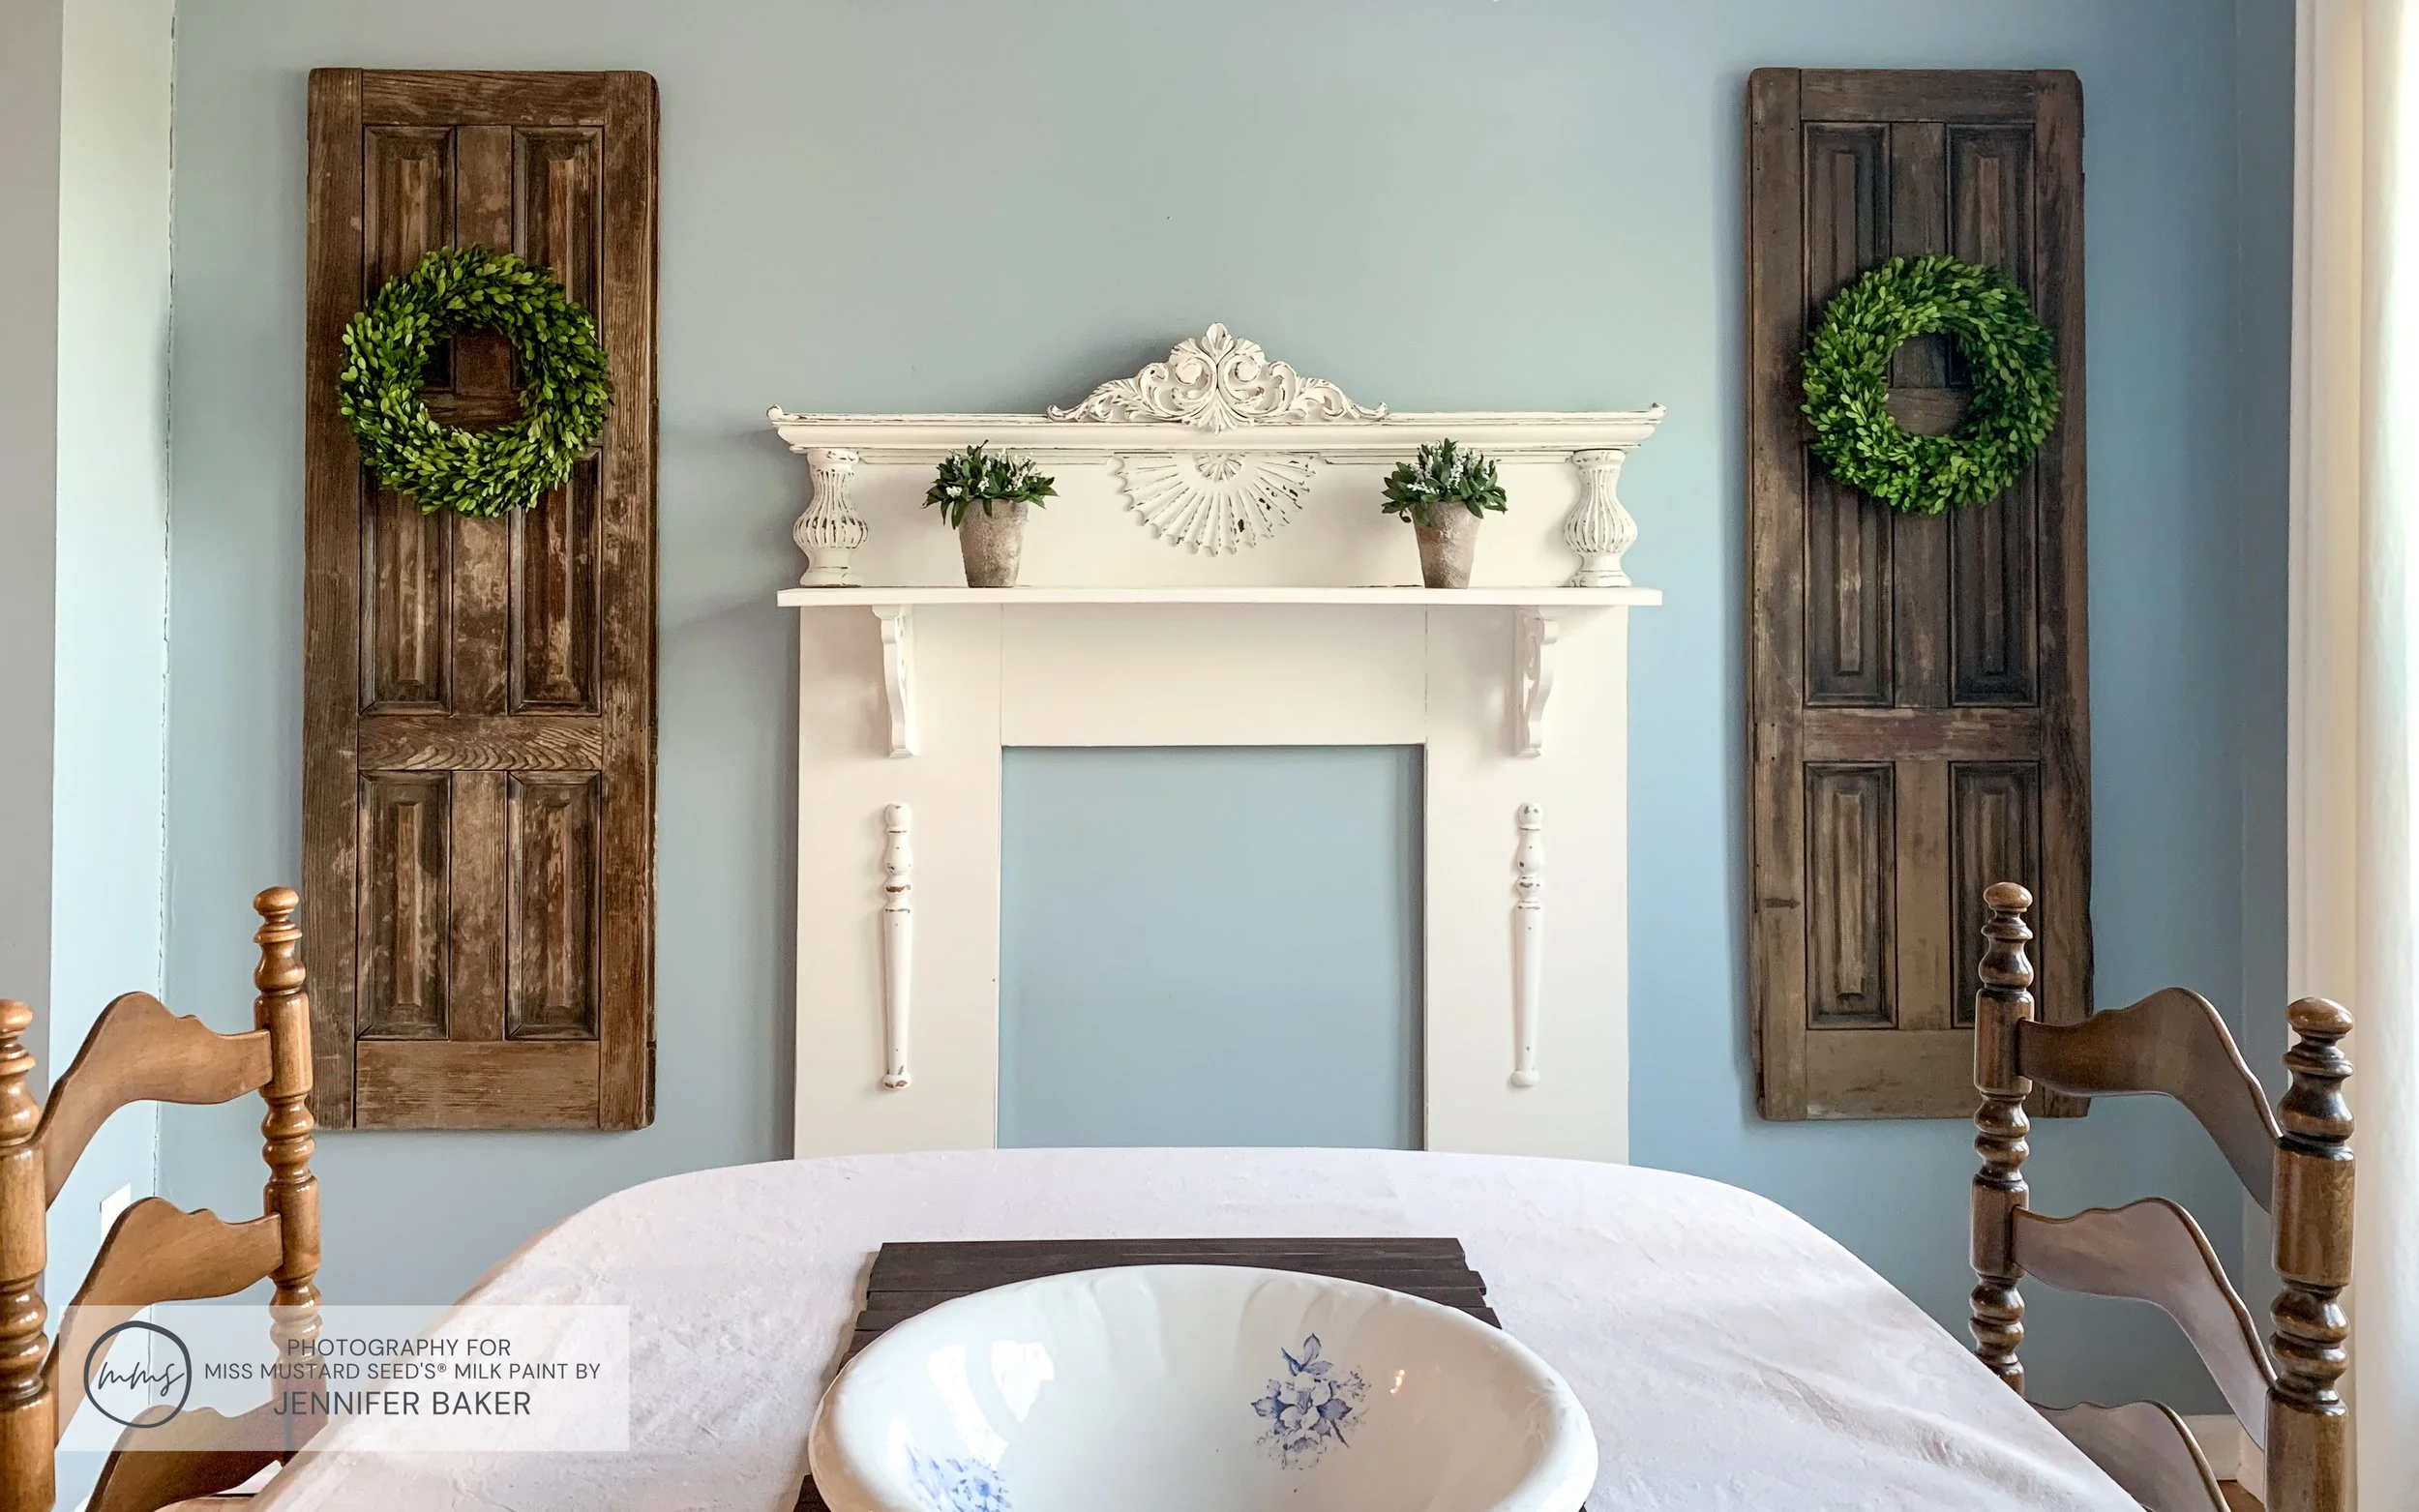
The Finished Project
Once the finished mantle was on the wall, I finally got a chance to step back and admire the final result.

I REALLY love everything about this wall now - the wall color, the brightness of the mantle, the vibrance of the boxwood wreaths…YUM! Everything looks so fresh and clean.
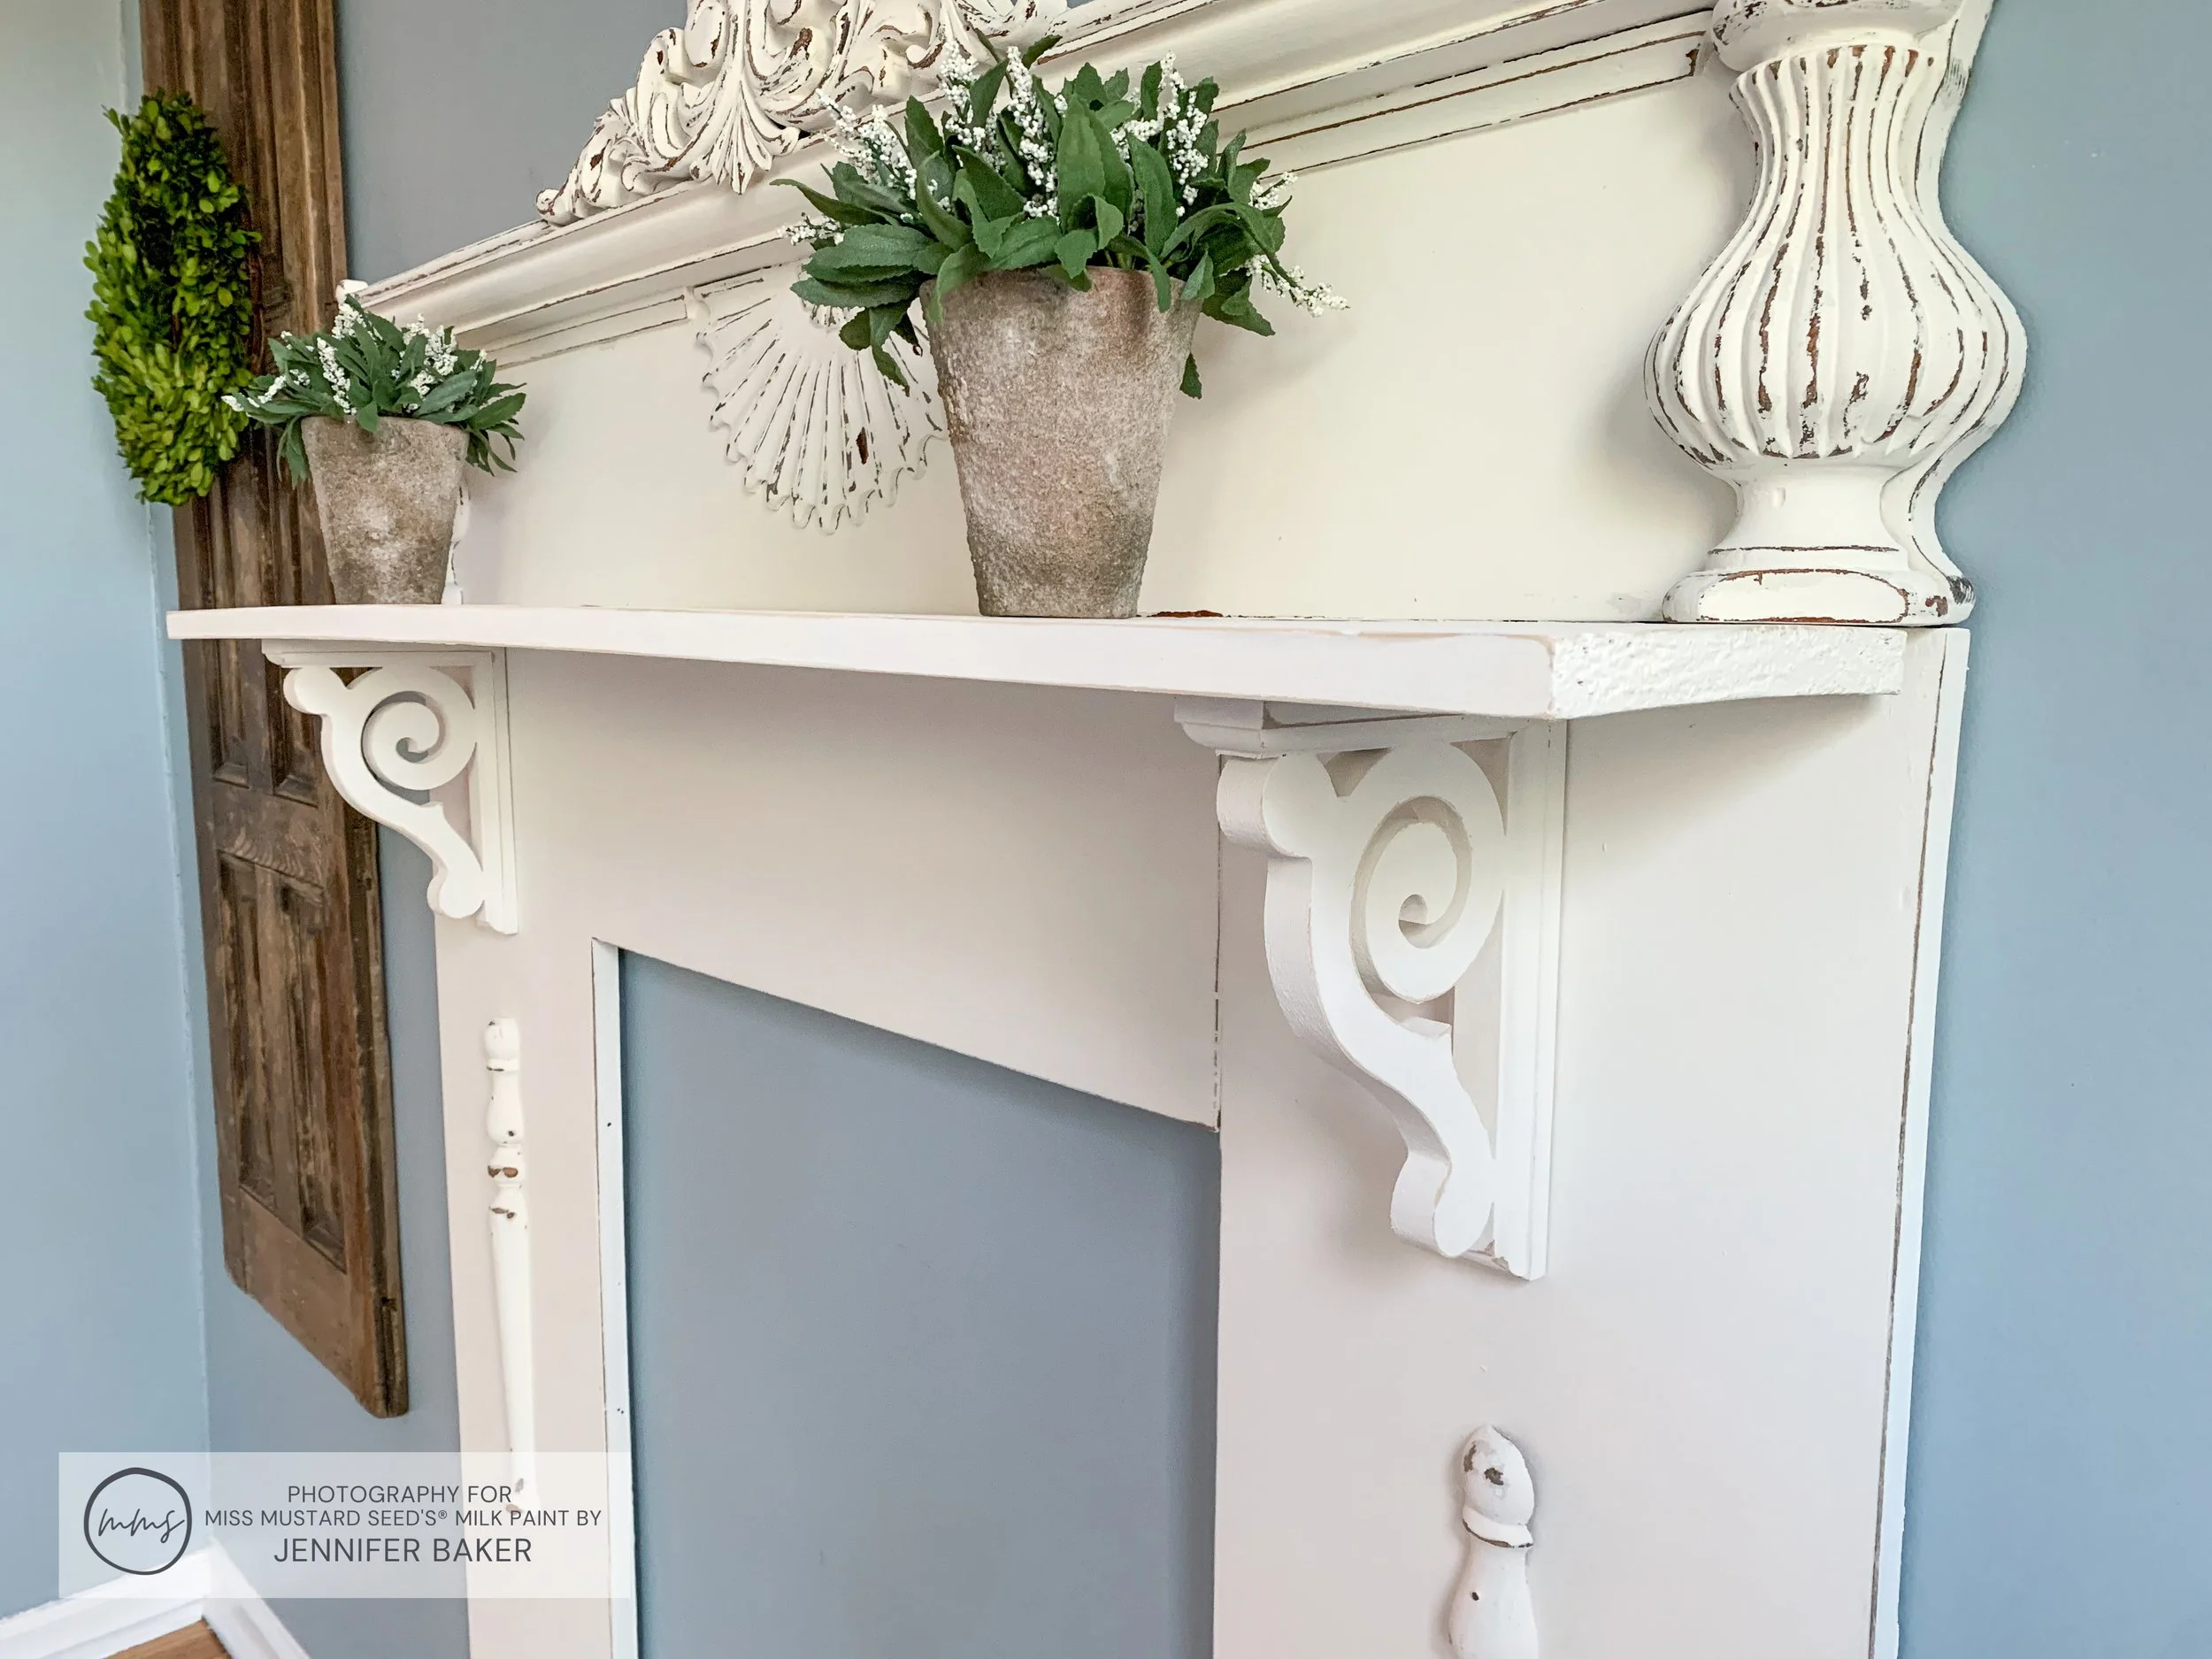
The contrast between the wood and the Ironstone paint is just perfect. Some parts of the top got chippy, which adds to the whole this-is-old-and-has-a-lot-of-age kind of vibe.
Here’s a view looking into the dining room. The table and chairs belonged to my grandmother. We were super close, and I’m so glad that I get to use her set in my home. It’s crazy sturdy!
The table runner came from this holiday project, and the tablecloth is actually a painter’s drop cloth. I plan on hemming the left and right sides to bring them up a bit. That’ll take no time at all.
By the way, do you like my handmade chair skirts? I followed this tutorial if you want to make your own too!

Here’s how everything looks straight-on. This is from the kitchen looking into the dining room. When we bought our home, this was used as a sunroom/second living room. I really like using it as a dining room. It’s fancy without being too formal. You feel like you can sit down and relax. Everything is imperfect, slightly off and mostly handmade. Know what I mean? Plus, you can see the most gorgeous sunsets through those 3 windows!
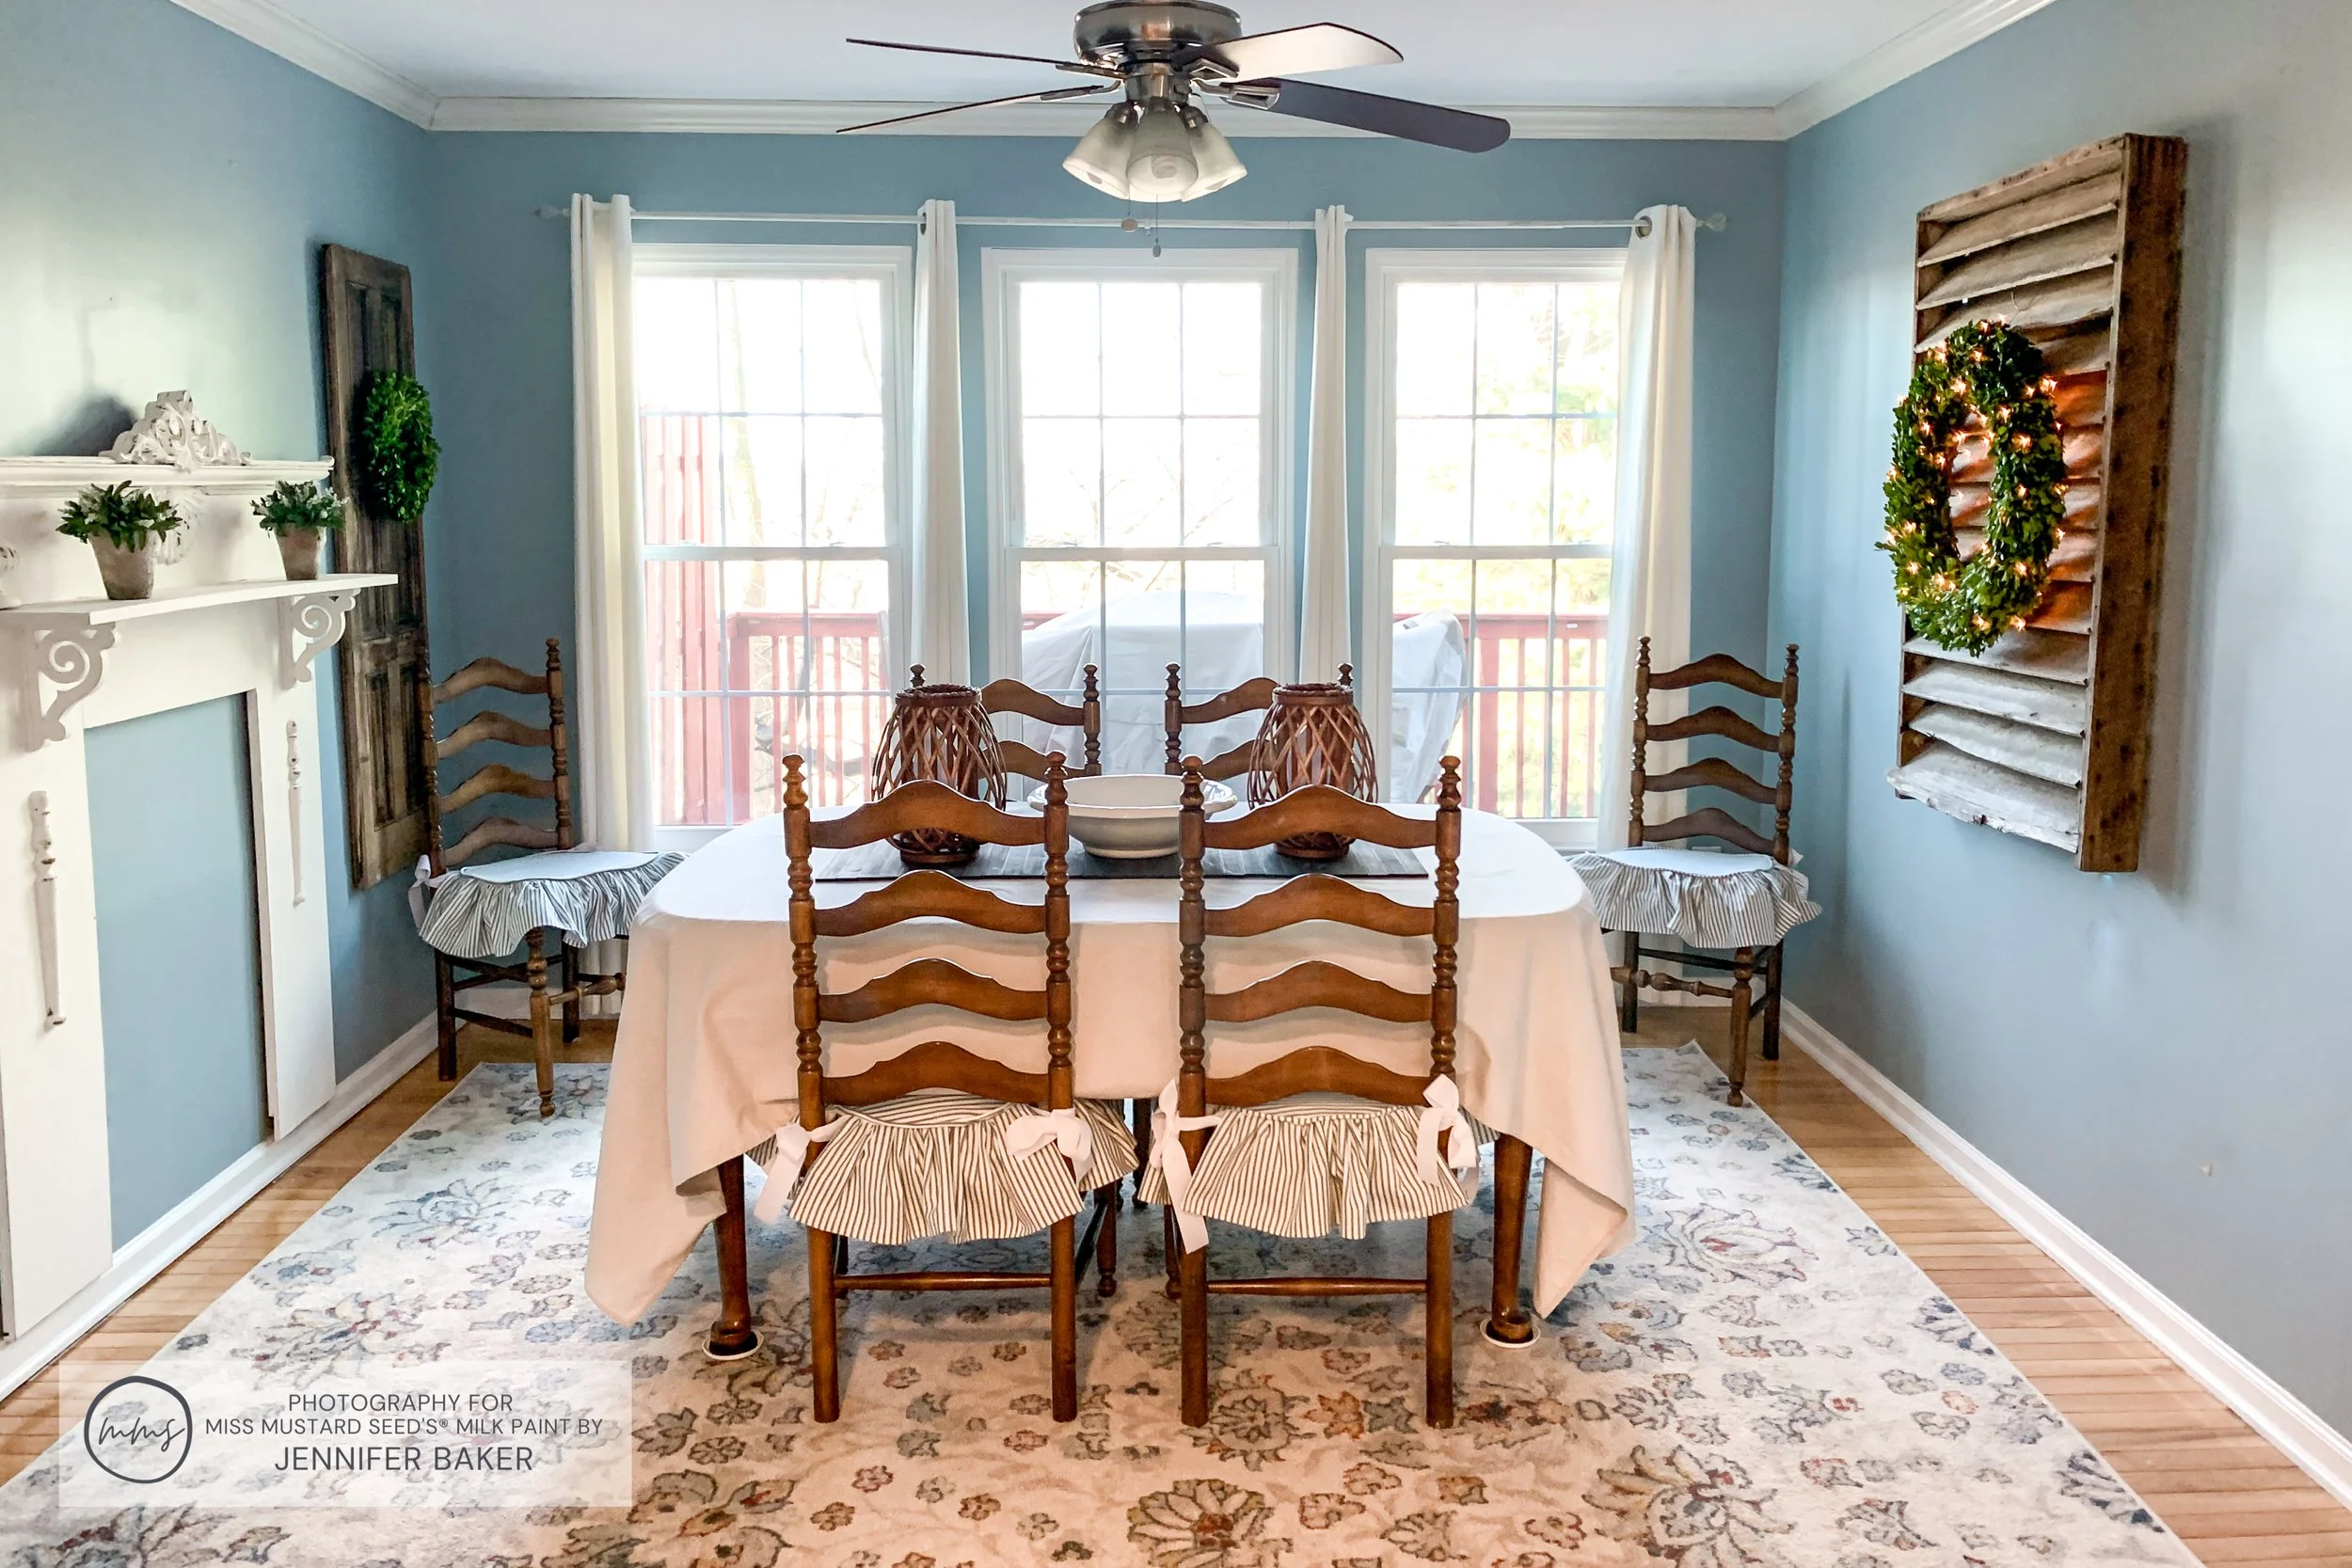
The barn vent on the right wall is next in line for a MilkPaint™ makeover. I’m going to paint it in Ironstone so it matches the mantle. To keep the rustic feel, I’ll force the chippy look with wax. That tutorial will be coming soon!

I really didn’t know what to do the bookcase that used to be here, so I let it sit until I got inspired. Most of my decorating dilemmas are like that. Some idea comes across my path and BOOM - problem solved.
Do you have any space on your walls for a faux fireplace mantle? Have any bookcases or display shelves that aren’t serving any purpose? Give this project a try, and make sure you share your results with the MMSMP Team!
