
How To Upcycle Glass Jars And Bottles With MilkPaint™
Do you have spare glass jars and bottles hanging around your house, and you have no idea what to do with them? We’re talking wine bottles, mason jars, jelly jars, votive holders, spaghetti sauce jars, etc.
C’mon, you know you’ve got some of those hanging around!
We’ve got a few suggestions on how you can upcycle them using MilkPaint™ and MilkGrip™!
Beachy/Coastal Wine Bottles
Supplies Needed:
MilkPaint™ in the Coastal Collection Colors (Linen and Sunkissed are available currently; Aqua Sky in February; Teal Ocean, By the Sea, Carolina Dune in March)
Old Wine Bottles
Cord (We purchased ours from Hobby Lobby)
How To Upcycle Old Wine Bottles With A Coastal Vibe
First, make sure the outside of your wine bottle is clean.
Then, pour some MilkGrip™ Indoor/Bonding Agent into a separate container, and paint one coat on the glass.
Allow it to dry for 24 hours prior to painting.
Mix up your chosen color(s) of MilkPaint™.
Add MilkGrip™ into your mixed MilkPaint™. Use 2 parts MilkPaint™ to 1 part MilkGrip™ for glass. If you’re having trouble with adhesion, then switch it up to a 1:1 ratio.
Use Frog Tape to create stripes down your bottle. Paint 2-3 coats of your MilkPaint™ in the taped-off sections.
Once your paint is dry, gently pull the Frog Tape off and finish your coastal wine bottle with MilkWax™ - Clear.

Upcycling Mason Jars As Kids’ Craft Containers
Supplies Needed:
MilkPaint™ - We used Sunkissed, Aqua Sky and Arabesque (available in February)
How To MilkPaint™ Mason Jars
First, make sure the outside of your mason jar is clean.
Tape off a section of your mason jar that’s about 2 or 3 inches from the bottom. This will help you create a “dipped” effect. We varied the sizes for a more organic feel.
Then, pour some MilkGrip™ Indoor/Bonding Agent into a separate container, and paint one coat on the glass.
Allow it to dry for 24 hours prior to painting.
Mix up your chosen color(s) of MilkPaint™.
Add MilkGrip™ into your mixed MilkPaint™. Use 2 parts MilkPaint™ to 1 part MilkGrip™ for glass. If you’re having trouble with adhesion, then switch it up to a 1:1 ratio.
Peel your Frog Tape off carefully when the paint is dry.
Finish your mason jar off with a coat of MilkCoat™Gloss

Sophisticated Mason Jar Office Containers
MilkGrip™ Indoor/Bonding agent
MilkPaint™ - We used Ironstone and Ink Blue
How To MilkPaint™ Mason Jar Office Containers
Make sure your mason jars are clean.
Tape off sections for stripes.
Paint one coat of MilkGrip™ on your jars.
Allow them to dry for 24 hours prior to painting.
Mix up a batch of Ink Blue and Ironstone.
Pour some Ink Blue into 2 additional cups. Add varying amounts of Ironstone into each one so that you have 3 different shades of Ink Blue - Full strength, medium strength, and light strength.
Paint a pattern you love in the striped sections, creating a sophisticated monochromatic look.
Peel your Frog Tape off carefully when the paint is dry.
Finish your mason jar off with a coat of MilkCoat™Gloss

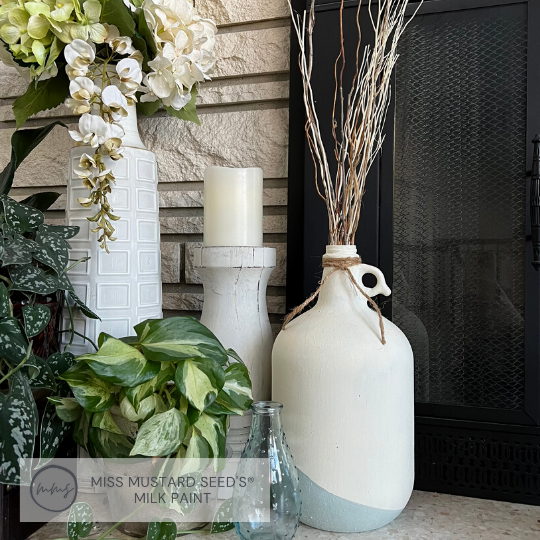
Milk Painting A Glass Gallon Jug
Glass Gallon Apple Cider Jug (or any gallon jug)
MilkGrip™ Indoor/Bonding agent
MilkPaint™ - We used Linen and By The Sea
MilkWax™ - White
How To Upcycle Your Gallon Jug
Make sure your jug is clean.
Paint one coat of MilkGrip™ on the outside.
Allow it to dry for 24 hours prior to painting.
Mix up a batch of Linen MilkPaint™. When mixing your MilkPaint™, we recommend 2 parts MilkPaint™ to 1 part MilkGrip™. If there are problems with adhesion, do a 1:1 ratio.
Paint 2 coats of Linen on your jug.
While the Linen is drying, mix up a batch of By The Sea in a stain ratio - 4 parts water to 1 part MilkPaint™. You will need enough to dip the bottom corner of your jug. We used a glass mixing bowl that could easily be washed out.
Once the Linen is dry, dip the corner of the jug into the By The Sea “stain”.
Mix up a batch of By The Sea in a 1:1 ratio. Use the dip line as a guide and fill it in with the full-strength mix.
Finish with MilkWax™ White.
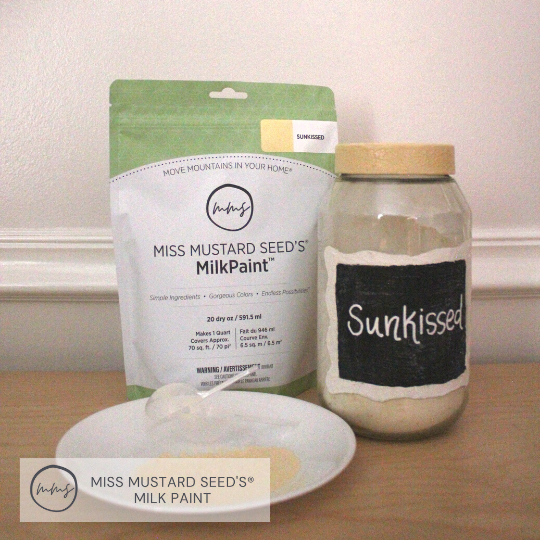
Spruce Up Your MilkPaint™ Storage Containers
Supplies Needed:
MilkGrip™ Indoor/Bonding Agent
Powdered MilkPaint™ (To go inside the jars - we used Sunkissed)
MilkPaint™ Color for the Label of Your Jar (We used Typewriter and Ironstone)
MilkCoat™ - Gloss
Old Glass Container
Favorite Craft Cutting Machine (We used Sissix frame dies)
White Chalk
How To Spruce Up Your MilkPaint™ Storage Containers
Make sure your old glass container is clean. We used an old Lipton tea jar.
Add MilkGrip™ to your chosen paint colors. We recommend doing 2:1 for glass (or 1:1 if there are problems with adhesion).
Paint the lid the color that will go into the jar.
Once dry use MilkCoat™- Gloss to protect the lid.
We used sticker paper and our die cutter to create a stencil.
Then we used the stencil to create the painted label.
We chose a two-part stencil. We used Ironstone for the decorative outline around the chalkboard label. Let dry fully before moving ahead to the reusable chalkboard label.
The first two coats of Typewriter for the chalkboard label need MilkGrip™. Apply a third coat without MilkGrip™ to create the chalkboard surface.
Season your chalkboard by rubbing the entire area with chalk and wiping away the excess with a lint-free cloth.
Finish by using your chalk to add the name of your MilkPaint™ color.
*Tip: to cover a dark lid with a light color, apply a gray/beige first to prime for the lighter color so you don’t have to apply so many coats. Such as in our case the bright blue of the Lipton jar lid.

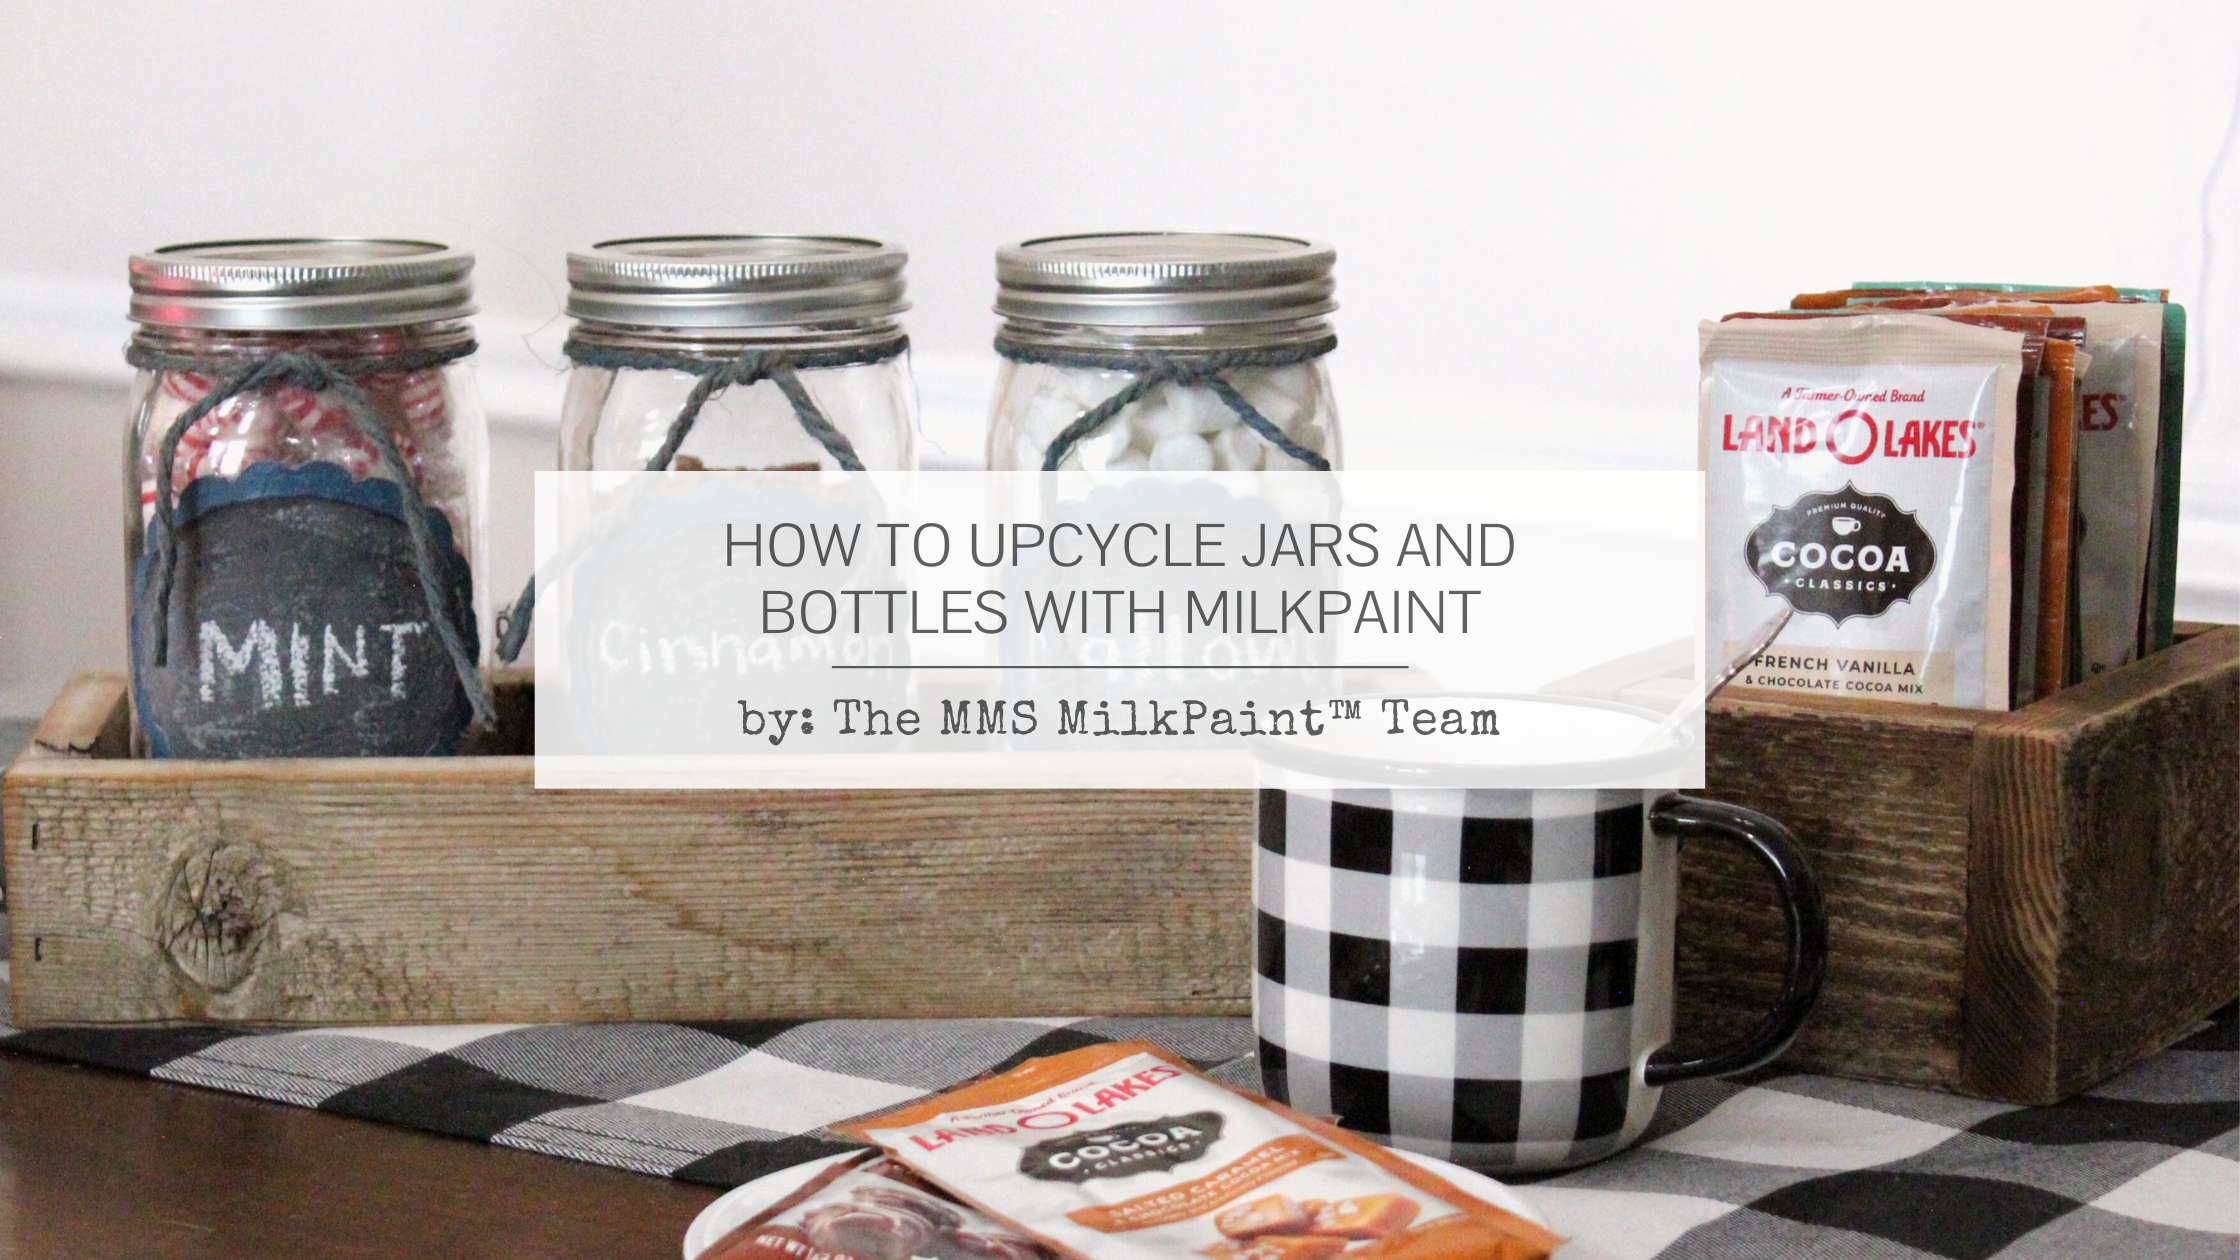
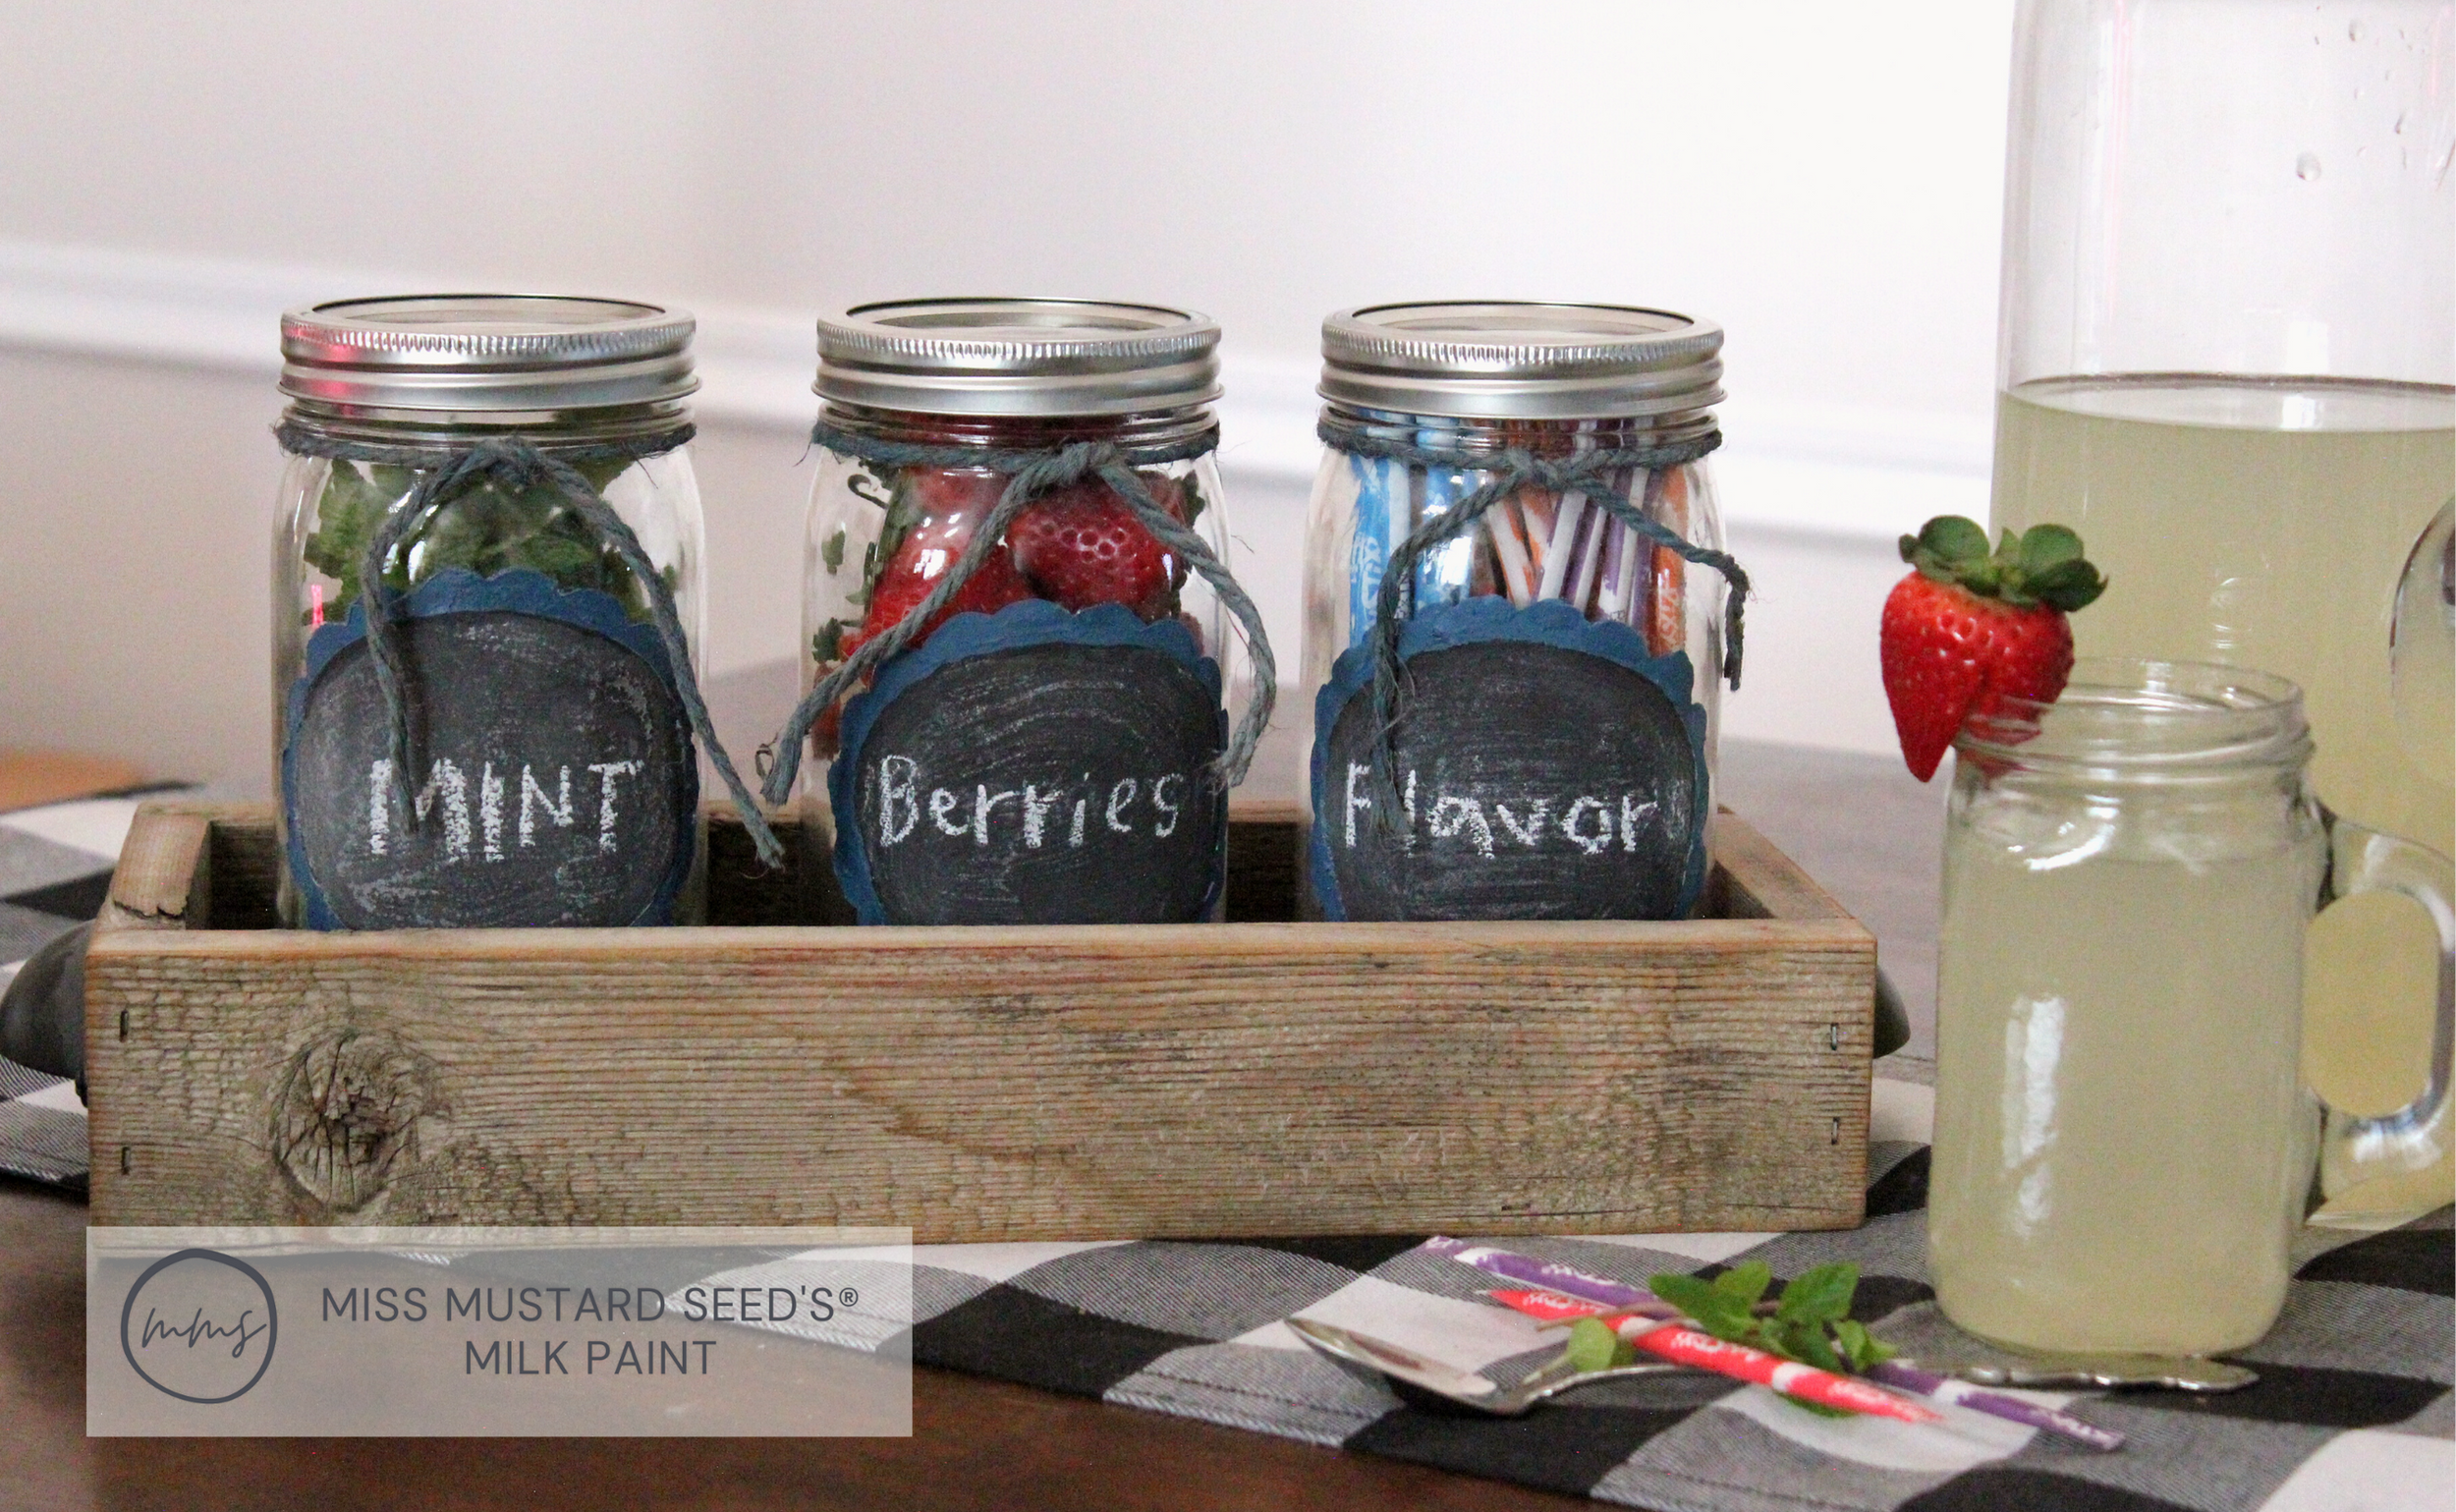
Other Ways To Upcycle Jars And Bottles
Still have some stray bottles hanging around? Consider making your own lemonade, hot cocoa or apple cider bar!
Supplies Needed:
Flow Blue and Typewriter
MilkGrip™ Indoor/Bonding Agent
Jute Twine (How to dip-dye the strings can be found in this dip-dying ornament blog post.)
Reclaimed Wood or any 1 x 4 material (box dimensions: 14.5”x2.5” (2) and 1.25”x2.25” (2); base 13”x4.5” (You can paint your box to match!)
Small finishing nails

Ready to repurpose and upcycle your stray bottles, jars and jugs? Purchase NEW MMS MilkPaint™ products from any of our fabulous retailers!
