How to Wet-Distress Furniture

Modern Rustic Cabinet Makeover with Typewriter
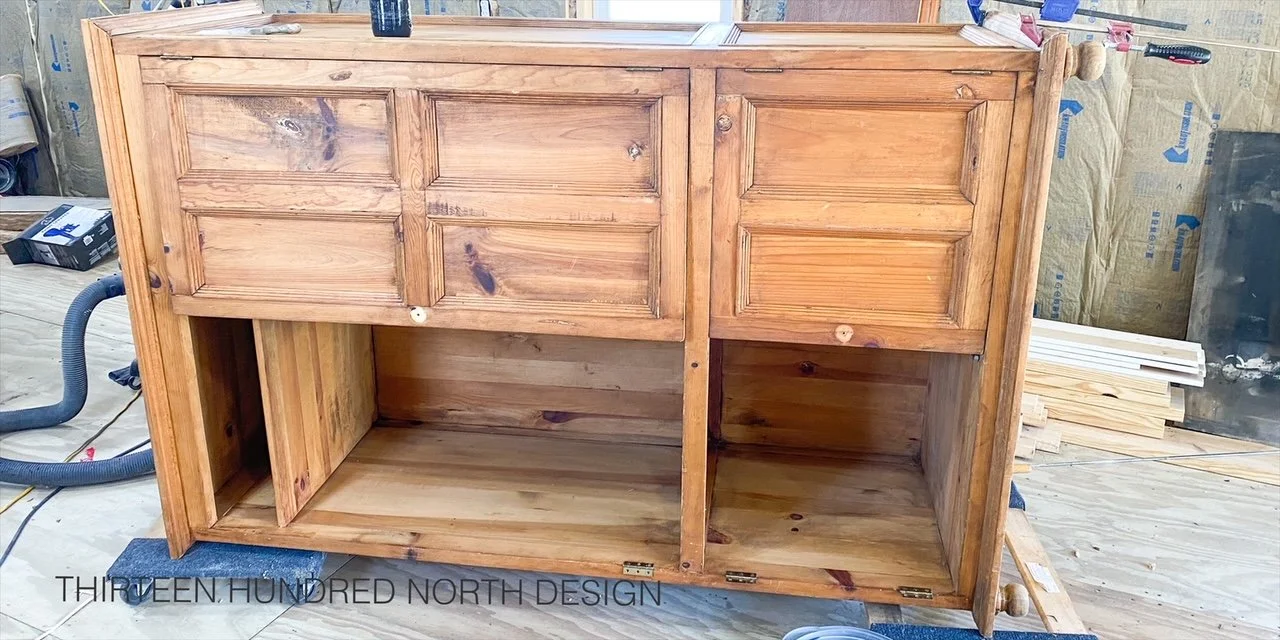
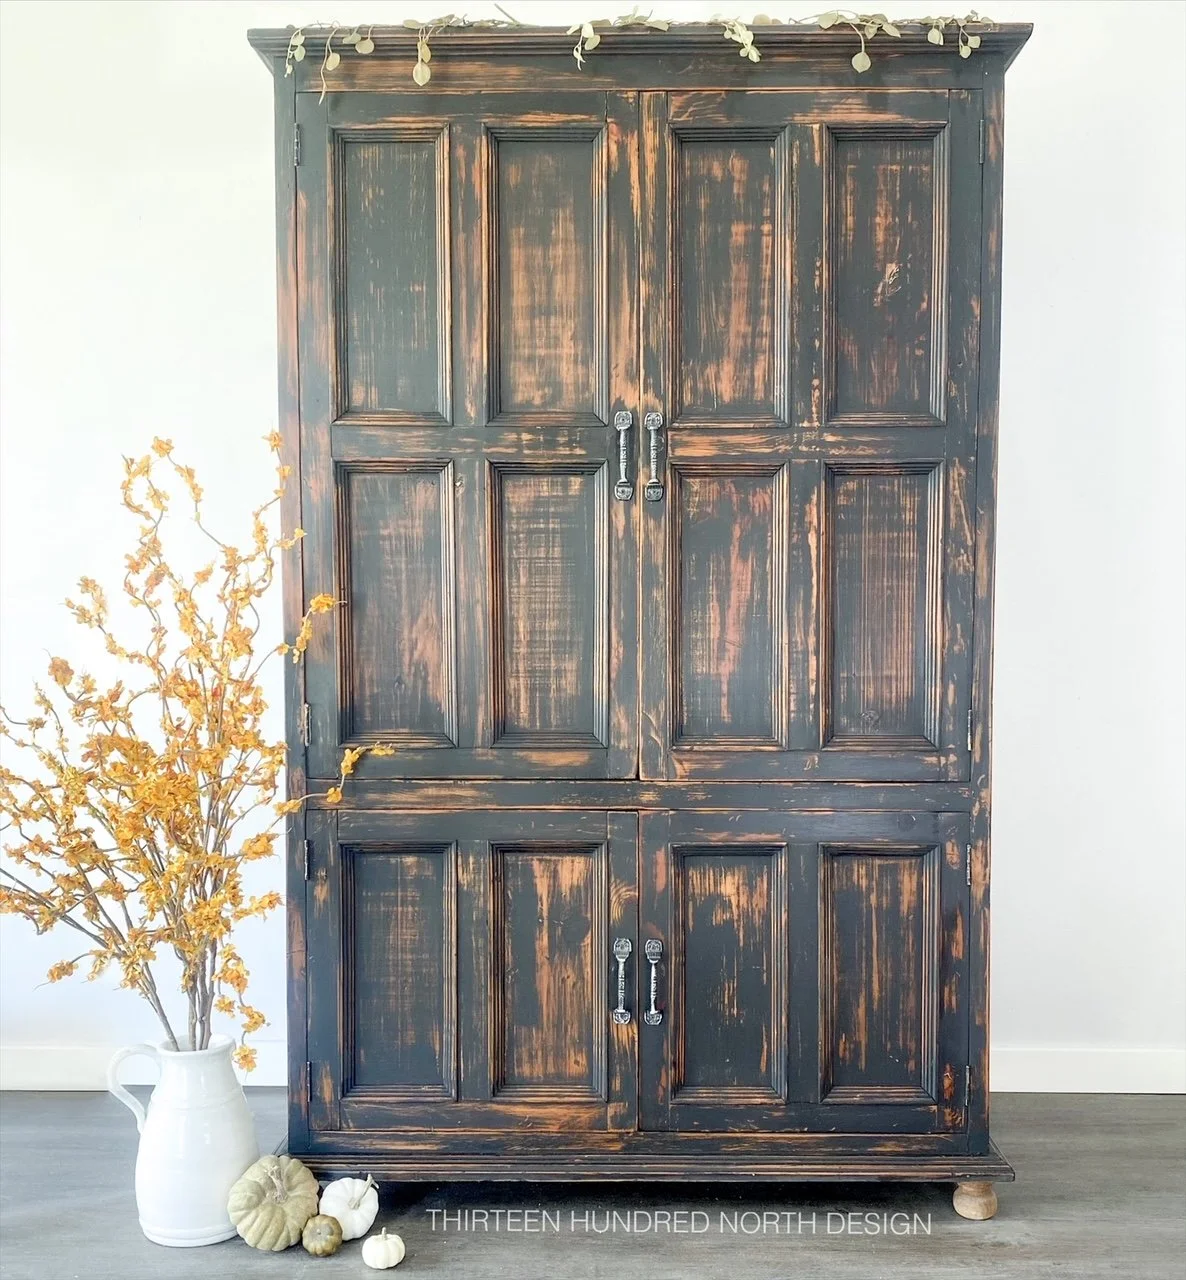
This large cabinet is by far the largest piece I have refinished to date; it is over 6ft tall and almost 4ft wide, so I had my work cut out for me. It belongs to a family member of mine, and she wanted to update the look. This piece will be used for storage in her newly designed and constructed home office. The original finish appears to be knotty alder, and the wood has a more rustic appearance. While she wanted to keep the character of the piece, she was also wanting it repaired and freshened up. She gave me creative freedom, and for the longest time, I was not sure what I wanted to do with it, so it sat in my shop until I found some inspiration. It truly had me stumped. I had never refinished this style of furniture or species of wood before.
I was throwing around the idea of whitewashing the piece or bleaching it to maintain the wood look, but that look did not seem appropriate for her new space. She is installing hammered metal light fixtures, as well as a floor with a lot of gray tones, so I decided on a dark paint color to create a little bit of drama in the space, and I tied it all together with cabinet hardware that matched the new fixtures.
Inspo
I always tend to start painting with darker colors as summer turns into fall; for whatever reason, it seems more fitting to break out the richer and more dramatic colors this time of year. I am loving the more Industrial and European trends circulating for fall right now. It is the perfect mix of texture, neutrals, coziness, and patina. That was the vibe I was going for with the finish on this cabinet.
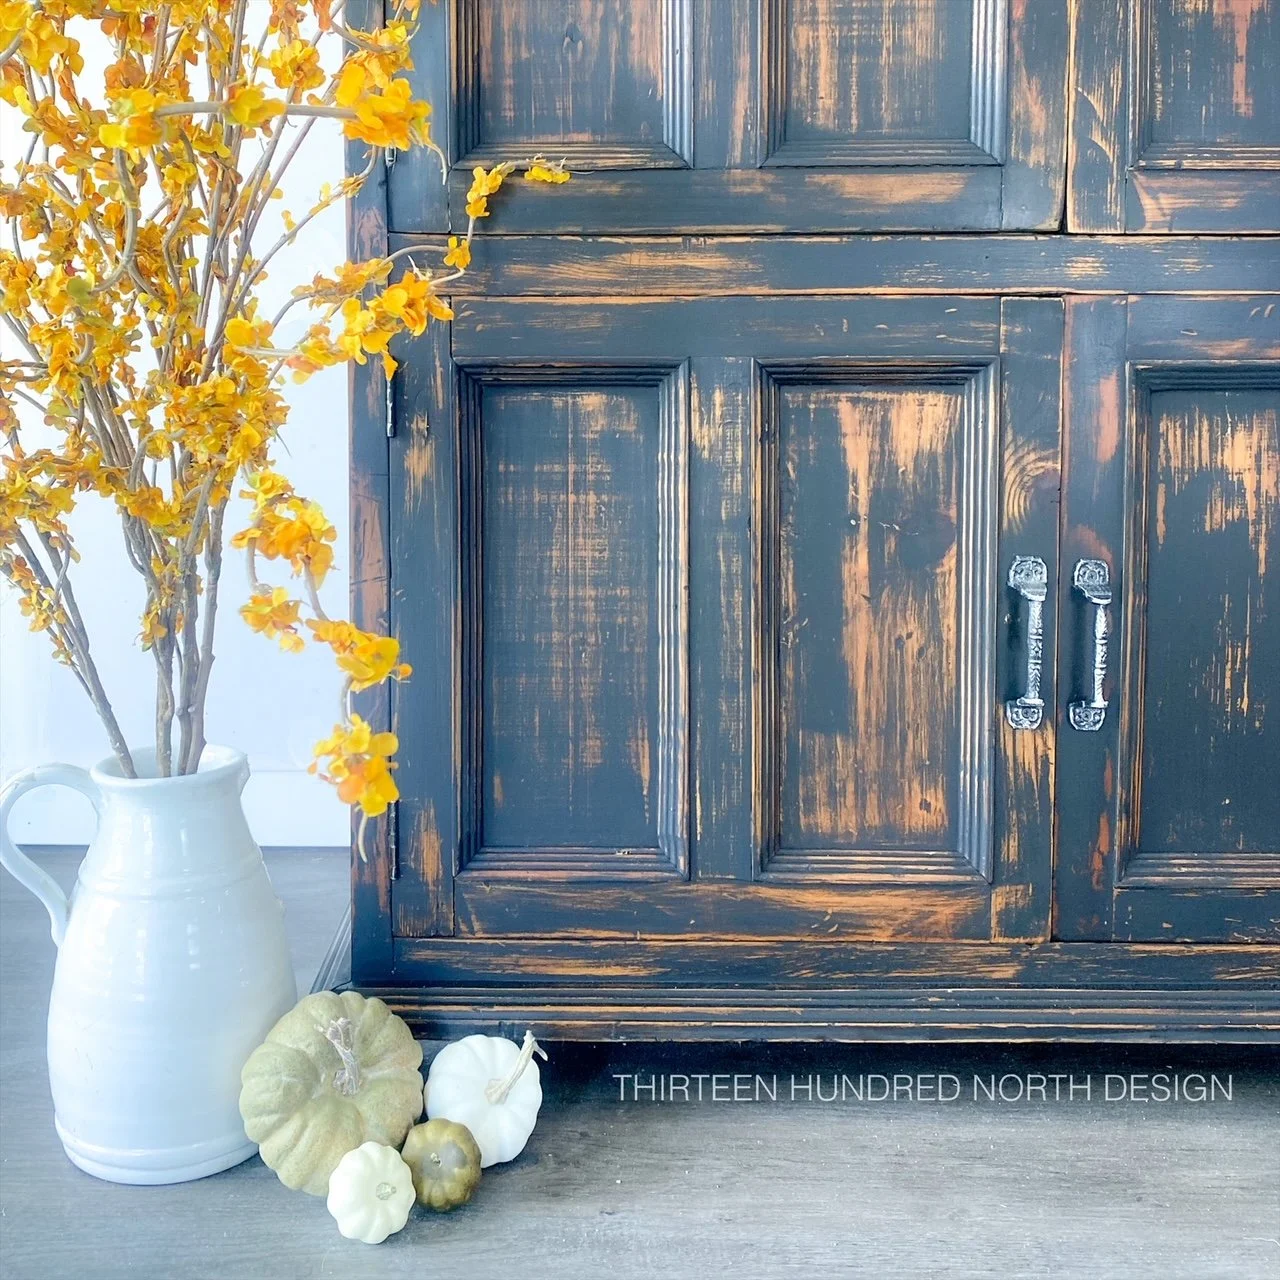
I knew black was the direction I was headed with this piece, but to paint a piece this size all black with no depth or color variation felt too heavy, and I was afraid the piece would feel cold. With the amount of surface space and all of the detailed molding, a blackwash was not a great option, but I still wanted a similar look. I decided to create a sort of reverse wash using a wet distress method. I wanted it to look perfectly worn and allow the warm wood tones to show through to add depth and character. Here is how I did it!
Tools and Materials Used:
Vacuum
Dawn dish soap
Scrub Daddy Sponge
Orbital Sander
220 grit sandpaper
Microfiber cloth
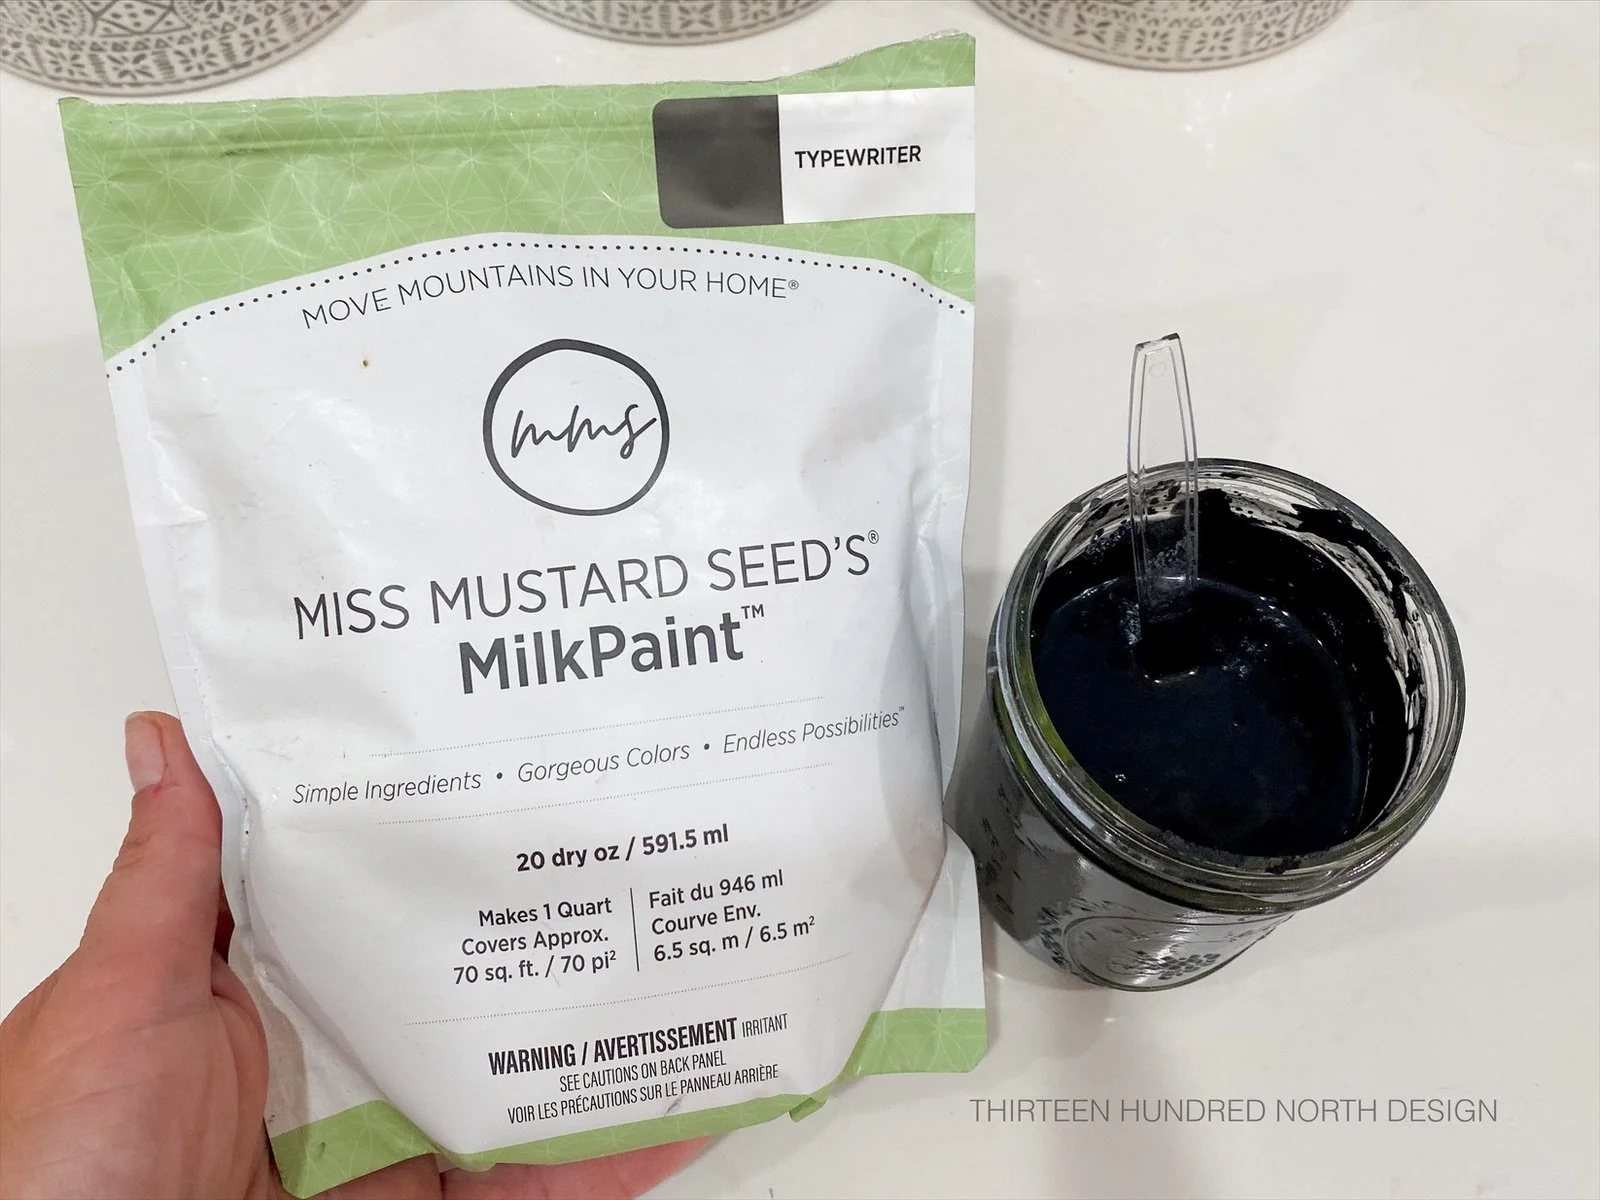
Miss Mustard Seed’s® MilkPaint™ in Typewriter
Paintbrush
Foam paint brush
220 grit sanding block
Lint-free cloth
New hardware
Vacuum the Piece Inside and Out
For this, I use a shop vacuum to get any and all surfaces free of dust. A vacuum is also a great tool when working with a more textured wood because it will get those textured and pitted areas clean.
Scrub the Entire Piece Down with an Abrasive Sponge and a Strong Soap
When I clean furniture for painting or sanding preparation, I like to use a more abrasive sponge such as a Scrub Daddy and a strong degreasing soap such as Dawn Dishwashing Liquid in hot soapy water. Those two products together help to cut through the dirt and years of polishing sprays. Taking the time to clean before sanding saves you time and sanding pads.
Sand your Furniture Piece
For this specific piece, it did not require much sanding prep. I knew I wanted a portion of the paint to wipe back off after application, so I did not want a really strong paint adhesion where it soaked into the wood. I did an all-over very quick sand with my orbital sander using 220 grit sandpaper, and that was all of the wood prep I needed.
Vacuum Again!
As I mentioned before, this wood is very knotty and has a lot of natural pitting, so I did need to vacuum again after sanding to remove the dust from those textured areas.
Repairs
Repairs are going to look different for everyone, so I don’t want to focus too much on what this piece needed, but I thought it was worth mentioning that it is important to do your repairs before you paint a piece. This piece had a hinge that had been completely ripped out of the door and had taken some of the door with it, as well as a few areas that needed glued and clamped from normal wear and tear. I got those issues fixed with a new piece of wood I patched in, Bondo, and lots of wood glue. Then it was time to paint!
Painting your Piece
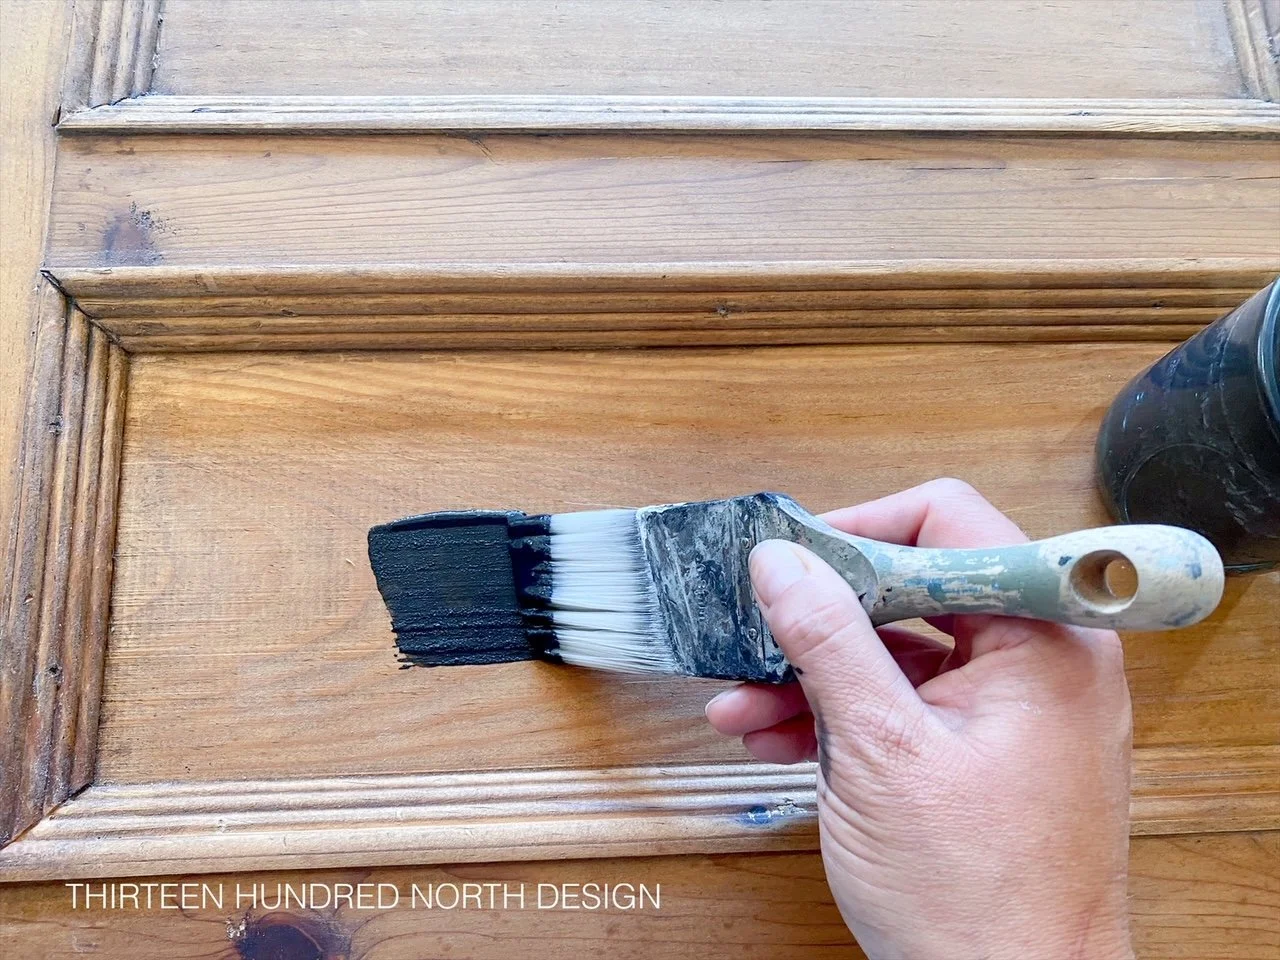
I mixed up Miss Mustard Seed’s® MilkPaint™ in Typewriter in a 1:1 ratio of paint powder to warm water as directed. I let the paint rest for about 10-15 minutes, added two drops of Miss Mustard Seed’s® MilkMix-EZ™, then gave the paint another good mix before applying. I applied the paint with a paintbrush and tried to get into the grooves and pits as much as possible. I only needed one coat of paint for the desired color. Let the paint dry completely before moving on to the next step. The paint will look almost gray and chalky as it dries, but the top coat is really where you get to see that gorgeous deep black color. Trust the process.
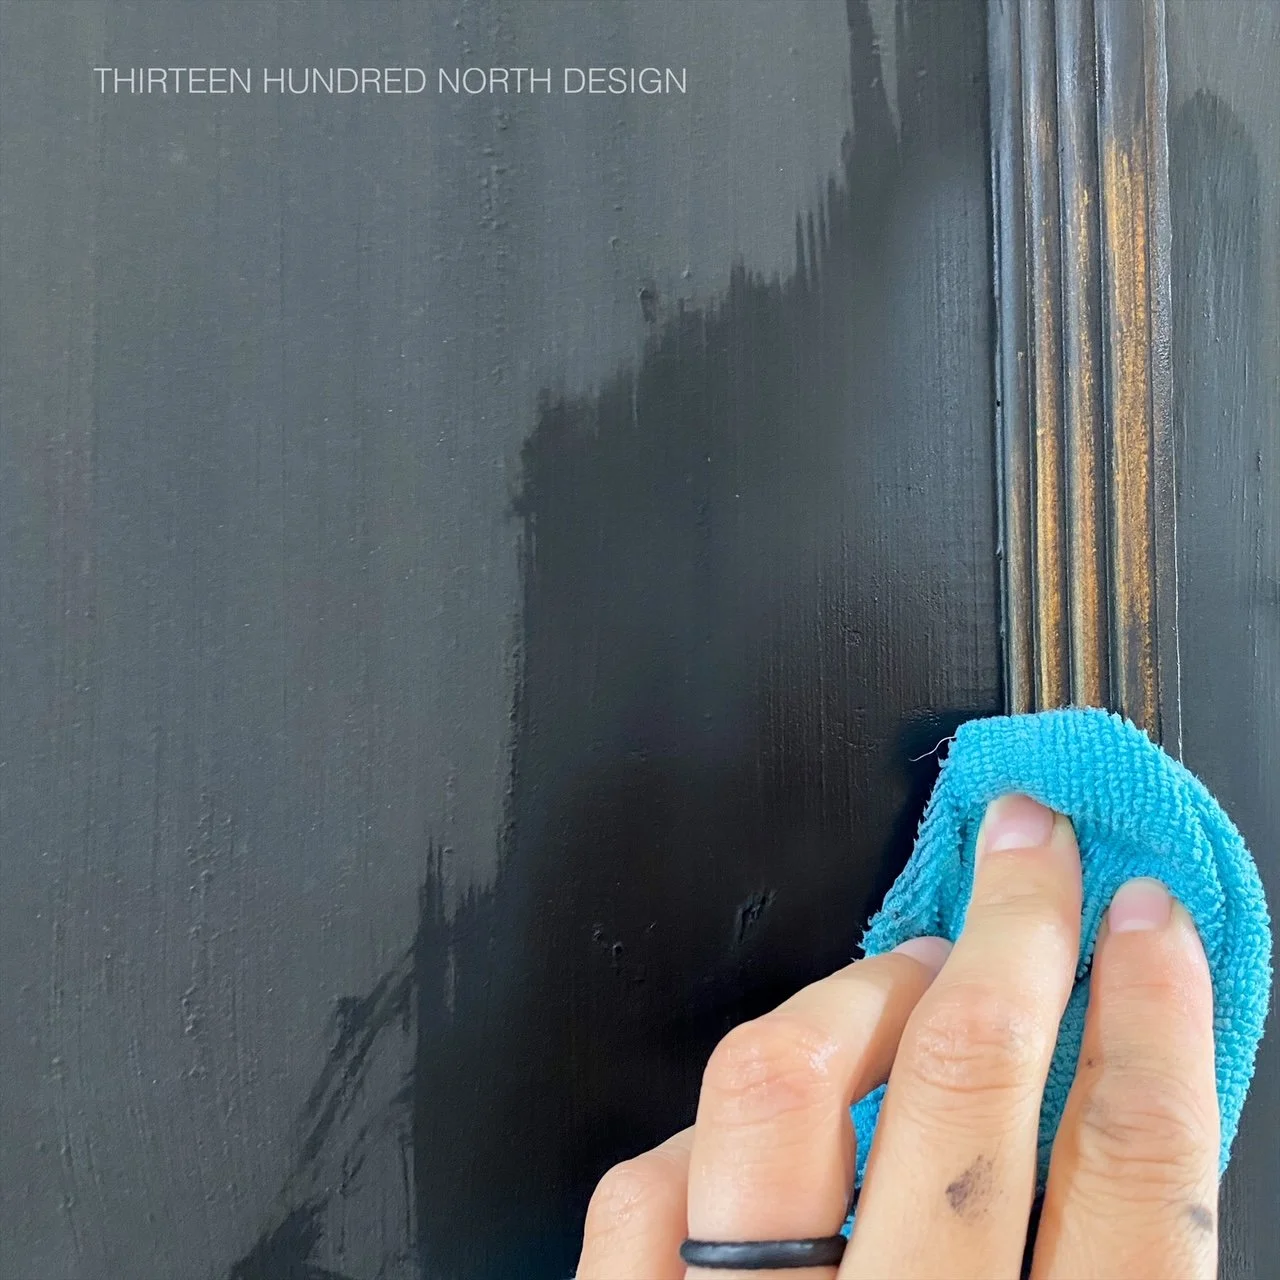
Wet Distressing with Water
Using a wet microfiber washcloth, I started to wipe the piece down with warm water. I was pretty aggressive with the pressure, and slowly you start to see some of the wood coming back through. At this point in the project, how much paint you remove is your personal preference. I knew I wanted quite a bit of the wood coming back through, so I removed a lot of the paint. If you are looking for a less worn look, you could simply use this method to lightly distress.

Wet Distressing with Miss Mustard Seed’s® MilkOil™
After the piece was completely dry from the wet distress, I applied Miss Mustard Seed’s® MilkOil™ with a foam brush in small sections. After applying the oil, I distressed with a 220 sanding block on the wet oil. When you have the desired amount of distressing and your paint is smooth, wipe away the excess oil with a lint-free cloth. MilkOil ™ is my favorite way to seal dark-colored milk paint; it really adds to the richness of the color and leaves you with a smooth and buttery finish.
Dry and Cure Time
After you have completed your MilkOil ™ layer, allow the piece to dry overnight before handling it any further. The next day you may need to wipe away any oil that did not absorb overnight. Your piece should be dry at this point, but for the next 30 days, you will want to be careful with the finish until it is considered cured and protected.
Staging
For staging with this piece, I kept it very simple. The cabinet is so large it took up most of my staging wall! I used a cream-colored heavy pitcher and filled it with some gorgeous fall stems, and placed a few pumpkins as the base of the pitcher. I draped a few muted ivy stems on top, and that was it! I wanted the photos to have a subtle touch of fall without taking on a Halloween vibe because of the black cabinet.
Final Thoughts
I honestly can not stop staring at this piece. The texture and the movement in the distressed finish are beautiful, in my opinion. I love how rich the black looks, contrasting with the wood tones peeking through. I cannot wait to see this piece in my family member’s home! This paint finish would be perfect for a beginner, the steps are very simple, and you do not need a lot of tools or products to achieve this look.
Happy Painting!!