
Layering MilkPaint™ To Achieve An Authentic Patina
The reason I started researching and then fell in love with MilkPaint™ (more specifically Miss Mustard Seed's® MilkPaint™ products) was because I could not find a product that gave me a realistic aged look. I could distress chalk paint and try different methods to make it look aged and chippy, but it never felt authentically old to me.
I found Miss Mustard Seed's® products a few years ago and it was truly life-changing for my home and my business. It allows me to execute my vision for furniture and crafts exactly how I imagine it! There is a product for each look I strive to achieve and that is what has had me hooked for years.
Inspiration
For this piece, I knew I wanted to do an aged and chippy finish because it had been a while since I had done one. I had been invited to go picking in a customer's barn to purchase project pieces and I found a few tables that had layer after layer of paint and dirt, and I couldn't help but be drawn to them. Those pieces were too far gone for resale and covered in lead paint, but they did give me the inspiration to create my own aged patina.
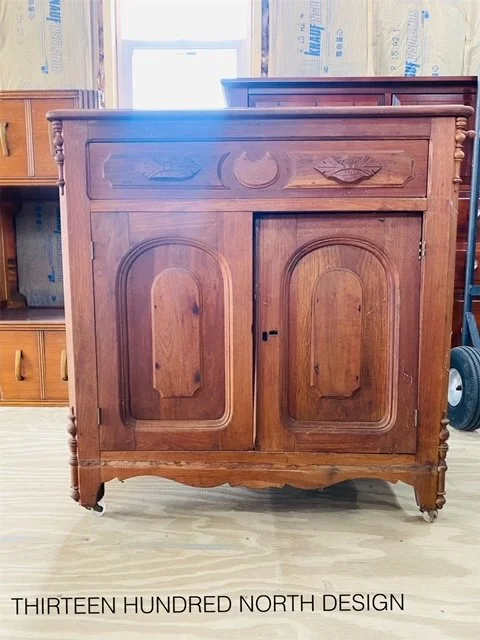
I found this sweet little washstand on that same picking trip and thought it was a great canvas. It is very old, so it is appropriate for this type of old-world finish. I was wanting it to look like it was well-loved and had come out of a sweet grandmother's house who had painted it to match her home as she redecorated over the years.
Supplies Needed
The products I used to achieve this look are:
Cleaning and Repairs:
Dawn dish soap
Scrubbing Pad
Vacuum
Microfiber towels
Wood glue
Clamps
Sanding:
220 grit sandpaper
Microfiber towel
Sanding block
Bondo
Painting and Finishing:
2" paint brush
Small detail paint brush
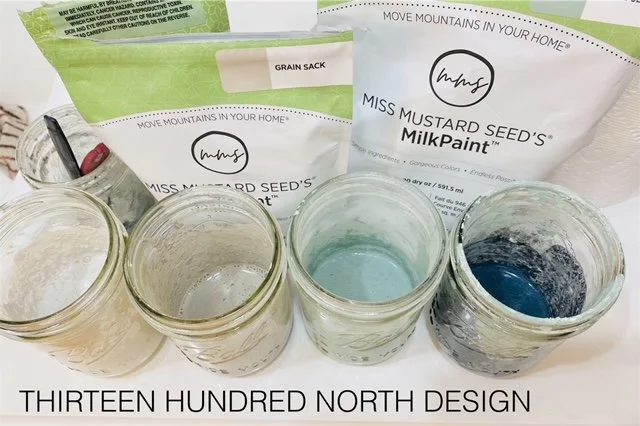
Miss Mustard Seed’s® MilkPaint™ in Schloss
Miss Mustard Seed's® MilkPaint™ in Ink Blue
Miss Mustard Seed's® MilkPaint™ in By the Sea
Miss Mustard Seed's® MilkPaint™ in Grain Sack
Shellac
Microfiber towels
Heat Gun (optional)
Misting water bottle (optional)
Finishing Touches:
Small glass drawer pulls found at Hobby Lobby
Peel and stick wallpaper for drawer and shelf lining
Cleaning And Repairs
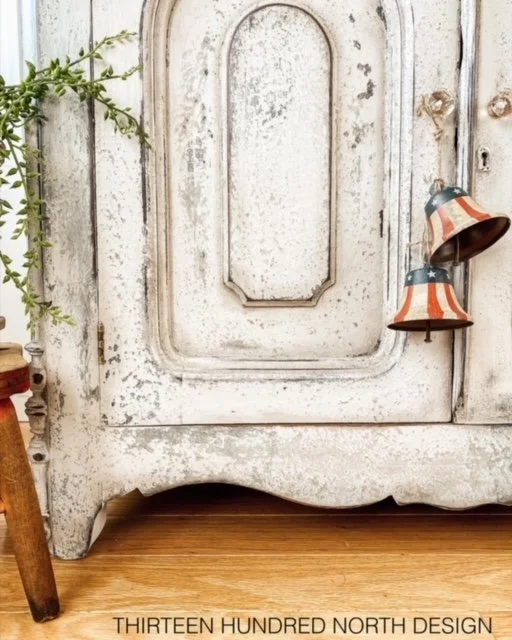
This washstand was in great shape overall. It did have a broken door hinge, a few deep scratches, and a few joints that had wiggled loose over the years. I went around to all the loose joints and secured them with wood glue and clamps. I filled the deep scratches using Bondo and filled in the previous hardware holes so I could have centered knobs.
This piece had been in storage for many years, so I vacuumed it all out and I scrubbed it down using dawn dish soap, a sponge, and microfiber towels. After it was clean and dry, I was ready to sand!
Sanding
There was very little sheen or finish left on this piece, so it just needed a quick scuff sand. I did want some chipping from the MilkPaint™, so I very lightly sanded hoping it would chip in areas where a bit of the finish was left. I hand sanded the entire piece using 220 sandpaper.
Layering Milk Paint
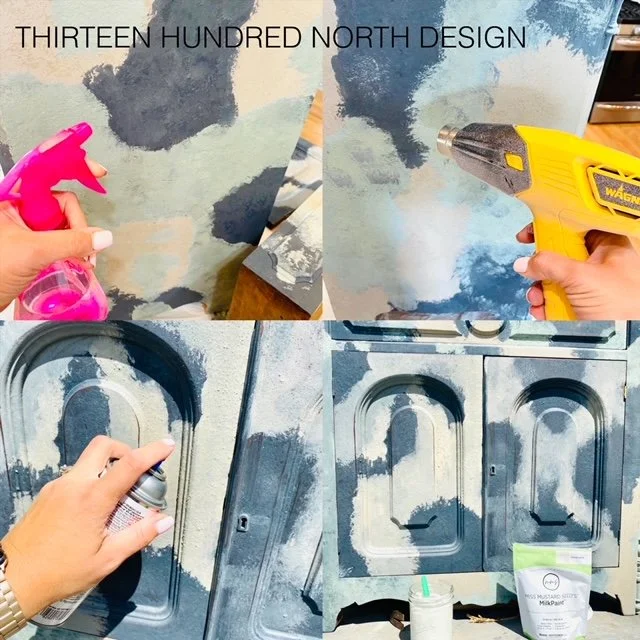
In order to get a lot of texture, chipping and various layers showing through I began by painting my base layer. I randomly painted different darker colors that I wanted to show through the top layer of paint and left some areas with the wood still showing. I alternated Miss Mustard Seed's® MilkPaint™ in Ink Blue, By the Sea, and Schloss. I applied the paint using a pouncing or stippling technique to bring out the most texture. When I initially mixed the paint, I added just slightly less water than is suggested for added texture from the thicker paint as well.
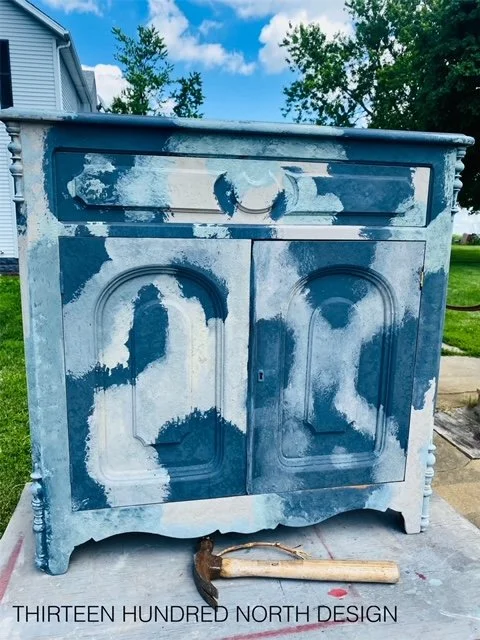
If you attempt this technique, you must trust the process! It looks insane and quite chaotic, but I promise it works itself out! In areas that I felt needed a second coat, I did touch them up with a second layer of paint. When your base layer is dry and looking like a sad version of camouflage you are ready for the next step.
I sealed this base layer of paint using clear Shellac. I did this for two reasons. 1) Because I wanted the layer of Shellac to resist some of the next layers of paint and chip allowing some of the base colors to show through. 2) Because I wanted to seal the base colors in, so they did not bleed into my all-over lighter top layer of paint.
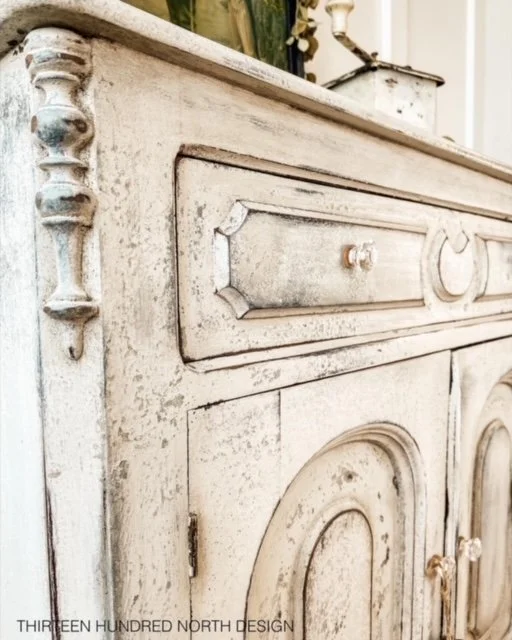
After the Shellac was completely dry I painted two layers of Miss Mustard Seed's® MilkPaint™ in Grain Sack mixed 1:1 paint powder to water, as directed on the bag, and applied using normal brush strokes. As the paint begins to dry, this is when the magic happens. Some of the base layers of paint chip away to the wood, and some of the top layer of Grain Sack chips away allowing the base colors to show through. I let these top layers dry completely before moving on to the next step.
Distressing
I started distressing first by misting the entire piece down with water in sections and lightly going over it with my heat gun. Rehydrating the paint and adding a little heat can be a great way to achieve a more chippy finish. You can skip this step if you are happy with the amount of chipping already! After the piece had dried from the misting, I took a wet microfiber towel and wet sanded the areas I wanted more of the base colors to come through. This is a preference thing and is also a step that can be skipped if you are happy with your finish as it is.
My last step in distressing this piece was lightly sanding all over with a 220 grit sanding block. This step was less about the distressing and more about smoothing out the finish a bit and bringing the wood back out on some of the edges. I did not want to lose all the great texture, but I also wanted to make sure the piece was smooth enough to clean for the future owner.
Sealing
After wiping away any paint dust I began to seal with Miss Mustard Seed's® MilkWax™ in Clear. I applied the wax with a paint brush, allowed the wax to dry, then buffed it back with a microfiber cloth. I then took a small detail brush and Miss Mustard Seed's® MilkWax™ in Antiquing adding it in the details to create depth and give it a little bit more of that aged look.
The Details
I decided I wanted classic glass pulls on this piece, so I ran into Hobby Lobby to pick some up! I needed a smaller knob and had very little space to add them to the doors, so I chose to find them in a store instead of buying them online so I could be sure the size was right.
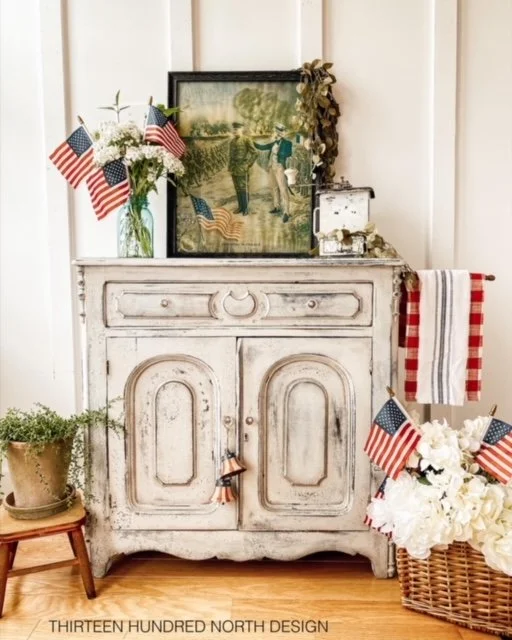
The drawer on this piece had gorgeous Knapp joints so I was careful not to paint over any of the drawer sides, and I gave them a big drink of Miss Mustard Seed's® MilkOil™ to show off the detail. This washstand also had this adorable little rod that pulls out to hang your hand towel on, so that also got a drink of MilkOil™ to bring it back to life. I chose a neutral peel and stick wallpaper for the drawer liner and to line the two shelves inside.
Staging
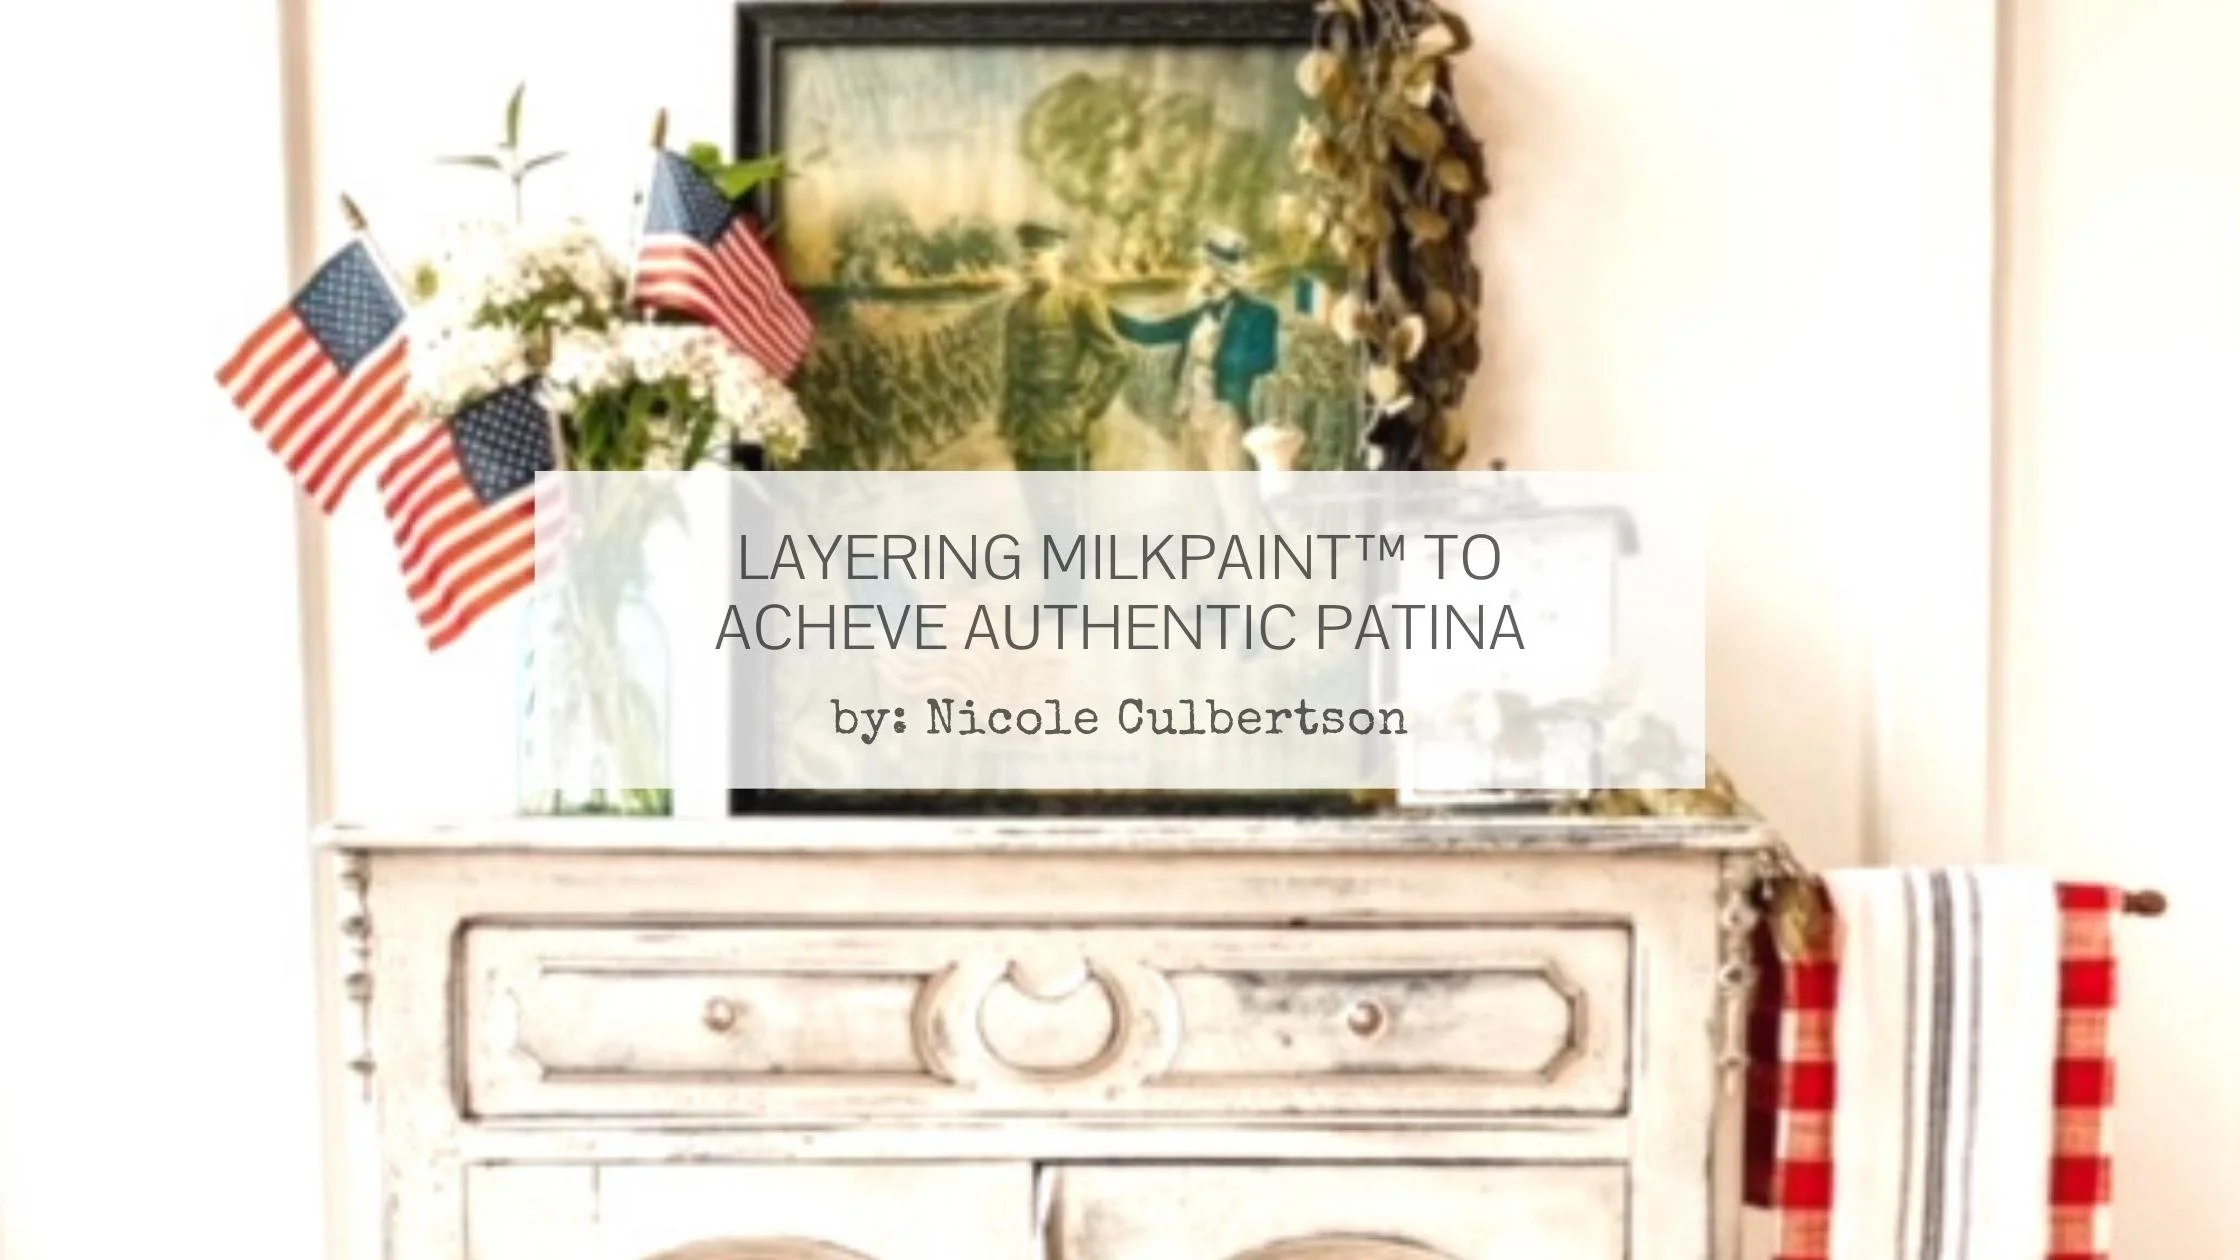
We are right in between Memorial Day and the 4th of July, so I was thinking vintage patriotic staging would be perfect. I found this amazing antique framed war poster on that same picking trip I had found the washstand on, and that was my staging inspiration. I ordered small inexpensive flags on Amazon and decided to tea stain them and give them that antiqued look. A classic blue Ball jar and hydrangeas pulled it all together for me!
Conclusion
I am beyond pleased with the finish on this piece. It turned out exactly as I was hoping it would and it made me fall even more in love with MilkPaint™. I truly feel like the patina you can achieve with it is unlike any other product out there. This layered finish would have almost anyone questioning if it were authentically aged.
Happy Painting!
