
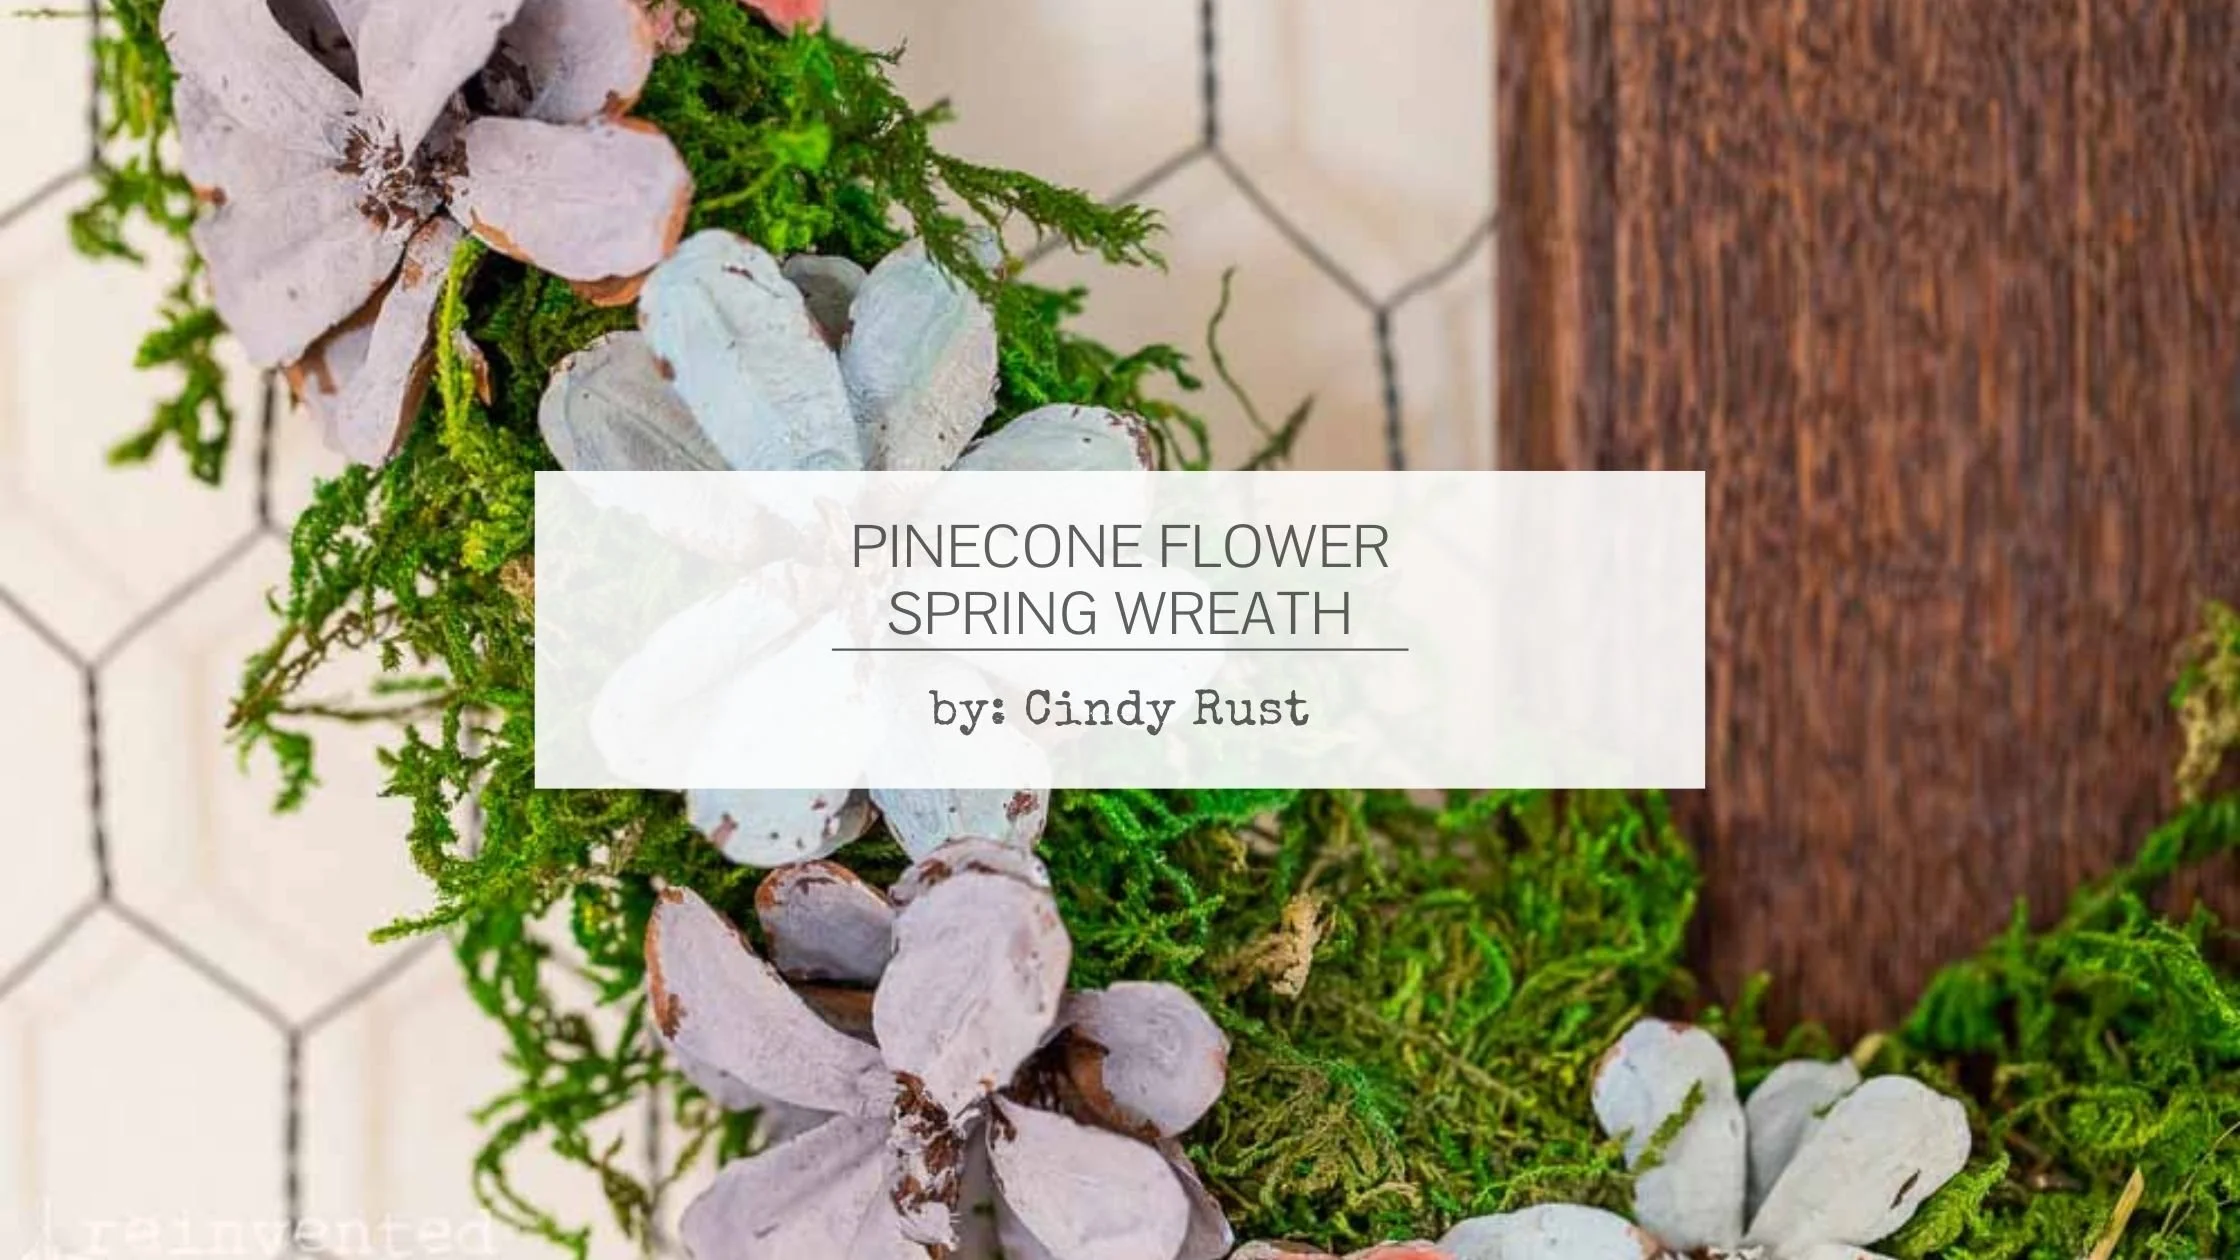
Pinecone Flower Spring Wreath
We are so thrilled to introduce you to a brand new guest blogger here at MMS MilkPaint™ - Cindy Rust from Reinvented Delaware.

Cindy is a long-time lover of MilkPaint™ and a whiz at craft projects, furniture makeovers and reinventing everyday objects into brand new creations.
Today, Cindy has a sweet Spring craft project for you involving pinecones.
Take it away, Cindy!
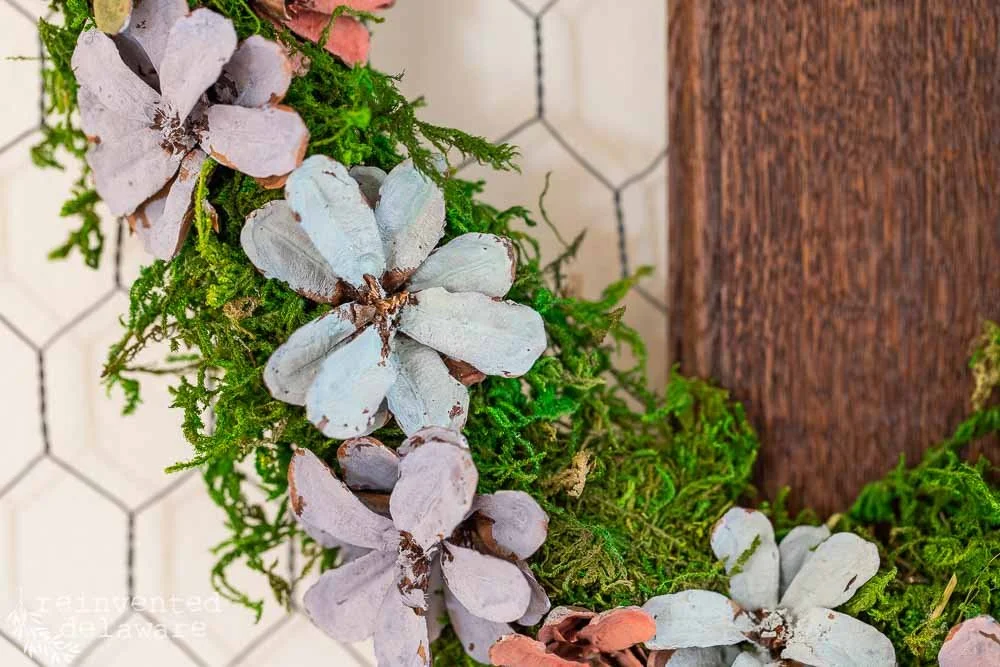
Spring is just around the corner, and we are all thinking of new projects to do for our homes! Today, I am sharing an easy pinecone wreath for Spring using the lovely pastel colors Miss Mustard Seed’s® MilkPaint™ has to offer!
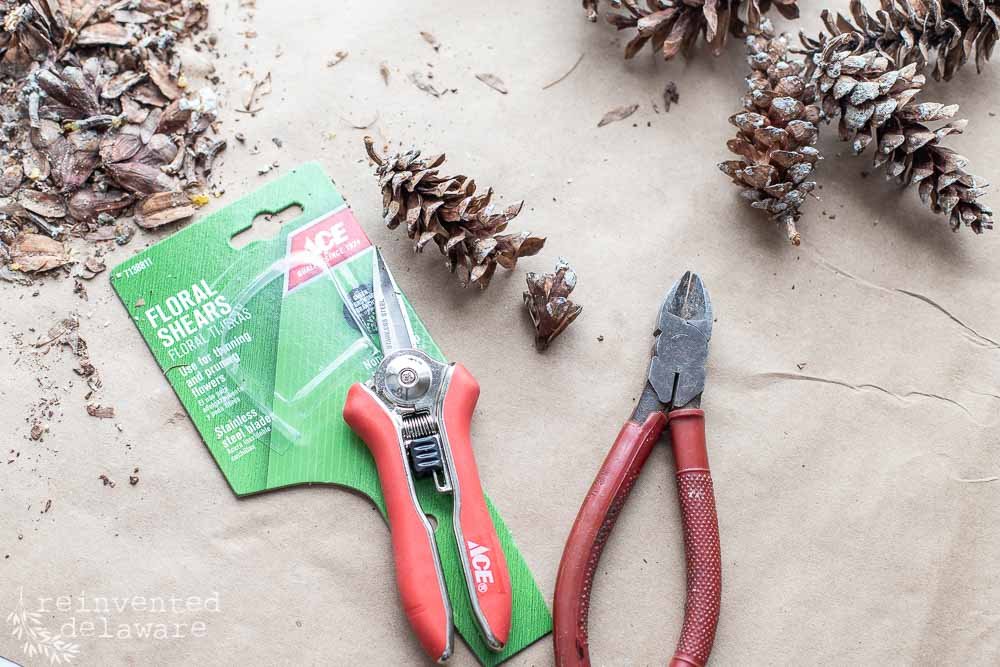
Supplies:

Wreath Form (craft wood frame, floral wire frame, or grapevine wreath)
10-15 Dried & Opened Pinecones
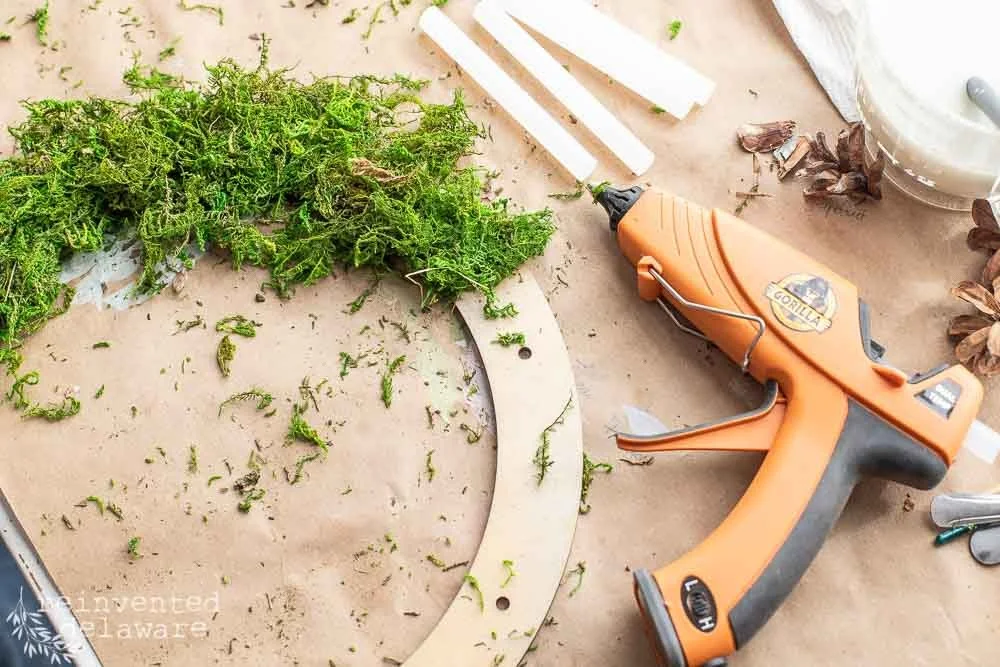
Floral Moss
Miss Mustard Seed’s® MilkPaint™ (Arabesque, Dried Lavender, By the Sea, Pink Grapefruit, Boxwood, Lucketts Green) use as many colors as you like!
Floral Clippers
Hot Glue Gun & Sticks
Twine
Artist Round Paintbrush
Step One: Mix The MilkPaint™
You can use whatever colors you like for your pinecone wreath. Pastel colors make great choices. For this wreath, I chose the colors listed above for a Spring feel.
You could choose colors for any season! Think colors like Tangerine, Schoolhouse Red, and Mustard Seed Yellow for Fall, for example. Use your imagination and create whatever color scheme you want for your home!
You can find how to mix Miss Mustard Seed’s® MilkPaint™ in this post.
Since only small amounts of each color are needed, I mixed one teaspoon of powder to one teaspoon of water in an ice cube tray. I also used a drop of MilkMix-EZ™ to help with mixing.

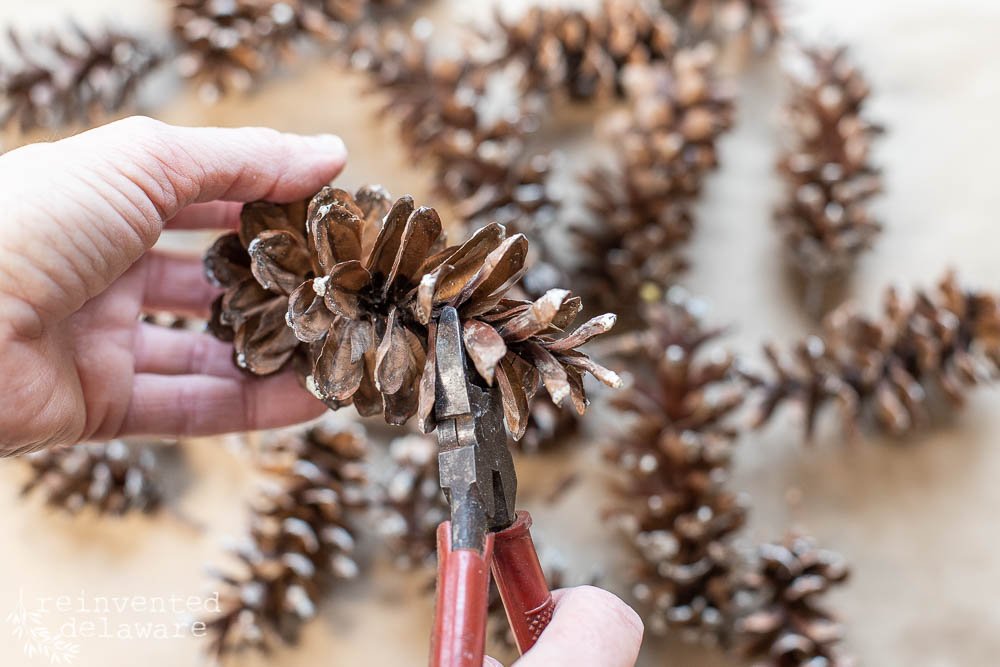
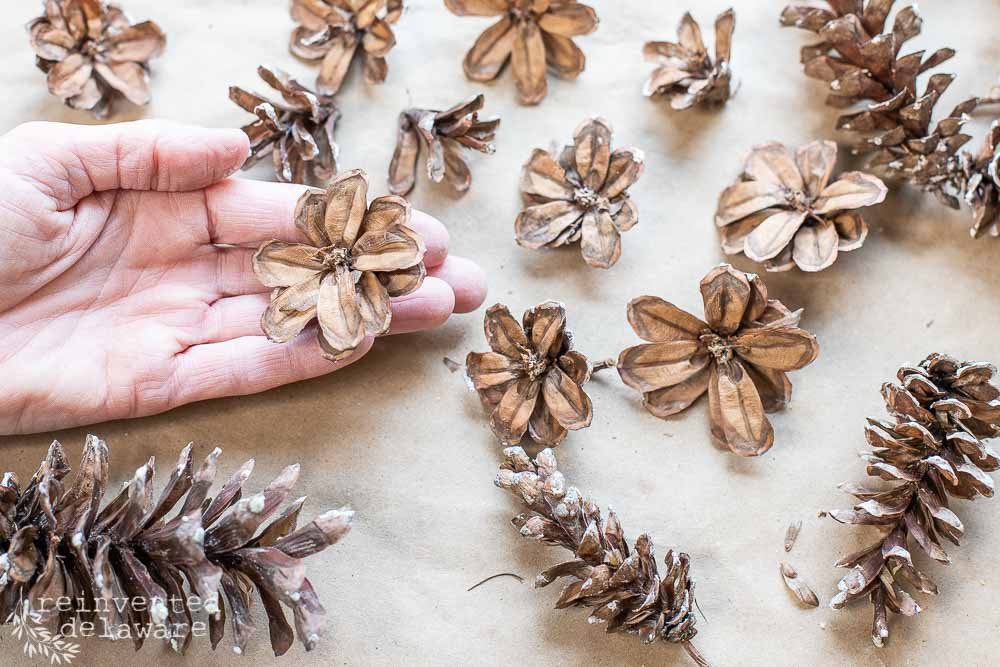
Step Two: Cut The Pinecones
Don’t make the mistake I made by using wire clippers to cut the pinecones. The clippers were dull, and in turn, my hand suffered! Use floral snips from the gardening department in your hardware store. They are sharp and have pointed tips making it easy to reach the center stem of the pinecone.
Cut about 3-4 sections from each pinecone. Each section will look like a dimensional flower! Be sure to watch the tutorial video at the end of my post to see how I do this!
Step Three: Paint The Pinecones
This is always the fun part, don’t you think? There is something about holding a paintbrush that is so calming!
Using the artist's round paintbrush, paint each ‘petal’ of the pinecone flowers you just clipped.

You can paint as many flower sections in the colors you choose. I divided up how many pinecone flowers I had and the paint colors I had mixed and did some simple math to figure out how many to paint in each color.
You don’t need to be that precise! That’s just the numbers fanatic coming out in me ;)
Have fun painting! Turn on some music, light a candle, and enjoy creating something beautiful!

Step Four: Attach The Moss
Let’s get that wreath form covered!
● If you use a grapevine wreath, you can skip this step if you like. You could spray paint the grapevine wreath or leave it natural.
● If you use a wire wreath form, wrap it in burlap first, so the moss has something to stick to.
● If you use the wood wreath form, glue on sections of the moss securely to cover the front side of the wood frame.
This part is a little messy, so grab your shop vac for clean up!
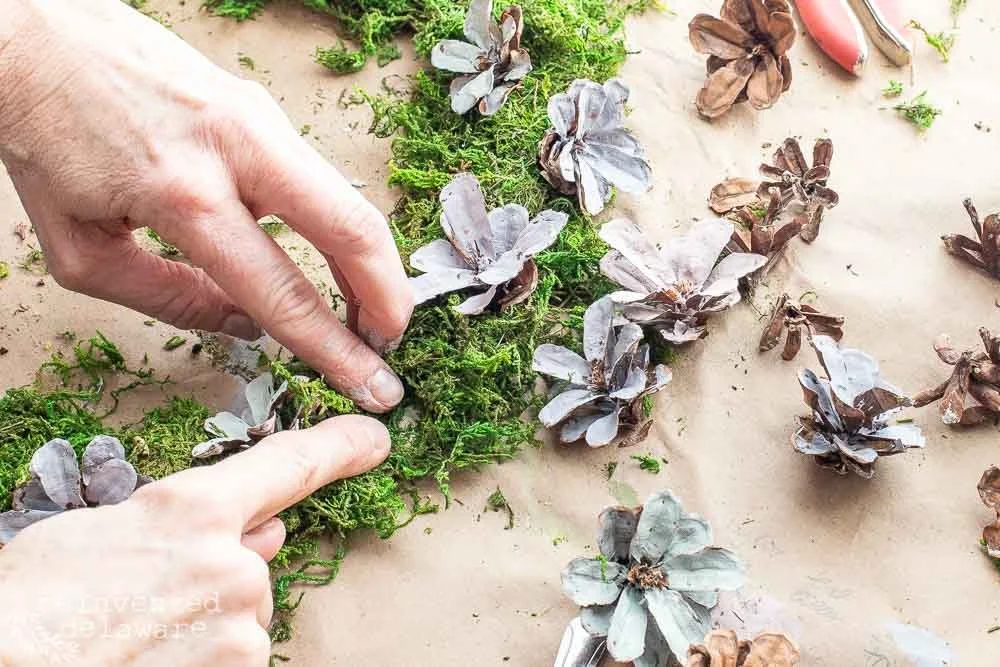
Step Five: Glue On The Flowers
By now, your painted pinecone flowers will be dry. Lay them on top of the moss to determine placement for colors and balance around the circle of the wreath form.

Once you have them in the spots you like, glue them on by separating the moss to expose the wood, put a heavy dollop of hot glue in the spot and then place the pinecone flower on the glue.
Hold until the glue cools and sets, and then move on to the next pinecone flower!
Step Six: Attach Twine Hanger
Make a loop and tie a knot with a piece of twine (use the length you need for the area you will hang your wreath), and glue the knot end to the back of the frame. If you are using the wire wreath frame, you can tie it on!

Hang your wreath wherever you need a touch of spring in your home!

Cindy’s Pinecone Flower Wreath Tutorial
Thanks for joining us today!
Wasn't that an easy wreath to make? I encourage you to think outside of the box when making yours. Change out the colors, and in doing so, you change the look.
Making this pine cone wreath would be so much fun as a group. Gather your friends, share in the cost of all of the supplies, and have a great time crafting together!
What colors would you choose for your wreath? Comment below and let us know what you think of this adorable pine cone wreath!

Thanks for stopping by! Here’s a big thank you to Miss Mustard Seed’s® MilkPaint™ for inviting me to share this free tutorial! Be sure to subscribe, so you don’t miss any posts!

We’ll see you next time!
