
Vintage Inspired Children’s Table
Adding Vintage Charm To A Wooden Chair And Table Set
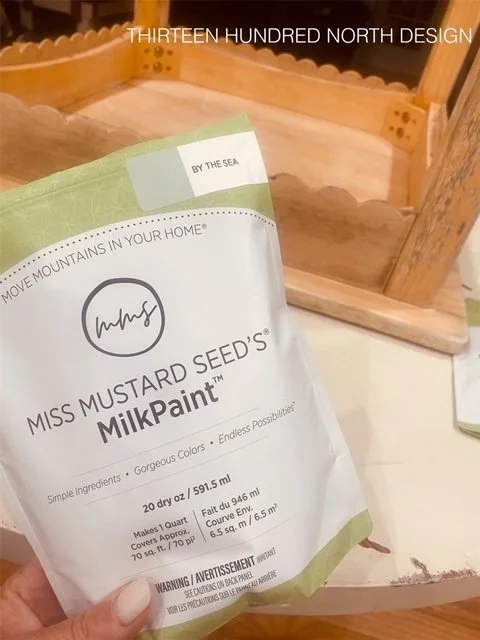
With the school year coming to a close, it got me thinking about how I will have my boys home with me for the summer, which led me to think that we only get so many of those summers before they are off on their own. One of my favorite activities to do with them is to find a destination, explore and have a picnic lunch, even if that means we are only exploring our own backyard. That train of thought reminded me that I still had my son’s small children’s table in our garage, and it was the perfect candidate for a makeover. I was dying to try the new Miss Mustard Seed’s® MilkPaint™ color “By the Sea,” and it turned out to be a match made in shabby chic heaven.

Inspiration
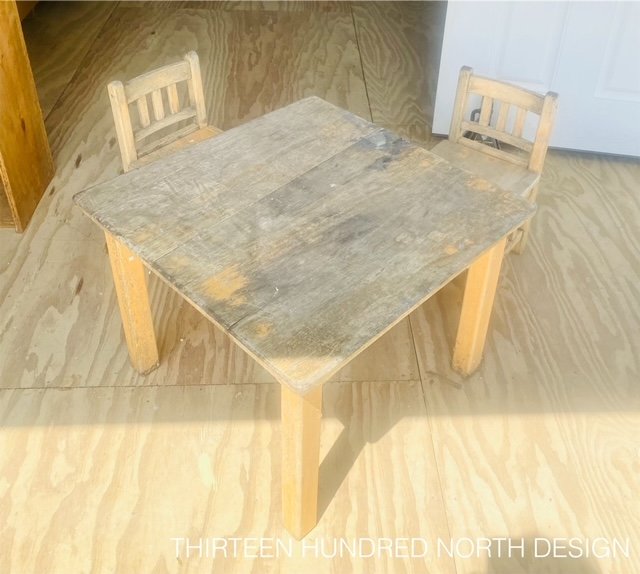
My inspiration for this sweet little table set was the color I had chosen. “By the Sea” reminds me of that beautiful, muted teal found in vintage and shabby chic fabrics. The table set is solid wood, but it had no real character. It was originally blonde wood with very basic construction. I thought adding scalloped details to the table, and the chairs would give it character and take the table in the style direction I was headed. Adding on small elements to basic furniture is such a small detail, but it really can transform something and make it look like a custom-built item.
Products I Used To Achieve This Look:
Cleaning:
Bleach cleaning spray
Dawn dish soap
Scrubbing sponge
Vacuum
Microfiber towels
Repairs And Scallops:
Wood glue
¼” plywood pieces
Painter’s Tape
Tools:
Orbital Sander
Drill
Miter saw
Band saw
Hole saw
Pin Nailer
3/4” micro pin nails
Sanding:
120 grit sandpaper
220 grit sandpaper
Sanding block
Painting & Finishing:
2” Paintbrush
Satin Topcoat
Cleaning & Repairs
This little table had seen better days, we would leave it on our patio, and it would get rained on if it was pulled out from under the awning. The table had been stored in our garage for years, and some of the wood had aged, so it was in serious need of a good cleaning.
I started by spraying the whole set down with a multi-purpose bleach cleaner and letting that sit for a bit. I then came through with my dawn dish soap and hot water and gave it a really good scrub, and left it to dry out in the sun. I did take the legs off as well, added wood glue to all of the joints, and screwed everything back together just to ensure it was good and sturdy for its next life.
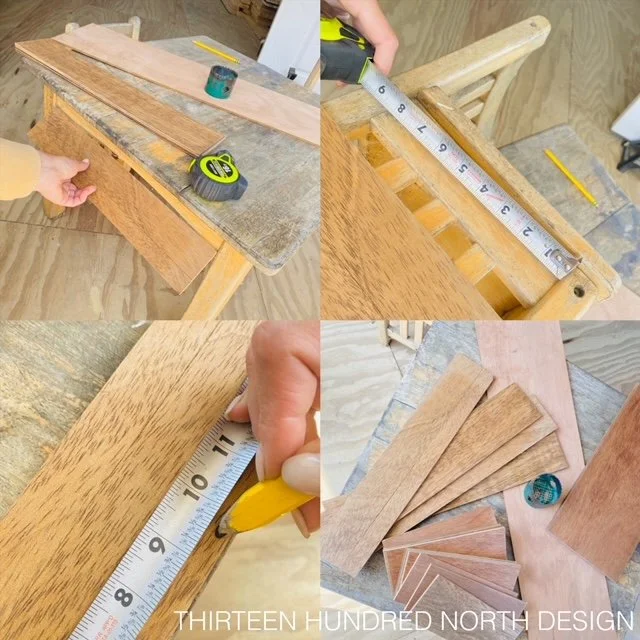
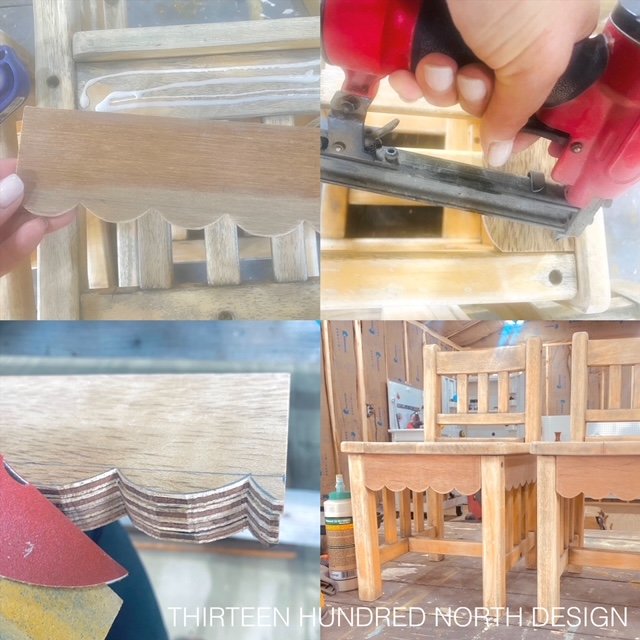
To create the scalloped details, I cut down ¼” plywood pieces using my miter saw to fit into the areas I wanted to add the details. Once the small wood pieces were cut to size, I found the center of each piece and began to draw out my scalloped half-moon shapes using the small lid of my furniture wax as my guide. After I had the scallops drawn onto the top piece of plywood, I taped together four plywood pieces using painters’ tape, enabling me to cut four at a time on my band saw, saving me time and helping them to be more uniform. I ran each set through the band saw slowly, following the lines I had drawn on the top.
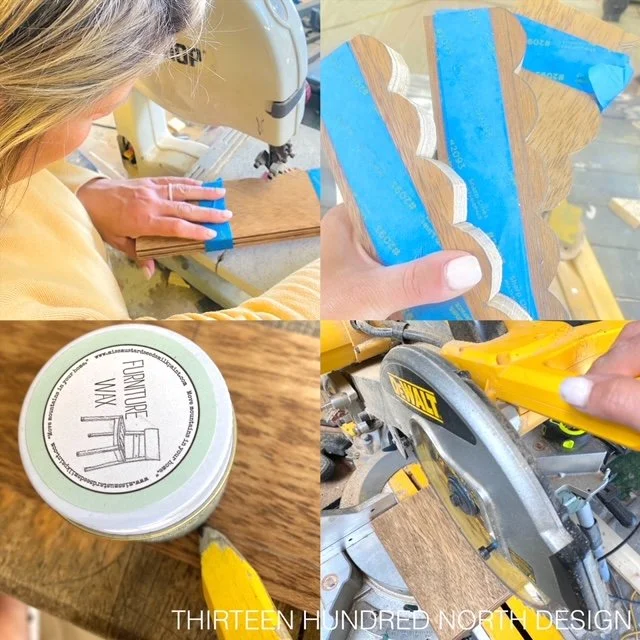
Once I had finished cutting all of the trim pieces, I hand sanded each set to smooth the edges and get rid of any little splintered pieces of wood or jagged areas using 220 grit sandpaper. I attached the trim using wood glue and a pin nailer. The pin nailer I found at a local big-box retailer and they are fairly inexpensive. The thing I love most about a pin nailer is there is no head on the pin that it shoots into the wood, so it allows you to nail in visible areas without making a huge nail hole that needs to be filled and sanded.
Sanding
After the cleaning, repairs, and detail pieces were attached I sanded the entire table set down using 120 grit sandpaper with an orbital sander. When I had everything nice and smooth, I cleaned off all of the sawdust, and I was ready to paint.
Painting
I used the new shade “By the Sea” from Miss Mustard Seed’s® MilkPaint™ for this set. I mixed my MilkPaint™ as suggested on the package, and I added a few drops of the new anti-foaming agent. I decided that I wanted to do some distressing on this set, but I was not looking for a lot of chipping, so I did add MilkGrip™ to my paint as well. I applied two coats of paint and let it dry. After the pieces had dried overnight, I distressed them with 220 grit sandpaper all over but mostly concentrating on the areas a piece of furniture would naturally wear over time.

Sealing
I opted to seal this piece in a durable clear coat because I thought it would likely see plenty of wear and frequent cleaning in its next home. I went with a satin finish to make it easy to clean, and I applied the topcoat by spraying it on using my pneumatic paint sprayer.
The Details
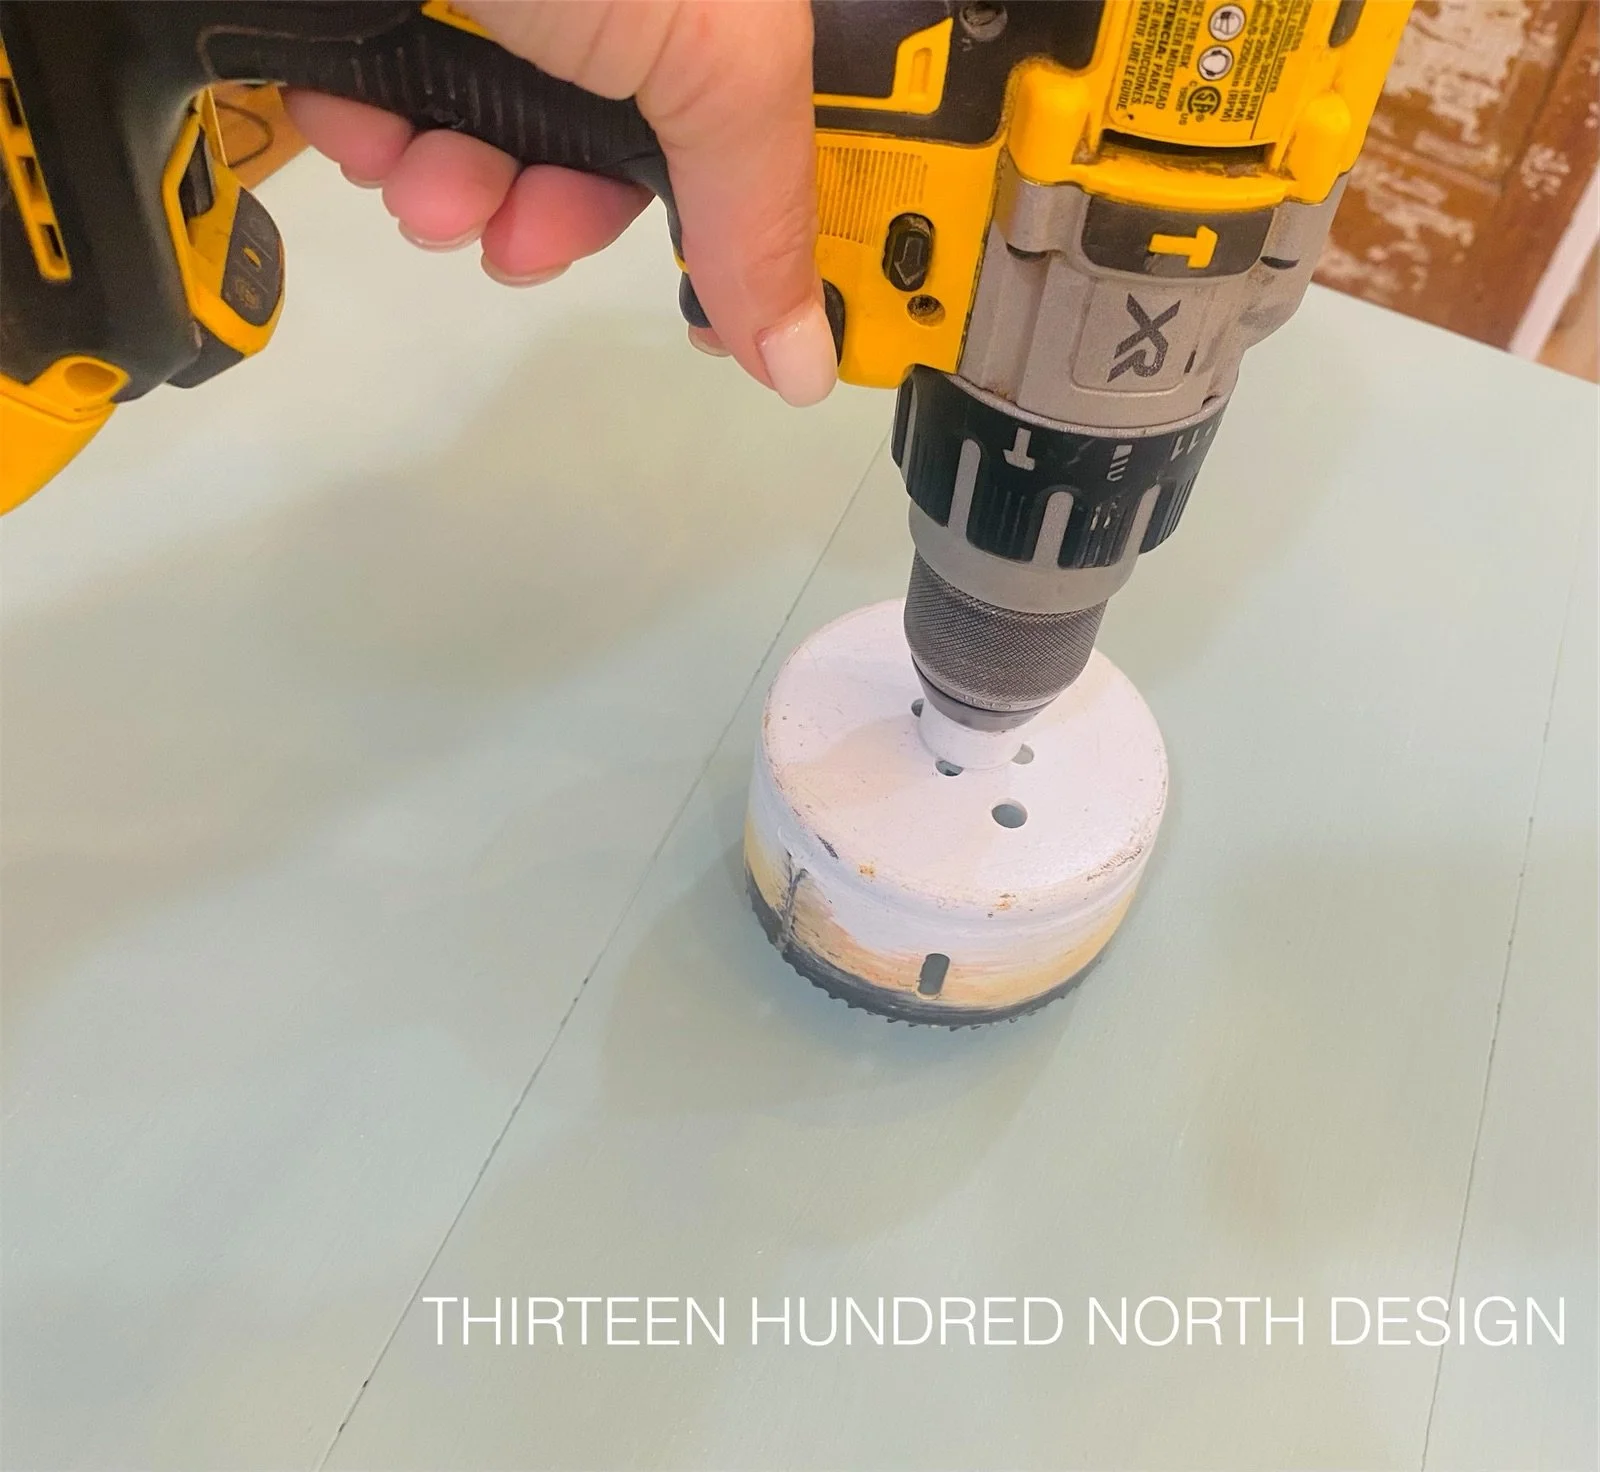
I decided to use my hole saw to cut a hole in the center of the table to add a little flowerpot. I thought it would add a fun detail that could be used as a vase, an area for a plant, or a place for art supplies.
I painted a terracotta pot in the same paint I used for the table set (By the Sea) and sealed it with MilkWax™ White to give it an aged look. Doesn’t it look so sweet in the middle of the table?

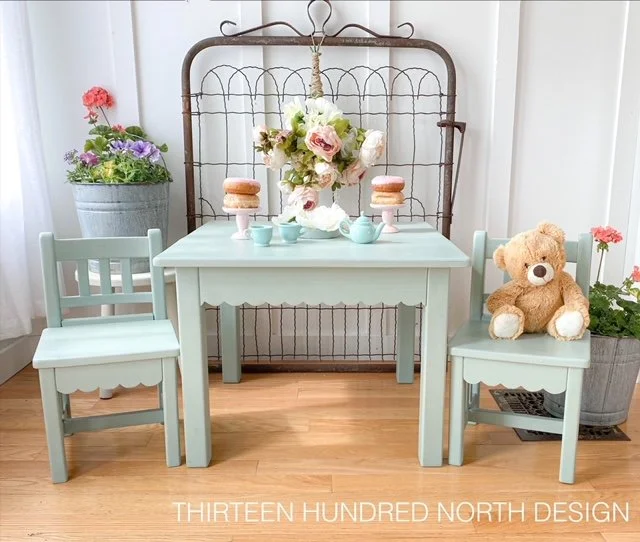
Staging
Tea, anyone? I found this sweet little teapot and cups at the craft store and knew they needed to be included in my staging. Keeping in the theme that gave me my inspiration, I thought I would create a cute little vintage summer tea party. I brought in fresh flowers from my yard and a rusty garden gate. Pastel peonies and pink donuts with sprinkles pulled it all together.
Conclusion
I am so happy with how this little set turned out. I have never refinished a table and chair set, nor have I done much children’s furniture. Stepping outside of your comfort zone can be the best way to spark new creativity. I feel that adding the scalloped details and the flowerpot center, added character to this otherwise boring children’s table. I am a Mom of boys, so this piece allowed me to be creative and live out my vintage tea party dreams while giving me an excuse to purchase pink frosted donuts! I want to encourage you to step back and look at your next painting project and think about what you could add or take away to completely transform and customize the piece!
