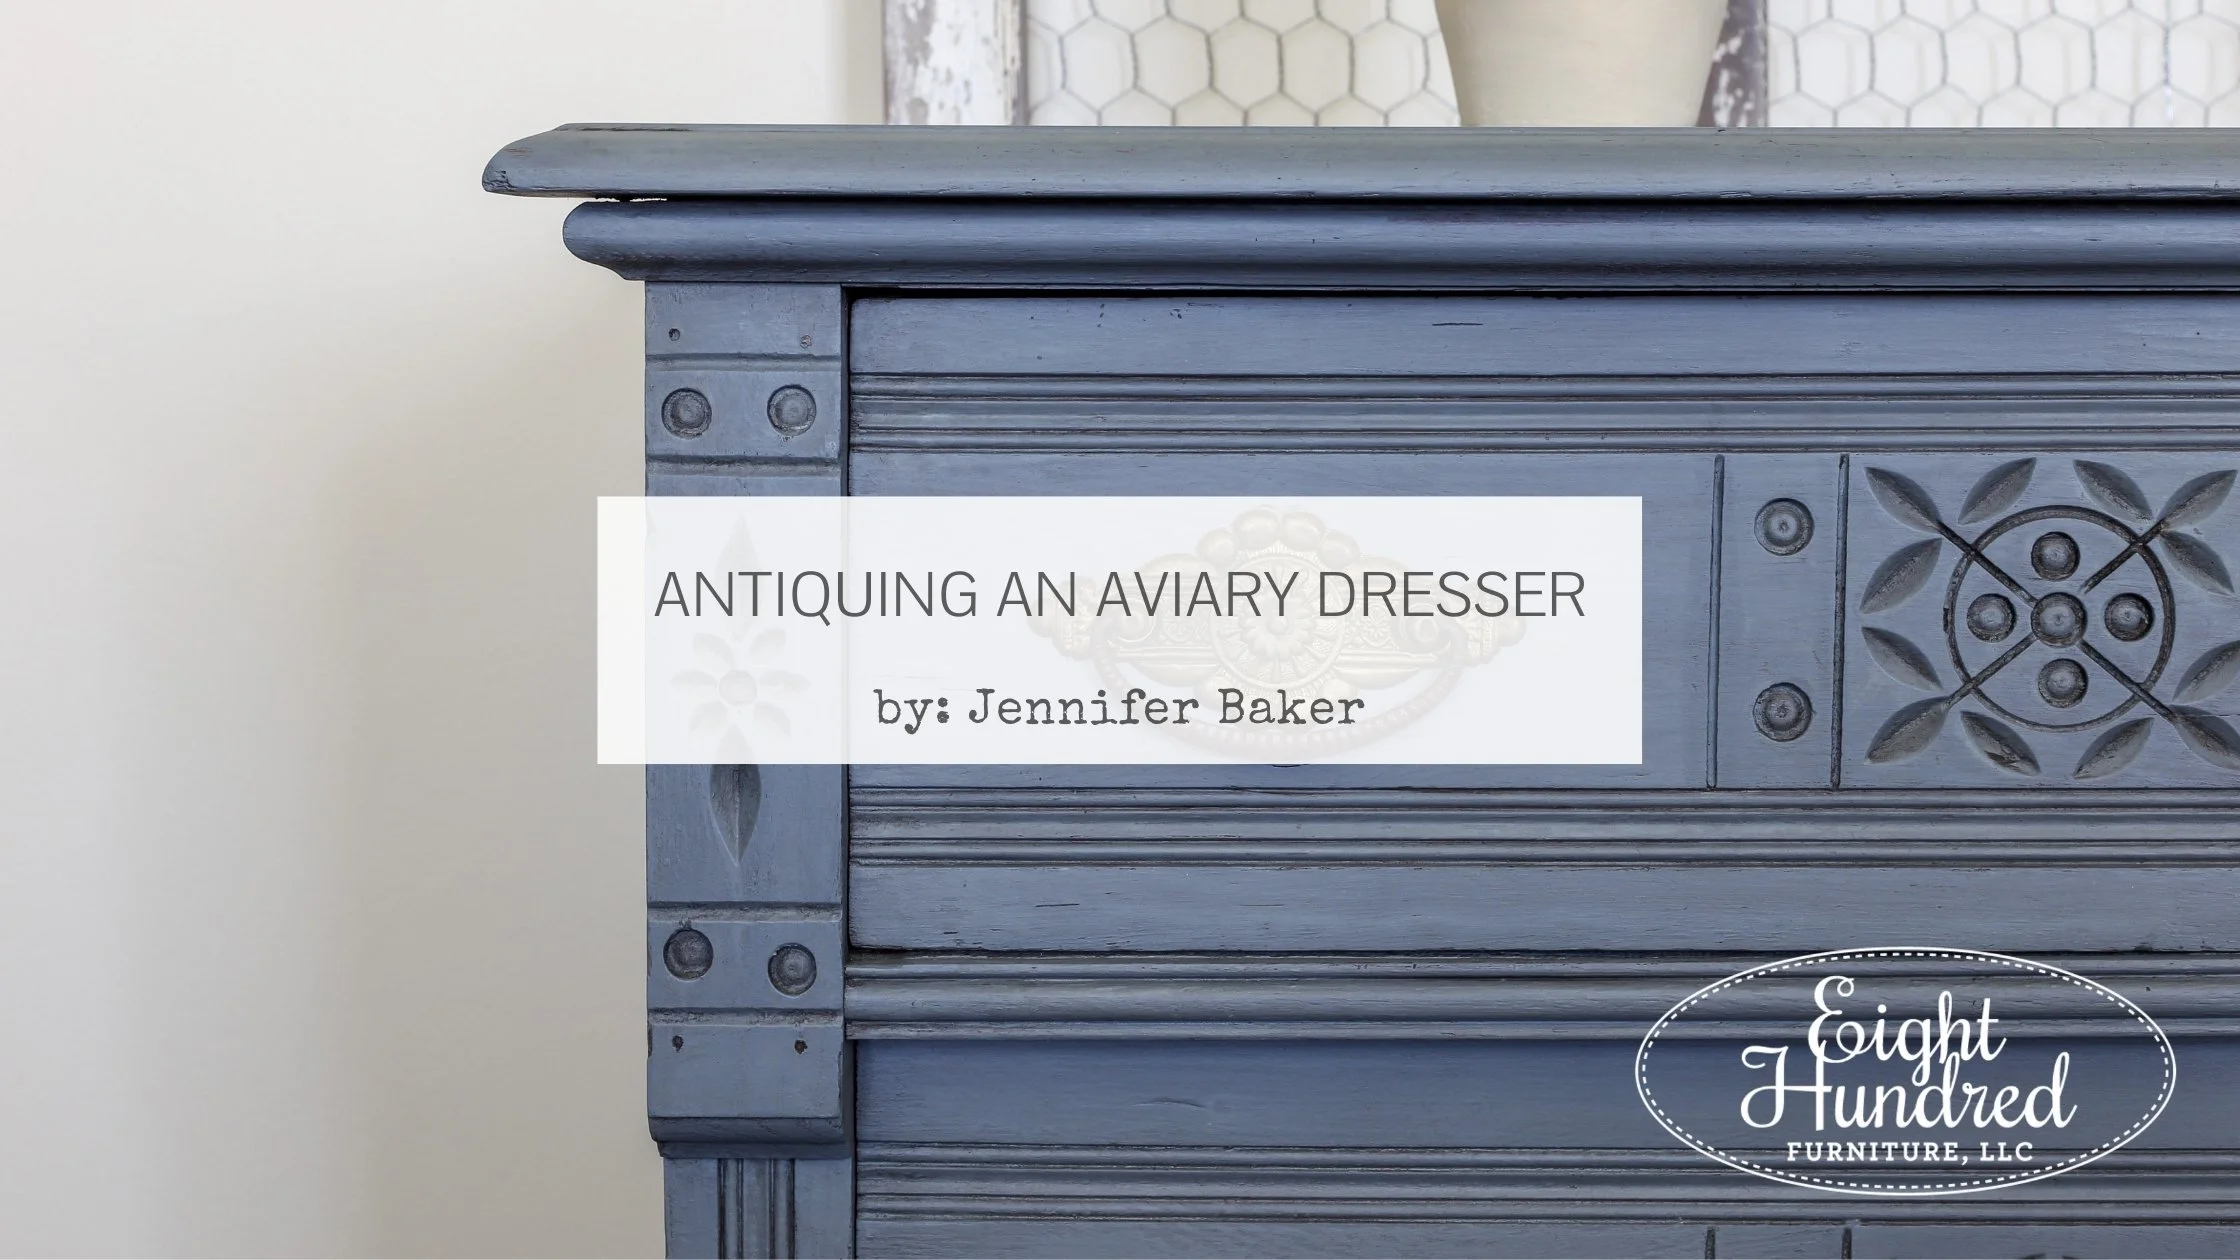
Antiquing An Aviary Dresser
Want to add age and patina to your next painted furniture project? Consider using MMS MilkPaint™’s MilkWax™ Antiquing! It’s just the right product to simulate a worn look that could only happen over time.
Let’s see how it’s done!
Step 1 - Paint Your Piece In MilkPaint™
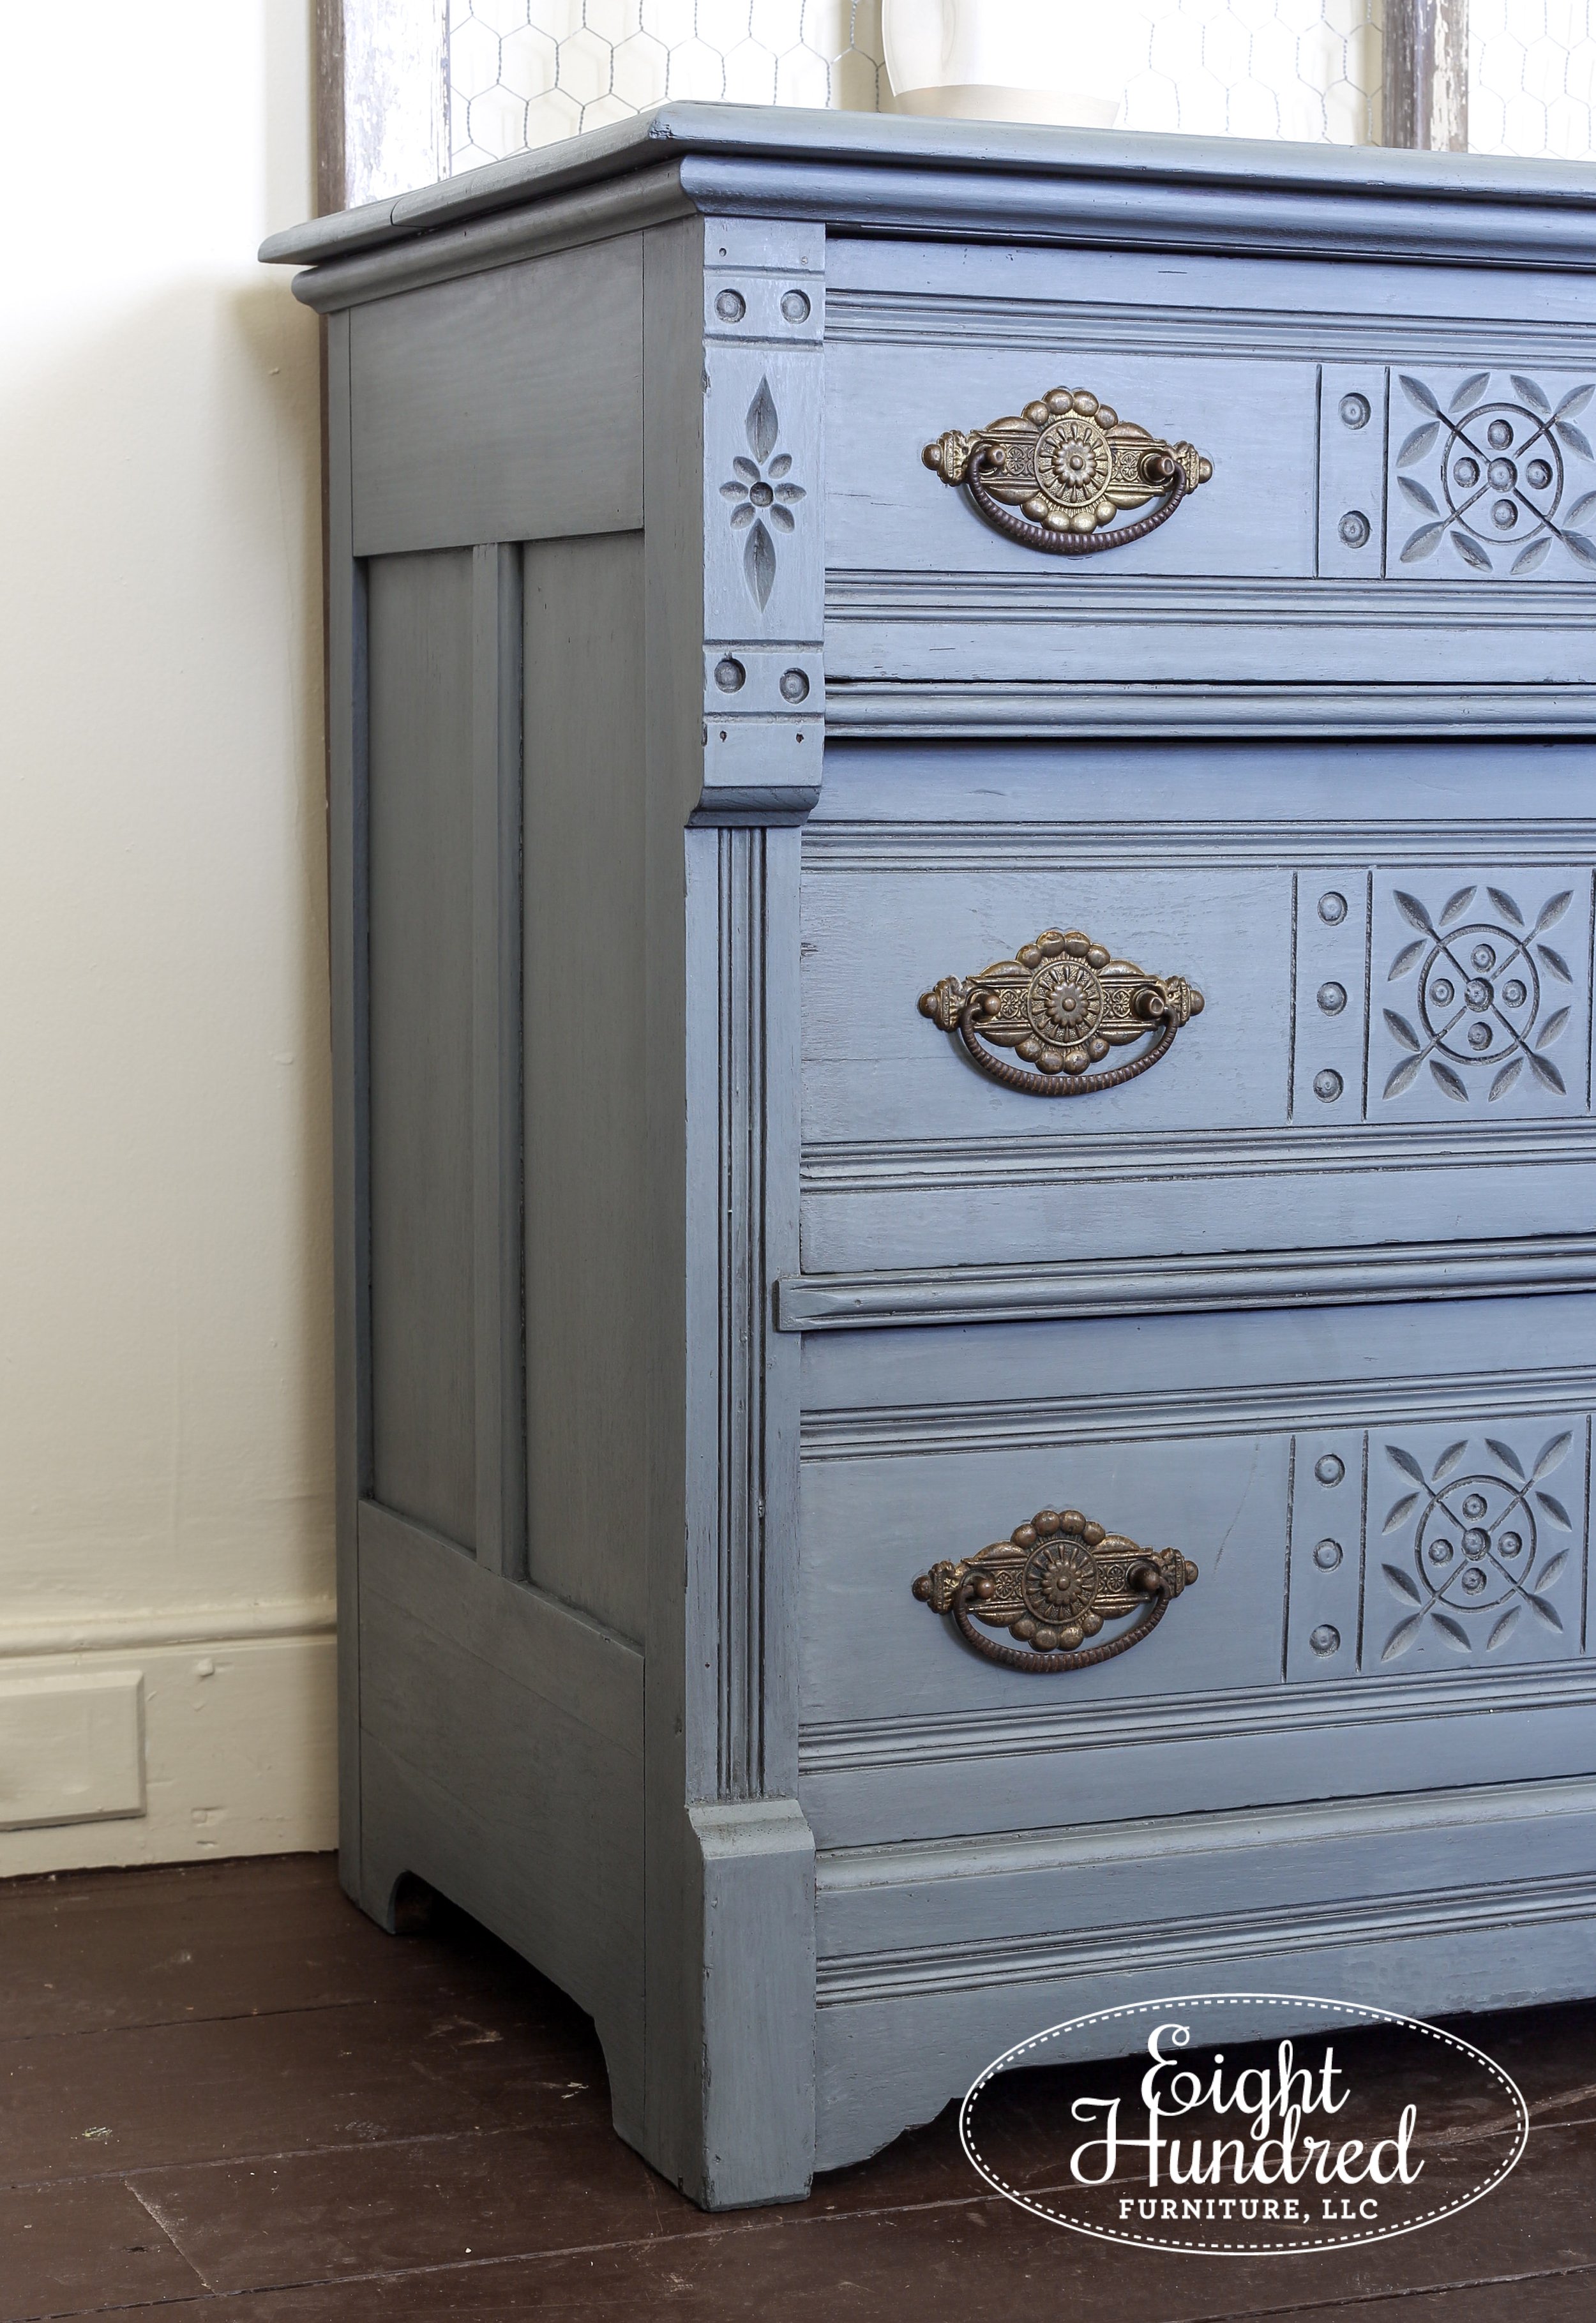
To get started, pick your favorite MMSMP color and paint your piece. I picked Aviary for my eastlake style dresser. Aviary is a smokey blueish gray that’s so pretty it’s hard not to use it on every project!
Here’s what my piece looked like after 2 coats of Aviary MilkPaint™.

Step 2 - Seal Your Piece With A Clear Topcoat
Antiquing effects can get a bit out of control and look too heavy-handed. One easy way to prevent this from happening is to apply a layer of clear topcoat first! You could use MilkWax™ Clear or MilkOil™, which is what I did on my dresser.
The darker areas are where I applied the MilkOil™, and the lighter parts are where there’s no topcoat yet. The MilkPaint™ is still raw (unsealed) in those spots.

After wiping away the excess with a lint-free cloth, you’re ready to move onto the next step - adding MilkWax™ Antiquing!
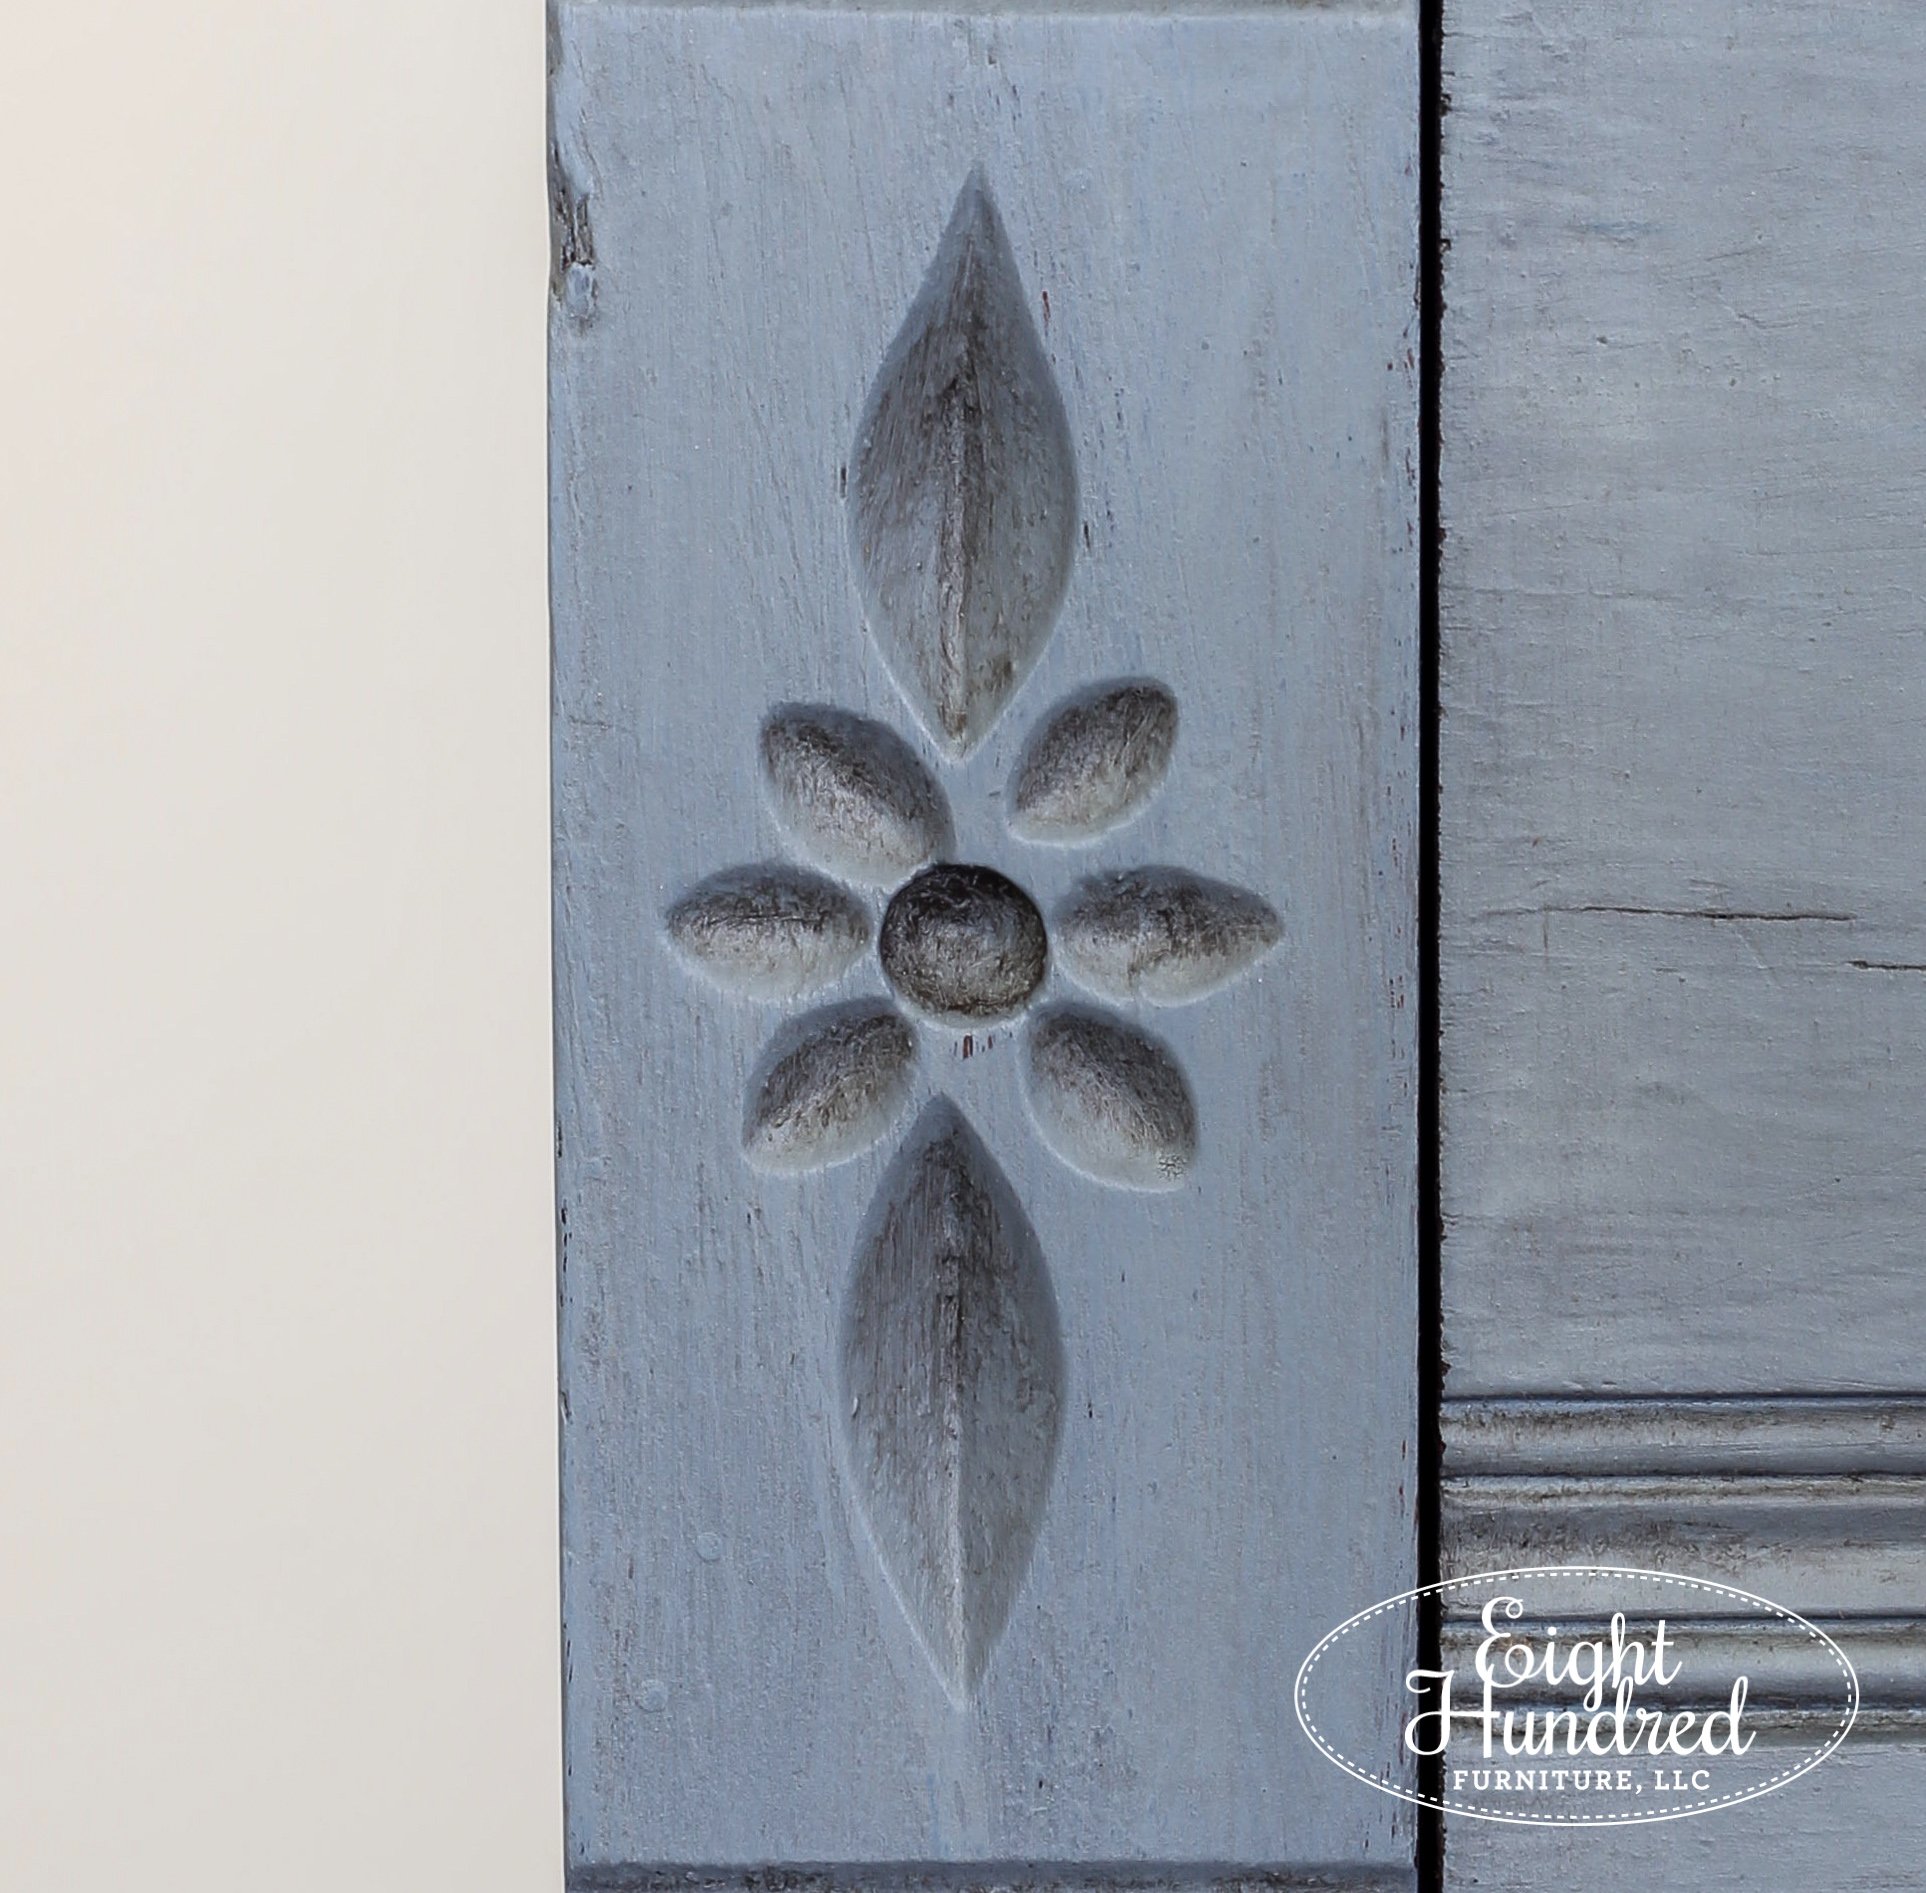
Step 3 - Apply MilkWax™ Antiquing
Using a wax brush or a lint-free cloth, get a bit of the antiquing wax onto the surface and begin rubbing it in.
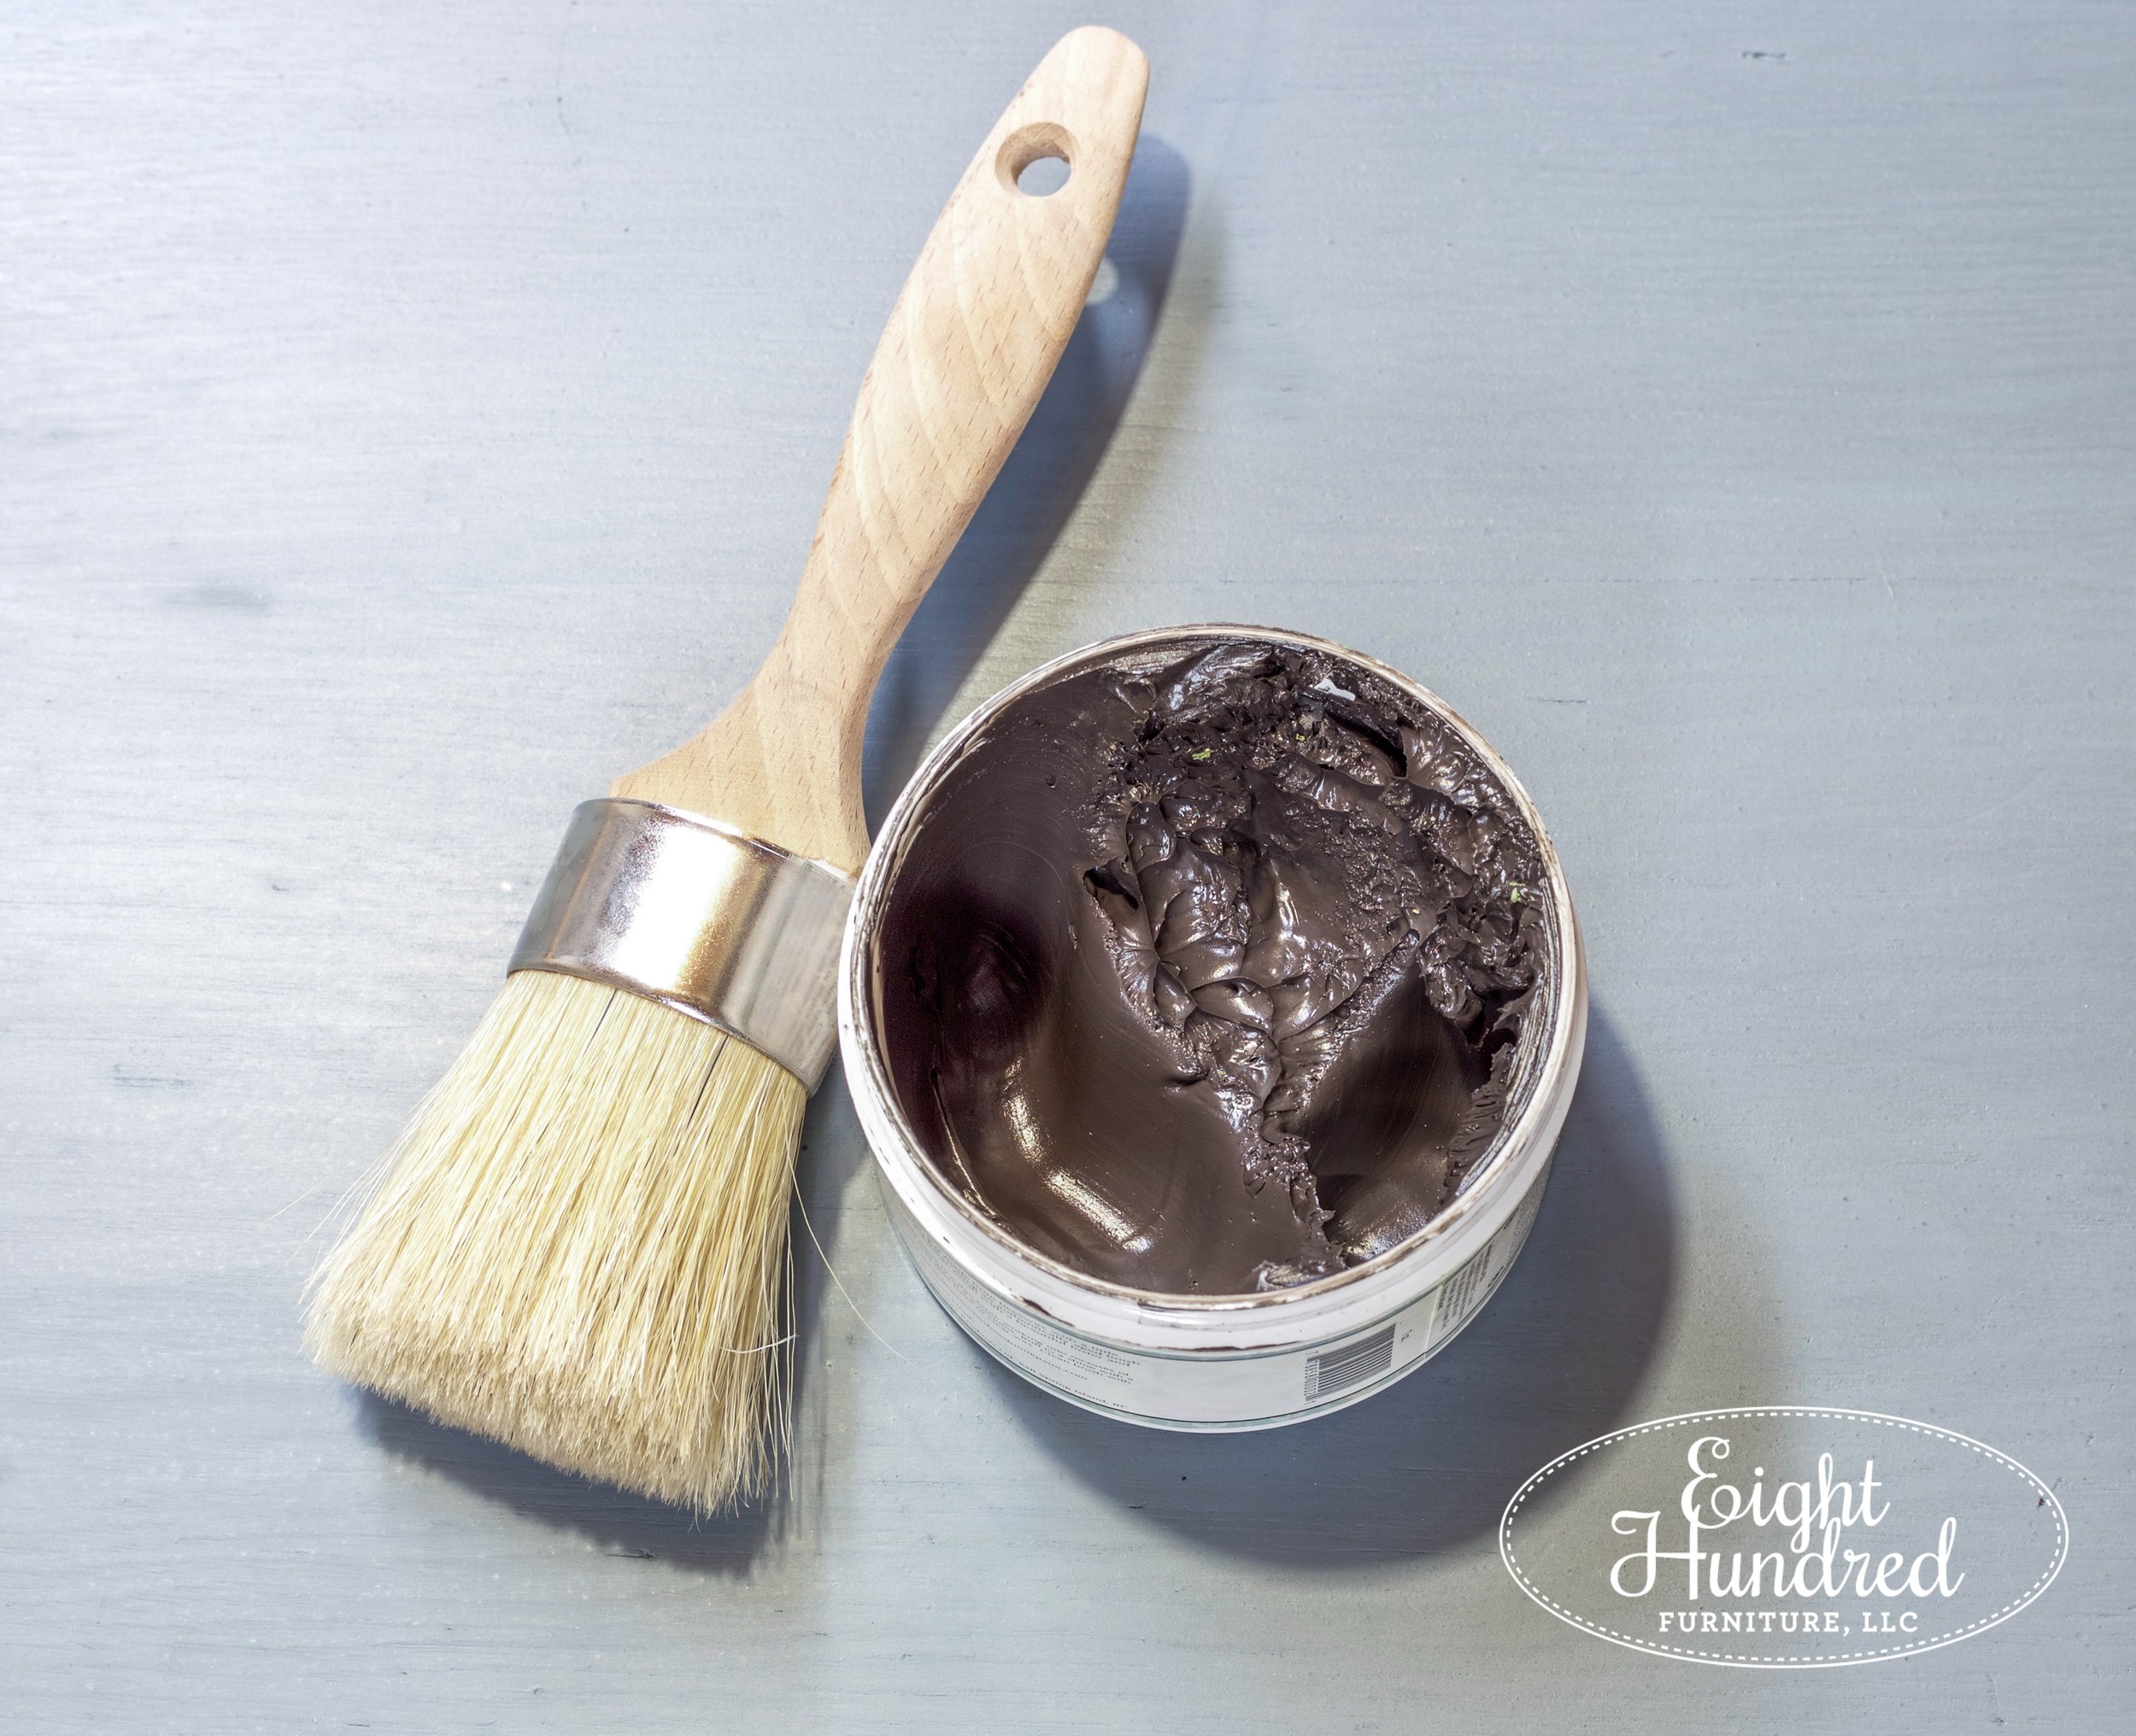
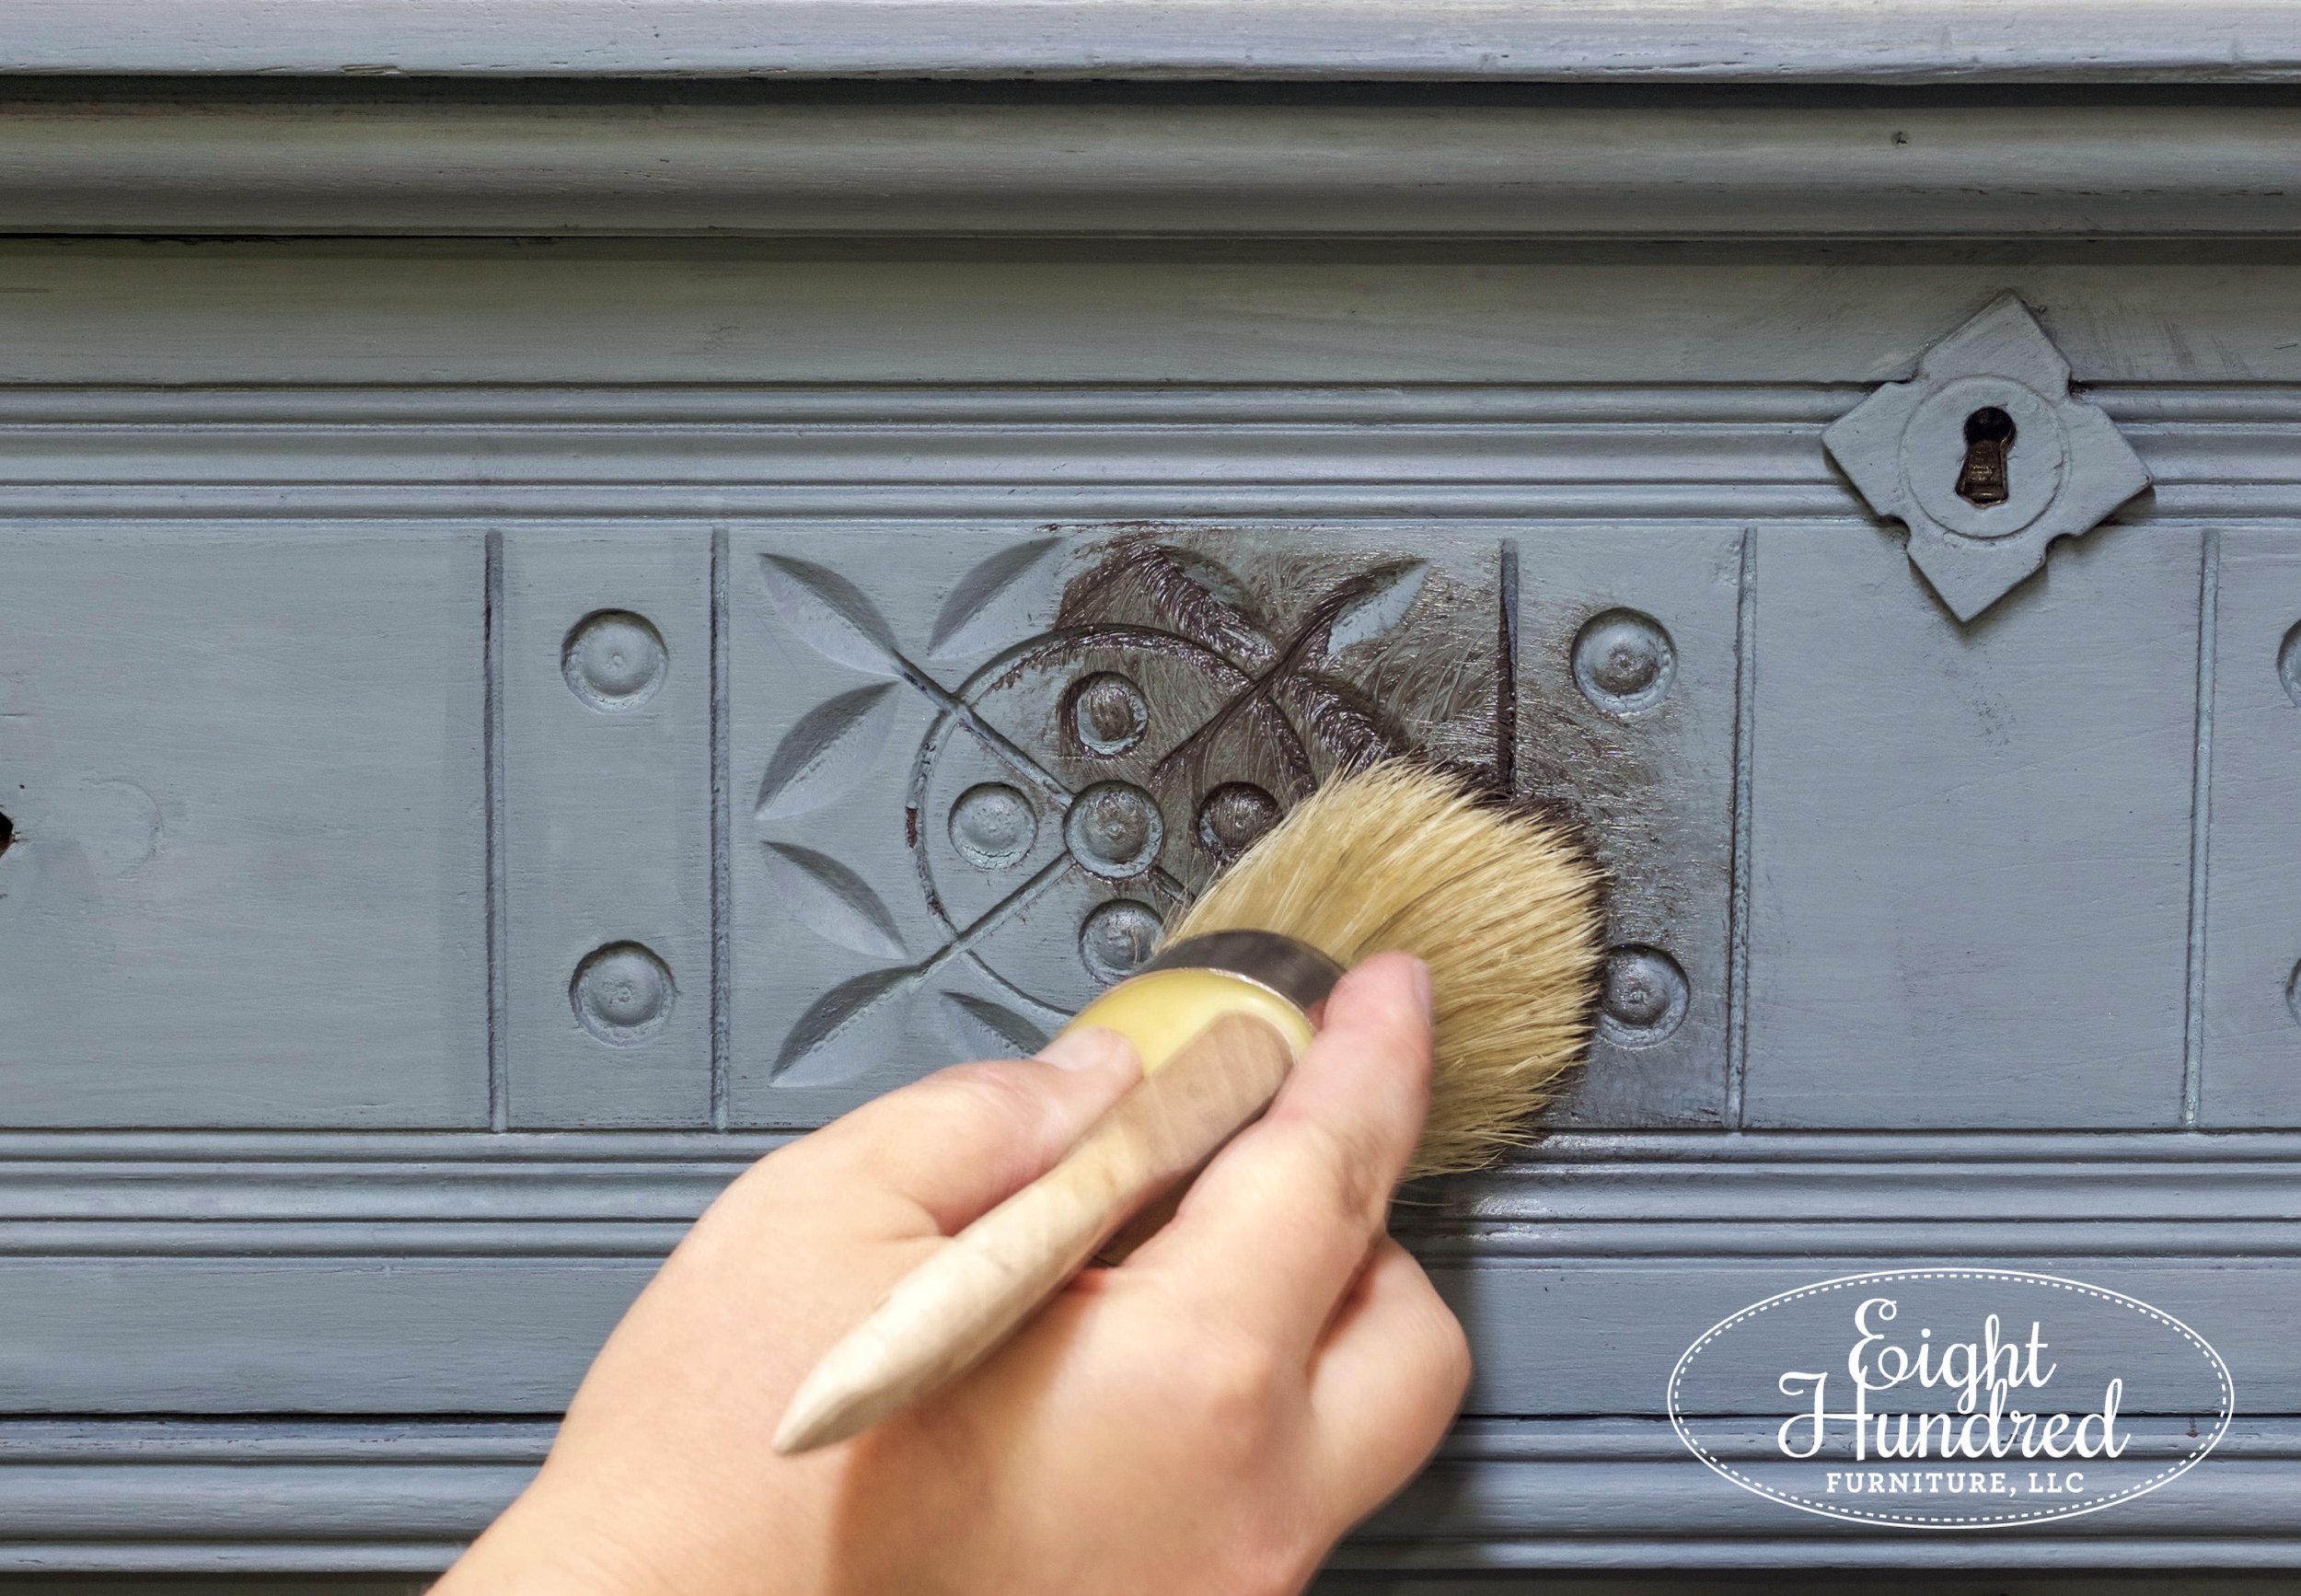
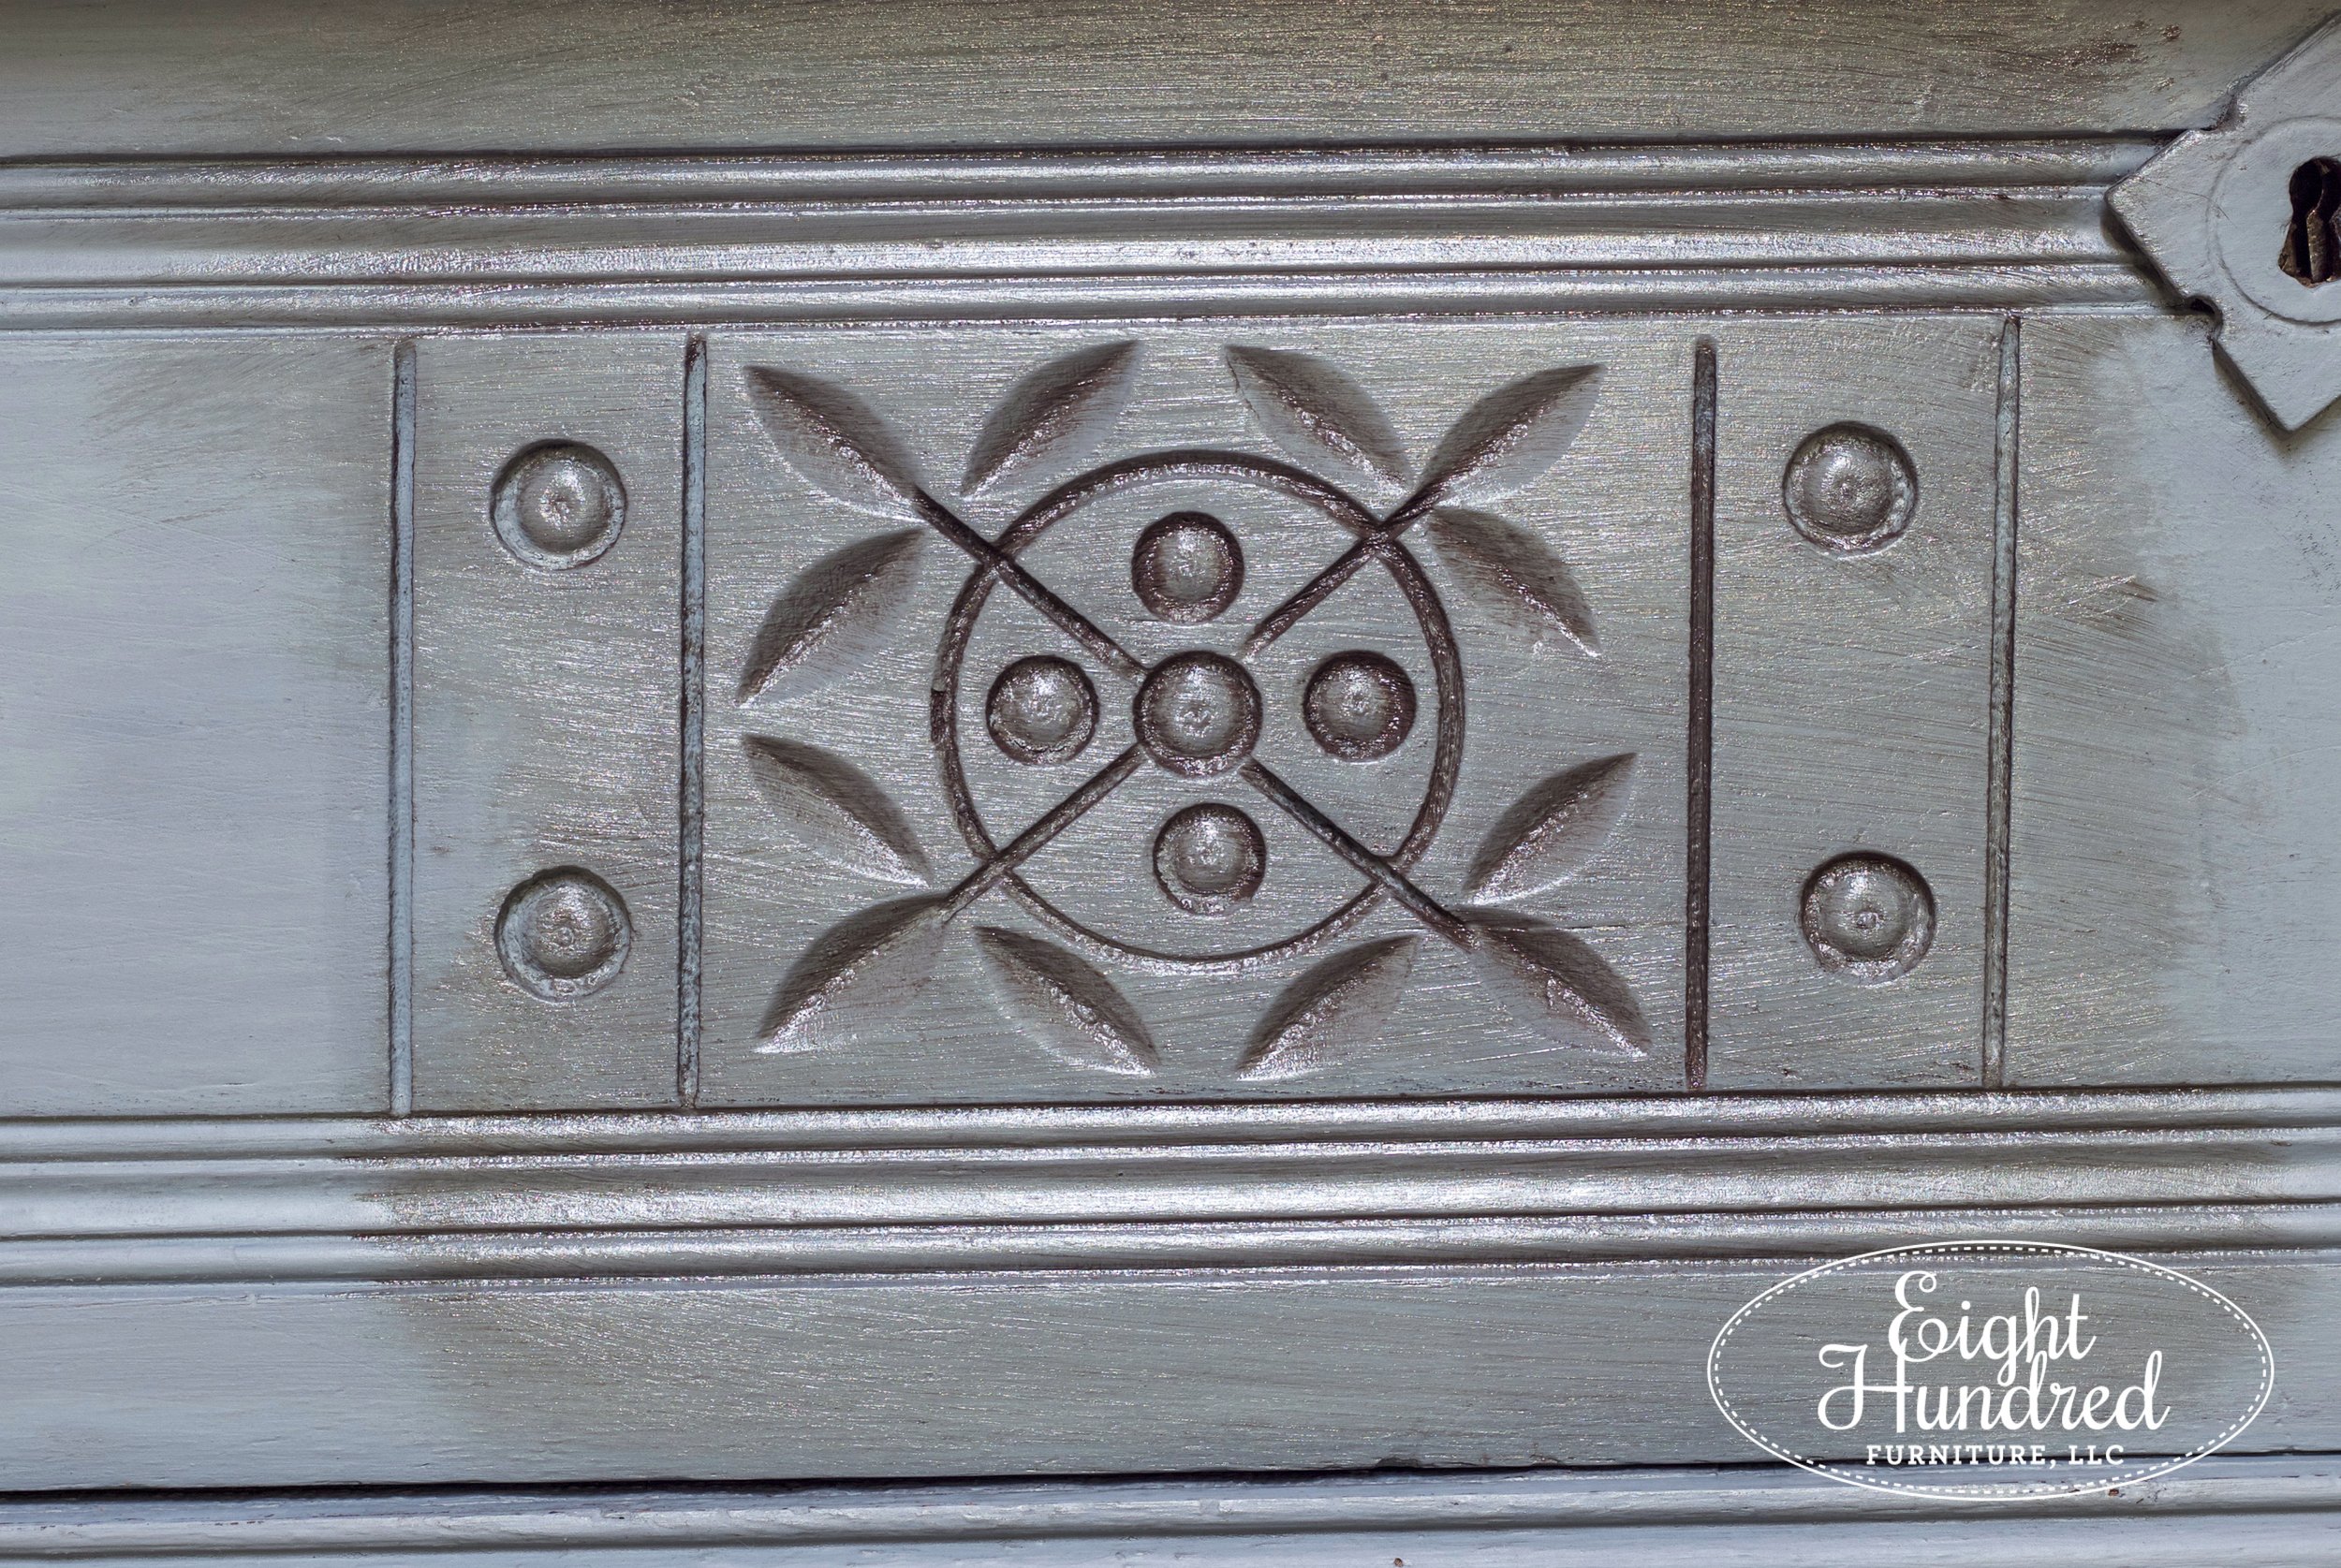
The wax will settle itself into all of the recessed areas on your piece, adding a nice contrast and shadow effect.
Next, use a lint-free cloth to wipe away the excess antiquing wax. (I keep on mentioning using a lint-free cloth because if you use a paper towel or an old t-shirt, you’ll get fuzzies ALL OVER your piece. Trust me…I’ve had to pick them off before and it’s not fun!)

Step 4 - Let Your Piece Cure
Once your piece is all finished, it’s important to be gentle with it for 20-30 days while the wax cures. It’ll feel dry to the touch, but it needs that time period to completely set up so it’s at its most durable state for every day use. You can use the piece during the cure window - just be really gentle with it.
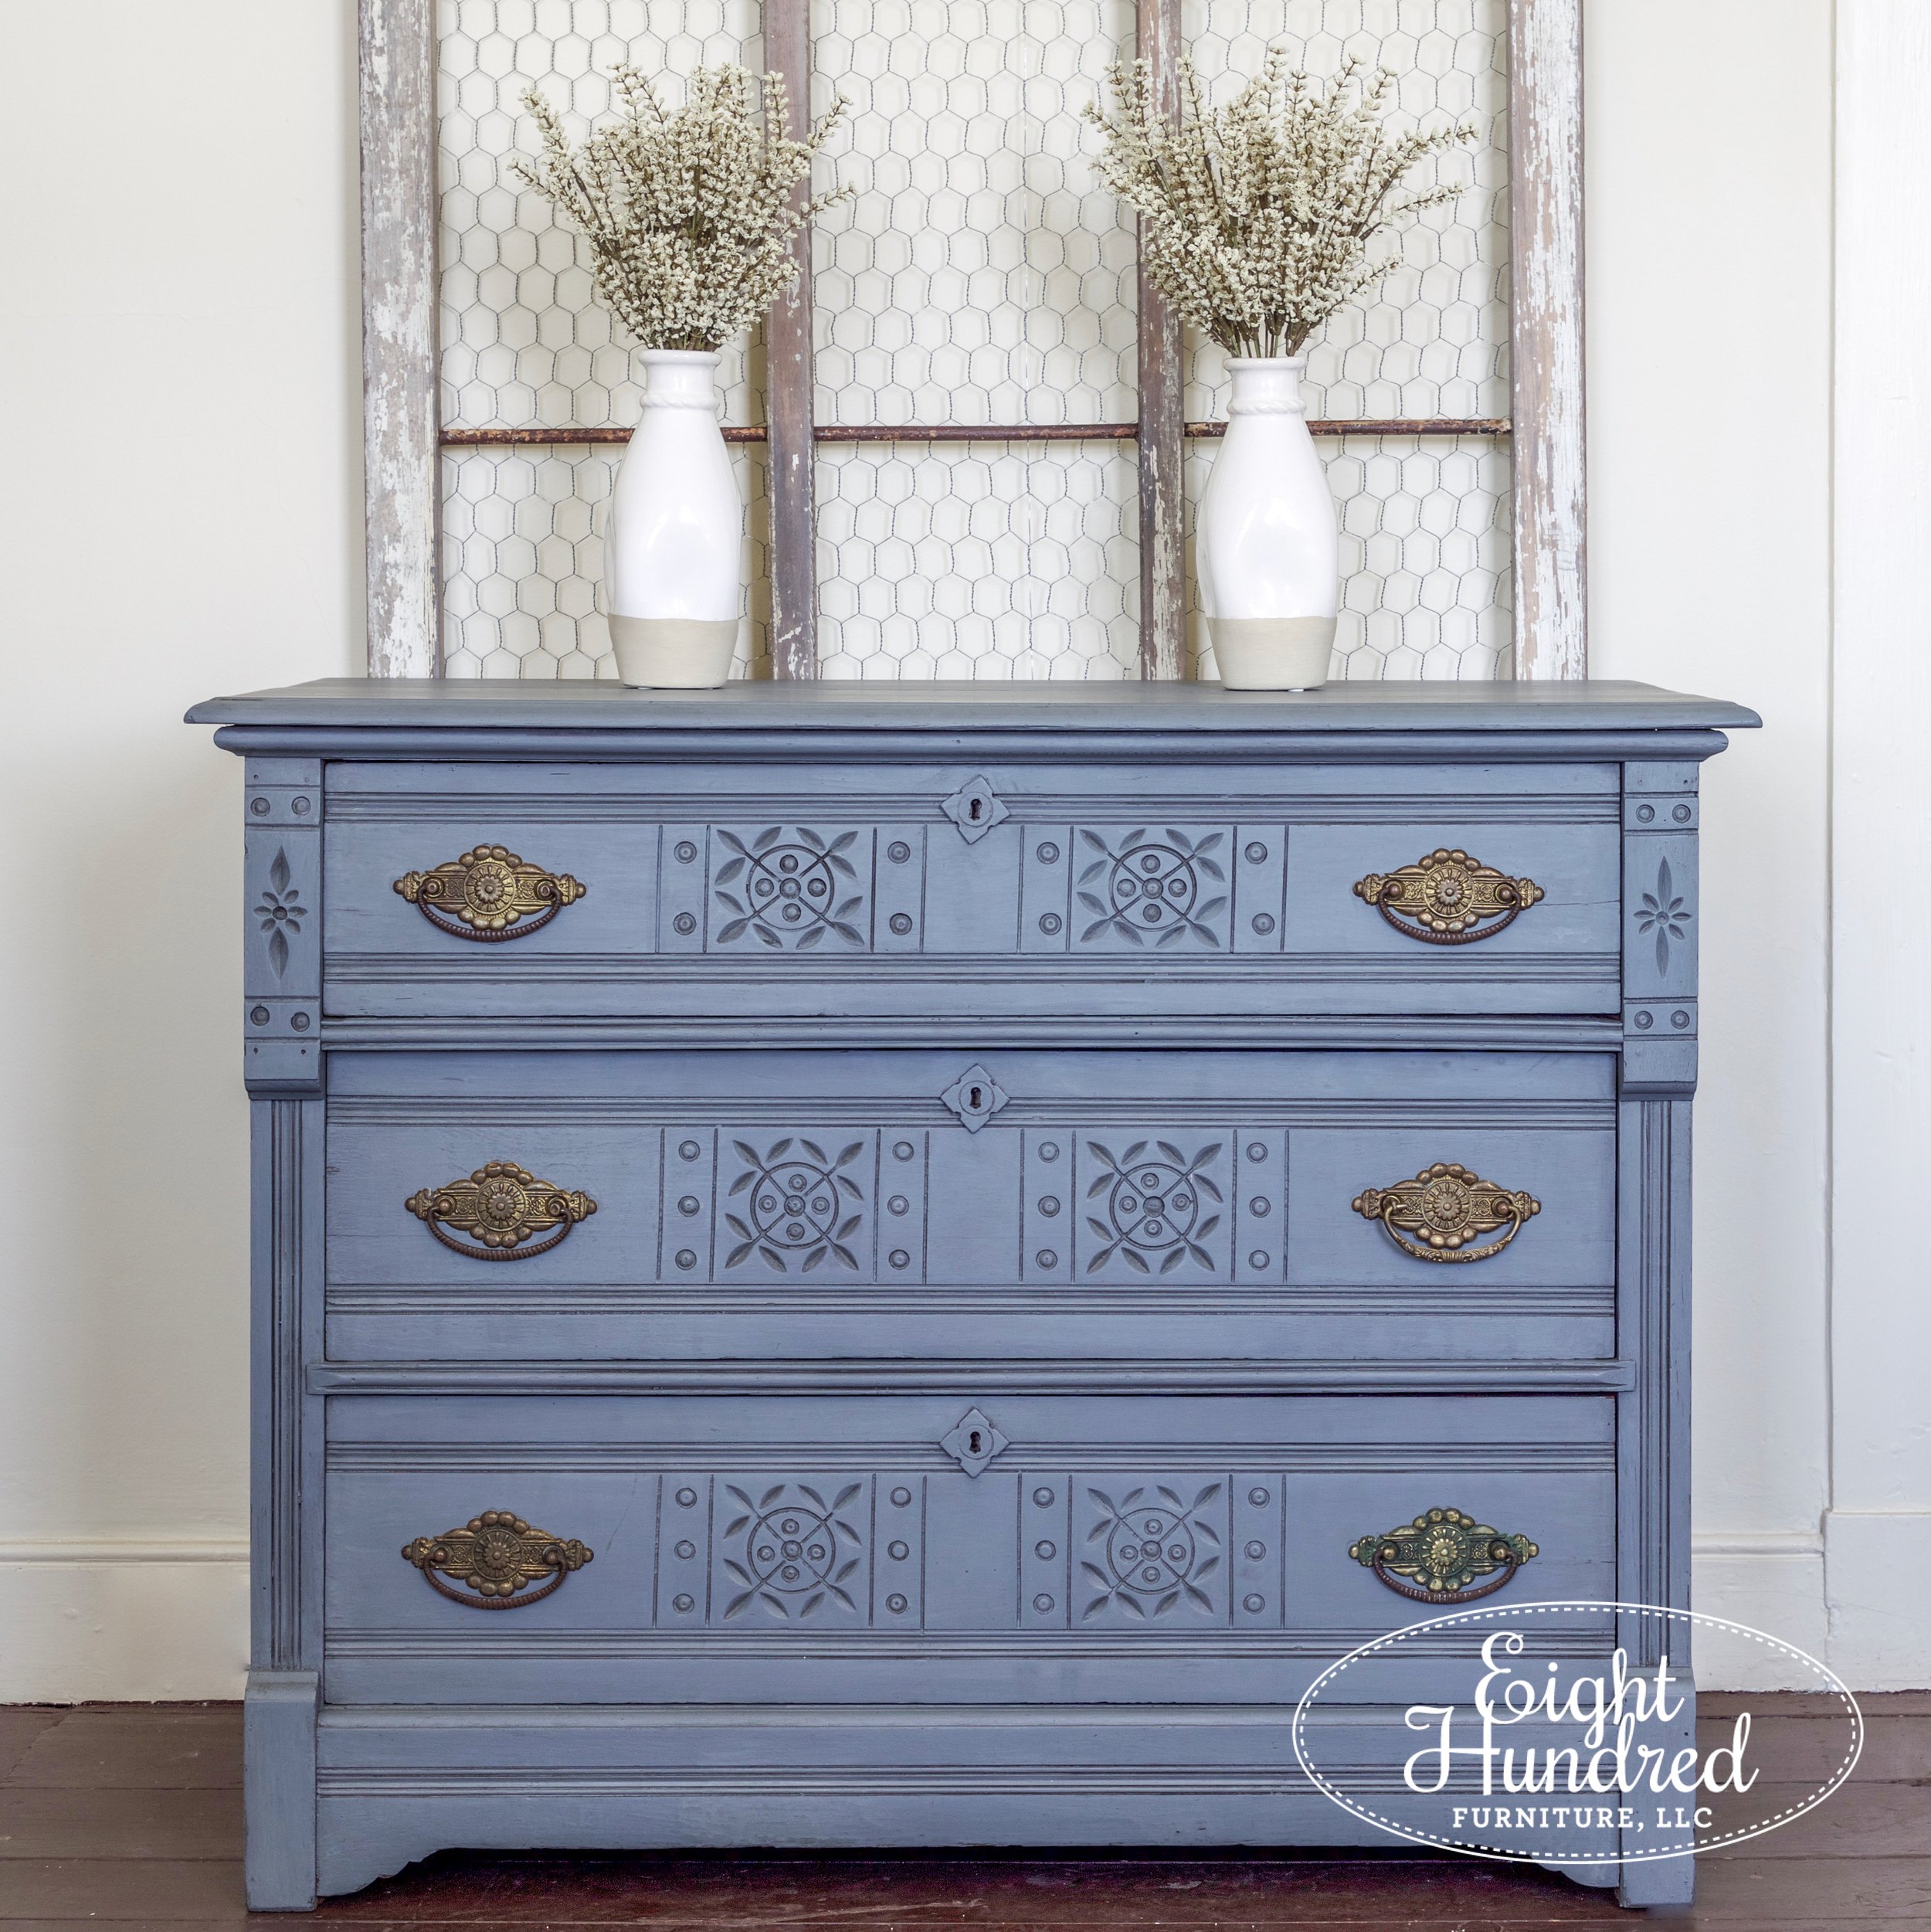
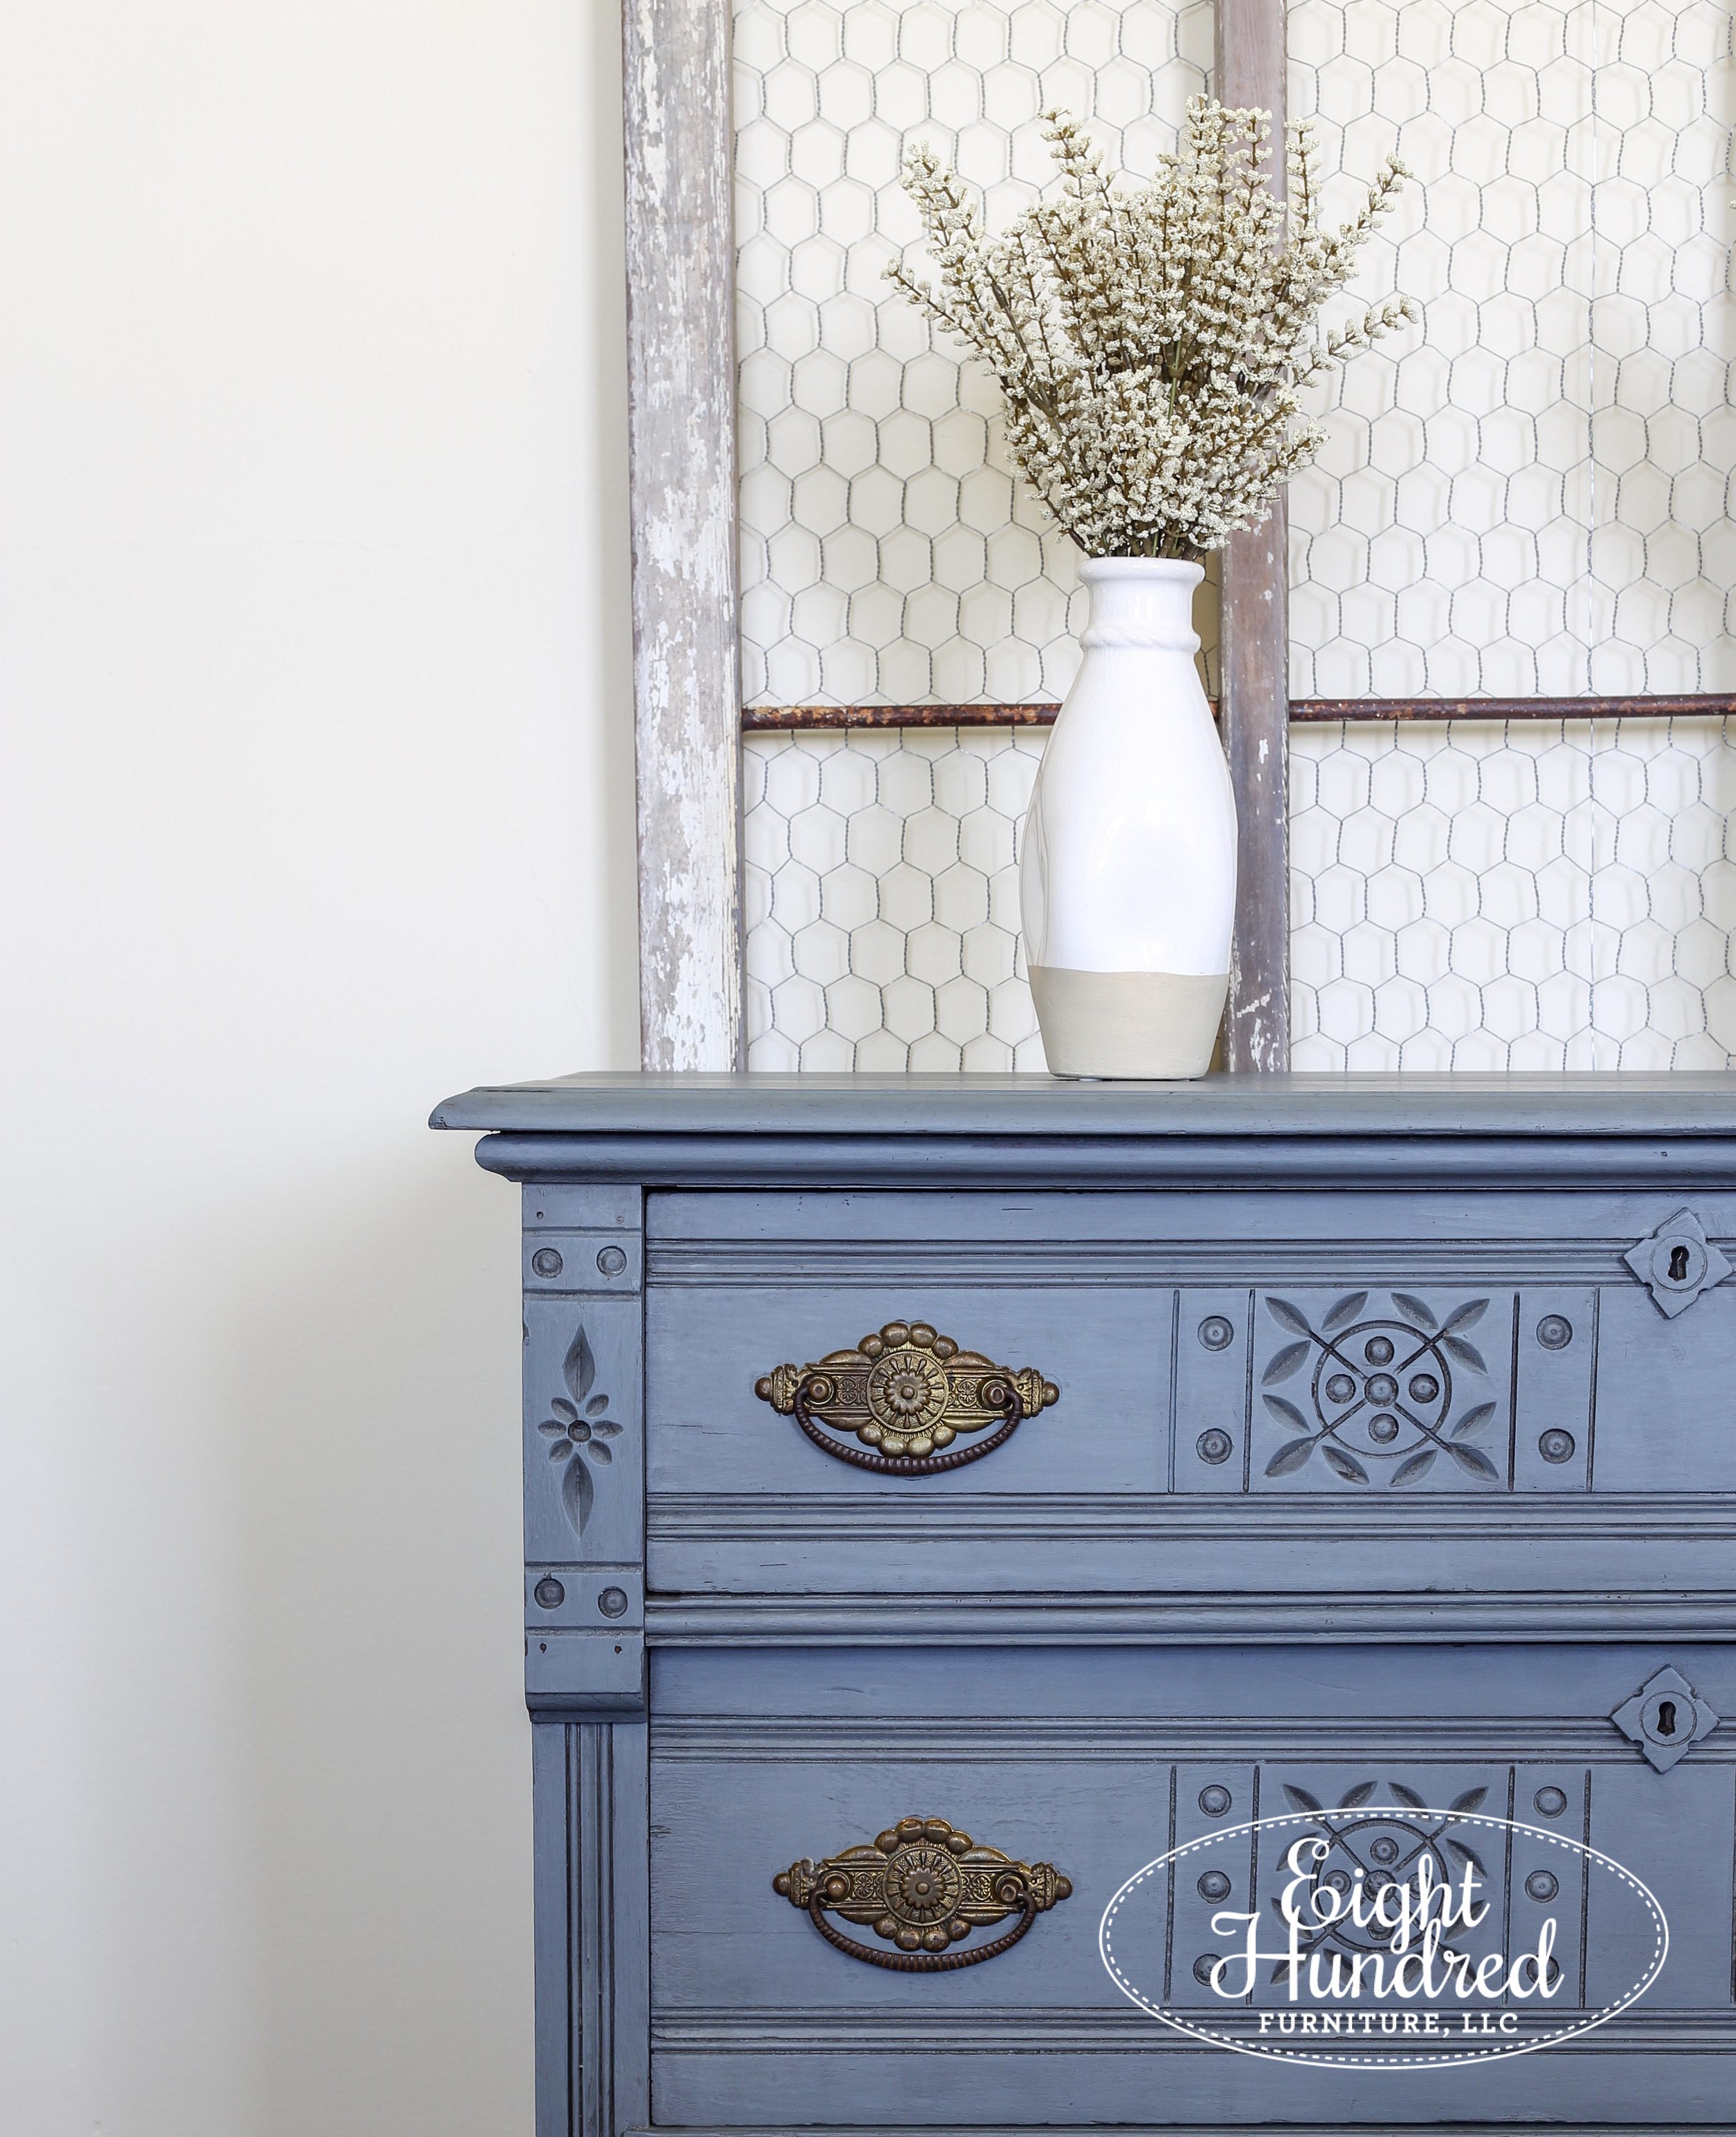
So there you have it! I hope you enjoyed these 4 quick and easy steps to adding an antiquing effect to your painted furniture projects. If you try this technique, make sure you tag us on social media so we can see what you created!