
DIY Primitive Grain Sifter Wall Collage
I’ve had a set of 6 primitive grain sifters, cheese boxes and flour sieves in my stash for a few years. I used to hang them in a collage above the love seat in my studio.
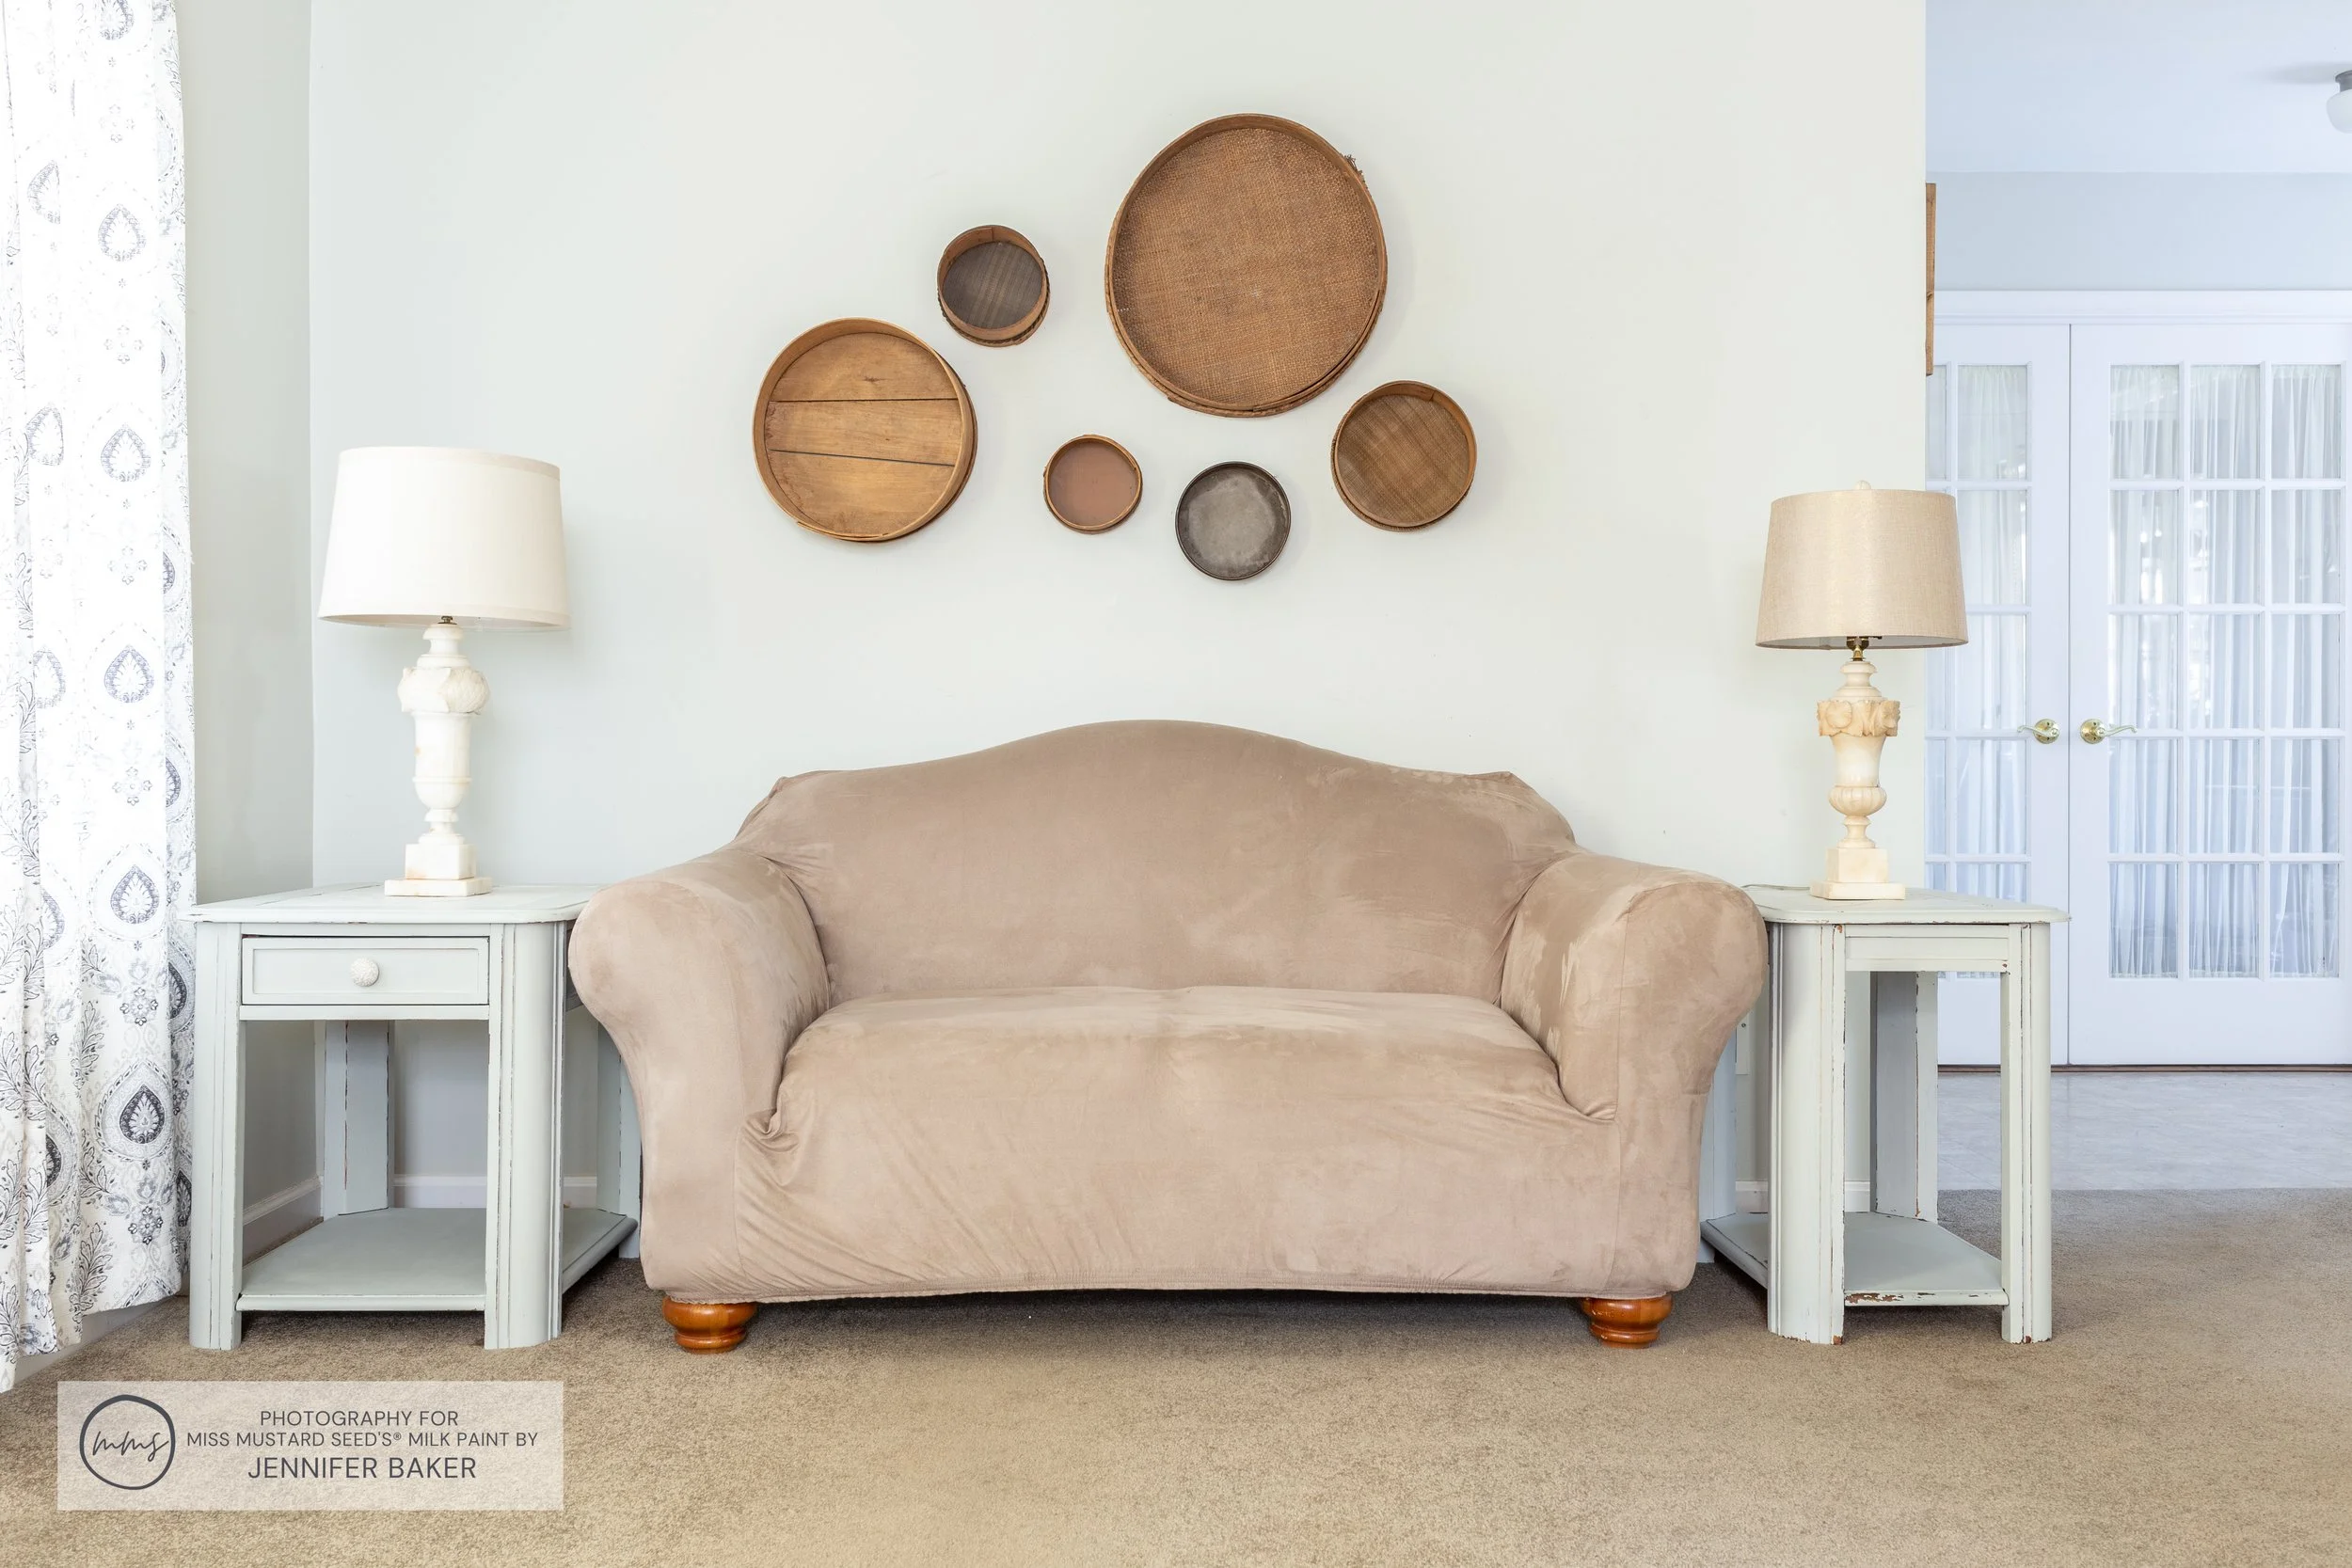
Since I refinished my end tables and added new curtains, the orange patina of my sifters seems out of place. It all looks too primitive, and I wanted things to be lighter and more “farmhousey”.
Miss Mustard Seed’s® MilkPaint™ worked wonders on lightening the appearance of my end tables, so I knew it would do the same for my grain sifter collage!
Prepping The Grain Sifters For MilkPaint™
Work started by taking my grain sifters down from the wall and using my household vacuum to remove the dust from the inside and outside.
For my color, I thought Grain Sack would be appropriate, given the fact they’re grain sifters. (See what I did there?)
I mixed up 1/4 cup of the new MMSMP formula in Grain Sack with the same amount of warm water and stirred it for a few minutes. To reduce the foam, and make the mixing process a bit easier, I used a drop or two of MilkMix-EZ™.

Forcing The Chippy Look With MilkWax™ - Clear
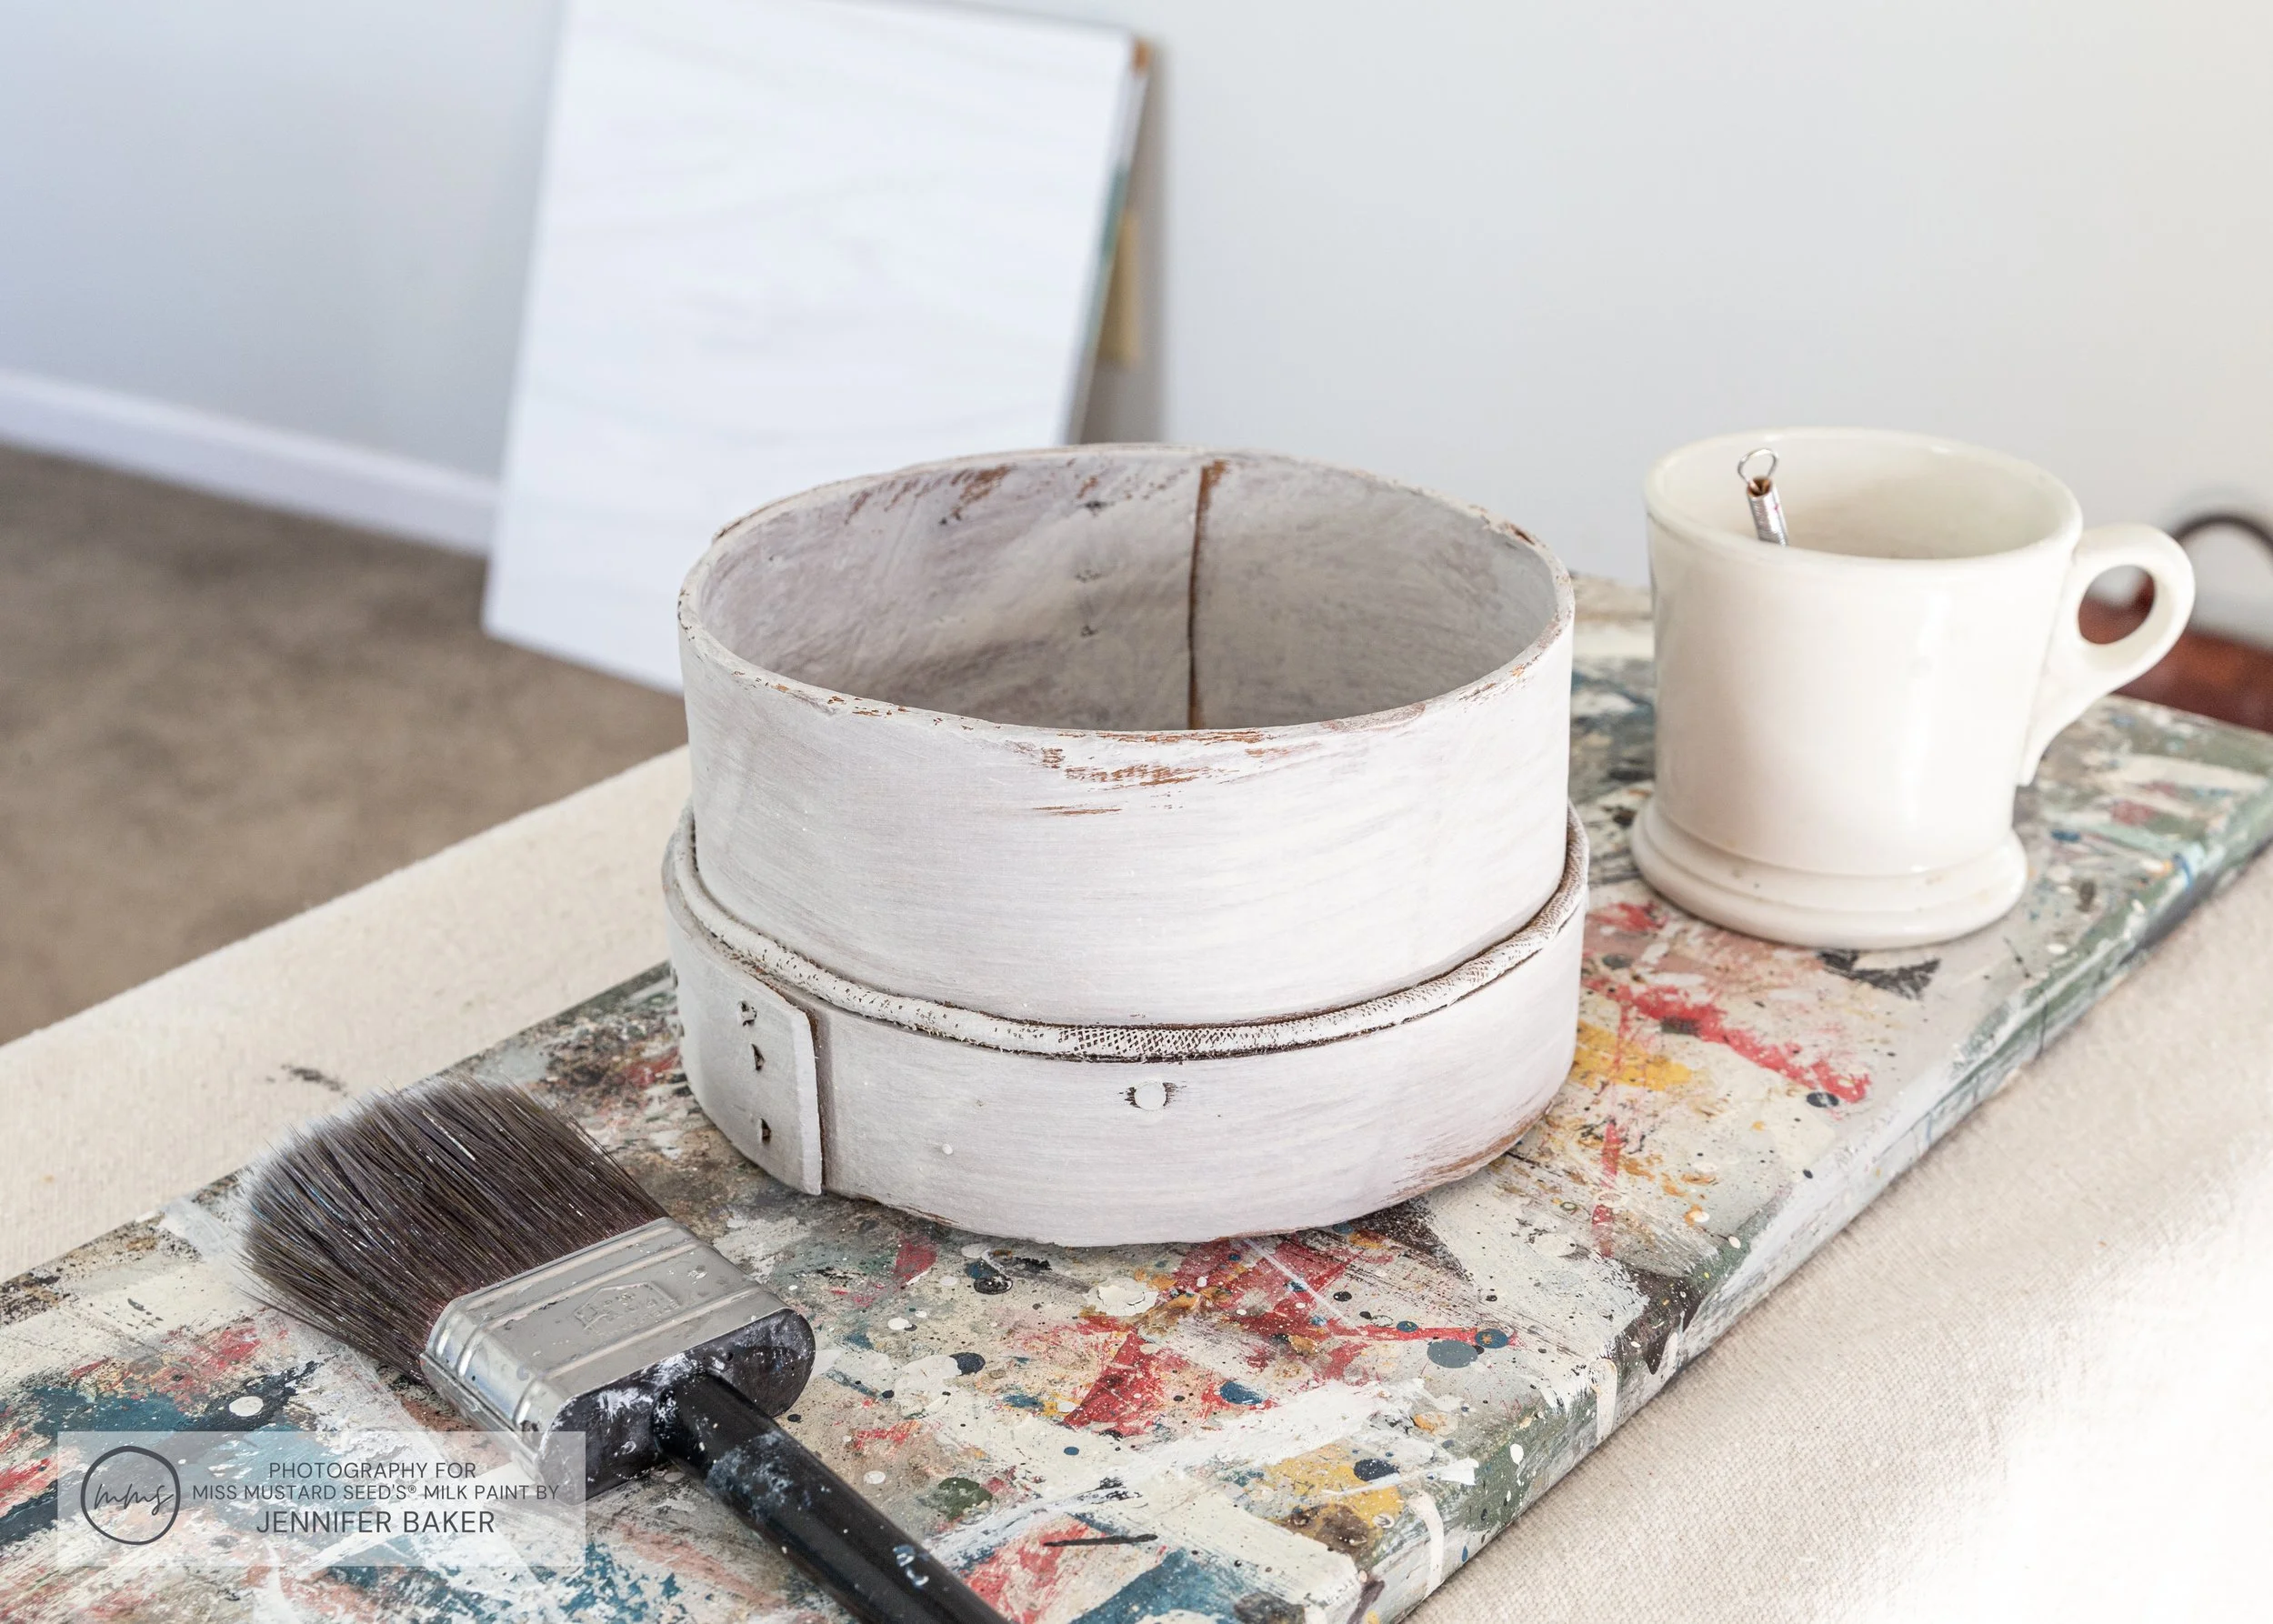
I wanted some of my sifters to have a chippy finish. Most of them were raw wood though, so they needed some extra help to chip. You see, MilkPaint™ soaks into raw wood like an opaque stain, so if I wanted the chippy look, I’d have to force it. It wasn’t going to happen naturally.

Using my finger, I gently rubbed a little bit of MilkWax™ - Clear randomly across the surface of one of my grain sifters. One of the things that I really like about the new MilkWax™ - Clear is that it smells like oranges! I’d rather smell that than the heavy chemical smells of other waxes on the market.

The wax served as a “resist”, preventing the Grain Sack MilkPaint™ from sticking in the places where I placed it. The idea is that as the paint dried, it chipped away, giving me the look I wanted!
You can see a visual demonstration of this process in the video below. It’s from a different project here on the MMSMP blog, but the process is the same. Fast forward to minute marker 3:22 to save time.
Painting My Grain Sifters In Grain Sack MilkPaint™
Once my sifter had wax placed here and there, I started applying my first coat of Grain Sack.

You can use whatever kind of brush you have at home - Wooster, Purdy, Cling On!, etc. Just don’t use one of those throw away chip brushes that cost less than $1.00. They shed a lot and may leave lots of bristles in your paint.
You can see the MilkWax™ resist working in the lower left corner of my sifter!

I painted the outside and inside of each sifter so you would see gorgeous MilkPaint™ from every angle.

Here’s how everything looked after one coat of Grain Sack:
The first coat always looks a bit ugly, so push through and know that another coat or two will do the trick! You can see how much better my second coat (on the left) looks compared to the first one (on the right).

Each sifter needed 3 coats of Grain Sack to get the coverage I wanted. The wood on them was very dry, so it sucked up a lot of MilkPaint™ as a result.

Distressing The Grain Sifters
Once the sifters were dry, I took them outside and distressed them with some 150 grit sandpaper.

Grain Sifter Before Distressing

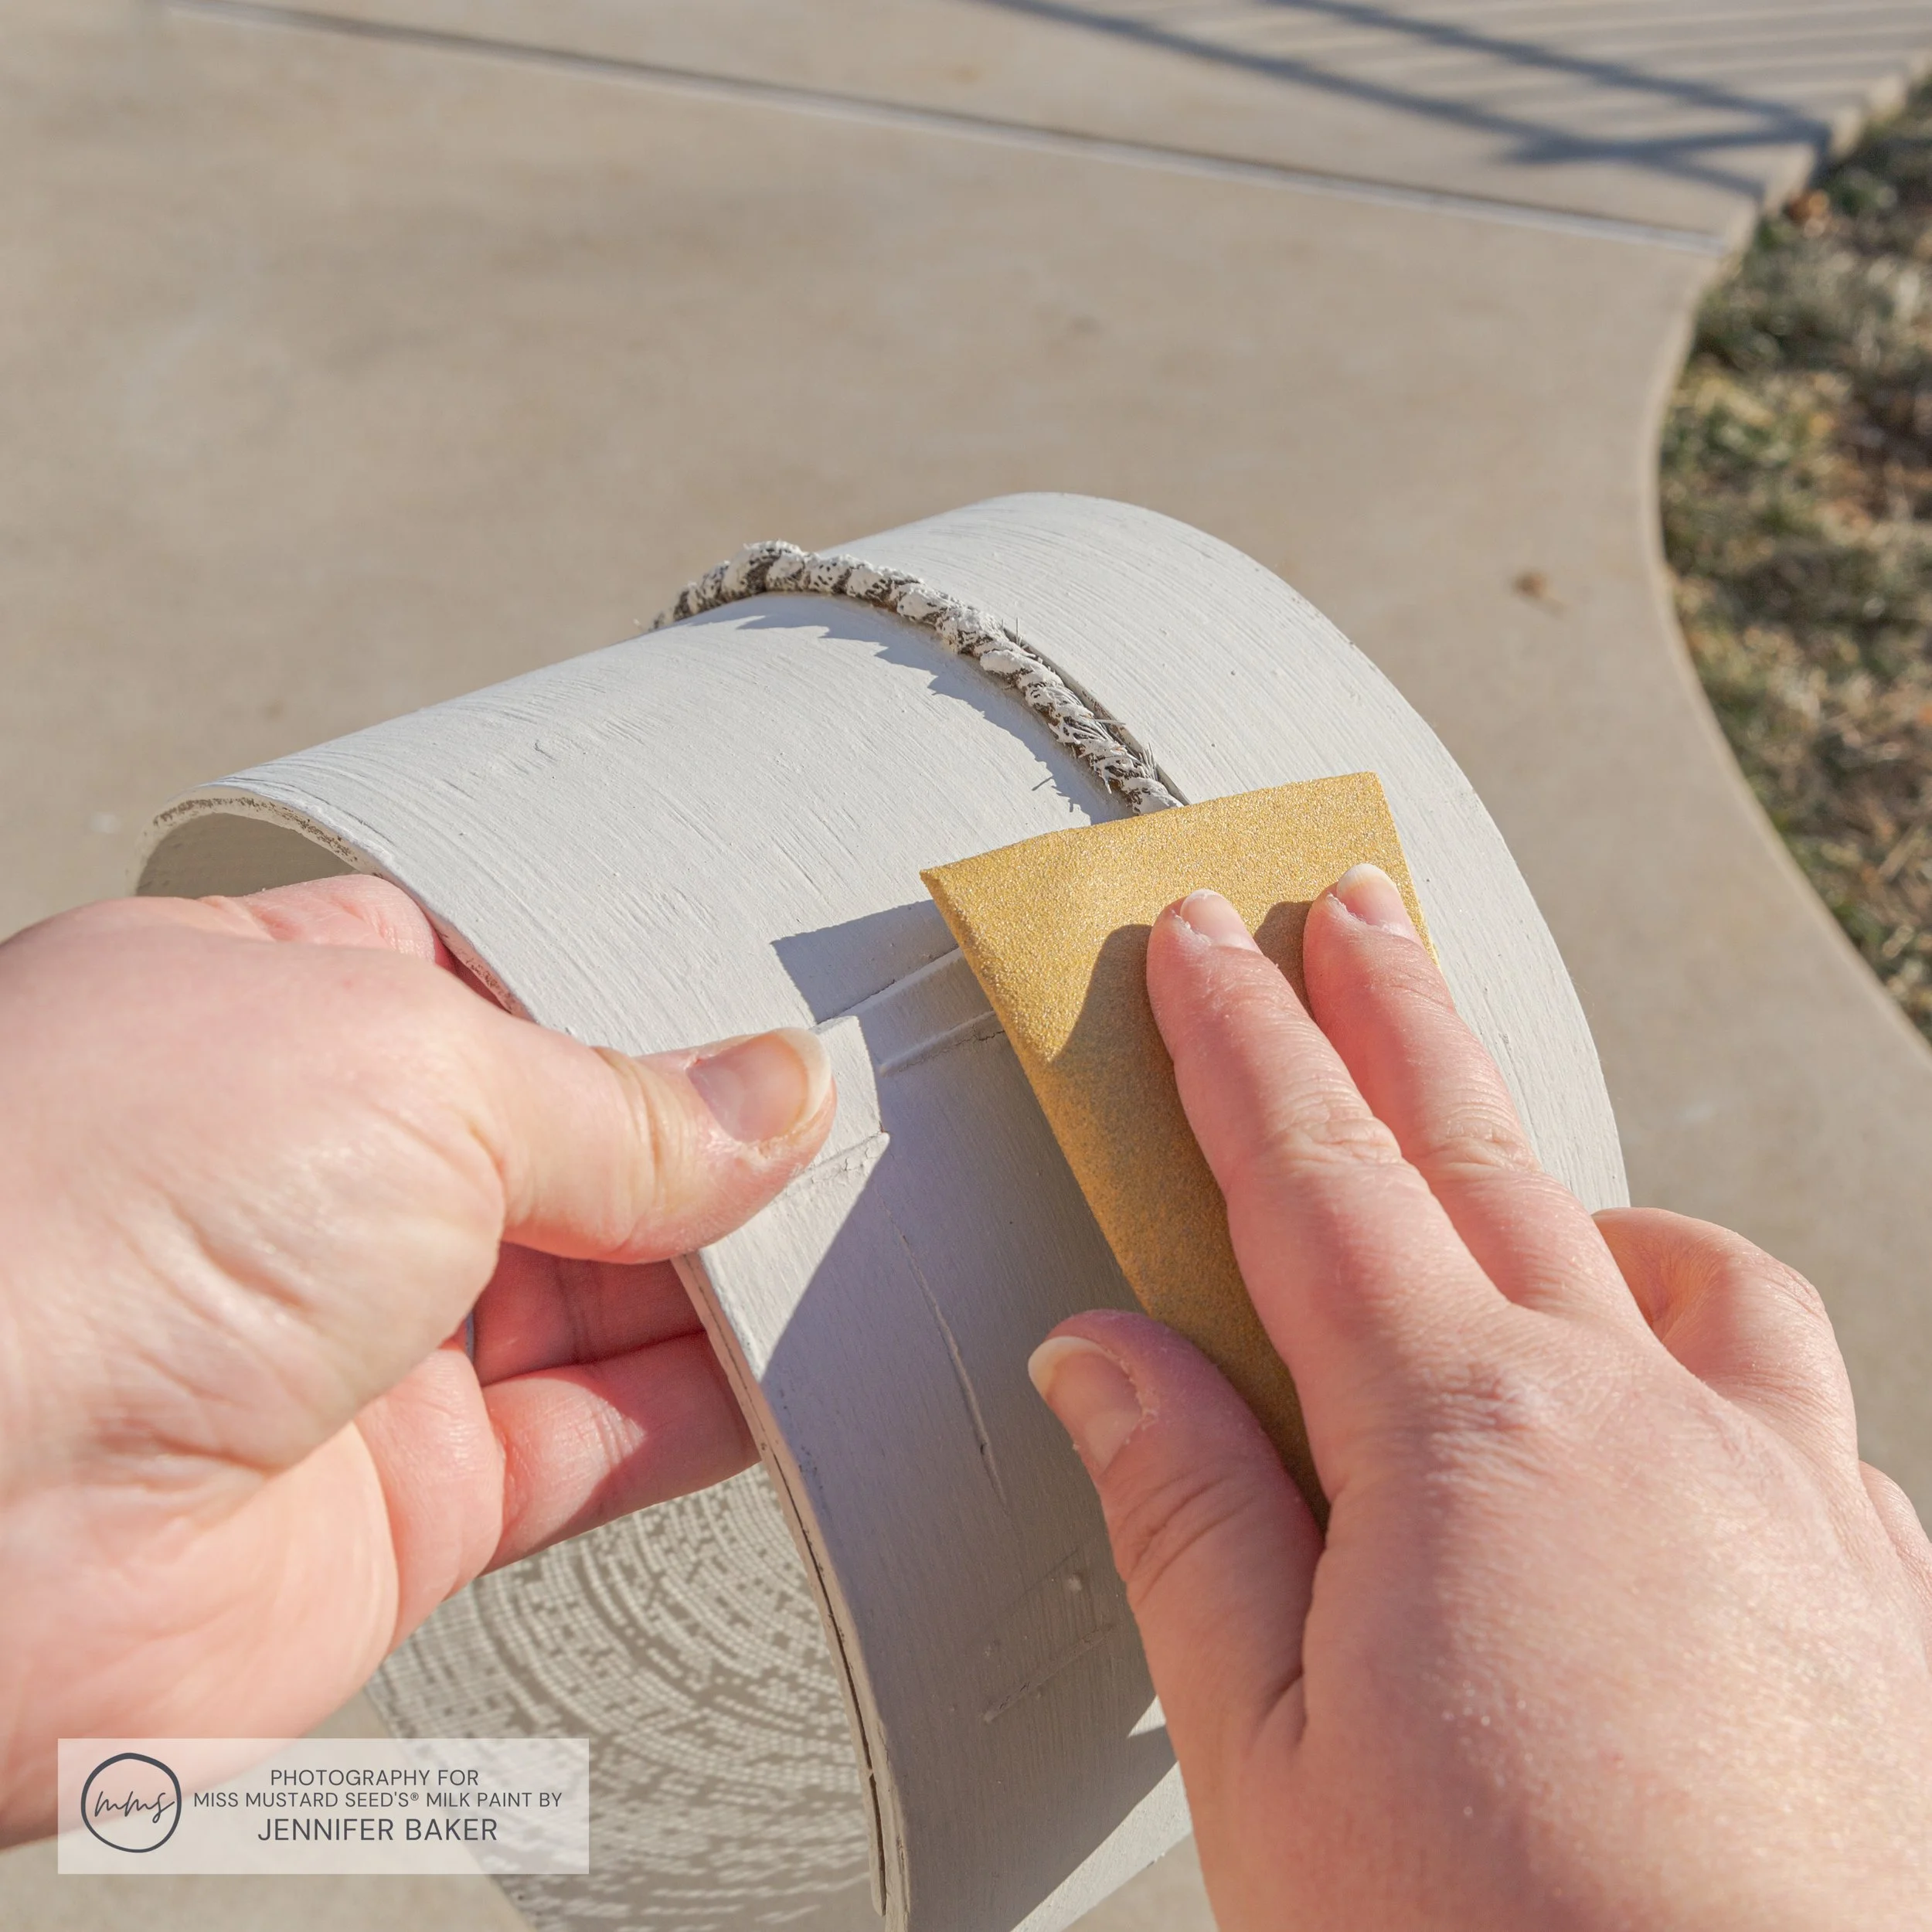
Distressing with 150 grit

We’ve Got Chipping!
Each sifter distressed in its own unique way. Some were chippy and others were more subtle.
I loved the way they turned out, so I decided not to put a topcoat on them. All I did was dust them off and call it a day. Plus, they’ll just hang on the wall, so they don’t really need a topcoat anyway.
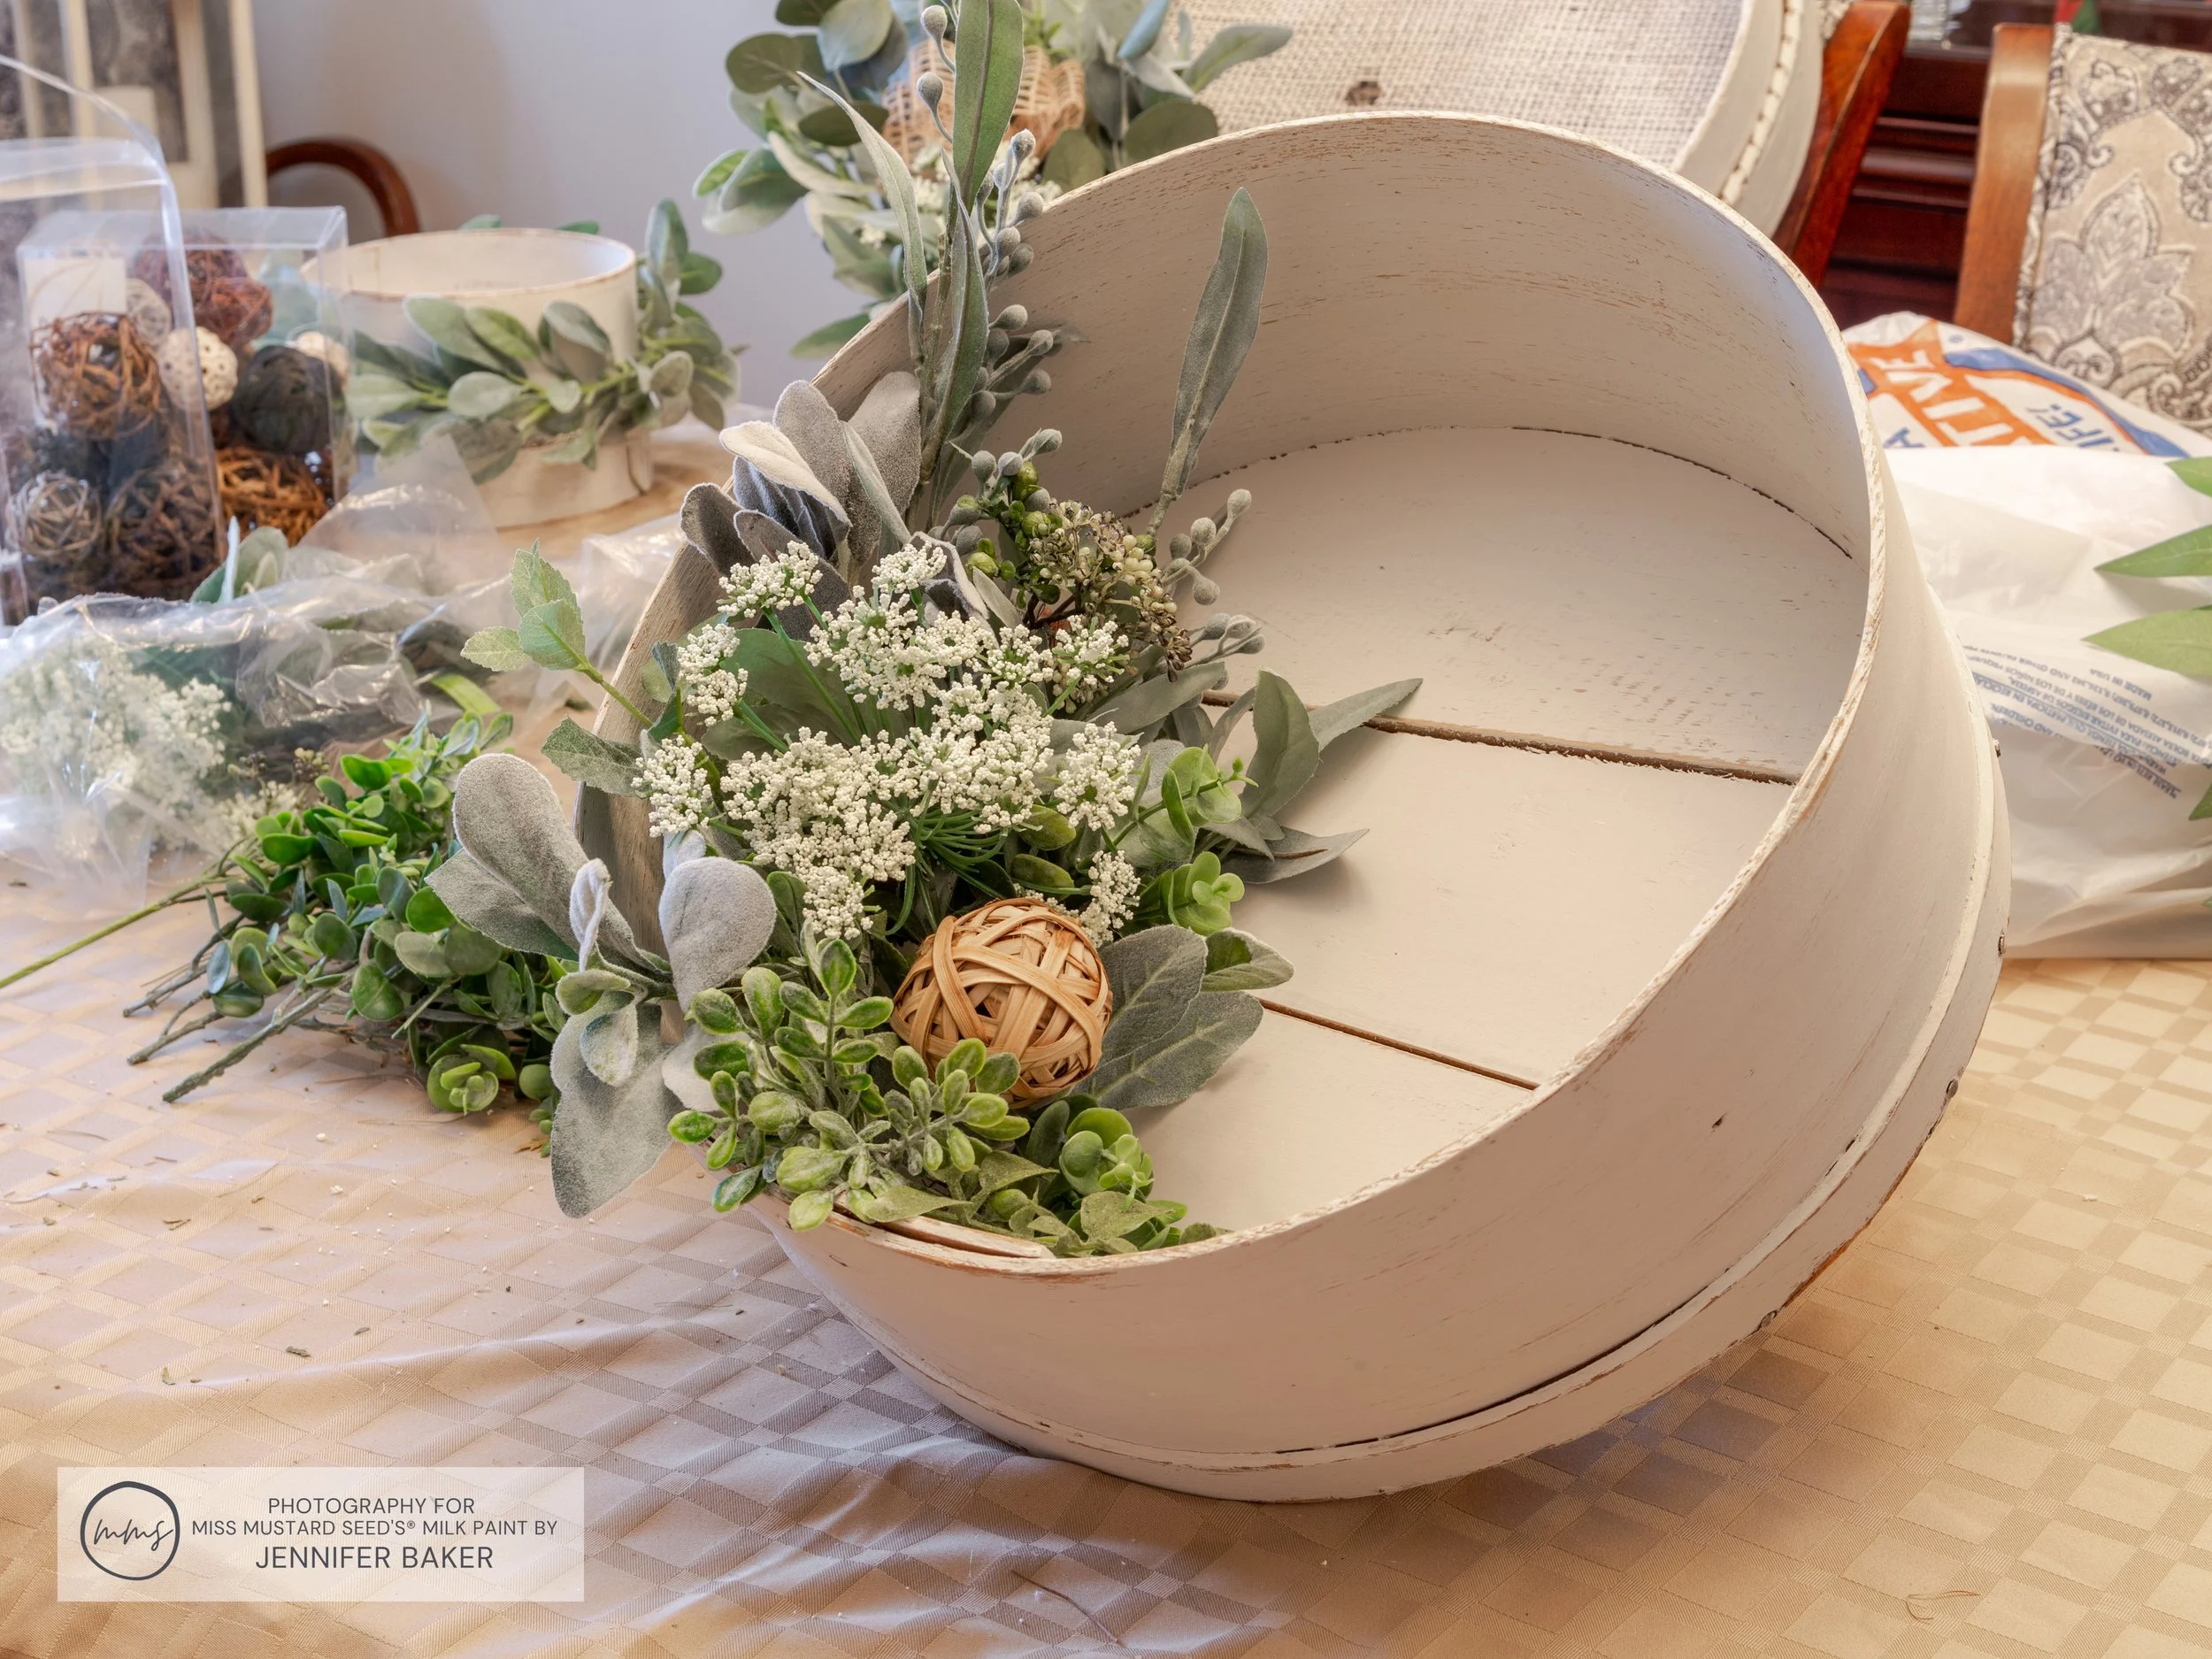
Decorating The Grain Sifters
The grain sifters looked a little boring once I hung them back up on the wall. They were a little too light now. Each one needed a little “something”.
After going down a Pinterest/Google Image photo rabbit hole, I got inspired to add faux greenery to each one.
My Mom and I worked together to make each one unique. Because we used similar greenery and natural accents on each sifter, they all tied together in the end.

Once they were decorated, I rearranged them on the wall and stepped back to admire their new look.

The sifters have lost their primitive orange patina and are now a gorgeous farmhouse faded gray/white. The floral arrangements bring a freshness to the collage, and the pops of sage green are perfect.
Each one is decorated in a slightly different way, matching its unique character.

With every MMS MilkPaint™ I tick off my to-do list, the color palette of my studio is steadily growing softer. It’s going from dark to light one corner at a time, and I’m loving every step of the way!
